Starcraft: Remastered - Rozdzial 3 - Misja 9 - Shadow Hunters
Send all your units, led by Zeratul. Have the Arbiter cover all other units and destroy the first line of turrets. Zeratul deals devastating damage, capable of quickly taking out a Sunken Colony or one-shotting a Hydralisk. You can also send Zeratul alone to take out the Hatchery in the North.
Here's where trouble begins, as the enemy AA turrets will begin targeting the Arbiter and Zeratul will be detected. You'll need to storm the Red base quickly, otherwise you'll lose your Arbiter.
Have your army focus on enemy Spore Colonies and Overlords. Zeratul will take care of Uktralisks, Hyralisks, and Sunken Colonies. Take out the Hatchery with your melee units to build you own Nexus in its place as quick as possible. In the meantime, the Red Zerg will begin summoning forces from his base on the other side. You could try taking a risk and save your game now, then send Zeratul to take out as many enemy structures in the second base as possible. Either way, begin developing your own base and proceed to white point 3.
Do NOT build a base here, as you'll be left without any resources. You need to go either to the left or the right corner of the map.
This locations has mineral fields and places to build gas mines. Development won't be easy, as there's little place, but it's also much easier to defend from land attacks. You'll still have to watch out for enemy airborne operations and air raids from the North though.
Following this route will allow you to safely infiltrate the White Zerg base. Use Arbiters cloaking skill to hide your units from enemy Guardians, which are hidden on the hills, and other units. Using a larger aerial force is risky here, as the enemy has numerous turrets and your resources are limited.
Use this position as an gathering point before your attack the eastern flank of the enemy base, near the upper edge of the map. For now, leave the Arbiters and other fliers here, as the enemy has a throng of AA turrets.
Move your forces to this location. Your soldiers should be able to attack enemy turrets, ground units, and possibly enemy Hatchery/Lair/Hive from this locations. Zeratul needs to destroy the Cerebrate, otherwise it will reborn at full health. You can send some additional units to help reduce its life points, but Zeratul must be the one to deal the finishing blow.
Like in the previous base, keep to the upper edge of the map and destroy everything that would hinder Zeratul from completing his mission - mainly Spore Colonies and Overlords.
This locations has mineral fields and places to build gas mines. Development won't be easy, as there's little place, but it's also much easier to defend from land attacks. You'll still have to watch out for enemy airborne operations and air raids from the North though.

Mission 9 - Shadow Hunters | Protoss | Campaign Walkthrough

guides

Last update:

Table of Contents

Quick Raid #1 – Send all your units, led by Zeratul. Have the Arbiter cover all other units and destroy the first line of turrets. Zeratul deals devastating damage, capable of quickly taking out a Sunken Colony or one-shotting a Hydralisk. You can also send Zeratul alone to take out the Hatchery in the North.

Quick Raid #2 – Here's where trouble begins, as the enemy AA turrets will begin targeting the Arbiter and Zeratul will be detected. You'll need to storm the Red base quickly, otherwise you'll lose your Arbiter.

Quick Raid #3 – Have your army focus on enemy Spore Colonies and Overlords. Zeratul will take care of Uktralisks, Hyralisks, and Sunken Colonies. Take out the Hatchery with your melee units to build you own Nexus in its place as quick as possible. In the meantime, the Red Zerg will begin summoning forces from his base on the other side. You could try taking a risk and save your game now, then send Zeratul to take out as many enemy structures in the second base as possible. Either way, begin developing your own base and proceed to white point 3.

Starting Position – Do NOT build a base here, as you'll be left without any resources. You need to go either to the left or the right corner of the map.

The place to build your base – This locations has mineral fields and places to build gas mines. Development won't be easy, as there's little place, but it's also much easier to defend from land attacks. You'll still have to watch out for enemy airborne operations and air raids from the North though.

The route to the White Zerg Base – Following this route will allow you to safely infiltrate the White Zerg base. Use Arbiters cloaking skill to hide your units from enemy Guardians, which are hidden on the hills, and other units. Using a larger aerial force is risky here, as the enemy has numerous turrets and your resources are limited.

Forest – Use this position as an gathering point before your attack the eastern flank of the enemy base, near the upper edge of the map. For now, leave the Arbiters and other fliers here, as the enemy has a throng of AA turrets.

White Zerg Base - Cerebrate's location – Move your forces to this location. Your soldiers should be able to attack enemy turrets, ground units, and possibly enemy Hatchery/Lair/Hive from this locations. Zeratul needs to destroy the Cerebrate, otherwise it will reborn at full health. You can send some additional units to help reduce its life points, but Zeratul must be the one to deal the finishing blow.

Brown Zerg Base - Cerebrate's location – Like in the previous base, keep to the upper edge of the map and destroy everything that would hinder Zeratul from completing his mission - mainly Spore Colonies and Overlords.

Mission objectives:

  1. Use Zeratul to kill the Zerg Cerebrate
  2. Zeratul and Fenix must survive

Zeratul shares with you some info on Overmind. He reveals that he's able to kill the Cerberate and they won't return then. He can also kill Overmind himself, but you have to weaken his forces by attacking the most important Cereberates. You can do that as Zeratul.
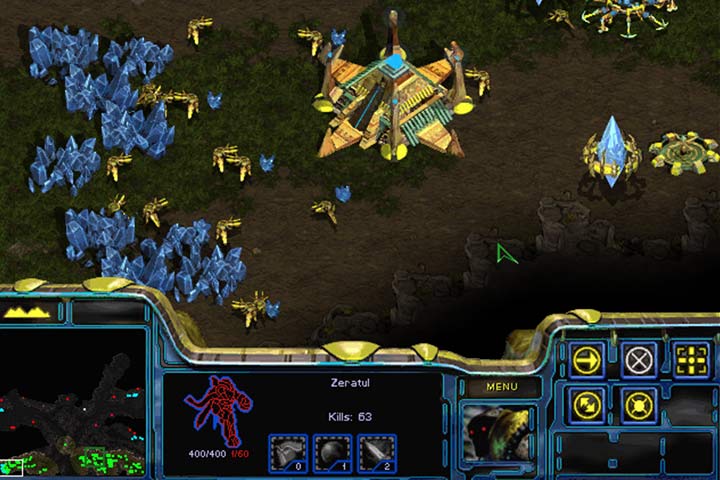
Building a base at the bottom of the map is not the best solution, albeit the easiest one. There is little space here and it is difficult to defend against the attack of enemy aircraft. - Mission 9 - Shadow Hunters | Protoss | Campaign Walkthrough - Protoss - StarCraft: Remastered Game Guide
Building a base at the bottom of the map is not the best solution, albeit the easiest one. There is little space here and it is difficult to defend against the attack of enemy aircraft.

This mission won't be a walk in the park. The whole map is full of turrets and swarming with Zerg. As if that wasn't enough, there are three enemies here. The red is the vanguard. The Brown and White will attack you with increasing numbers of Zerg and defend the Cerebrates. You start the game at the bottom of the map, without a base (1). You can build a Nexus in either left or right corner of the map (2).
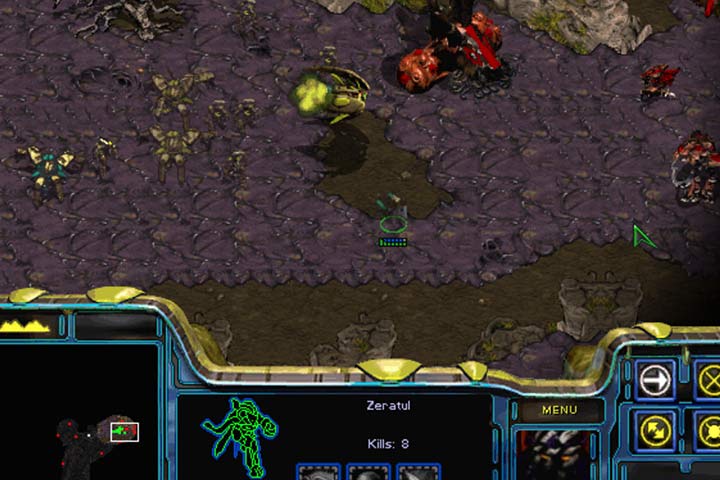
A difficult, but very effective approach is an immediate attack on one of the enemy bases. At the beginning of the mission, he did not train any additional soldiers and your forces should be enough to clean up one of the bases of the Red Zerg. - Mission 9 - Shadow Hunters | Protoss | Campaign Walkthrough - Protoss - StarCraft: Remastered Game Guide
A difficult, but very effective approach is an immediate attack on one of the enemy bases. At the beginning of the mission, he did not train any additional soldiers and your forces should be enough to clean up one of the bases of the Red Zerg.

You can also try to assemble all your forces and immediately after the mission begins attack the Red base. Create two teams. The first: Zeratul; the other: Arbiter with all infantry and Probes. You have to be quickly. You have to act with conviction. Go up, use Zeratul to destroy the turrets, but also keep pushing with the main party (1). Stick to the right side and go along the cliffs. When you'll reach a narrow passage, you will see anti-air turrets (2), but focus on getting into the base as fast as possible (3). Eliminate the Hydralisks and Ultralisks (Zeratul will be very useful). The ground force should take care of turrets and Hatchers, and Zeratul should stop the reinforcements until the Overlords appear. After you destroy the base, build your own here and dig in. You can also use Zeratul alone to destroy the outer defenses of the Red base. At the beginning of the mission, his Overlords are in bases, and the Sunken Colony have no detection, so they're defenseless against Zeratul.

After building a base, you will have to defend from attacks from northern bases. The Defiler will be the most pestering enemy, since he can Plague your soldiers from afar. Although the Protoss still have personal shields, they cannot replenish their health. Keep Zeratul before the base, so he can eliminate them before they enter the base. Remember that the Overlord and Spore Colony might have detection.
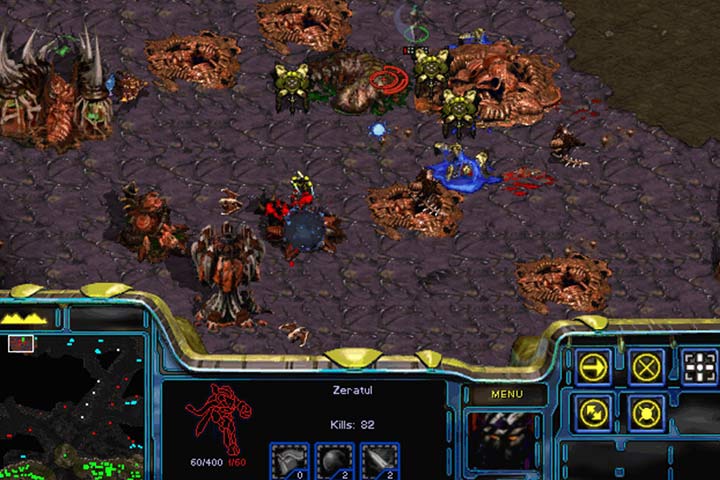
Remember that Zeratul is the only one capable of killing both targets - the Cerberate. You can use your units to weaken the enemies, allowing Zeratul to finish the job. - Mission 9 - Shadow Hunters | Protoss | Campaign Walkthrough - Protoss - StarCraft: Remastered Game Guide
Remember that Zeratul is the only one capable of killing both targets - the Cerberate. You can use your units to weaken the enemies, allowing Zeratul to finish the job.

Use a team of Zealots and Dragoons and some Templars with Reavers. Don't build any aircraft - the enemy has heaps of AA turrets and Mutalisks. You should counterattack right after repelling a wave of enemies. You can easily breakthrough into the white base. Keep to the valley on the right (3), until you reach the forests in the top-right corner (4). Some Zerg units and AA turrets guard the entrance. Destroy the Spore Colony, to save Zeratul. Have your army clear the way for Zeratul. He's the only one able to destroy the Cerbrate; otherwise the enemy will be resurrected (5). Then destroy the Hive and immediately target the base in the west. There's more soldiers here, plus the Sunken Colony (6). The procedure is similar: your soldiers clear the way, and Zeratul targets the Cerebrate. After both enemies die, the mission in successfully concluded.

Alternatively, you can also try to attack both northern bases at the very beginning, instead of building a base or attack the red enemy. Assemble everyone and push north along the path to the right. Don't stop; don't engage enemies, just push. Keep an eye on the Arbiter's position, so that most of your units are always hidden. In the main base, the Arbiter won't survive for long, but your units should be able to defeat the enemies and the Sunken Colony. They can also help by decreasing Cerebrate's health, but remember that Zeratul has to be the one, who kills the abomination. Then get to the brown base and do the same thing. Use the Probe to lure enemies; don't just leave them at the starting position.

StarCraft: Remastered

August 14, 2017

PC
Rate It!

You are not permitted to copy any image, text or info from this page. This site is not associated with and/or endorsed by the Blizzard Entertainment or Blizzard Entertainment. All logos and images are copyrighted by their respective owners.

Copyright © 2000 - 2025 Webedia Polska SA for gamepressure.com, unofficial game guides, walkthroughs, secrets, game tips, maps & strategies for top games.