StarCraft Remastered: Mission 4 - The Hunt for Tassadar
Last update:
Mission objectives:
- Locate Tassadar
- Bring Tassadar to the marker
- New Objective: Bring Tassadar and Raynor to the marker
Despite the fall of Antioch and Fenix's death, the Conclave has given you a new mission. You are to find and capture Tassadar, who in the meantime was declared an enemy of the Protoss. He was last seen on the planet Char, a location with significant Dark Templar presence. Your armies reach the platform above the world of Char, where they have to defeat the Zerg.
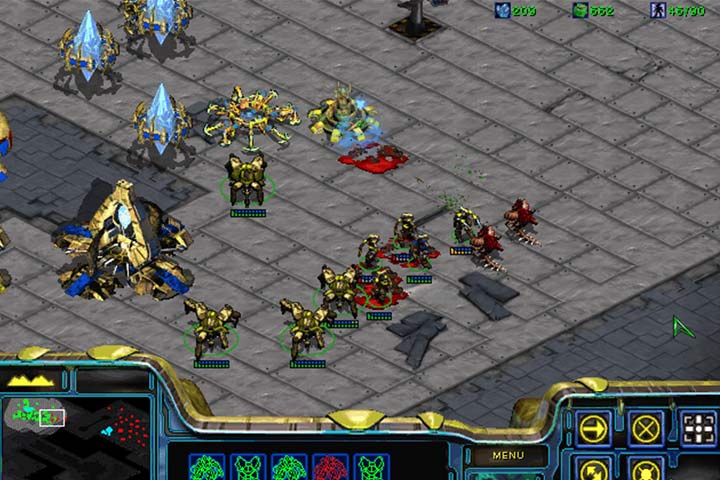
You begin near the marker (1), to which you'll have to bring Tassadar (along with Raynor, as you'll learn soon enough). First, you'll have to break through the small Zerg groups to reach Tassadar's base in the upper left corner of the map. Your forces are small, but you have a High Templar to offset this limitation. The unit is an offensive "caster", similar to Science Vessel of Zerg Queen. It's basic skill, Psionic Storm, summons a small lightning storm, which deals 100 damage to all units in the area across a few seconds. It's perfect for eliminating groups of Zerglings or Hydralisks. There will be several Zerg groups on the road to the Protoss base. Use the Templar's skill to eliminate enemy forces and immediately withdraw him behind your lines (1). Use this method to deal with the enemy and try do wipe out as much of them as you can. Keep to the left side of the map and slowly head north until you encounter allies.

Once you reach the Protoss base (3), the units of the red Zerg will go active, and he will send additional forces to all routes leading from your base to the marker. Those Zerg groups will only guard their respective assembly points. The Zerg will also train additional units and send them to the eastern flank of your base (4). This side of the base needs to be fortified ASAP. Then, add more turrets around your base, as there will be occasional Mutalisk attacks. You don't have to destroy the Zerg base, which is heavily defended by the way, so focus on building a few teams to clear a path to the marker. You can train a few Templars to support your forces. You can also research their second skill, Hallucination. It will create two harmless copies of a selected unit (allied or enemy). They can be used to lure or confuse the enemy, e.g. when you use it on your particularly important and/or wounded units. In this mission you'll be also able to create an Archon by combining two Templars. This will make them loose all of their special abilities, but also gain a powerful short range attack against ground and air targets. While it has only 10 HP, the Archon's powerful shield has as much as 350 points to offset this weakness. Additionally, it's immune to many enemy special skills, such as the deadly Spawn Broodlings.

Build a complete team of Zealots (you may add some Archons to the mix) and a team of Dragoons. You will also need 6-12 Scouts and a few Templars. Keep Tassadar and Raynor safe. Both have good stats and will be useful for the assault if you can effectively manage them and keep them from dying. Take the route that led you here. This way you'll only be facing the red Zerg forces. Send lone Templars to the front and have them use the Psionic Storm on enemy groups. You can also create illusions and use them as scouts. Upon using the skill, immediately send the Templar back, and have your regular troops take it from there. If you see any Zerglings use the Scouts to wipe them out. This way, step by step, you'll open up a route to the marker. If you're already close but the enemy assaults your base, have your troops push forward. The survival of the base isn't essential at this point. Both characters must reach the marker for the mission to end.
- StarCraft: Remastered Game Guide
- StarCraft Remastered: Game Guide
- StarCraft Remastered: Campaign Walkthrough
- StarCraft Remastered: Protoss
- StarCraft Remastered: Mission 1 - First Strike
- StarCraft Remastered: Mission 2 - Into the Flames
- StarCraft Remastered: Mission 3 - Higher Ground
- StarCraft Remastered: Mission 4 - The Hunt for Tassadar
- StarCraft Remastered: Mission 5 - Choosing Sides
- StarCraft Remastered: Mission 6 - Into the Darkness
- StarCraft Remastered: Mission 7 - Homeland
- StarCraft Remastered: Mission 8 - The Trial of Tassadar
- StarCraft Remastered: Mission 9 - Shadow Hunters
- StarCraft Remastered: Mission 10 - Eye of the Storm
- StarCraft Remastered: Protoss
- StarCraft Remastered: Campaign Walkthrough
- StarCraft Remastered: Game Guide
You are not permitted to copy any image, text or info from this page. This site is not associated with and/or endorsed by the developers and the publishers. All logos and images are copyrighted by their respective owners.
Copyright © 2000 - 2026 Webedia Polska SA for gamepressure.com, unofficial game guides, walkthroughs, secrets, game tips, maps & strategies for top games.
