StarCraft Remastered: Mission 1 - First Strike
Last update:
Mission objectives:
- Meet up with Fenix in Antioch
- Destroy the Zerg base
- Fenix must survive
In this campaign you will be playing as the Executor, a newly-appointed leader who replaced Tassadar, the previous Protoss Executor. Judicator Aldaris assigns you a new task. You are to protect the Antioch settlement from a Zerg attack. On site, you will meet up with another warrior, Fenix.
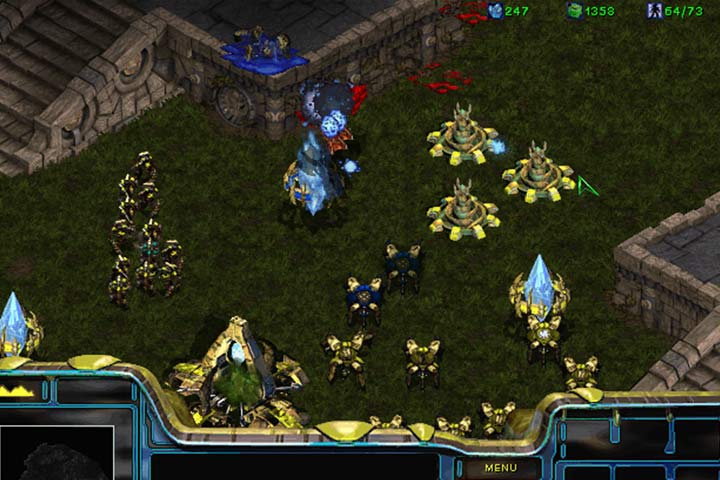
Your first task is in part a rushed Protoss tutorial, but this doesn't mean that defeating the Zerg will be a walk in the park. First, you need to know that the game allows you neither to heal your units or machines, nor repair your buildings. On the other hand, each unit and structure in this faction has a personal shield. The shield regenerates over time and often has its own health bar. Additionally, the units have bigger attack power, but cost more and require more Psi points (unit cap; an equivalent to Supply and Control). You begin in the right lower corner (1). Gather your units and move north. You'll encounter small groups of Zerg on the way. Zealots will attack first, behind them the Dragoons. If one of your units looses its shield, have them retreat to the second line. This will keep them alive longer.

Once you reach the base, Fenix will give you full control over his army (2). Now you can begin expansion and training. As usual, begin with training workers, Probes. The unique trait of the Protoss enables them to summon buildings, instead of building them. Your worker only needs to initiate the process, after which he can be given another task. The whole process will take place without the need to trouble your subordinates, significantly reducing the time you spend on building. You just need to have enough resources, and you can field a large base in an impressively short time. Additionally, other than your HQ (The Nexus) all buildings must be within range of the Pylons. They are your power plants, doubling as storage space (they provide Psi points that increase your unit cap). You cannot build structures beyond their range, and if a building looses its access to a Pylon, it will stop functioning. You'll have to replace the missing Pylons and buildings. You can add several Photon Cannons near the entrance to your base. They have the advantage of being able to attack both ground and air units.

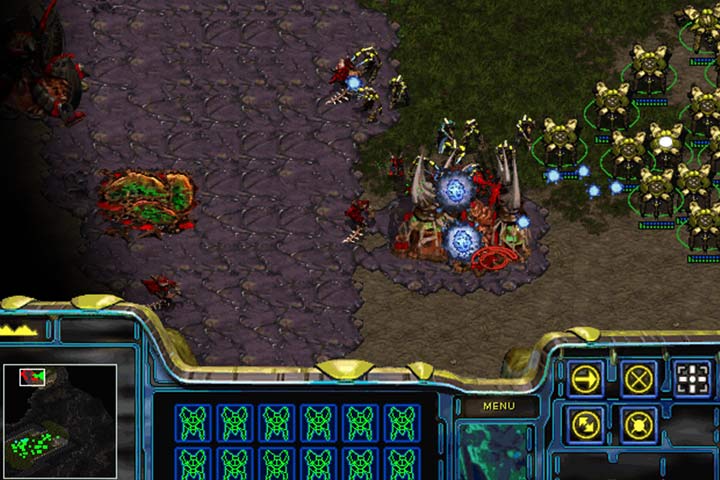
Now you can assemble you battle groups. Your first team should consist of Zealots. They have 80 HP, 100 shield points (SP), and significant melee damage. On the flipside, they cost as much as 100 crystals, require 2 population points per unit, and training them requires more time than Marines or Zerglings. That said, they're able to defeat most basic enemy land units in single combat. You'll be relying on them throughout your entire campaign. Dragoons are ranged units, and a bit pricier. They take up more space in transport vessels and cannot go through narrow passages. This mission gives you enough time and resources to field a second team of 6-12 Dragoons. The Zerg base is in the left upper corner of the map. Send the Zealots to the front and have Dragoons follow them. Assault the ramp and destroy the turrets outside the enemy base. Then, head for the center of the Zerg base. Your easiest approach is to go past the first ramp, along the cliff to the second ramp and attack the base from the east, near the gas vent (3). This section of the base has weaker defenses, which enables you to quickly take down the Hatchery (4), depriving the enemy of reinforcements. Once you destroy the buildings inside the base, the mission will be completed.
- StarCraft: Remastered Game Guide
- StarCraft Remastered: Game Guide
- StarCraft Remastered: Campaign Walkthrough
- StarCraft Remastered: Protoss
- StarCraft Remastered: Mission 1 - First Strike
- StarCraft Remastered: Mission 2 - Into the Flames
- StarCraft Remastered: Mission 3 - Higher Ground
- StarCraft Remastered: Mission 4 - The Hunt for Tassadar
- StarCraft Remastered: Mission 5 - Choosing Sides
- StarCraft Remastered: Mission 6 - Into the Darkness
- StarCraft Remastered: Mission 7 - Homeland
- StarCraft Remastered: Mission 8 - The Trial of Tassadar
- StarCraft Remastered: Mission 9 - Shadow Hunters
- StarCraft Remastered: Mission 10 - Eye of the Storm
- StarCraft Remastered: Protoss
- StarCraft Remastered: Campaign Walkthrough
- StarCraft Remastered: Game Guide
You are not permitted to copy any image, text or info from this page. This site is not associated with and/or endorsed by the developers and the publishers. All logos and images are copyrighted by their respective owners.
Copyright © 2000 - 2026 Webedia Polska SA for gamepressure.com, unofficial game guides, walkthroughs, secrets, game tips, maps & strategies for top games.
