Microsoft Flight Simulator: Taxiing and take-off of a passenger aircraft
In this part of the guide to Microsoft Flight Simulator we explain the take-off procedure for a passenger plane and taxiing to the runway.
In the video above you can see how to perform taxiing and takeoff in an Airbus A320neo. All the stages visible in it are described below. For the purpose of shortening the film, taxiing and take-off took place from a different lane than in the message from the controller from the tower.
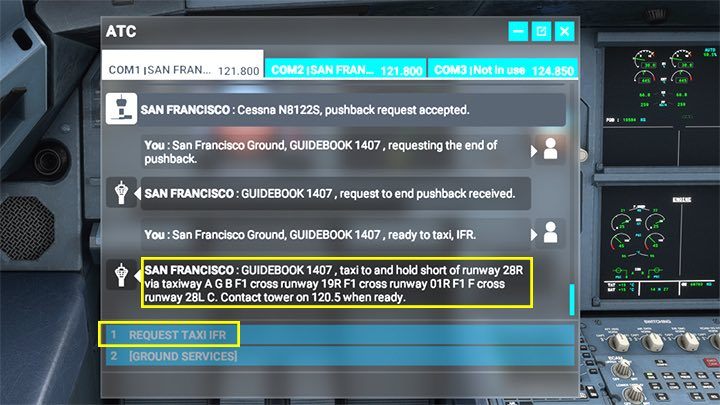
From the ATC toolbar and communication menu, select Request Taxi IFR. The tower will respond with the lane number. The taxiing instruction is described in detail on the page: Taxiing to the runway.
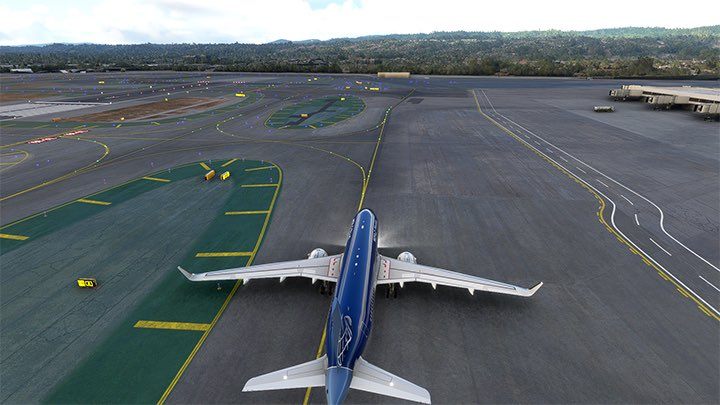
If you don't have an airport chart or you don't know where to go, you can use the external view by clicking the END key. Move along the yellow lines until the beginning of your lane marked with white letters on a red background. Remember to use very little engine power, use the rudder to turn and the wheel brakes to slow before turning.
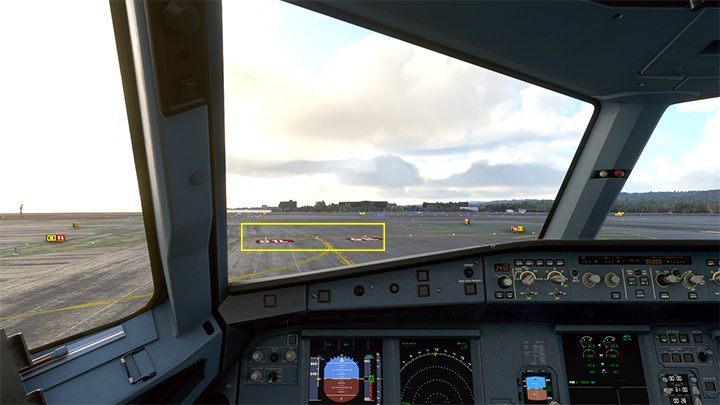
Stop just before entering the lane, which is a thicker line with a white-red lane code. Here you can ask the ATC for permission to start by selecting the appropriate option from the communication menu (Request Take-Off).
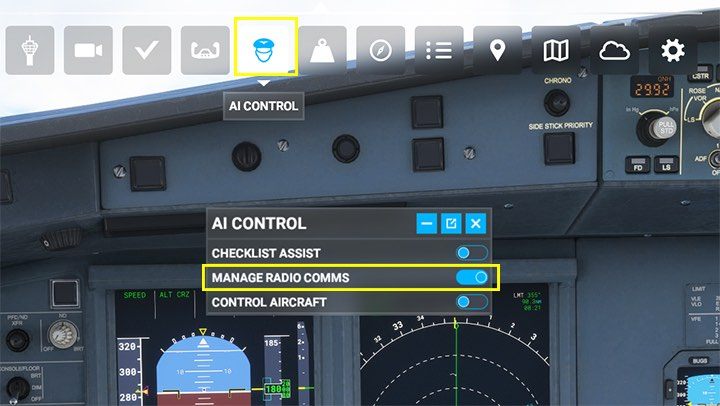
This is a good time to select AI CONTROL functions from the toolbar and transmit radio communication to it (Manage Radio Comms)- otherwise you will have to confirm different messages every now and then.
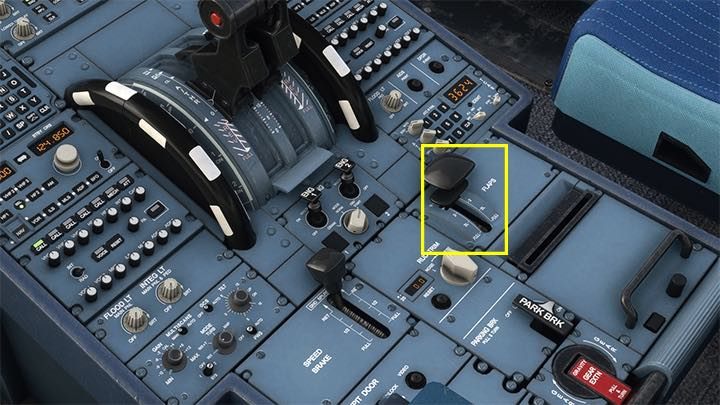
Set the FLAPS to the starting position (usually "1" for long runways, higher when it's short).
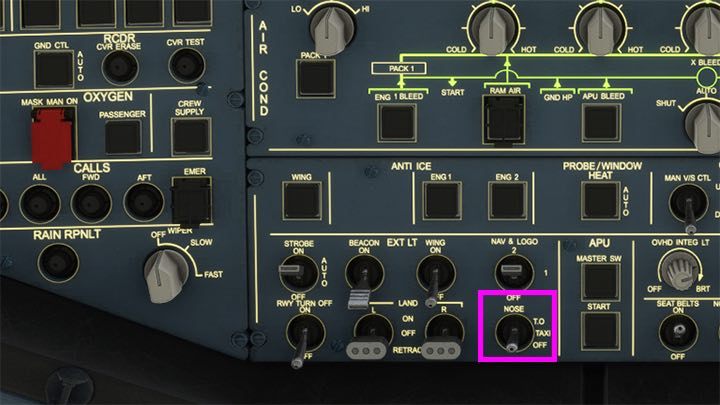
On the Overhead panel, switch the NOSE lights to the start position T. O.
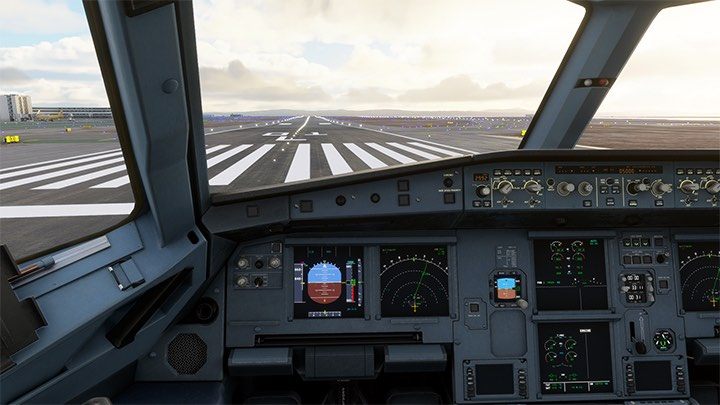
Add a little bit of power to drive into the lane and position yourself on its axis with the rudder.
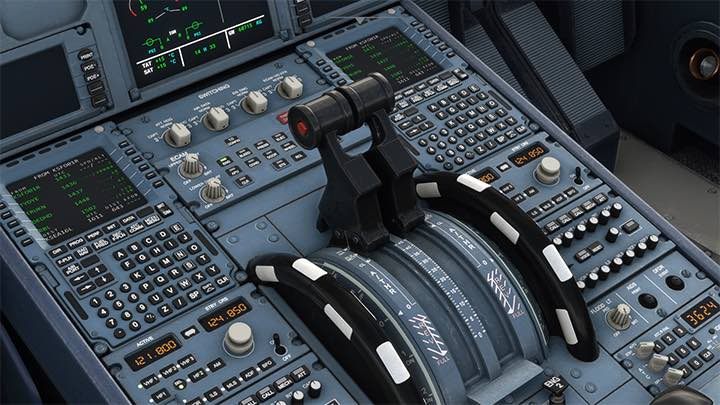
Set throttle to full power (TOGA)- the plane will start to accelerate along the runway.
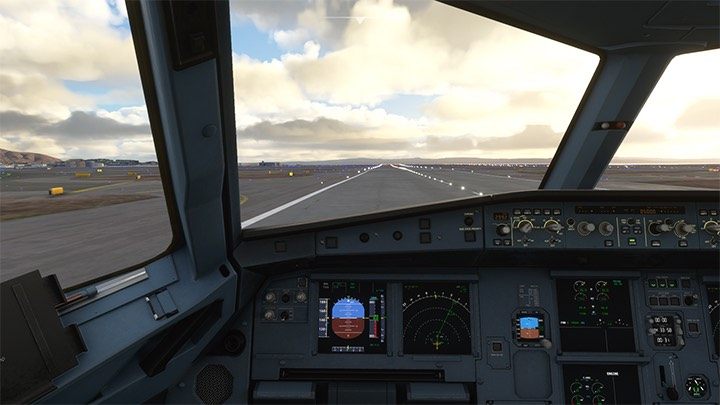
Make sure you don't go off the runway while you're taking off. Sometimes you'll need a little adjustment.
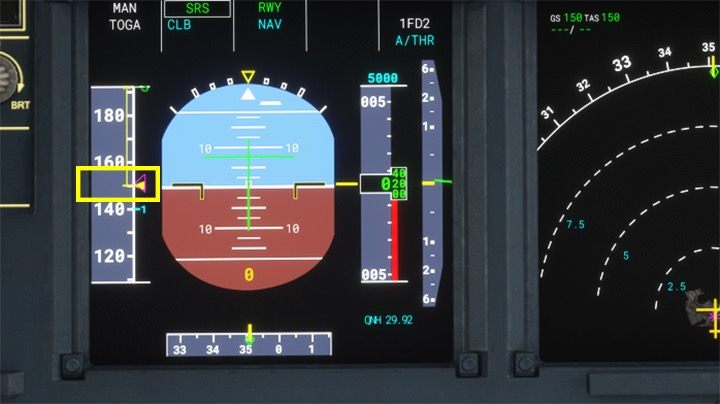
The pink triangle on the speed indicator indicates the calculated speed from the computer Vr that is, to lift up. When the yellow triangle is level with the pink triangle, gently pull the bar / steering wheel towards you to climb up.
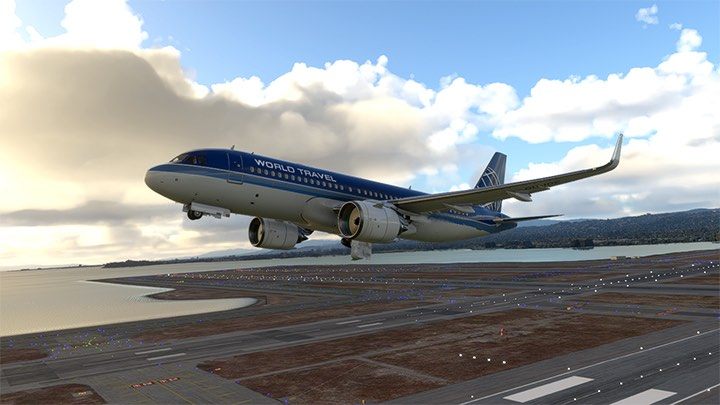
If the plane takes off without any problems, press the G key to hide the chassis.
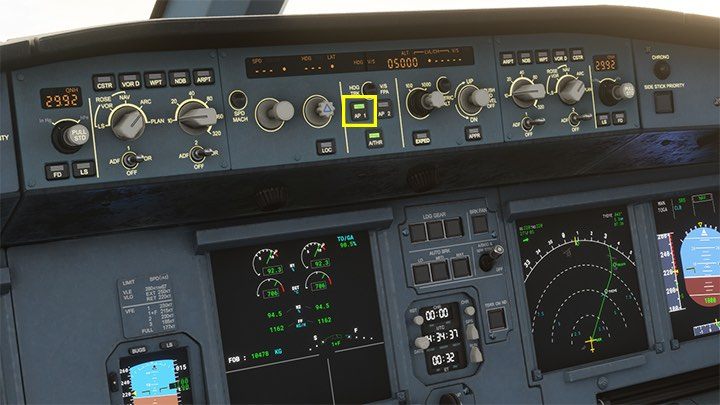
Turn on the autopilot with the button AP1. Unless you are taking off from an airport surrounded by steep mountains, the default altitude of 5,000 feet will be sufficient for the aircraft to pass the SID departure procedure.
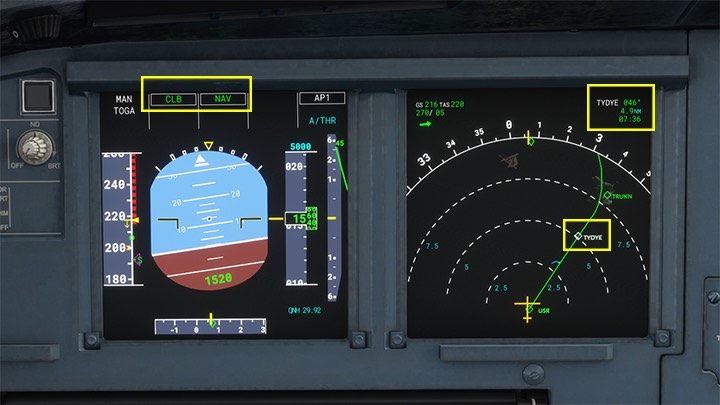
The correct operation of the Autopilot is confirmed by the NAV and CLB (Climb) messages on the PFD monitor and the fact that the aircraft began to turn towards the next navigation point. On the ND screen it is marked in white, and in the corner you can see the distance to it. On the altimeter you can see the blue numbers 5000 indicating the target value for the current autopilot settings. The speed is regulated automatically by the A-THR (Auto-Throttle) function.
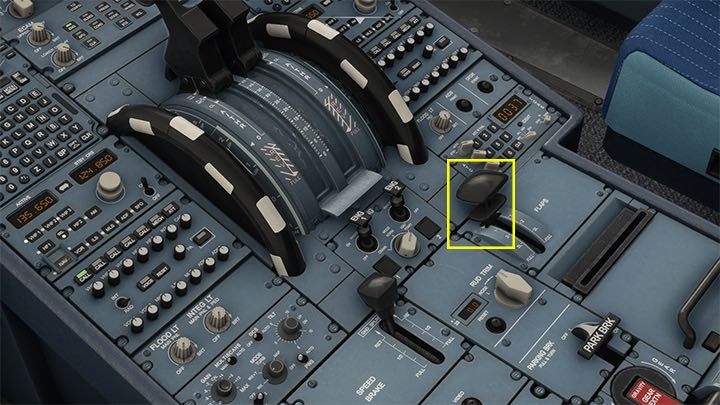
At an altitude of about 1500 feet, hide the FLAPS to level 'zero', so the plane can pick up speed.
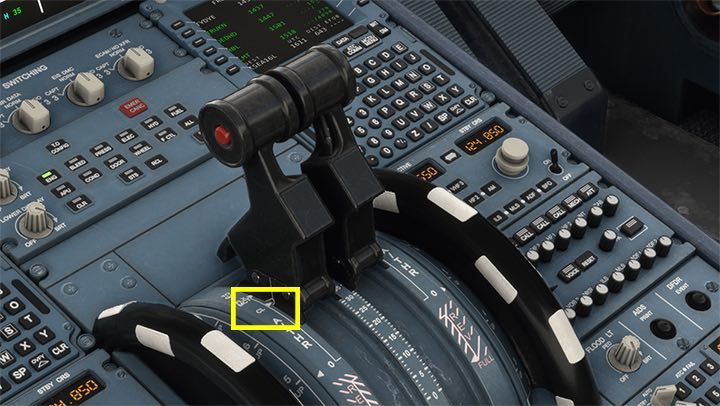
After turning on the autopilot and hiding the flaps, switch the throttle to maximum TOGA power to CL (Climb). This will ensure optimum performance and fuel consumption during ascent.
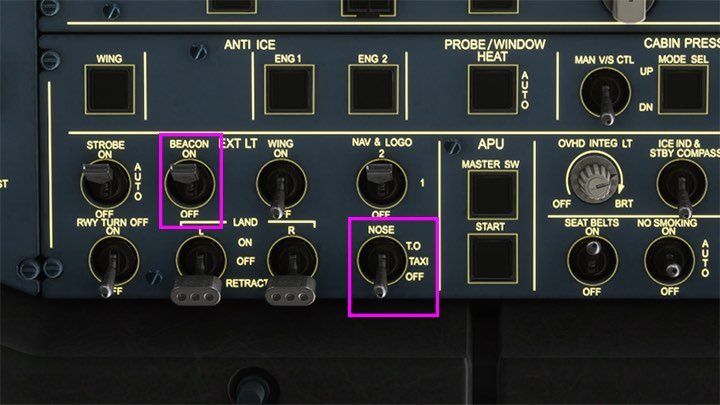
You can already turn off unnecessary NOSE T. O. lights. During the flight, BEACON, NAV and STROBE remain on.
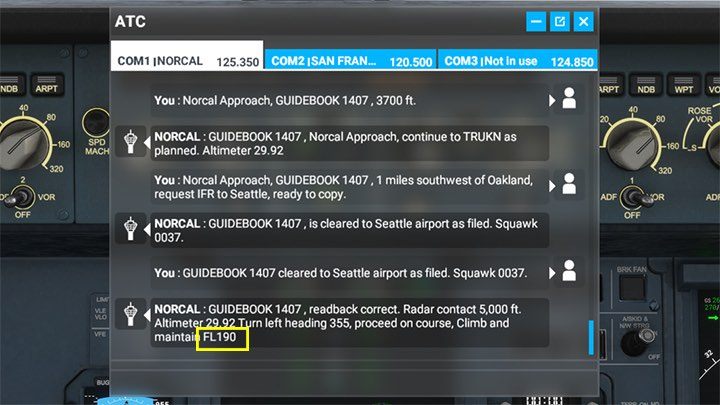
In the meantime, the ATC will assign you a target FL (Flight Level). In this case, it's FLl190, which is 19,000 feet.
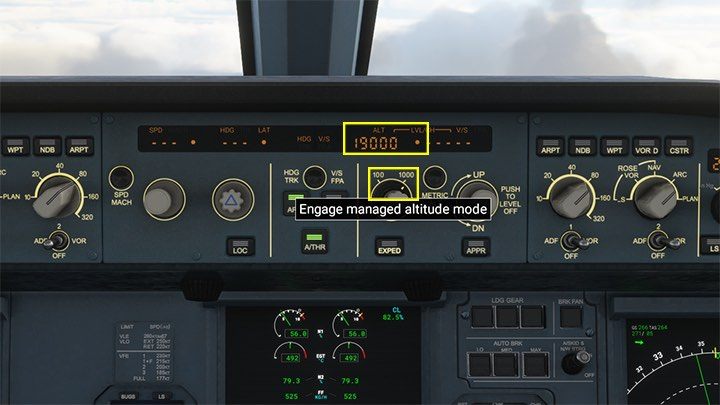
On the Autopilot panel, set the altitude dial to 19000, and then press the Engage Managed Altitude.
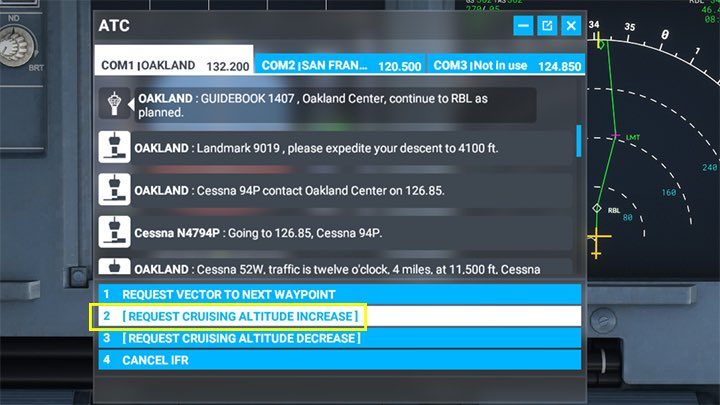
If, for some reason, you want to increase/decrease the cruising altitude, for example, to the one recorded in the flight plan, you can ask in the communication menu to change the altitude by the specified amount by selecting: Request Cruising Altitude Increase / Decrease. Otherwise, the controller will send a request every now and then to adjust the altitude to its guidelines.
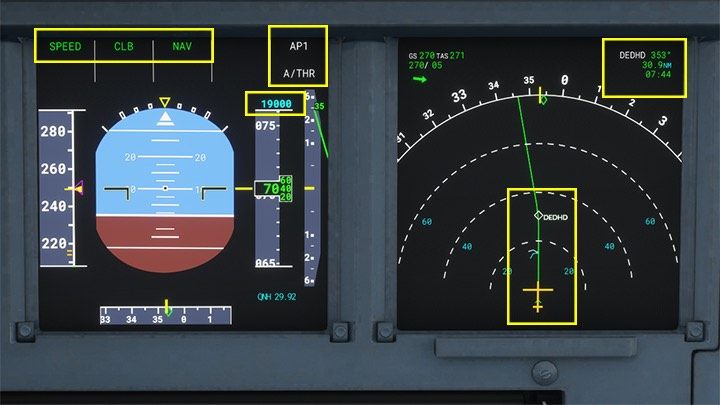
The new altitude set on autopilot will appear as a blue value on the altimeter. At the top you can see the active autopilot modes, and on the ND screen the way to the next navigation point, which confirms that the plane is flying as planned.
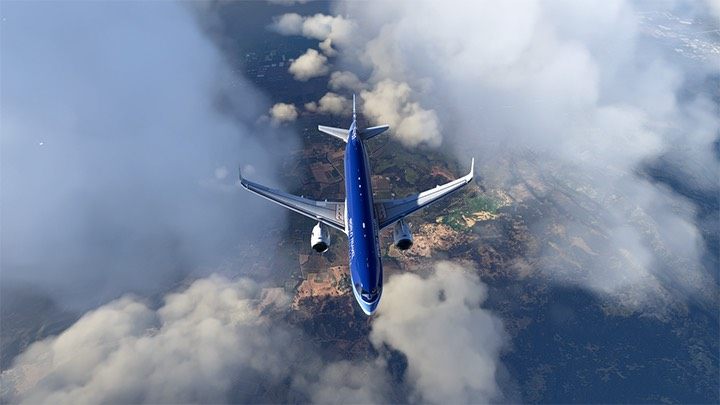
In principle, you can already relax and start to admire the views, especially the outside, after pressing the END key. The autopilot will take care of the rest for a long time, together with the pre-programmed MCDU computer.
- Microsoft Flight Simulator 2020 Guide
- Microsoft Flight Simulator: Game Guide
- Microsoft Flight Simulator: Passenger aircraft
- Microsoft Flight Simulator: Example flight
- Microsoft Flight Simulator: Flight Preparation and Cold Start
- Microsoft Flight Simulator: Taxiing and take-off of a passenger aircraft
- Microsoft Flight Simulator: Scheduled flight - Passenger aircraft
- Microsoft Flight Simulator: When to begin descent?
- Microsoft Flight Simulator: ILS landing - Passenger aircraft
- Microsoft Flight Simulator: Example flight
- Microsoft Flight Simulator: Passenger aircraft
- Microsoft Flight Simulator: Game Guide
You are not permitted to copy any image, text or info from this page. This site is not associated with and/or endorsed by the developers and the publishers. All logos and images are copyrighted by their respective owners.
Copyright © 2000 - 2026 Webedia Polska SA for gamepressure.com, unofficial game guides, walkthroughs, secrets, game tips, maps & strategies for top games.
