Microsoft Flight Simulator: Beginner's Guide - how to start flying? Tips
In this chapter of the Microsoft Flight Simulator guide we present the absolute basics of gameplay. We suggest how to start and conduct your first flights. We describe the HUD interface features and how to choose a flight plan.
Flying isn't that complicated, especially with Flight Simulator 2020, which offers a range of gameplay facilitating options. With the whole world recreated thoroughly, you can go anywhere on the globe. Below is the way to start flying as soon as you turn on the game. If you need to change your controls, you can find all the information in the dedicated section and quick tips on the front page.
Choosing the route or a starting place
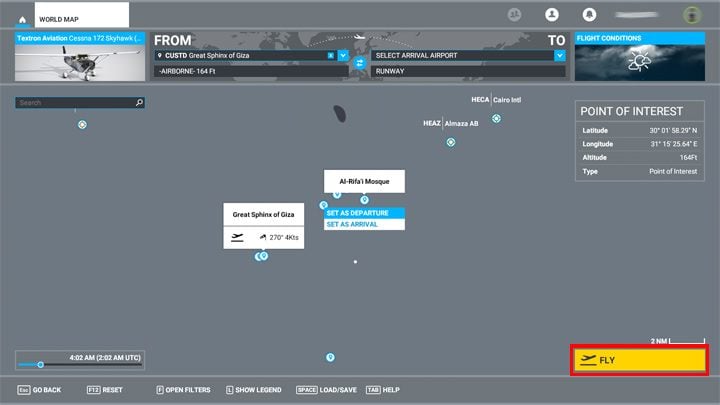
Choose the World Map mode. Use the mouse roll to zoom in on a map or write the name of a city, airport tourist attraction, or geographical coordinates of interest in the search engine. Places of particular interest or recreated in better quality are marked with blue pins.
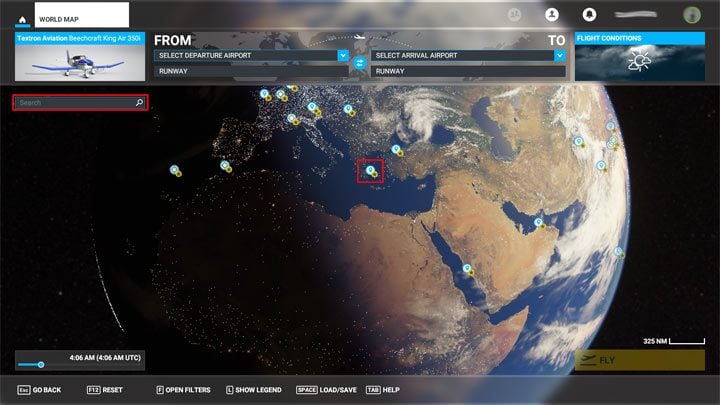
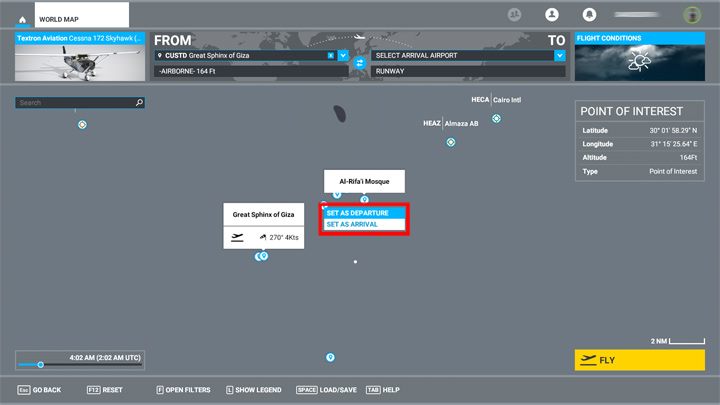
Click on the location of interest on the map and select Set as departure. You don't have to specify your destination. You can now click Fly and move to the game world. If you have chosen a location that is not an airport, you will start your flight right in the air.
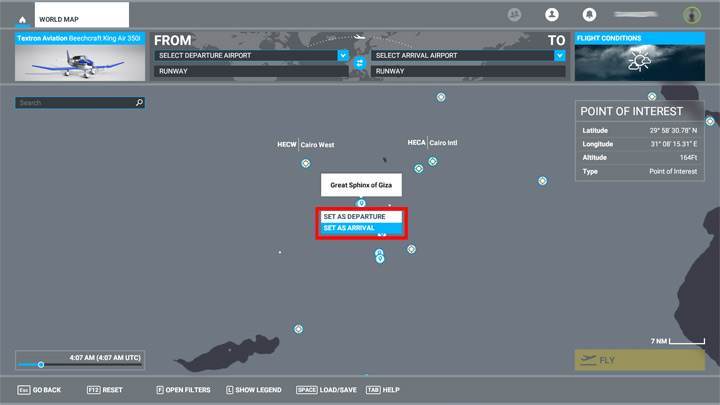
However, you can choose your destination right away. Click on any point near or on an airport and select Set as arrival.
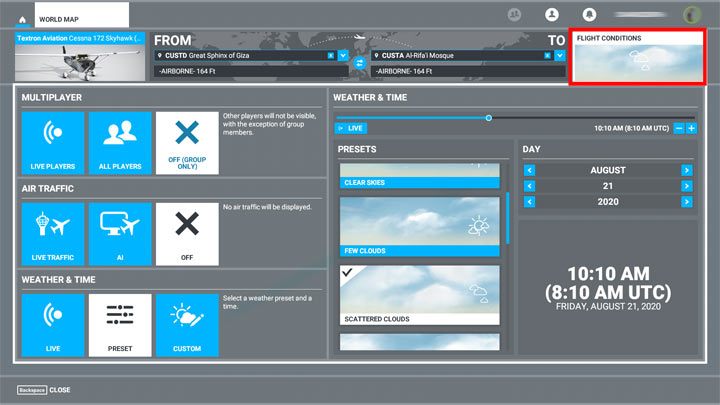
Then click on Flight Conditions and set the chosen weather and time of day. You can also choose Live mode with current, actual weather and air traffic. Weather selection at this stage is optional. You might as well change it during the flight.
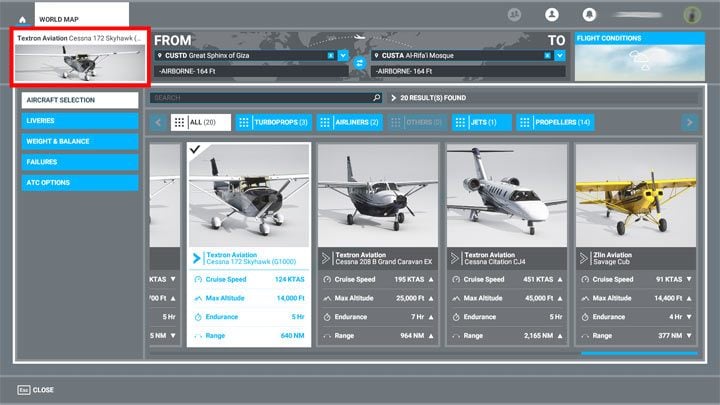
Choose your plane for this route. Unlike weather, once you load your location you won't be able to change it. Click the airplane icon in the top corner again to return to the map.
If the route is ready, choose Fly.
First flight
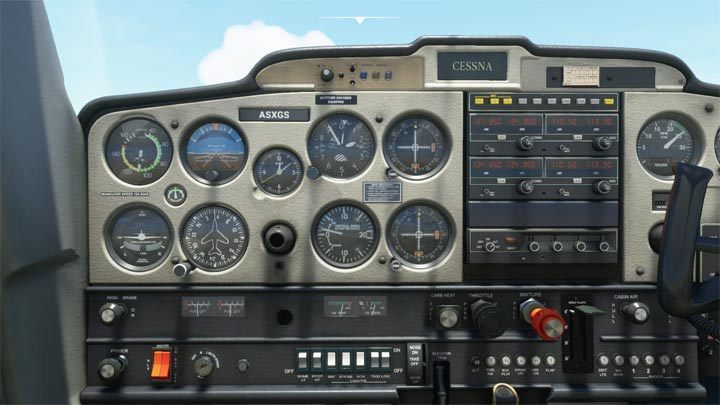
You're in the air! You can fly in any direction but not vertically into the ground. Press the active pause (PauseBreak) to stop the plane in the air and look around the cockpit.
You can look around with the right gamepad stick or with the right mouse button pressed. The arrows on the keyboard control the position of the camera in the cabin. The mouse roll zooms in and out the view. When you place the cursor on a particular switch, you'll find out what it's for. Detailed information about gauges and instruments can be found in the Flying School section.
Press the End key to go to the third person perspective view. Hold the right mouse button to look around the plane. Disable the active pause. You control the aircraft with the gamepad's left stick, joystick or, as a last resort, numeric keyboard arrows, but we strongly advise against the latter option. The aircraft is hard to control with the keyboard alone.
Use the F2 and F3 keys to adjust the engine thrust, tilt the bar and pull to turn. Focus on making slow, precise rudder movements, otherwise the aircraft will start to lose thrust and fall. Make adjustments to key assignment and control sensitivity if needed. You can find tips on a dedicated page.
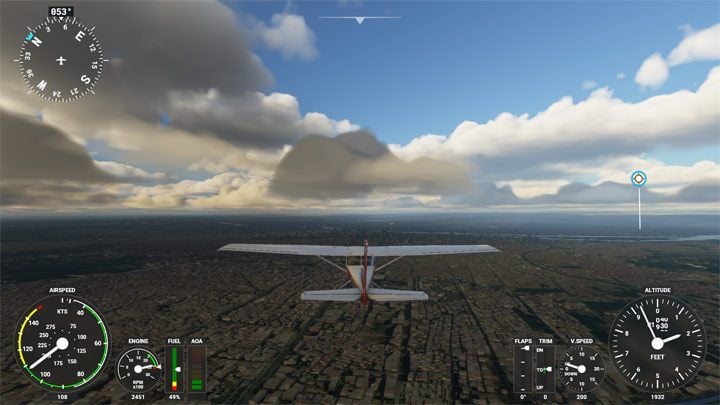
HUD description
Controlling the aircraft from the outside view is facilitated thanks to the HUD - screen interface. It contains basic information about flight parameters. HUD will vary slightly depending on the type of aircraft chosen, but generally will always provide the same information.
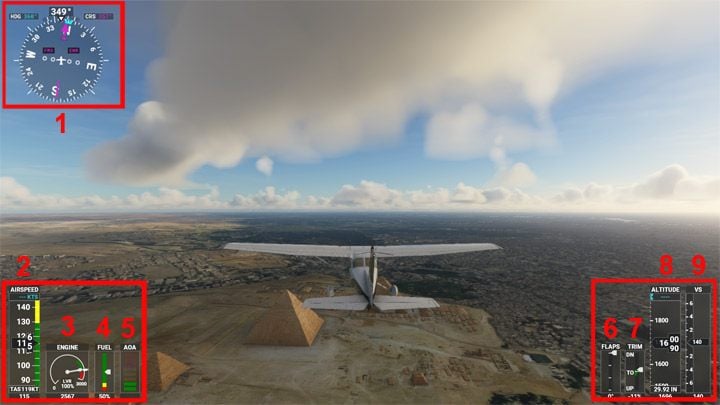
1. Compass Rose. The white numbers are the current flight course. HDG (heading) is the course set for Autopilot, and CRS (course) is the course set for the selected navigation point on the scheduled route.
2. Speed is displayed in kts. Don't go beyond the green field, especially with the realistic flight model on.
3. Current engine power. During a normal flight, set it at 75-85 percent.
4. Fuel level.
5. Angle of Attack. Indicates the angle of wings inclination in relation to the flowing air. You don't have to worry about it until it starts showing red lines. This means that the speed is too low relative to the angle, causing the aircraft into stall - there is not enough power to fly. In such cases, point the nose down to gain speed.
6. Flaps. It shows the degree of flap tilt. During a normal flight, it should be at 0. We release them for landing and take-off only. They help to stay airborne at a minimum speed. The default keys are F6 and F7.
7. Trimmer. Shows the trim tab setting. TO (take off) means setup for take-off, UP means nose facing up, and DN means nose facing down. Gently adjust the height trimmer (numeric buttons 7 and 1) to keep the aircraft flying at a constant altitude or to make it ascending without having to hold the yoke.
8. Altitude meter. It shows the current altitude above the sea level in feet per second and the altimeter pressure at the bottom.
9. Vertical Speed. It shows the plane's current vertical speed, and whether it ascends or descends.
Toolbar
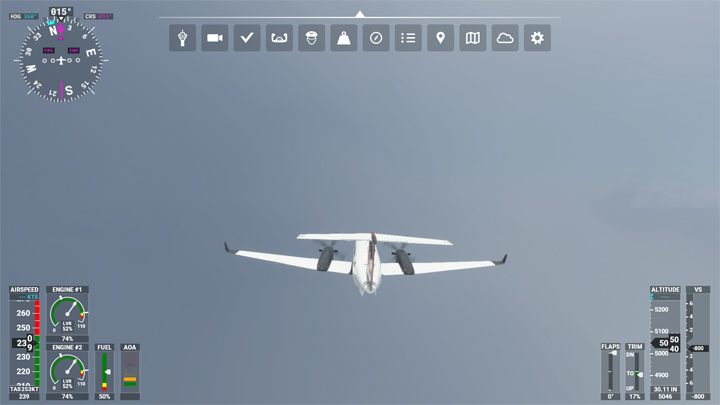
Move the mouse cursor to the upper part of the screen to display the toolbar. Experiment with the options and facilitations it offers. A full description of its functions can be found in the corresponding chapter.
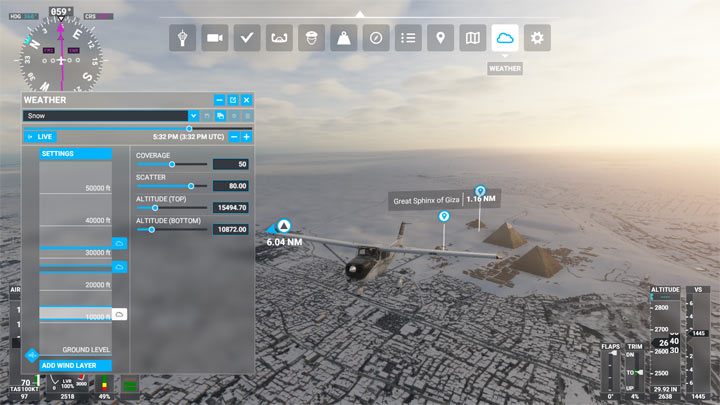
Weather editor
Select the cloud icon from the toolbar and play with the weather editor. Snow around Egypt's pyramids? In Flight Simulator it's possible! You can also change the time of day and date, and, for example, fly at night with full moon.
Facilitations
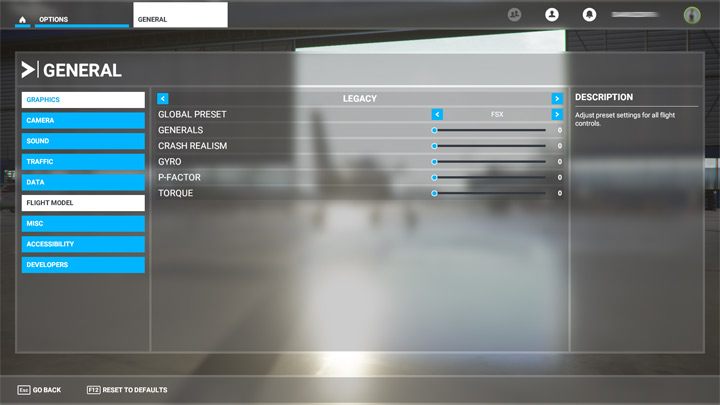
If you feel the need to lower the difficulty, check the gameplay realism options. You will find them in the Options menu when you press the Escape key. The facilitations are located in two separate locations. The first concerns only the flight model and can be found in the General tab. By selecting the FSX level you can choose the easiest settings. See the corresponding chapter for a full description.
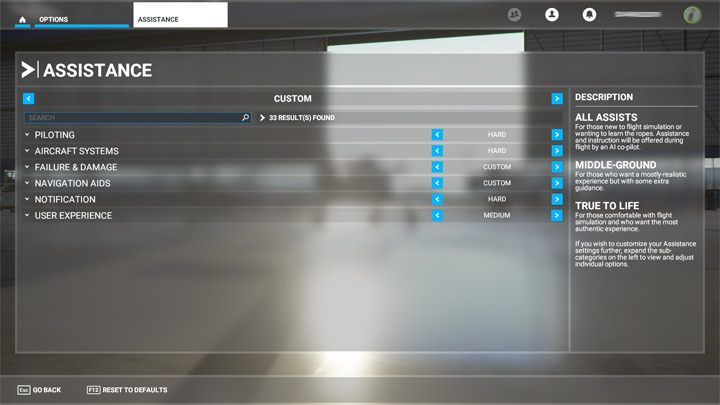
Further options are in the Help menu. Here, you'll find much more detailed options dedicated to the plane's behavior, defects, assists and screen interface. A full description of these features can be found in the corresponding chapter.
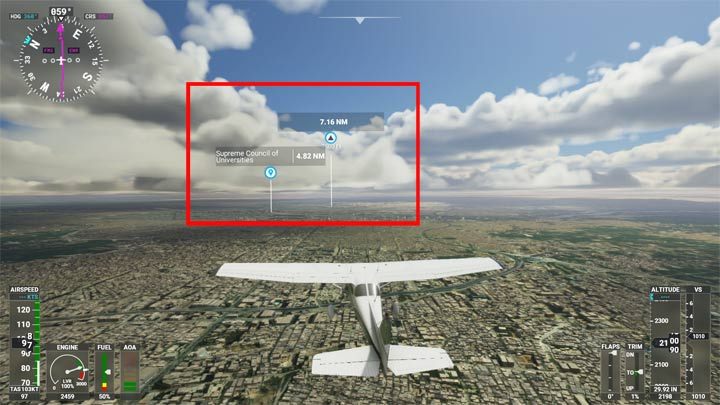
Pay particular attention to navigation aids, where you can display a range of clues, including approach paths, route points and interesting locations along the way. If you have set a longer flight plan in advance, you can turn on the next navigation point on your route here.
- Microsoft Flight Simulator 2020 Guide
- Microsoft Flight Simulator: Game Guide
- Microsoft Flight Simulator: Basics
- Microsoft Flight Simulator: Beginner's Guide - how to start flying? Tips
- Microsoft Flight Simulator: Aircraft list
- Microsoft Flight Simulator: Airports list
- Microsoft Flight Simulator: Game modes
- Microsoft Flight Simulator: Toolbar
- Microsoft Flight Simulator: Realism level and assists
- Microsoft Flight Simulator: Ground Services
- Microsoft Flight Simulator: List of best mods
- Microsoft Flight Simulator: Basics
- Microsoft Flight Simulator: Game Guide
You are not permitted to copy any image, text or info from this page. This site is not associated with and/or endorsed by the developers and the publishers. All logos and images are copyrighted by their respective owners.
Copyright © 2000 - 2025 Webedia Polska SA for gamepressure.com, unofficial game guides, walkthroughs, secrets, game tips, maps & strategies for top games.
