Microsoft Flight Simulator: ILS landing - Passenger aircraft
This page of the Microsoft Flight Simulator guide describes the landing of a passenger aircraft using the ILS -Instrument Landing System. We provide a comprehensive guide to all the steps required to land an Airbus or Boeing aircraft.
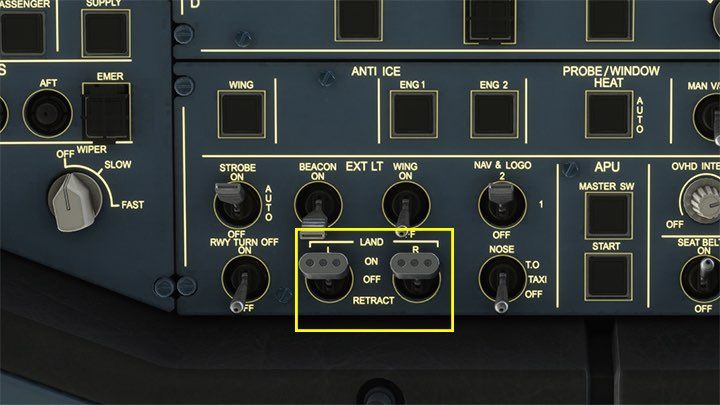
Preparations for landing begin already from the descent to 10,000 feet, when the LAND L and R-ON lights turn on.
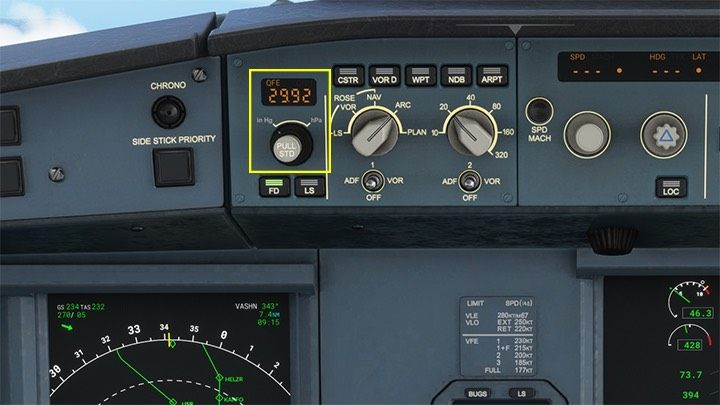
The next step is altimeter pressure adjustment to local conditions - either the B key, or more realistically - a knob on the instrument panel according to indications of METAR weather data or message from the tower.
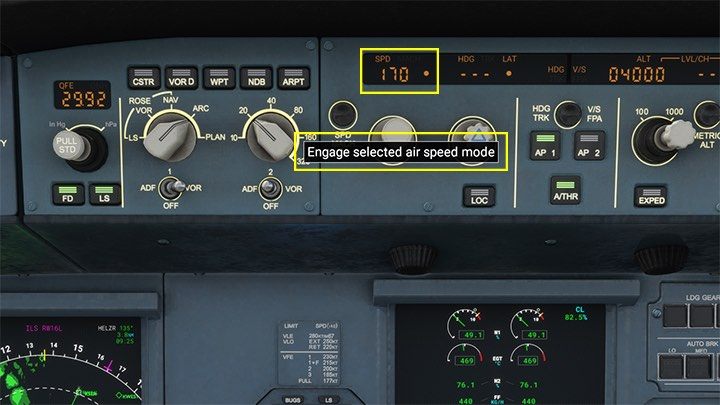
During the descent, you also need to lose speed. Below 15000 ft, you can set it to about 200 knots and below 10,000 ft, reduce to a little under 200 knots. Use the knob to set the value and confirm by pressing Selected Air Speed Mode.
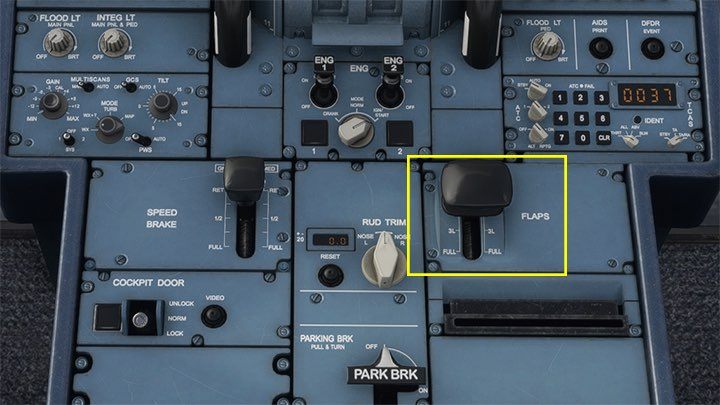
Slowing down below 200 knots already requires FLAPS-in position 1.
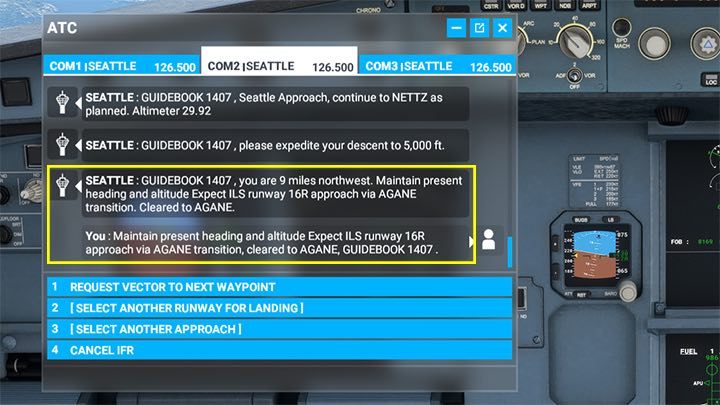
In the meantime, the tower controller will respond with the landing information, e.g. the runway number or STAR procedure. If you have previously entered another STAR on your computer and its points are recognized, you can ignore this message.
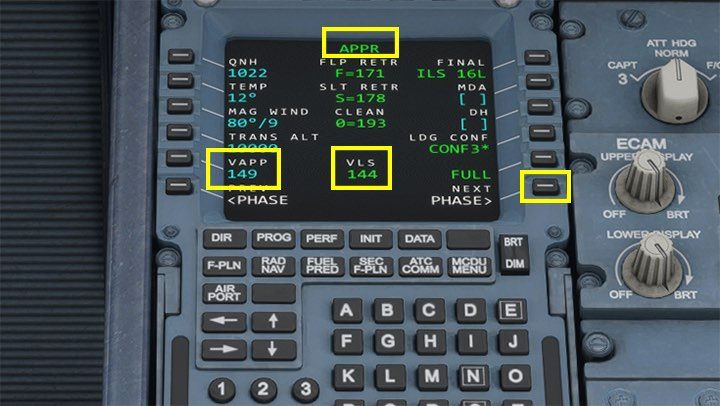
Click Next Phase on MCDU up to the landing approach screen APPR to check the flight computer's calculated landing speed. VAAP (V Approach) shows that when approaching the runway with the landing gear and flaps released the plane should fly at a speed of 149 knots. VLS to Lowest Selectable - the lowest speed maintainable by the autopilot and automatic throttle.
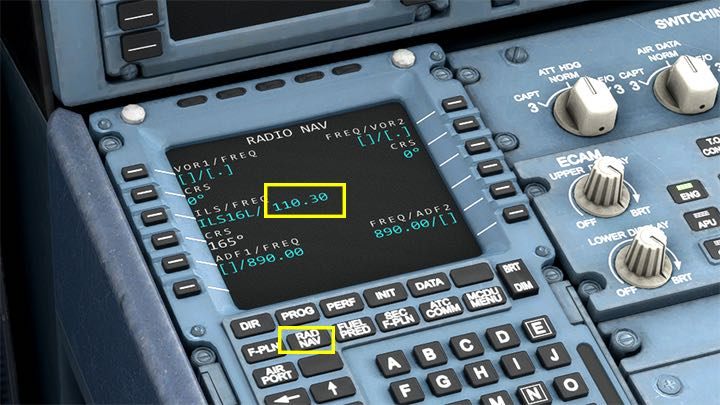
In the NAV SERIES tab of MCDU, verify that the system frequency is ILS for the selected landing runway. On the default A320, this should be done automatically; on other machines, it may be necessary to enter this value yourself. The frequency of ILS can be found on airport maps or in the game. Detailed instructions can be found in the FAQ section of the guide.
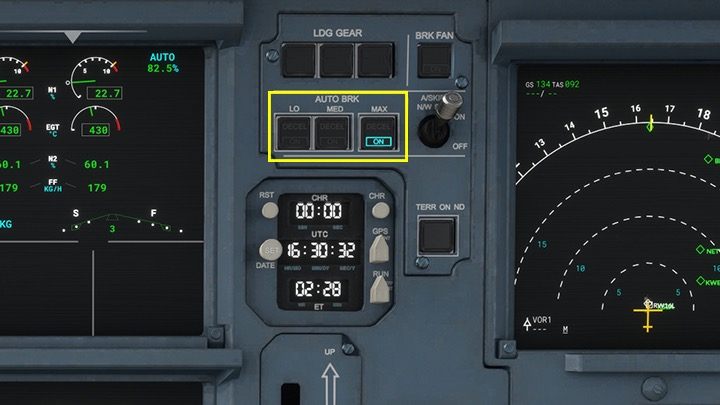
In the center of the instrument panel, adjust the force of the automatic wheel brakes AUTO BRK. With long runways, MED. is usually enough, with shorter ones, use MAX.
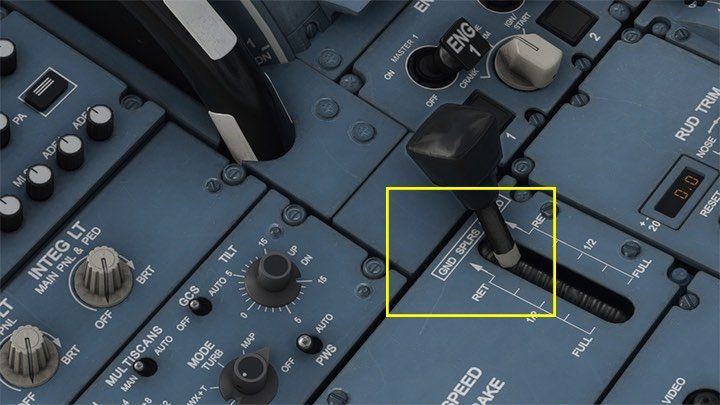
Behind the throttle, position the brake lever all the way up to prepare the spoilers (GND SPLRS). After landing, they will automatically extend and help to slow down the aircraft on the runway.
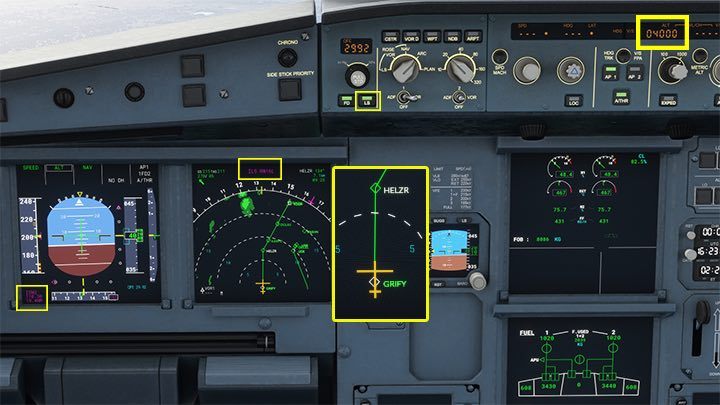
From an earlier check of the navigational points, it was clear that the HELZR point requires an altitude of 4000 feet. So this is the altitude set on autopilot. HELZR is also the the last point, where you must be fully ready to land. Click the LS button on the left side of the autopilot panel to the display the ILS information, which will be visible on the PFD and ND monitors in purple.
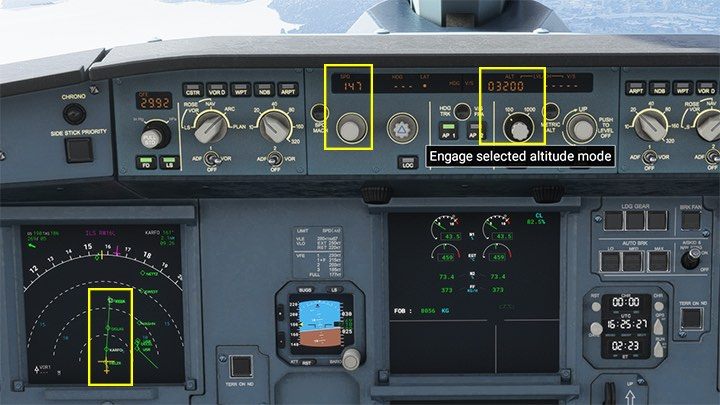
Just before the HELZR point, set the altitude for the next point, which is 3200 feet for KARFO. It's about time to set the approach speed, which is 149 knots (at least 144). Be sure to confirm the speed selection by pressing the button on the selected speed mode. According to the range rings on the navigation screen, we're about 12 miles from the runway.
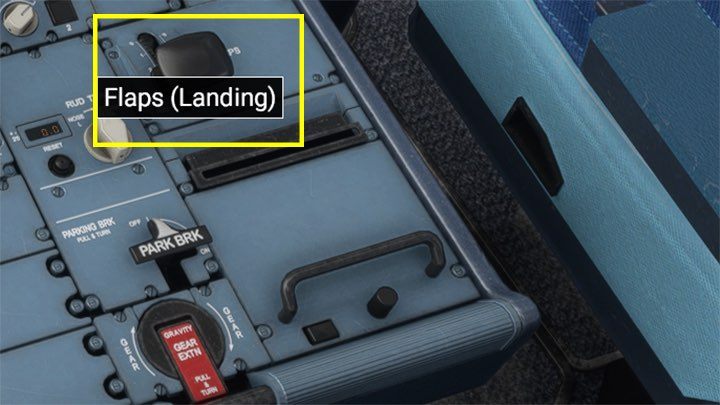
With such a low speed, you need to extend the FLAPS in the landing configuration, that is, to the 4-landing position.
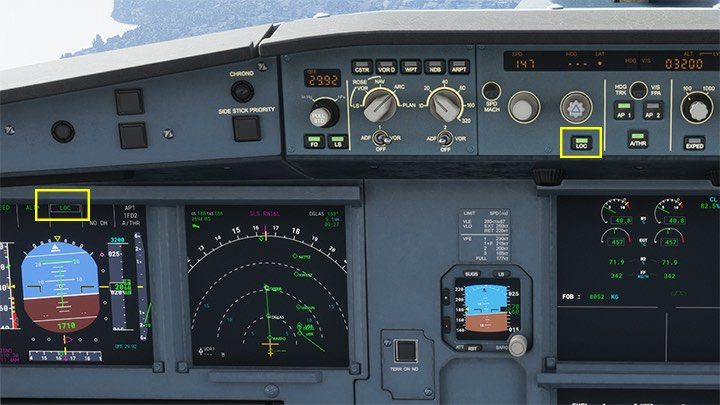
When entering the course of the runway, prepare the Localiser with the LOC button, to position yourself perfectly in front of the runway.
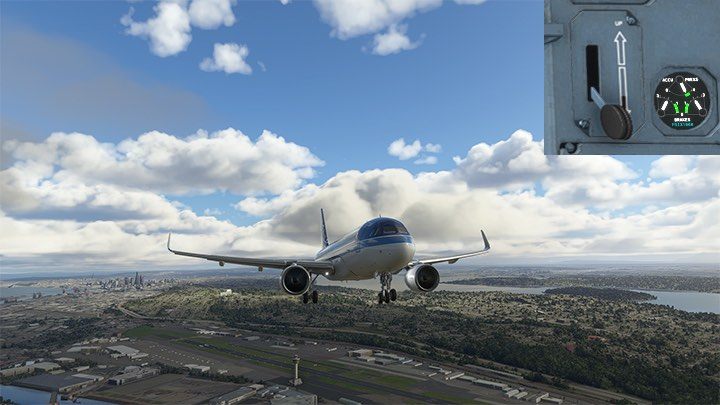
At a distance of 9 miles (minimum 7 miles) from the runway, slide the chassis out with the G key on the keyboard or a lever in the middle of the instrument panel.
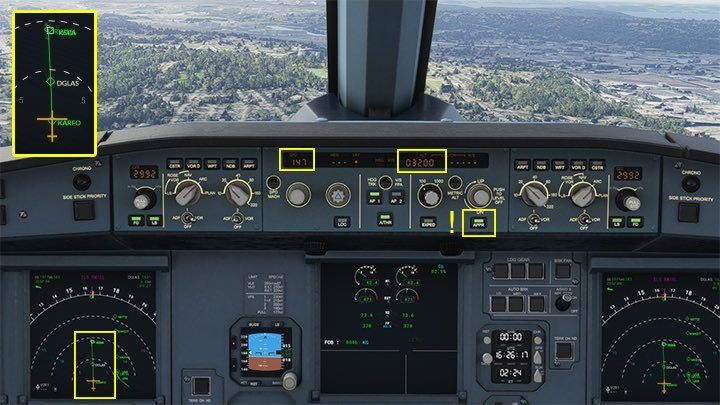
At KARFO point, the altitude and speed must already meet the requirements for descent along the path, that is, 149-144 knots and 3200 feet. This is the altitude, at which the ILS system often already works, so it is necessary now to activate the APPR mode (Approach) on the right side of the panel.
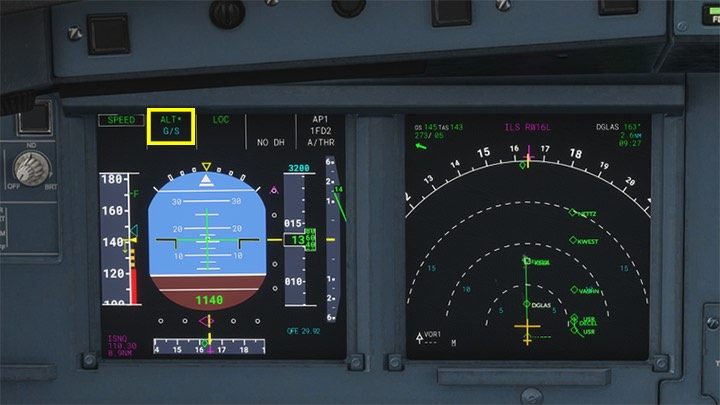
APPR mode is indicated on the PFD monitor as letters G / S (or Glide Slope). The blue marking below the green indicates that the mode is armed but not yet active. The plane hasn't picked up the ILS signal yet.
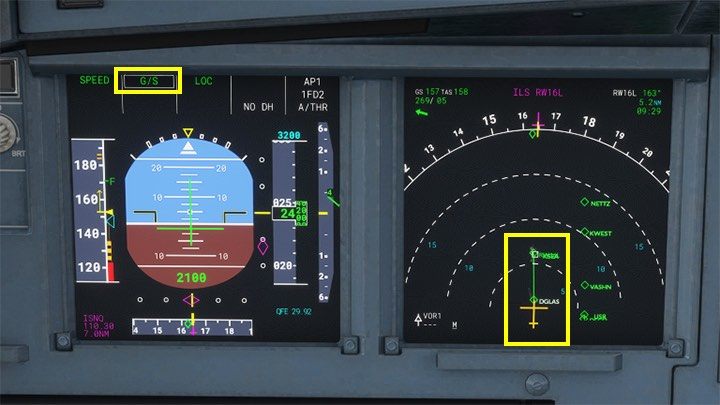
Just before the last navigation point - DGLAS the aircraft intercepted the ILS signal and began descent along the glide slope. You can see it by the letters G / S, which have turned green to indicate that this is now active Autopilot mode. The system will now control so that the two purple diamonds on the sides of the artificial horizon on the PFD screen are in the middle positions.
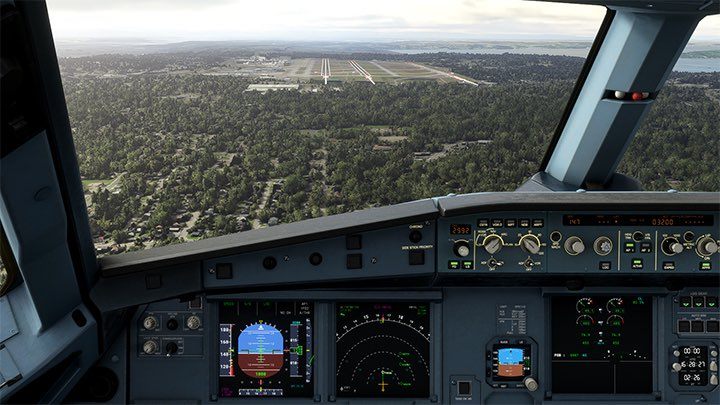
For a while you just have to watch the descent of the plane along the slope towards the runway, but it is common practice to take over the controls and perform the last phase of the landing "manually" by the pilot.
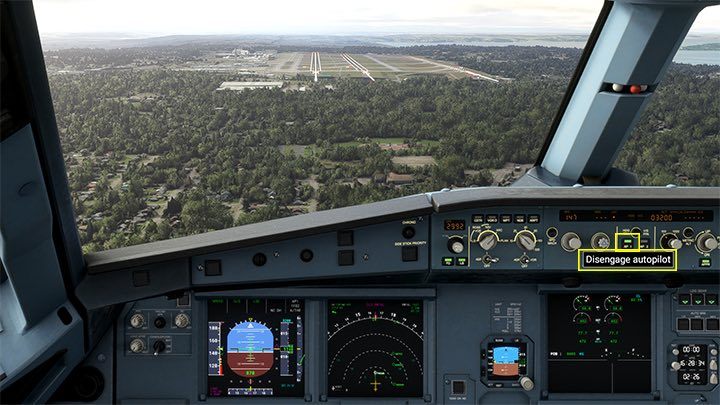
There's no iron rule here. Some pilots take over the controls earlier, around 3,000 feet above the ground. Others do it later. In case of bad weather, strong crosswinds this is done earlier.
Press the autopilot button AP1. The on-board computer will inform you about the altitude during the approach. From 1000 feet, these are signals every 100 feet, and below 50 feet, these are signals every 10, so 40, 30, 20...
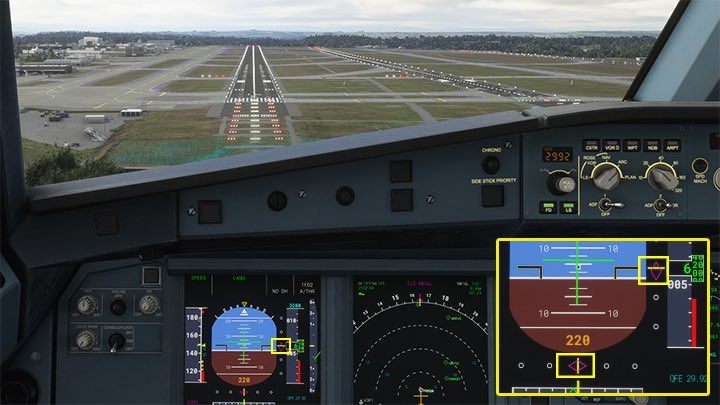
If there is no strong wind, you will not need to make any major adjustments in the steering. Maintain the direction set by the autopilot by observing and monitoring the center position of the two diamonds on the PFD. On the sides of the runway, you can also see the PAPI Lights. Two white and two red indicate that the aircraft is descending correctly on the path. The advantage of red means that you are too low, and white-too high.
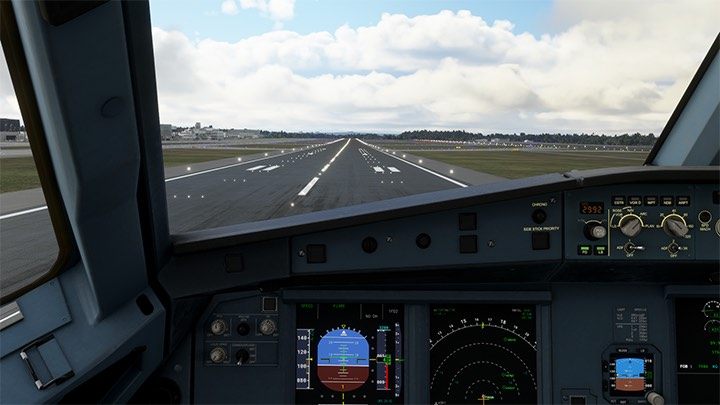
Just above the runway, when the computer reports the altitude of 20 feet, turn the throttle back to idle position. The plane must now perform a light "flare", that is, very gently lift the beak up just before touchdown. Pulling the rod towards you.
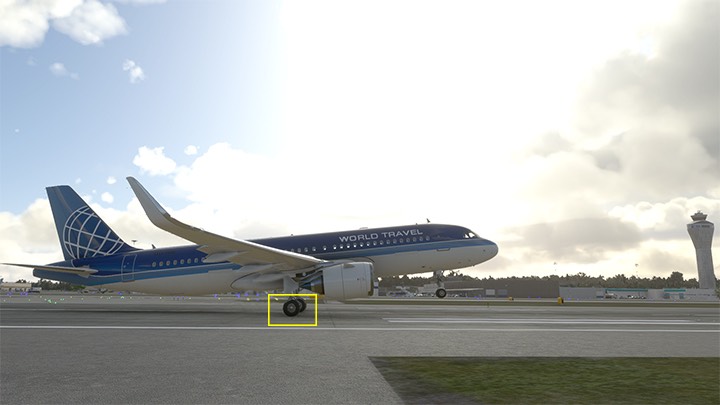
The flare allows the main landing gear to land. Proper descent on the path already sets the plane at a certain angle, so make sure that your flare isn't too large, otherwise the plane will hit the runway with its tail or lift up.
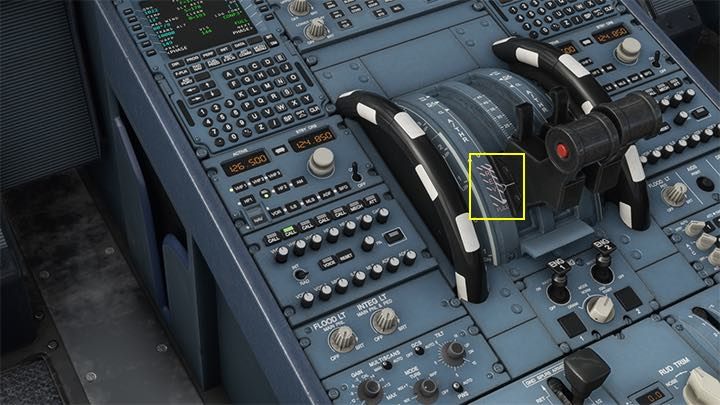
When the aircraft is on the runway, set the throttles to reverse, that is, the red box marked as REV.
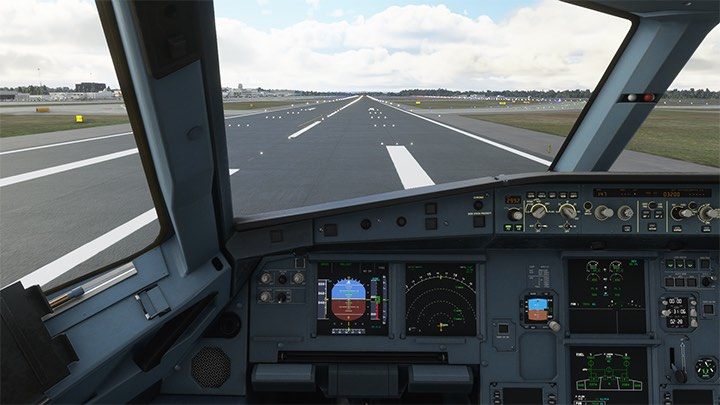
With Auto Brakes well set, there should be no need to brake with the wheels. The aircraft should decelerate to taxiing speed.
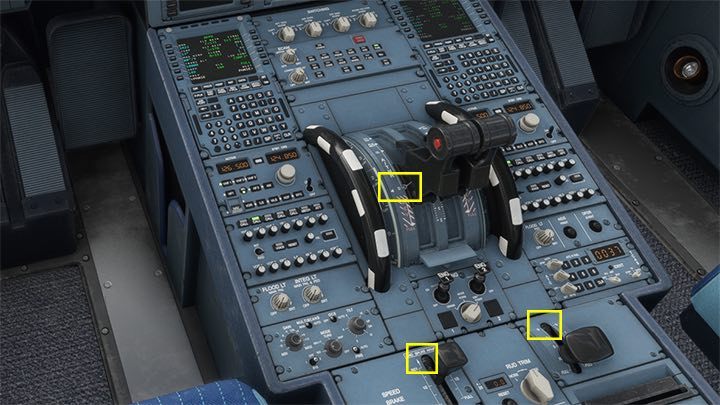
When the speed drops, you can already set the throttle to idle, as well as hide the flaps and spoilers. For more realism, you can still turn off the landing lights.
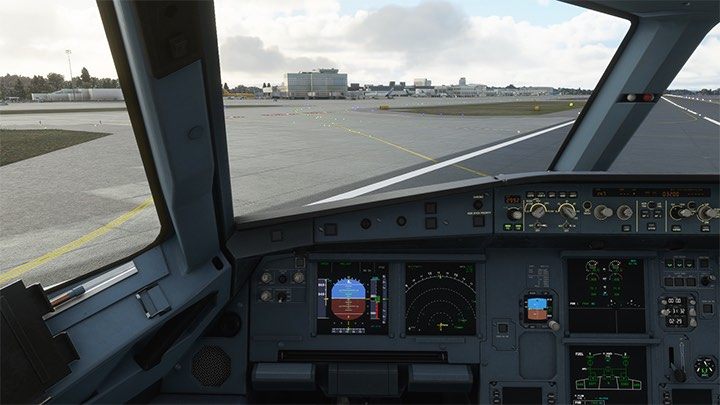
You can now exit the runway at the nearest exit marked with a yellow taxiway.
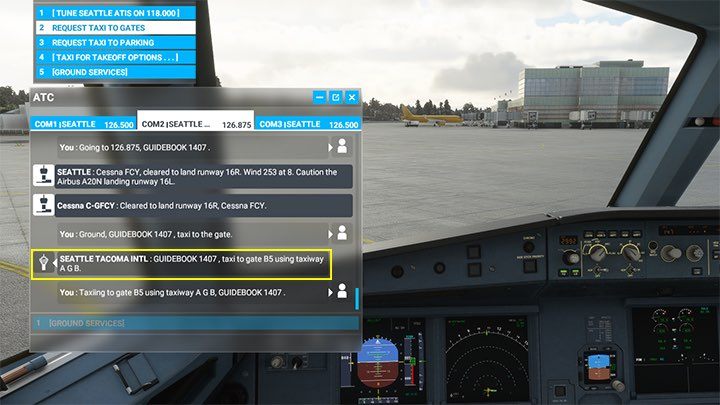
Optionally, you can ask the controller to designate a parking space and taxiways, but without an airport map, finding them can be difficult. In general, you just need to drive up to the selected gate.
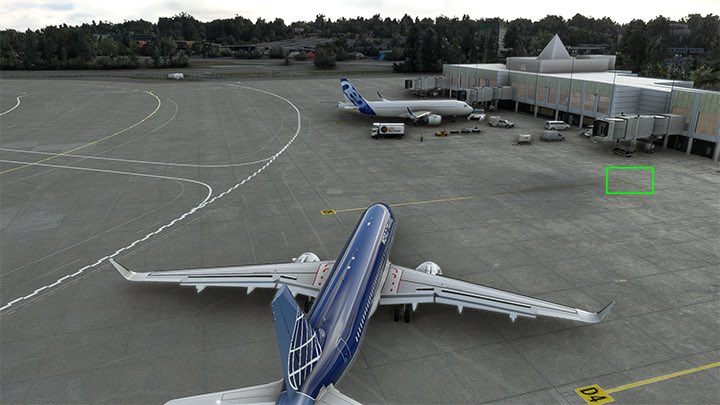
Using the rudder and gentle throttle control, steer to your chosen parking spot.
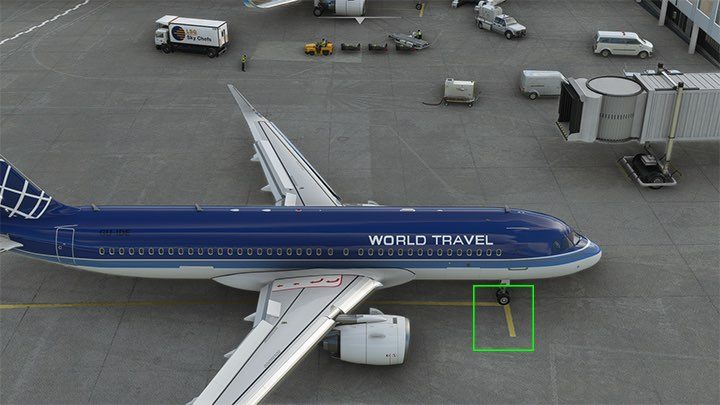
The ideal manoeuvre is to park the front undercarriage on top of the letter "T".
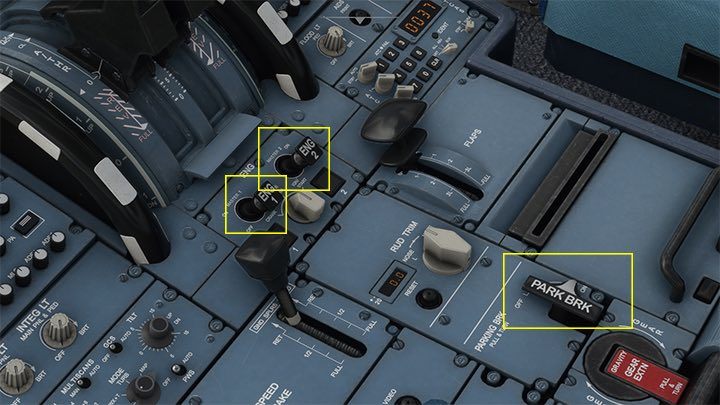
It remains only to tighten the parking brake PARK BRK and shut down the engines by pointing both levers down.
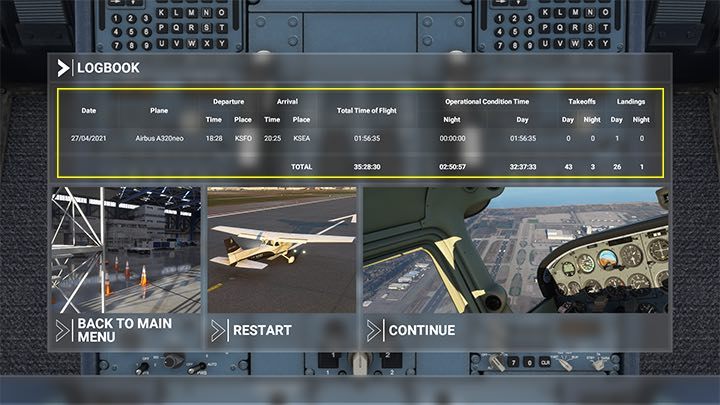
Microsoft Flight Simulator displays the flight summary at the end.
- Microsoft Flight Simulator 2020 Guide
- Microsoft Flight Simulator: Game Guide
- Microsoft Flight Simulator: Passenger aircraft
- Microsoft Flight Simulator: Example flight
- Microsoft Flight Simulator: Flight Preparation and Cold Start
- Microsoft Flight Simulator: Taxiing and take-off of a passenger aircraft
- Microsoft Flight Simulator: Scheduled flight - Passenger aircraft
- Microsoft Flight Simulator: When to begin descent?
- Microsoft Flight Simulator: ILS landing - Passenger aircraft
- Microsoft Flight Simulator: Example flight
- Microsoft Flight Simulator: Passenger aircraft
- Microsoft Flight Simulator: Game Guide
You are not permitted to copy any image, text or info from this page. This site is not associated with and/or endorsed by the developers and the publishers. All logos and images are copyrighted by their respective owners.
Copyright © 2000 - 2026 Webedia Polska SA for gamepressure.com, unofficial game guides, walkthroughs, secrets, game tips, maps & strategies for top games.
