Microsoft Flight Simulator: Flight Preparation and Cold Start
On this page of the guide to Microsoft Flight Simulator we describe the preparations for a standard flight between two airports, according to IFR rules, with a prepared plan. An example is an Airbus A320neo flight between KSFO Airport in San Francisco and KSEA airport in Seattle. We will go through all the stages, that is, the independent start-up of the engines (cold start), and the programing of the flight plan.
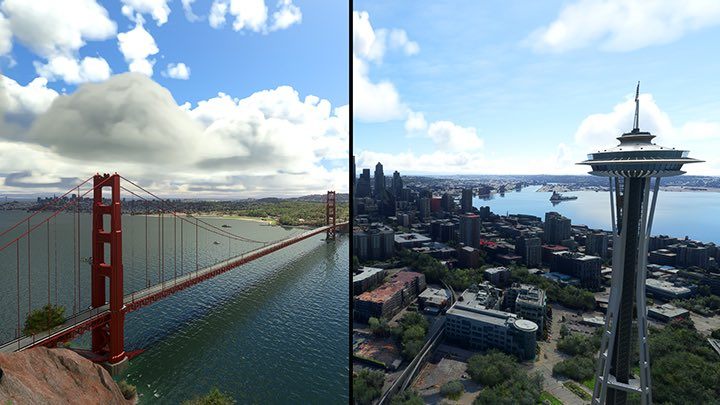
Each passenger flight starts with a prepared plan, i.e. a decision on the starting and destination airports. According to the instructions in the flight plan chapter, you can do it yourself on the dedicated pages or submit a plan created in the game menu.
The next decision is the take-off site, and there are two options to choose from:
- Gate in front of the terminal or parking space - then you must perform the entire procedure of starting the aircraft (Cold Start);
- Runway - the plane will be ready to take off. However, in case you have your own plan, you will have to program it into the MCDU computer.
Note: The following example flight also includes optional stages that do not affect the gameplay, but only increase the atmosphere and immersion, such as letting passengers on board. To show all the stages, we start from the place at the terminal and the externally generated flight route.
In this video you can see how to perform the engine cold start in the Airbus A320neo. All the stages visible in it are described below.
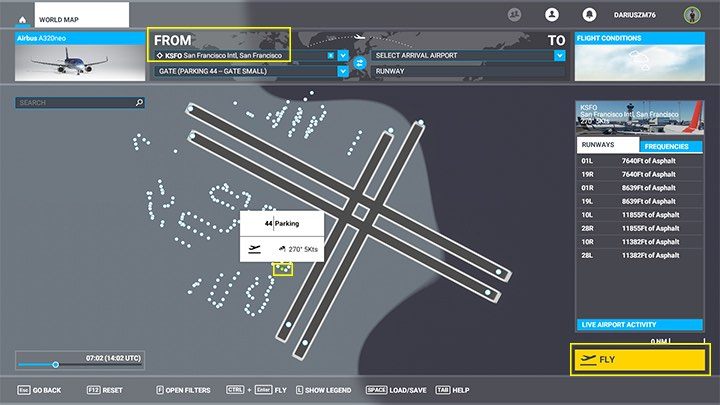
From the world map menu, in the departure airport selection box, select KSFO, or San Francisco International Airport. Then zoom to details. You click on any dot that indicates the gate and set it as departure to be able to perform the cold start stage. Now, just click FLY.
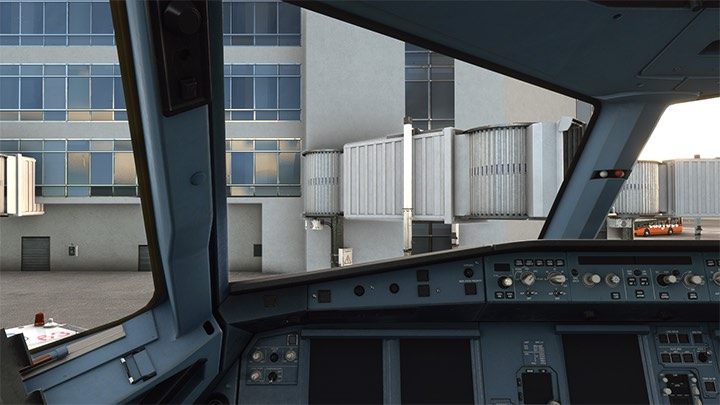
You will find yourself in the "dark" and "cold" cockpit of an Airbus A320 parked in front of the terminal. For now, the lack of electrical power prevents any interaction with the aircraft.
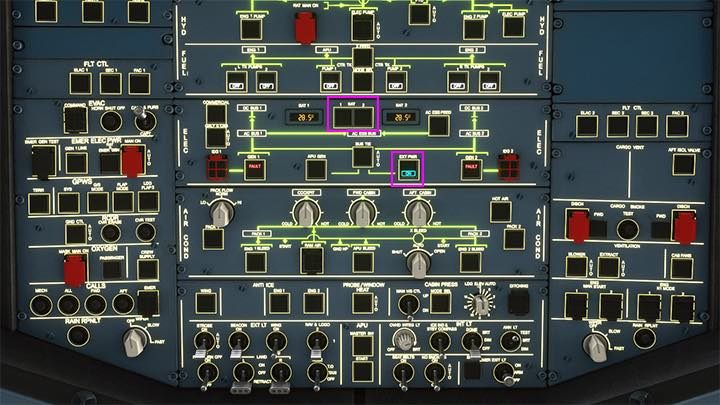
Use CTRL + 8 to go to the overhead view. Click two buttons BATT 1 and 2 to turn on the power supply; and EXT PWR to power up the outside. The cockpit and its screens will come to life.
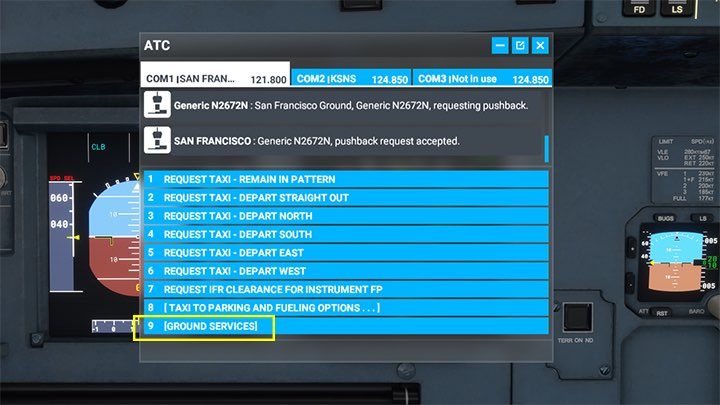
From the toolbar, select the ATC radio menu and then select ground services.
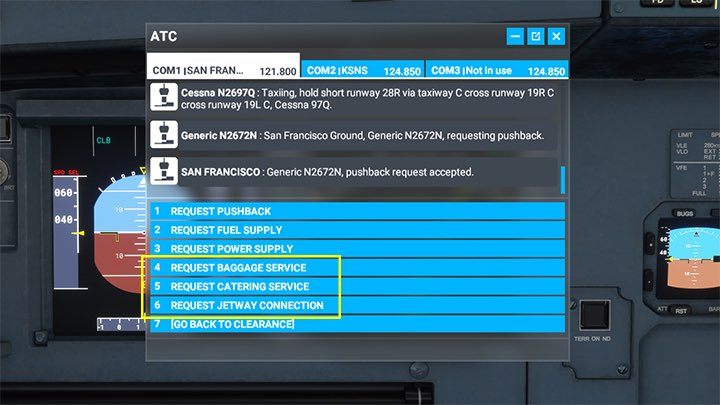
From the available services you can choose to load luggage, meals, and connect the jetway or ramp. This is an optional stage, but it increases the realism of the gameplay and builds the atmosphere.
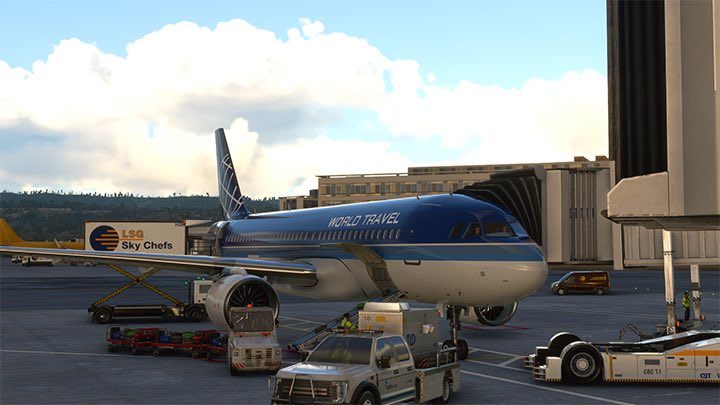
A long boarding time can be spent on programming the MCDU on-board computer.
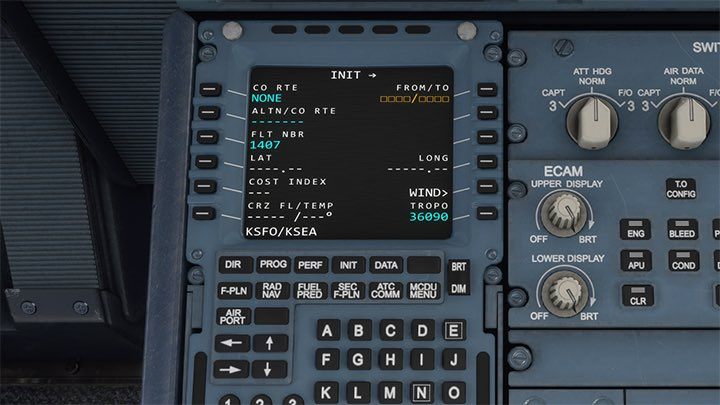
Use CTRL + 5 to navigate to the MCDU computer view. Complete the flight plan according to the instructions on the page: MCDU on-board computer. For a flight between KSFO and KSEA, the route is as follows:
KSFO - runway 01R-TRUKN2 (SID) - DEDHD - RBL - LMT-HAWKZ7 (STAR) - KSEA - runway 16L
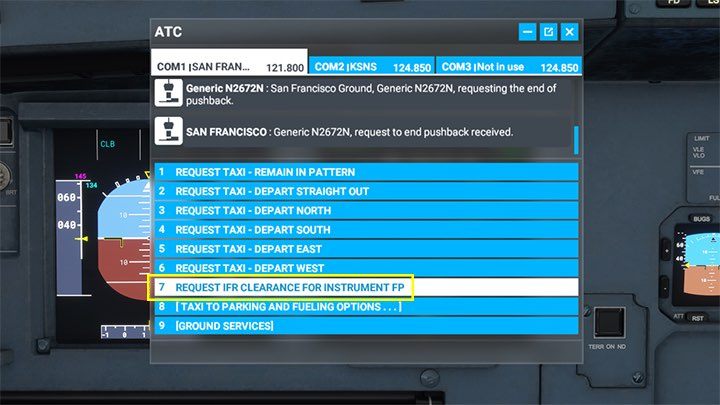
After programing the plan, request IFR clearance via the ATC radio menu. Thanks to this, the controllers will "guide" the aircraft by confirming the next points of the route, determine the altitude, until permission to land.
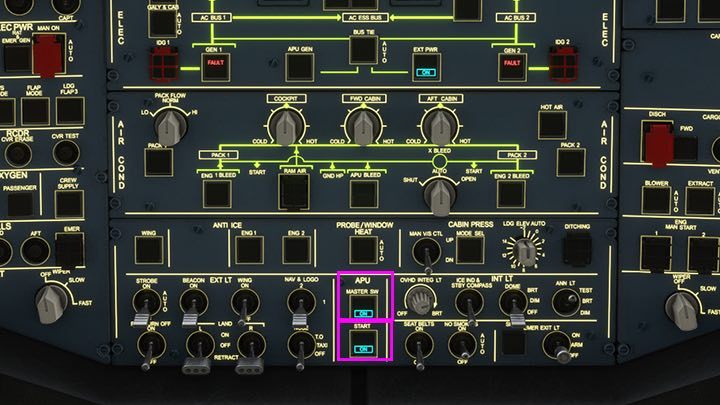
Time to prepare to start the engines. Press Ctrl + 8 to go to the overhead view. The first step is to turn on the auxiliary power unit (APU). Click MASTER SW and then START below.
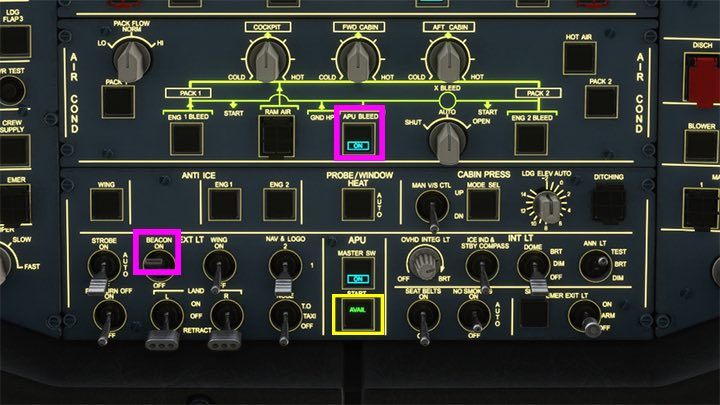
When the green text AVAIL appears on the START button, click a little higher on the APU BLEED button. Its activation will be confirmed by the blue ON light. For immersion, turn on the BEACON lights to warn the ground crew about the start of the jet engines.
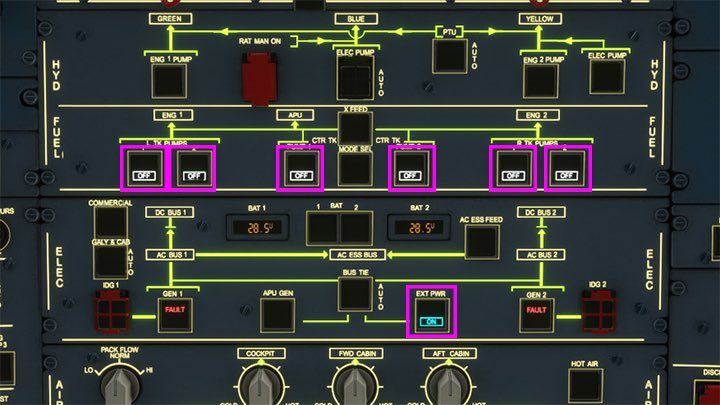
In the FUEL section, including all fuel pumps - this is a total of six buttons. After doing that, the OFF messages will disappear.
You can also turn off the external power by clicking EXT PWR. The blue indicator ON will disappear.
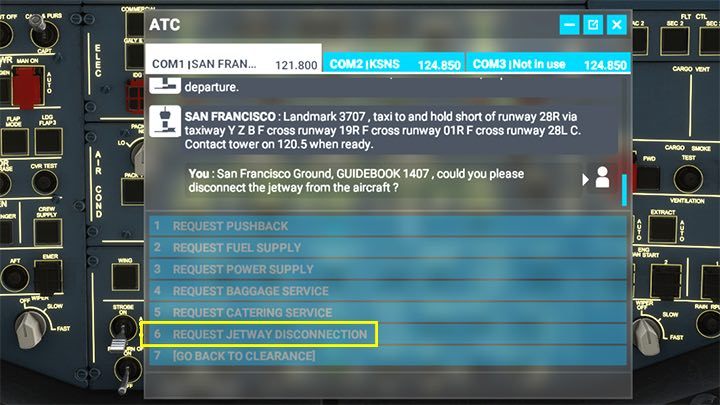
Be sure to ask the ground service via the radio menu to disconnect the "sleeve" with the passenger entrance.
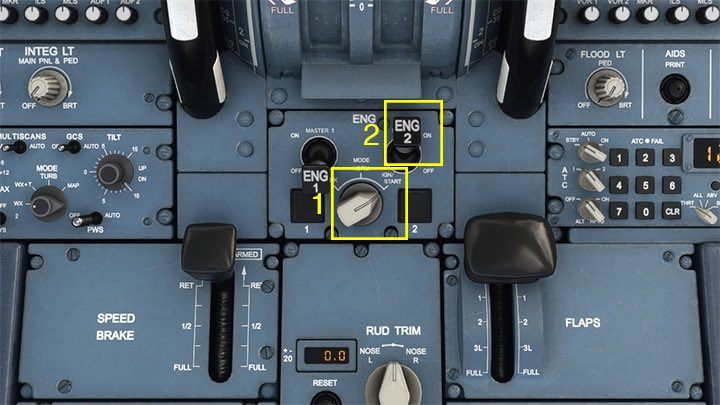
Ctrl + 7 keys move to the view behind the throttle. There you must turn the knob to the position IGN START and then the second engine start lever ENG2 to the top position ON. After a while you can do the same with the engine lever ENG1, although the airline's custom is to taxi on only one engine. The second starts before entering the lane - this way you can save a lot of fuel.
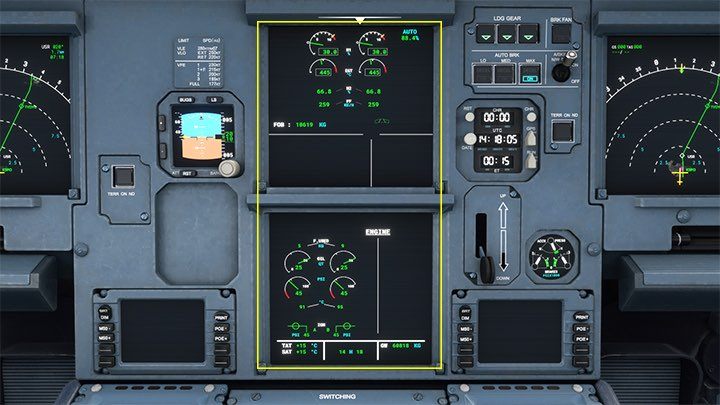
In the engine monitoring view Ctrl+3, make sure that no indication is alerting with red numbers or orange symbols.
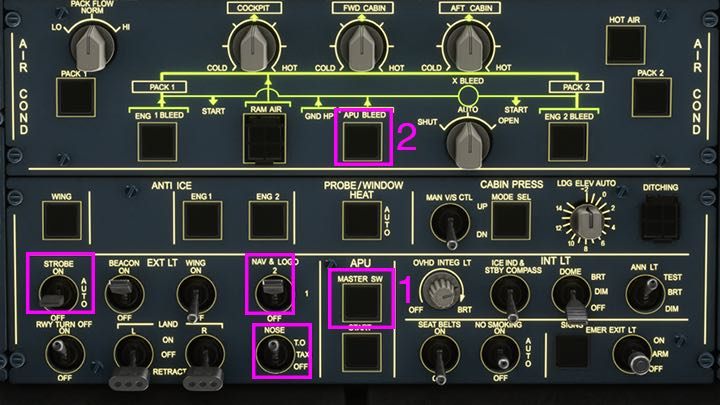
Back to the Overhead view Ctrl+8. Already one working engine allows you to turn off the additional APU engine. To do this, click MASTER SW, and when the light of the START button below goes out, click APU BLEED upstairs. In the next section, turn on the NAV&LOGO, STROBE and NOSE-taxi exterior lights.
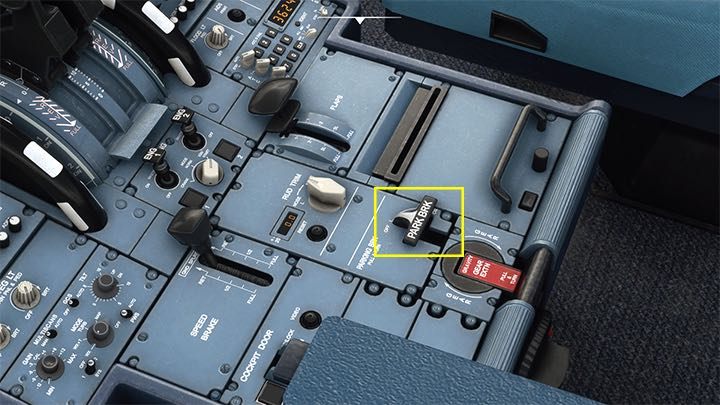
Under the throttle release the parking brake by clicking on the lever BRK PARK to turn it up.
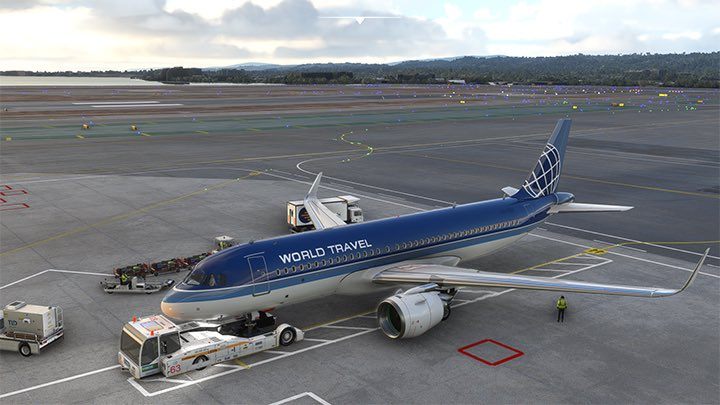
You can already push the plane from the gate of the terminal to the place where it will be possible to start taxiing. PushBack can be called from the ATC radio menu and ground support or keyboard shortcut SHIFT+P.
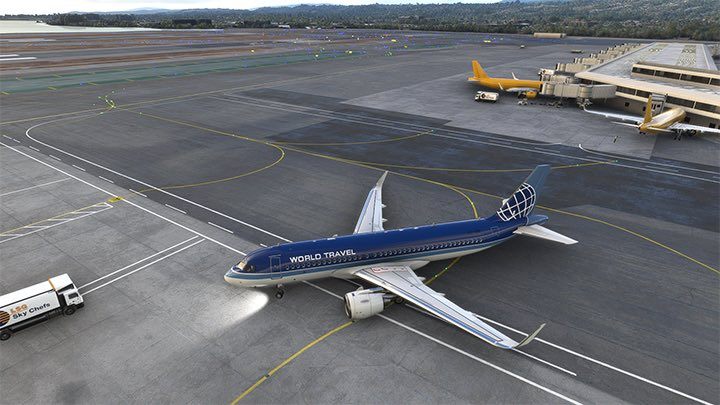
When the plane has enough room to make a u-turn, re-use the keys SHIFT+P to cancel PushBack. You can begin taxiing to the runway.
- Microsoft Flight Simulator 2020 Guide
- Microsoft Flight Simulator: Game Guide
- Microsoft Flight Simulator: Passenger aircraft
- Microsoft Flight Simulator: Example flight
- Microsoft Flight Simulator: Flight Preparation and Cold Start
- Microsoft Flight Simulator: Taxiing and take-off of a passenger aircraft
- Microsoft Flight Simulator: Scheduled flight - Passenger aircraft
- Microsoft Flight Simulator: When to begin descent?
- Microsoft Flight Simulator: ILS landing - Passenger aircraft
- Microsoft Flight Simulator: Example flight
- Microsoft Flight Simulator: Passenger aircraft
- Microsoft Flight Simulator: Game Guide
You are not permitted to copy any image, text or info from this page. This site is not associated with and/or endorsed by the developers and the publishers. All logos and images are copyrighted by their respective owners.
Copyright © 2000 - 2025 Webedia Polska SA for gamepressure.com, unofficial game guides, walkthroughs, secrets, game tips, maps & strategies for top games.
