Microsoft Flight Simulator: Cockpit of a passenger aircraft
On this page of the guide to Microsoft Flight Simulator, we describe the layout of the cockpit of a passenger plane. We show you what the individual screens and switches are for and how to quickly change the camera in the cockpit. We also explain how to operate the autopilot panel in the cockpit of a passenger aircraft.
- Cockpit cameras
- Cockpit layout
- Overhead
- Autopilot Panel
- Captain's instrument Panel (Capt-F / O panels)
- Pedestal
- Similarities in other models
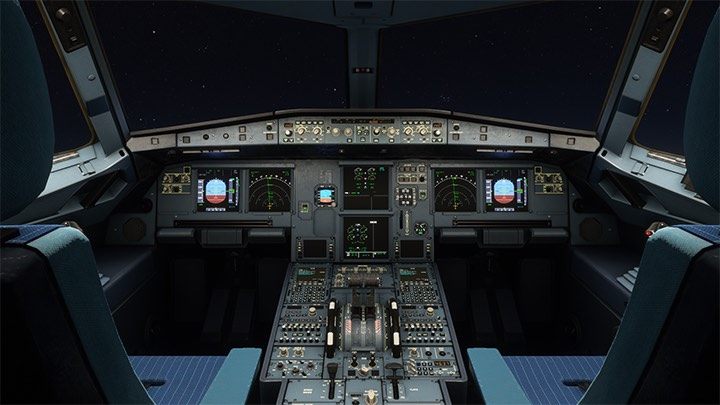
Cockpit cameras
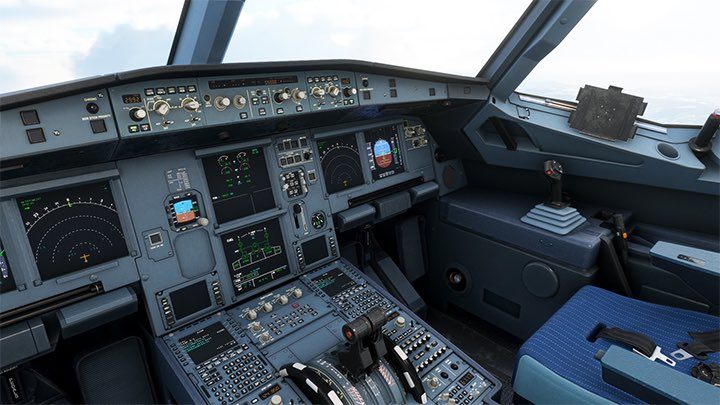
The default cockpit view is "attached" to the captain's seat and allows you to look around with the right mouse button pressed, and zoom in and out with the mouse roll.
However, the camera can be manipulated freely using different key combinations:
Keys | View |
CTRL + 1-9 | Close-ups of individual instrument panels |
Cursor arrows | Move camera left / right/up / down |
ALT + Up / Down Arrow | Moving the camera forward / backward |
Space | Raising the camera up |
CTRL + Space | Reset and return to default view |
=/- | Zoom view, useful when landing |
Cockpit layout
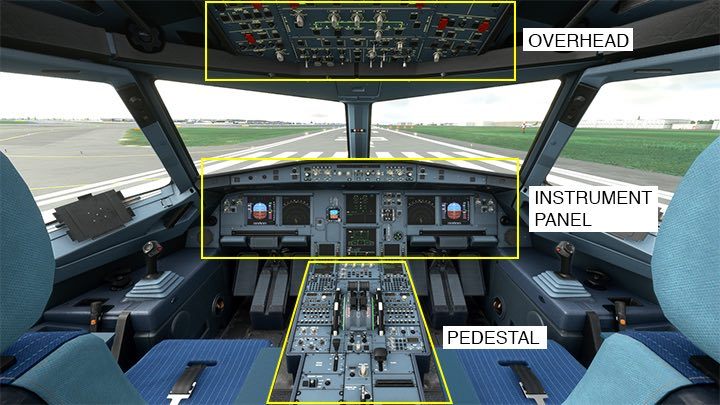
The cockpit of virtually every modern passenger aircraft consists of three main spaces important to the pilot:
- Overhead - top panel of switches.
- Master and first officer instrument panel.
- Pedestal - bottom panel.
It is worth noting that the right part of the cockpit for the first officer is a mirror image of the left part. The common part is the upper overhead and the final part of the plinth behind the throttle. In Airbus, a characteristic element is the "ordinary" joystick for piloting the aircraft, called the "side stick". It replaced the traditional steering wheel still present in machines of other manufacturers.
Overhead
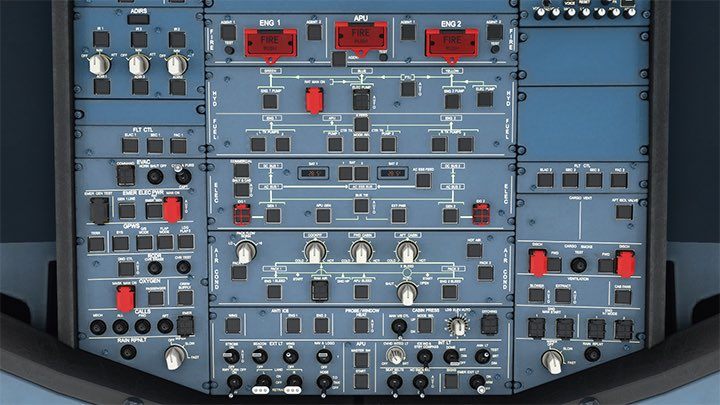
The top panel called overhead is full of intricate looking switches. In the default version of the aircraft in MFS2020 many of them are not simulated. Most are needed mainly for starting the aircraft, the engines, and the navigation tuning. There are also fire extinguishers and air conditioning panel. During the flight, you will most often refer to the section on the nearest edge of the panel where the external and internal light switches are located. You can quickly navigate to the Overhead view by clicking CTRL + 8.
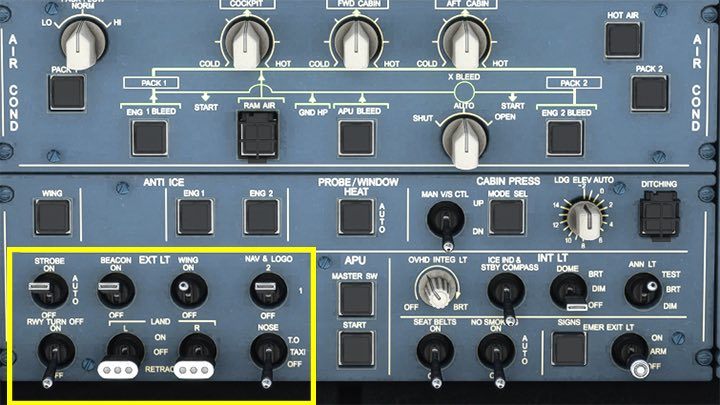
Section EXT LT is exterior lighting:
- STROBE - bright, flashing anti-collision lights on the wings and tail, the switch should be in the auto position. We turn them on immediately after taxiing, before entering the runway;
- BEACON - red flashing light, warning light for Ground handling, activated just before starting the engines on the apron;
- WING - illuminate the edges of the wingtips to check that ice does not get there;
- NAV & Logo - navigation lights, red and green at the wingtips, mandatory in flight. The Logo in this model means the tail light, where the airline logo is usually;
- RWY TURN OFF - turn lights for taxiing (including the Airbus model), operate with Nose-Taxi light;
- LAND - landing lights, beneath 10,000 feet. They can be turned on, off or hidden (then they do not cause aerodynamic drag);
- NOSE - the light above the front chassis, the position "Taxi" is switched on when taxiing, and T. O. until taking off.
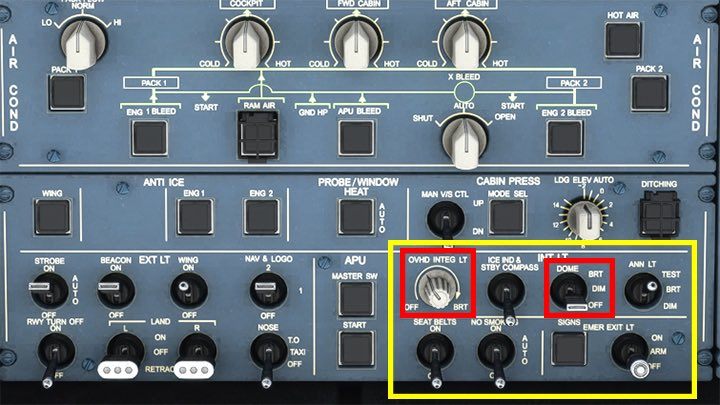
Section INT LT focuses on interior lighting, although it does not cover all the knobs and places that can be illuminated. In addition to typically "cosmetic" switches, for example, to inform passengers about the need to fasten seat belts (Seat Belts On) or No Smoking, we will most often refer to:
- OVHD INTE LT - highlights the Switch signatures on the overhead
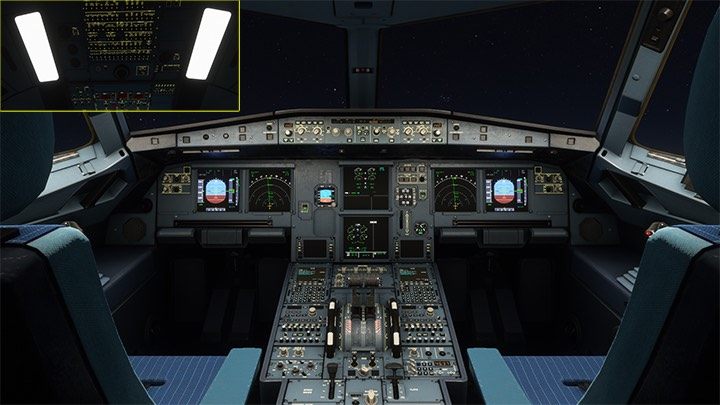
- DOME - activates the main cockpit ceiling light (BRT-bright, DIM-dimmed, OFF-off)
Autopilot Panel
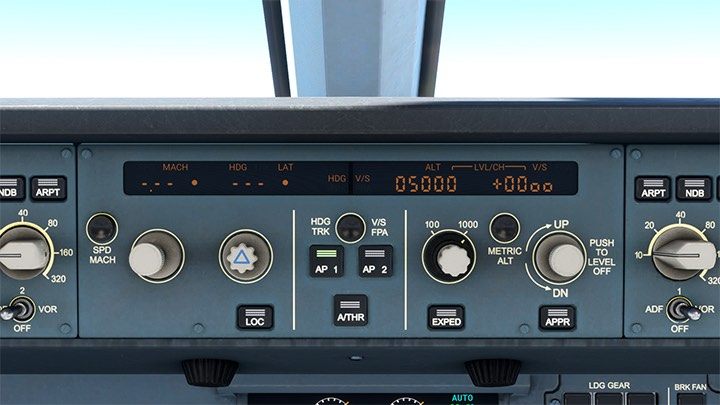
The autopilot panel is located above the main instrument panel of the captain and first officer. It is described in a separate chapter. Under the panel, there are two knobs that adjust the degree of illumination of the panel below. You can quickly jump to the Autopilot view by pressing CTRL + 2. More about Autopilot you'll find on a separate page in our guide.
Captain's instrument Panel (Capt-F / O panels)
During the flight, we spend most of our time staring at the front instrument panel, where the main flight parameters and the navigation screen are displayed. The front panel has a mirror reflection of the instruments for the first officer and two shared screens in the middle showing the state of engines, fuel and a few other technical things, not simulated in the default version of the aircraft. You can quickly jump to the main screens of the instrument panel by pressing Ctrl + 1.
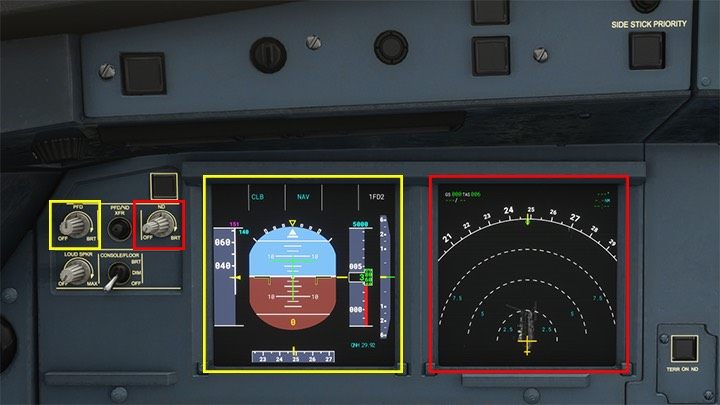
The left monitor is the Primary Flight Display (PFD). It shows the orientation of the aircraft relative to the horizon and the main parameters of the flight, as well as the currently activated Autopilot modes. The right monitor is the Navigation Display (ND). Displays the compass with the position of the aircraft and shows the currently programmed route with all navigation points. It can also show the terrain and the current weather. The left-hand knobs control the brightness level of the monitor.
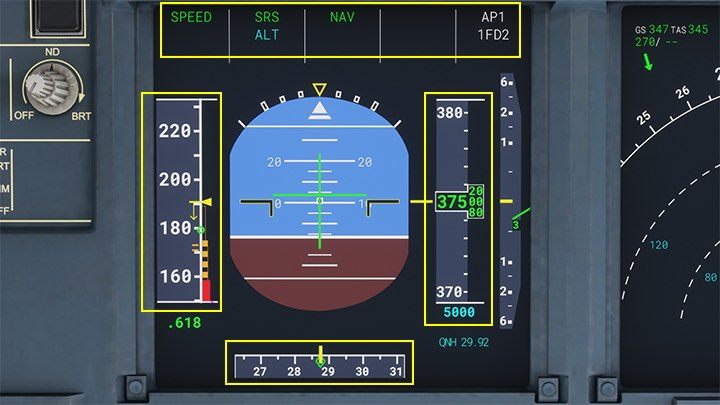
Primary flight display shows the main flight parameters. The top bar displays the autopilot modes currently enabled. The left tape shows the current speed in knots, and the right tape shows the height in feet. The blue altitude value at the bottom or top of the strip is the altitude indicated on the autopilot to which the aircraft is programmed.
The lower part is a compass. It shows the current course of the aircraft. In the center, you can track the current position of the aircraft relative to the horizon - whether it flies straight or tilted in any direction. On the artificial horizon, there are also various symbols that help in piloting, such as the green lines of the flight director system.
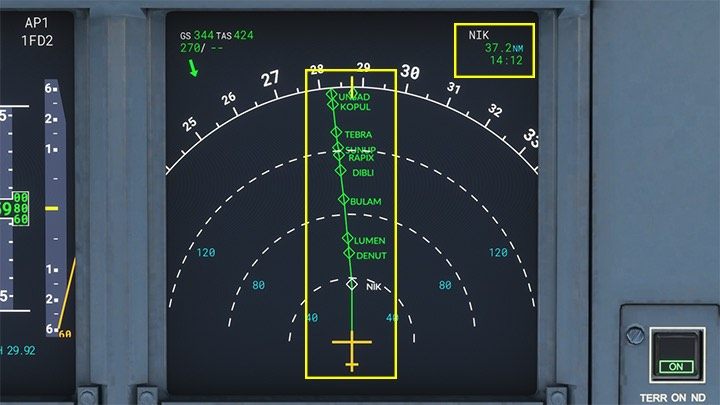
On the ND Navigation Display, the most important is the route of the flight and displayed in the upper right corner of the nearest navigation point with the distance to it.
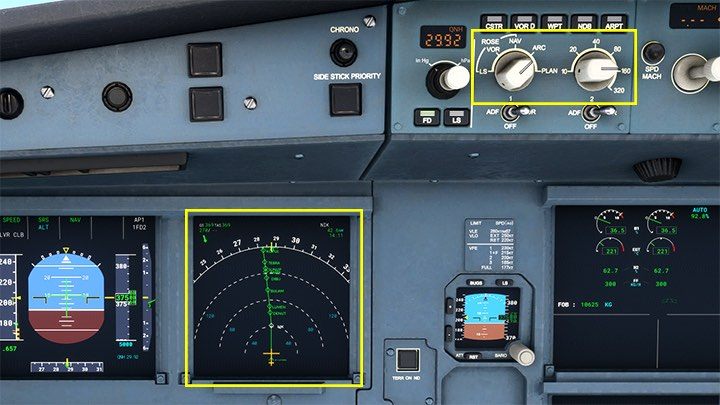
You can change the map mode of the ND screen and the scale in miles by swiping at the top to display larger or smaller sections of the route.
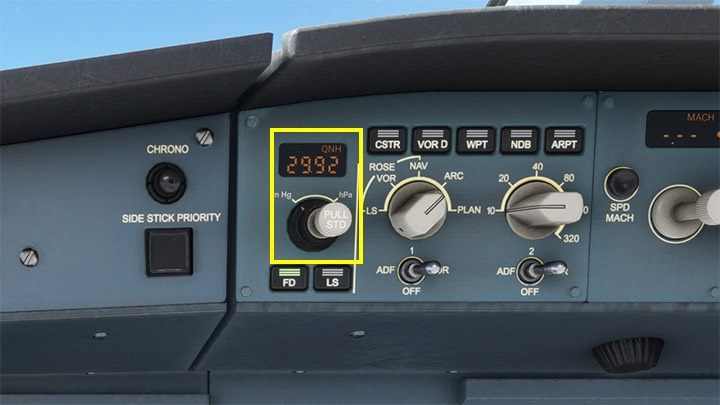
A very important element is the altimeter barometric pressure setting knob. Thanks to it, the plane can correctly read the altitude, because the pressure is different depending on the location. At higher altitudes, a standard pressure of 1013.25 hPa (29.92 inhg) is used, and the moment of transition from local to standard is called Transition Altitude. This is the altitude value in thousands of feet, different for each country.
If you are not sure when and what pressure to set, the game allows you to automatically tune with the B key.
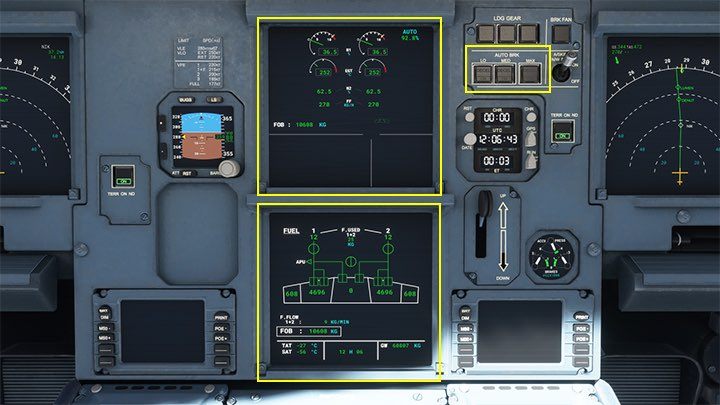
The central monitors show the technical condition of the aircraft. Upper Engine display always shows the status of the engines. The lower one is a Display System and you can switch between different systems, like APU, fuel etc. In the default version of the aircraft, however, only two modes work: engine ENG and FUEL. The ED and SD monitors can be quickly displayed with CTRL + 3.
Next to the monitors, there are quite relevant buttons of the braking system utilized when landing. You can set the braking force there AUTO BRK: low LO for long runways, medium MED for shorter runways, and the highest MAX for landing on the shortest runways or in bad weather (rain, snow).
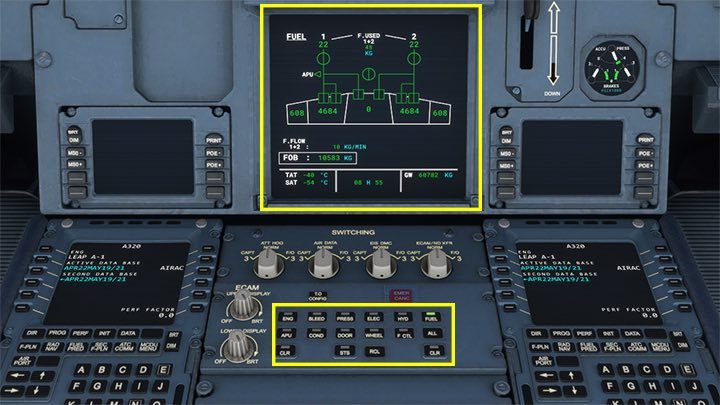
The buttons on the pedestal are used to switch the systems on the lower monitor. In the regular version many of them are not simulated. This view is available under CTRL + 4.
Pedestal
The central part called the Pedestal is so large that it is displayed in several separate sections:
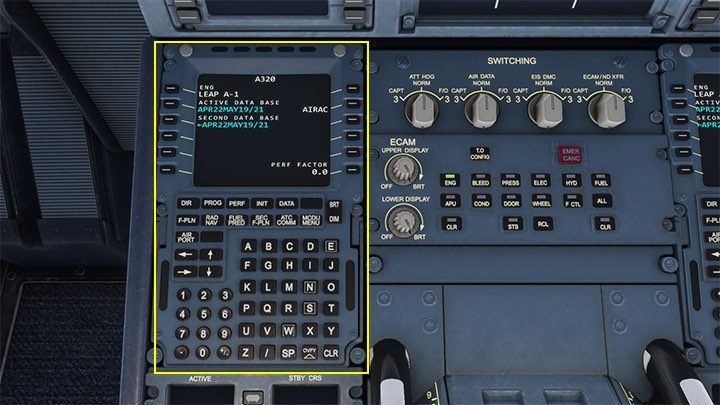
The first is MCDU - Multipurpose Control and Display Unit. We devoted a separate chapter to it in the guide. MCDU view is available under CTRL + 5.
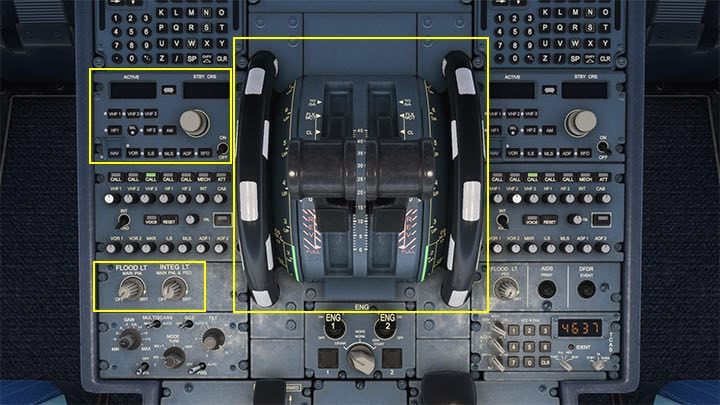
In the center, there is a throttle regulating the power of the engines - during the flight it can be operated automatically by the autopilot. On the right side there is also a radio panel - in the default aircraft A320neo operated automatically, without the need to manually change the frequency.
At the bottom, the knobs FLOOD LT and INT LT control the rest of the cockpit lighting. There are two more engine start levers behind the throttle. The top view of the throttle is activated by Ctrl + 6.
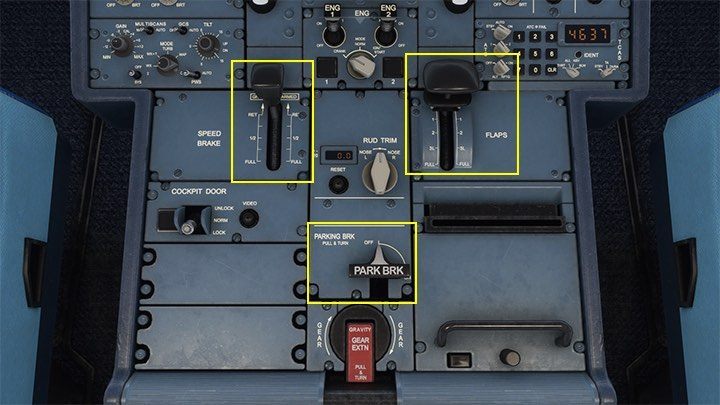
The rear part of the pedestal is the aerodynamic brake lever SPEED BRAKE - it helps even in a situation where you need to quickly lose altitude. Without it, the plane would have accelerated too much and the descent would have taken much longer. After arming before landing, the brakes and spoilers slide out automatically, shortening the aircraft's reach on the runway.
Next to the brake is a similar lever for extending the FLAPS. We extend the flaps to take off, and their extension level depends on the length of the belt. When landing, the flaps are gradually extended to their maximum level.
Below the parking brake knob BRK PARK works like a "handbrake" in the car. It should be enabled during a stop in front of the terminal and released just before calling the push back service or taxiing. The view of this part of the pedestal is available under Ctrl + 7.
Similarities in other models
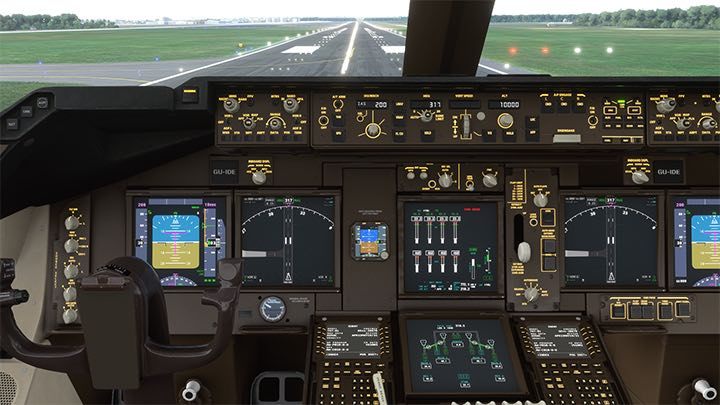
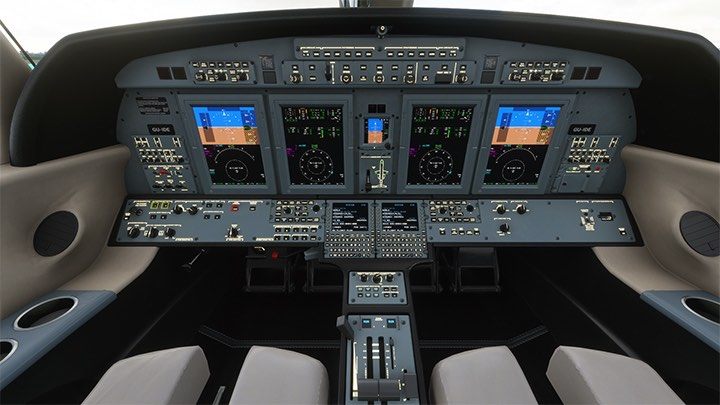
In both the older Boeing 747 and the modern Cessna CJ4 Citation, you will find a very similar instrument layout, buttons with the same functions and an MCDU computer.
- Microsoft Flight Simulator 2020 Guide
- Microsoft Flight Simulator: Game Guide
- Microsoft Flight Simulator: Passenger aircraft
- Microsoft Flight Simulator: Passenger aircraft - Basics
- Microsoft Flight Simulator: Tips for taking off - Passenger aircraft
- Microsoft Flight Simulator: How to create passenger aircraft flight plan?
- Microsoft Flight Simulator: Cockpit of a passenger aircraft
- Microsoft Flight Simulator: Autopilot in a passenger aircraft
- Microsoft Flight Simulator: How to program MCDU on-board computer?
- Microsoft Flight Simulator: Example flight
- Microsoft Flight Simulator: Passenger aircraft
- Microsoft Flight Simulator: Game Guide
You are not permitted to copy any image, text or info from this page. This site is not associated with and/or endorsed by the developers and the publishers. All logos and images are copyrighted by their respective owners.
Copyright © 2000 - 2025 Webedia Polska SA for gamepressure.com, unofficial game guides, walkthroughs, secrets, game tips, maps & strategies for top games.
