Chapter 6: Redemption | Order of the Flame
Main Quests:
#1 - Destroy the Umbragen Generator
#2 - Destroy the Umbragen Compound
#3 - Claim the Final Seal of Light
Side Quests:
#1 - Return the Cursed Scimitar
#2 - Sly the Horned Devil
#3 - Return the Horn of Devil Calling
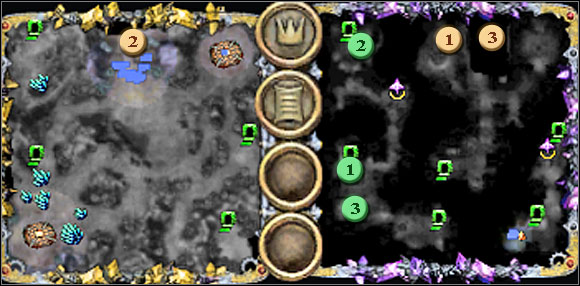
As you remember from the previous chapter the Order forces had last Seal of Light in their hands already, unfortunately, it got in the Umbragen hand. What's more, their army is blocking the passage leading to Heart of Siberys - they put the cannon screened with the barrier on the north of the map.
As you probably noticed by yourselves, missions get more and more strategic. In this mission planning is fundamental for the ultimate success because the Umbragen became quite aggressive. Their base is located on the northern east of the map and they send soldiers to attack us from time to time. Additionaly at the center of the map is located a small army of Umbragen. I suggest to sightseeing nearest surroundings and collecting shards and gold scattered here and there (we have skirmishes with Ettins or giants). When we have forces which are able in our opinion to fight off the enemy's attacks we move to passage located by the near our base(in the northern direction).
 |  |
After leaving below the surface we encounter Efreet who heard about our reputation. There is a Baatezu on the north, who rules these areas through ages and who amassed huge wealth. However only one object interests our interlocutor - Cursed Scimitar, of which winning back he would be delighted at #1. We proceed to the south where we encounter the chamber full of not moving golems. Wanting to watch them more closely we enter the chamber, but standing up on the board at the entry results in waking up guards. After the short fight Deathless shows up, who shouts on us for killing his bodyguards. However he charges us the task to kill Horned Devil #2, being located to the north from here. In this direction according to the interlocutor's words, there is a burial ground ruled by Grave Keeper. He possesses the Horn of Devil Calling which is able to help us to win the duel with Horned (it is necessary to bring Horn to the #3 interlocutor also). There is also the laboratory in this room, where we are able to re-examine found potions. We are able now to proceed to the north.
 |  |
The first obstacle is Grave Keeper mentioned earlier, who will fight us along with his servants. After defeating him we win Horn of Demon Calling and control of the mausoleum. We move westward, towards the place where Horned Demon is. The fight isn't easy, but with aid of Horn of we send him to the #2 spirit world. It turns out that he possessed Cursed Scimitar also. There is also a passage to the surface in this chamber, where we can meet the familiar from first chapter - Frozen Beast. We are able now to return both Scimitar (we receive the artifact, different in dependence on Champion whom we chose to the game) and Horn (in exchange we are getting 10 Horn of Battle of Battle Fury) to suitable persons. We set off to the east.
 |  |
 |  |
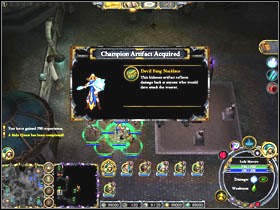
We encounter the Umbragen unit leaded by Orobus who is defended brave but he finally escapes from the field of the fight. We find first (from three) Wand of Negation which will help us to destroy towers defending the access to the generator (maybe it results from bug in the game, but sometimes these towers simply... don't exist) and teleport. We move in the northern direction and practically from the run we enter the fight (there is other old familiar among enemies, Marilith). After defeating them, we find other Wand of Negation. We move to the north, walking by eastern corridor, full of traps. We'll have next fight, this time with cobras and medusas. After finishing it, we collect third, last Wand of Negation.
 |  |
 |  |
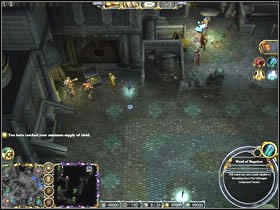
We return to corridor splitting, and we turn this time to the left. There are Umbragen forces at its end, baring the way to the generator. If the generator is guarded by towers we use collected Wands of Negation on them otherwise we attack the #1 generator itself. Wrapper of the Umbragen power field falls. Now we go to the middle branch of the corridor. But earlier I suggest earlier strengthen our units - the fight will be very desperate - we will face Orobus and Umbrascarred Beholder. However the victory will sweeten winning of last Seal of Light #3. Now we move for the cannon guarding the way for Heart of Siberys #2. Earnest may destroy the Umbragen camp mentioned earlier and the Lizards post on southern east (we obtain the access to it with the air road or also through the underground - the entrance is located on the east of the map).
 |  |
 |  |
You are not permitted to copy any image, text or info from this page. This site is not associated with and/or endorsed by the Atari/Infogrames or Liquid Entertainment. All logos and images are copyrighted by their respective owners.
Copyright © 2000 - 2025 Webedia Polska SA for gamepressure.com, unofficial game guides, walkthroughs, secrets, game tips, maps & strategies for top games.
