Chapter 3: Hostile Natives | Order of the Flame
Main Quests:
#1 - The Search for Lady Marryn
#1a - Find Lady Marryn
#1b - Rescue Lady Marryn
#2 - Claim the Seal of Light
#3 - Slay the Medusa
#4 - Destroy the Lizard Army
Side Quests:
#1 - The Archaeologist
#1a - Inform the Archaeologist of the Medusa's death
#2 - Lower the Drawbridge
#3 - Idol of Blinding
#3a - Free Lord Ratak'h
#3b - Return Lord Ratak'h to his Treasury
#4 - Escort the Archaeologist Assistant
#5 - Silver Flame Temple
#6 - Destroy Lizardfolk Outpost
#7 - Destroy Main Lizardfolk Village
#8 - Silver Flame Oratory
#9 - Bonus - Field Rescue
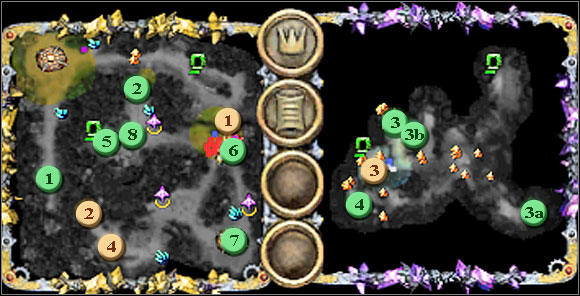
The army of the Order crossed mountains baring the way to Ring of Storm. First from three Seals of Light is located in the jungle which appeared in front of their eyes . Unfortunately how we find out from the film introducing into the mission, Lady Marryn is kidnapped. So apart from finding Seal of Light #2, we have to #1a find and free Lady Marryn #1b.
First we go to the south where we have seen Lady Marryn for the last time. We have short fight with flying enemies (Dire Giant Wasp) and the appointment with the #1 archaeologist. We find out, that he was exploring undergrounds with his assistant however he was attacked by the Medusa. He managed to escape however the assistant didn't have so much luck. In exchange for killing the #1a Medusa, the archaeologist will give us the powerful artifact. Certainly we accept the task and we move in the north eastern direction where according to his words to entrance to the undergrounds is located (earlier we can go to the Lady Marryn kidnapping place where scroll of experience is lying).
 |  |
In the way to Khyber we are attacked again by flying enemies. After that we encounter the raised bridge. Its #2 lowering would facilitate significantly our moves on the map, unfortunately we have to give up this idea for the moment. We move further in order to encounter two Ettins. Then we encounter remnants of Paladins of the Silver Flame temple which still teems with life apparently - we are able from now on to train and to recruit these warriors. After strengthened the force of our army we go down to undergrounds (I advise to enclose the Rogue unit).
 |  |
After entering the underground world we encounter the trap which we disarm using the Rogue skill (Kael also possesses such a talent). We make for the south, with only available way. First, undeads attack us, then we have a fight with gelatinous cubes. Then we have next fight against undeads - after winning it we move westward. We encounter here Neleyna (Qabalrin Spirit) who warns us against the medusa being located further on and asks us to kill #3 it. Following her we are supposed to receive the helpful object in this task - Idol of Blinding #3. However when it turns out the door of the vault only opens in presence of his owner, the lord Ratak'h who currently is in Beholder's power.
 |  |
 |  |
 |  |
We move south-east to free the #3a Lord. Fight against Beholder isn't easiest however he will fall sooner or later under our swords. With the freed Lord Ratak'h we return #3b to the vault. The gate of the vault is open and we are able to take treasures. Unfortunately, Lord is not happy of looting of his property, so we have to fight him. We move now to kill the Medusa. Her death releases Neleyna's sisters from the trap and we enrich ourselves with the head of the Medusa. We obtain the access to the exit for the surface which leads to areas so far inaccessible to our armies.
 |  |
 |  |
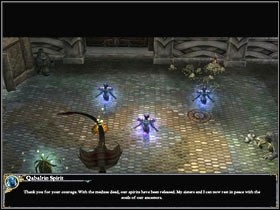
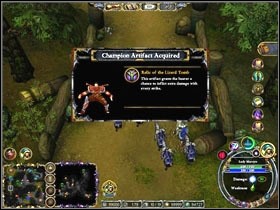
Bur before we go up we proceed for the south-west to unexplored parts of undergrounds. Struggling through corridors controlled by spiders we reach the room where half petrified archaeologist's assistant is located. We restore him to the world using the potion visible before him and after that in accordance to his request we convoy him to the #4 teacher (earlier we collect found objects). Now we convoy the assistant not letting to kill him and we receive quite useful objects for it. Additionally showing the head of the medusa to the archaeologist we receive the powerful artifact - Relic of the Lizard Tomb, which permits Champion to give better hits.
 |  |
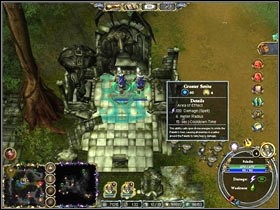
After exiting to the surface we can see the temple of Silver Flame - moving to its direction results #5 in gods attitude. Additionally, our army is strengthen by Archons of the Flame whom we are able to recruit from now on. After a while a Ranger shows up with information about finding Lady Marryn - she is located on the east, in the small Lizards #1a camp. We have to destroy the #6 encampment and the main Lizards #7 camp at the same time as well as to defeat their #4 army. But before we will go to the whirl of the battle, lets see the building located nearby ours current position - it is Silver Flame Oratory #8. We can see 3 figures here - of the wounded figure, the damaged titan and the evil spirit. It is necessary to use the ability to cure on them (Cleric), Warforged Titan repairs (Artificer) and of saint power (paladin). After executing this task (it results in the improvement in the weapon of our army) we are able to proceed in the northern direction and to lower the #2 bridge out.
 |  |
We are able now to proceed to the east already in order to free Lady Marryn. Lizards forces aren't too large although they defend themselves brave and they grow still with new units. However, we manage to defeat them and to destroy the encampment (if we manage to free Marryn during the fight we will get the extra #9 gratuity). One of defeated Lizards leaves the key which opens the Marryn prison. I suggest to place the Expansion here and to increase our army, recruiting mainly Paladins, Rangers and Archons. We move with such prepared the army to the south, towards the main Lizard base.
 |  |
 |  |
However we have to remember that the enemy will be charging attacks on our positions from the south-west and will be trying to take up Place of Power being in our hands. After destruction of the enemy's base we move westward in order to stand up to the confrontation with the rest of the Lizardfolk army. The purpose of our travel is being found westward - first Seal of Light.
 |  |
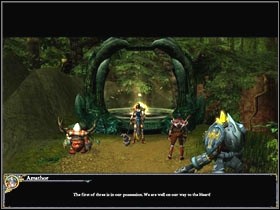
At the end of the mission we can receive the extra gratuity - Honorable Combatant for defeating the Medusa without usage of Idol of Blinding and defeating Blackclaw without the usage of the head of the Medusa.
You are not permitted to copy any image, text or info from this page. This site is not associated with and/or endorsed by the Atari/Infogrames or Liquid Entertainment. All logos and images are copyrighted by their respective owners.
Copyright © 2000 - 2025 Webedia Polska SA for gamepressure.com, unofficial game guides, walkthroughs, secrets, game tips, maps & strategies for top games.
