Chapter 2: The Forgotten City | Order of the Flame
Main Quests:
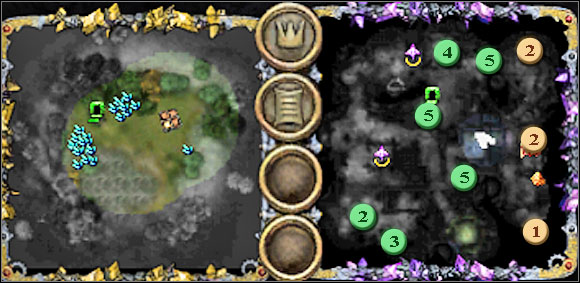
#1 - Traverse the city of Qualatesh
#2 - Return the Staff of Command
#2 - Defeat the Grave Keeper
Side Quests:
#1 - Collect 1000 Gold
#2 - Return the Key to the Tortured Spirit
#3 - Help the Elderly Wizard
#4 - Awaken the Golem
#5 - Find the Warforged Scraps

Traveling along the cave once inhabited by Frost Beast, our heroes reached the passage which appears to lead deep into the interior of the mountain. It is possible that thanks to it we can reach the Ring of Storms what significantly will bring Order of the Flame near getting Heart of Siberys.
It turns out that we come across remains of the Qalatesh town, the capital of the ancient empire of elves which vanished mysteriously. However it is only way in order to get the Heart of Siberys, so after choosing Champion we move across to the journey. We receive the main task - to wander around the town #1 and secondary - to collect 1000 pieces of gold which will result in 500 points of experience #1. Also the next commander reinforces our army - Artificer. We set off to the south checking every corridors. We pass by the room with the book but for now we don't have the access to it. We leave on and we encounter the aggressive Jelly after the short time, after defeating whom we are able to collect gold and valuables and scroll experience (+2500 points).
 |  |
We continue the travel to the south - we reach the circle, where Tortured Spirit is imprisoned in. His soul was jailed for ages and only chance for winning the freedom back is killing his guards and recovering the key back #2. If we agree to help him it is necessary to talk to the prisoner again. Then 3 guards will show up whom we have to kill and to stop them from killing our employer. We will receive some gold and a few valuable objects and elixirs in reward.
 |  |
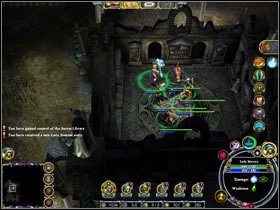
Then move in the eastern direction - we find the jailed wizard who needs our help there #3. The repayment for help will be the access to the room with the book seen earlier - of secret library. The wizard's staff is located in the opposite room. We open the door with help of lever in the floor. I advise to prepare your team - wizard "forgot" to tell us that his equipment is being guarded by the powerful monster named Marilith. After the hard fight we may take the wizard's staff and gold. As he promised, the wizard is giving us the access to the library and from now on we will be scoring experience faster thanks to it.
 |  |

We move to the north eliminating enemies who attack us. After reaching the end of the corridor we turn to the east and we reach the room where we find Potion Laboratory in. This device serves for identifying of every unknown elixirs which we will find in this chapter. Identifying of them all will give the extra gratuity to us after the end of the mission. Nearby there is a Tranquil Fountain which will speed up the regeneration of energy of our units. We can see also a statue covered with bats - when we pass by it undeads attack us - we move further away after the quick fight.
 |  |
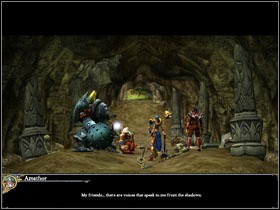
Two golems attack us near the next room however they not stand resistance of our armies. We obtain the next task - to wake up golem visible further in the room #4. After analyzing the tip, "golem will wake up when all looking at him they are blind", we arrange our soldiers on images of eyes in corners of the room - golem is under our orders. We make for east further away where we are being attacked again. After the fight we collect gold and Warforged parts, which leads us to the next secondary task #5.
 |  |
We proceed with the road down and we come across the exit to surface leading to the calm and quiet valley where we are able to set our camp up. When we perform administrations (I suggest to leave some raw materials and experience for future investments), we return under earth and we continue the march to the south (earlier we collect the other Warforged part). Further we collect gold and valuables - when we come across the shut chest, don't be perturbated - the time will come for her.
 |  |
We find murals in the more far-away part of the corridor telling history of the Heart of Siberys and guarded by Tomb Warriors. We'll have here quite long struggle - guards appear again after annihilating - however it is important not to destroy heads of dragons which cause them to appear. It is necessary to destroy heads when there are no more Tomb Warrior showing up - we will obtain bonus points after the end of the chapter and scroll of experience (+5000 of points). We return to the main corridor and we make for east. The short fight against undeads and the last chest of Warforged parts (and unidentified elixir) is ours. We move to the north - watch out for cut for scene to see the trap crushes the enemy.
 |  |
Rogues join our team - they are able to disarm trap among other things or to open locks and chests (after improving Rogue at least to 2nd level we are able to open the earlier seen chest). Quick fight waits for us in the next room and chests with gold also - then we get further. We encounter the next trap but its disarmament is a bit difficult because undeads attack us. After defeating them, we make to the north where we encounter next trap and chests with gold (one of them has 3rd level of securities). There is a Grave Keeper who asks us for recovering Staff of Command #2. It is in Tomb Guardian possession, whom we will find going to the corridor to the south.
 |  |
We have two options now - either we will kill Tomb Guardiana #2 (hitting to drum visible behind him and fighting against guards) and we will take the object to Grave Keeper or we will agree to help him and to liquidate Grave Keeper, using Scroll of Banishment received from Tomb Guardian. In both cases we will receive help in leaving undergrounds, but in my opinion, the fight against Tomb Guardian is more simple - if we liquidate Grave Keeper we have to fight with horned daemon visible in earlier cut scene. After fight we go further on to the south coming across the next trap, where we can find gold and the elixir. Further we have to fight against two stone warriors and then we get out to the surface. Tip: if we managed to keep woken Golem alive we will receive bonus points after finishing the mission.
 |  |

You are not permitted to copy any image, text or info from this page. This site is not associated with and/or endorsed by the Atari/Infogrames or Liquid Entertainment. All logos and images are copyrighted by their respective owners.
Copyright © 2000 - 2025 Webedia Polska SA for gamepressure.com, unofficial game guides, walkthroughs, secrets, game tips, maps & strategies for top games.
