Dragon Age Inquisition: Champions of the Just (siding with templars)
Champions of the Just begins the Templars thread in Dragon Age Inquisition. On this page, you will learn, e.g. how to escape from the Nightmare, how to defeat Envy Demon and what decision to make regarding the Order’s future.
Champions of the Just starts the Templars’ thread in Dragon Age Inquisition. This page contains a full walkthrough, from which you will learn, e.g. how to defeat Captain Denam, how to escape from the Nightmare or how to defeat the Envy Demon.
- How to start the Templars’ thread?
- Fight with Captain Denam
- How to escape from the Nightmare?
- How to survive the battle in the Great Hall?
- How to defeat the Envy Demon?
- What to do with the Templar Order?
How to start the Templars’ thread?
Way to unlock: Automatically, after the meeting with Lucius during The Threat Remains, main quest.
The quest-giver: - (M4,2)

This quest unlocks after you first come into contact with the Templars and Lucius who commands them. This (rather cool) meeting takes place after you arrive in Val Royeaux (M4,2).
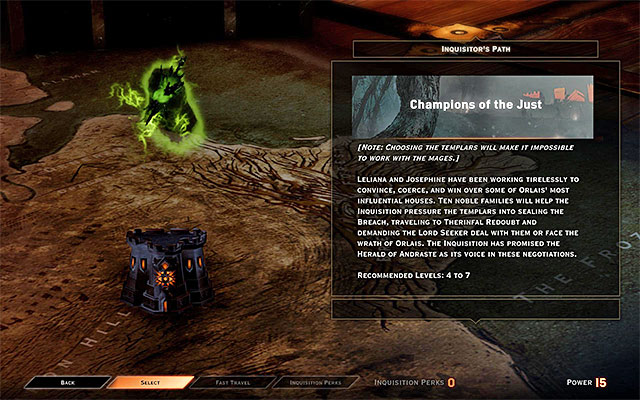
NOTE – Making progress in this quest will gain you the Templars’ support. This means that you won’t be able to make allies with the Apostates and, as a result, you won’t be able to complete In Hushed Whispers quest. Before you continue with this quest, be sure that you want to ally with the Templars.
To progress to the main part of this quest, you need to gather, at least, 15 Power points. Just like in the case of the previous main quest, I recommend that you complete several side quests, because the majority of them are rewarded with one, to several, Power points. After you have obtained the required amount of points, return to Haven and walk over to the war room. Find the "Champions of the Just" operation, shown in the above screenshot, and confirm that you want to spend 15 Power points on it.
The experience level of the party that the game recommends, is around 4-7. I recommend that you go an extra mile and progress your party members to, at least, the eight experience level, because this is the level of the quest's final boss.
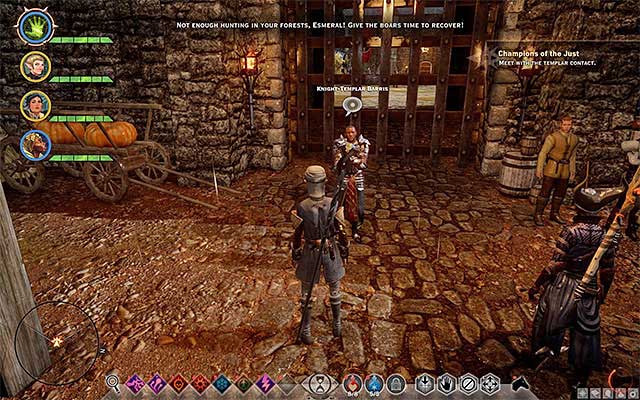
After you see several cutscenes, the party gets to the bottom level of the Therinfal Redoubt (M11,1a). Listen to the conversation with Lord Esmeral Abernache, whose course you will not be able to affect, too much (you can pick the unique dialogue option if you have earlier unlocked the appropriate Perk). After the conversation, go West. You need to meet another important NPC here -Knight-Templar Barris (M11,1b). During the conversation, you can pick one of the "regular" dialogue options, or a special one, which becomes available if Cassandra is traveling in your party.

Soon, your party walks over to onto a bigger yard (M11,1c) and Barris offers you to take part in a Templar rite, which is expected to help your character determine his priorities. You can agree to take part or, follow the suggestion that lord Abernache makes, refuse your part and demand an immediate audience with Lucius (the decision-taking moment has been presented in the above screenshot).

If you agreed to take part in the rite, you now need to take interest in the three knobs. They are connected with the flags that symbolize Andrasta, the Templars and the regular people. Interacting with the knobs raises the flag, half the way, connected with it. Using a knob twice makes the flag return to the very top. As mentioned by Barris, in the previous conversation, there is nothing like a wrong choice here. Which flag is placed above the remaining two (using the knob twice) does not play any vital role in the struggle, just as much as whether you want to justify your choice or pass on commenting it. Only to a minimal extent, they may change the relations between your party and the party members that took the journey, with him, to the Templar HQ.
Fight with Captain Denam

The next step is entering the Western building. After you get to the Lower Barracks, you encounter Knight-Captain Denam (M11,1d) and soon it will turn out that he is displaying hostile intentions. If you have taken part in the rite, lord Abernache will be annoyed and he will die, as a result. If you have passed on the rite, Abernache will remain alive. Regardless of the decision that you have initially taken, concerning the rite, you will now be attacked by Denam and the Red Templars. Right after the battle starts, focus on weakening Denam (attack him from the side or from the back, because he is, by default, hiding behind a shield), and also on eliminating the enemy Red Templar Marksmen.

After you win the battle, Barris will temporarily join the party and you will have to cross the Redoubt, towards Lucius' staying place. Take the only available exit, kill the new Templars, who have been hiding in the next corridor. While exploring the area, keep an eye out for chests and open locked doors (you are going to need the rogue for that). Head Southwards and find the stairs to the upper floor. Over the stairs, you will get to another yard (M11,1e). While exploring the yard, eliminate the archers, especially that they are more difficult to approach (many of them are standing on wooden scaffoldings).

After you have secured the yard, enter the nearby building and deal with more Templars. Head South-Westwards, then, turn West and Northwards. Approach the area, where the Templars are fighting and lend your hand at eliminating the hostile ones (again, pay attention, especially, to archers). If you want to, after the fights, you can have a rogue break into the Western room, where you find a corpse of an officer (and a loot chest) and listen to the conversation with Barris.

How to escape from the Nightmare?
Keep heading Northwards and, after you reach big stairs, turn, West. Lucius is already waiting for you, atop the stairs (M11,1f). After a short introduction, it turns out that it is the Envy Demon, who drags you into the Nightmare (M11,1g). Your new objective is to get out of this bizarre place, i.e. to restore your character to his senses (for quite obvious reasons, the rest of the party are not available here).

At first, you do not need to fear any threat so, head West and see the cutscene of the conversation with the Envy Demon, thanks o which you learn that his desire is to take control of your character's body. The choice of dialogue options is of no essence here. Keep heading West and take the door to the chamber with statues (M11,1h). Be careful here – touching green flames will deal you considerable damage.

Crossing the chamber with the flames is less problematic than it might seem at first. Note that some of the statues spin, every now and then, by 90 degrees - you can use that to your advantage and dash towards the successive areas, when the flames appear elsewhere. This way, change sides between the Northern and the Southern end of the chamber. In the spot shown in the above screenshot, you will have to do one more thing - you need to climb here onto the crates to get ahead.

On the South-Western side of the chamber with flames (M11,1i) you will run into an unique obstacle (one of them in the above screenshot). If your character class is warrior, it is going to be a wall that you can smash, in the case of the rogue, it is a locked door and, in the case of the mage, it is a barrier. Overcome the obstacle and walk into small room, where you can start the Demonic Dogma side quest, which has been described in the chapter with walkthroughs for side quests.

Now, for a change, walk into the North-Western end of the room (M11,1j). At the attempt to leave this location, there appears an opportunity to talk to the mysterious Cole. The apparition states his will to help you leave the nightmare. After the conversation, go back to the main hall, wait for the flames to disappear and take the newly unlocked passage to the West (M11,1k), into the second part of the nightmare - the Prison.

After you get to the second part of the nightmare (M11,1l), head Eastwards. Just like earlier, you can either watch the short cutscenes or skip them. Here, you are going to encounter the Envy Demon again. Examine the nearby rooms and find Cole again, inside one of them (M11,1m). Listen to his suggestion and kindle Veilfire here. Now, you need to reach four other places, where you need start fires also (M11,1n). Finally, reach the point at the end of the main corridor - the flames that appear here unlock the passage onwards.
Around, you can find the second inscription connected with the Demonic Dogma side quest. I recommend that you see that part of the walkthrough, for a moment, now.
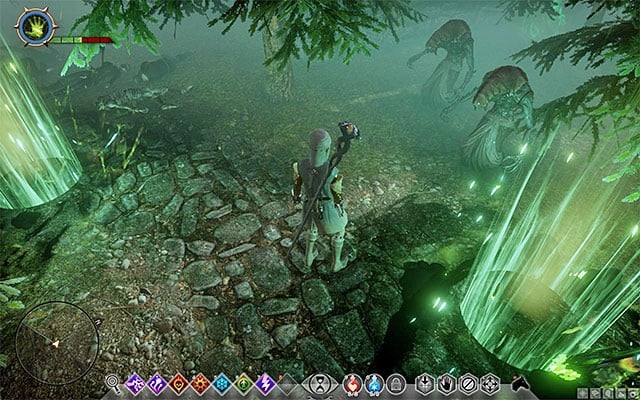
Locate the stairs (M11,1o). Thanks to climbing them, you will progress to the third part of the nightmare and this time around, you start off in the Forest (M11,1p). After you listen to a short conversation, leave the starting location. While exploring this part of the nightmare, you need to remember about two things. Firstly, do not stop anywhere for longer, because the green signs on the ground fulfill a warning role and, if you do not change your position, your character will take damage. Secondly, expect that you will have to eliminate specters. Fortunately, in most cases, a single attack gets the job done.

You now need to follow the linear path to a lever. Pull the lever and walk into the Therinfal Redoubt Courtyard. Here, you need to search out the passage shown in the above screenshot (M11,1q), which has been hidden between bushes and a wooden structure. Take a look around for the third inscription, connected with the Demonic Dogma side quest and head on. Ultimately, you need to return to the point, where you met Lucius (M11,1f) at the beginning of this quest. This time around, you run into the Envy Demon here. See the short cutscene, in the course of which your character leaves the nightmare.
How to survive the battle in the Great Hall?

After you get to The Great Hall (M11,1r) listen to the conversation with Barris. You will learn that you need to find three veterans and a cache of lyrium.
Before you head out, learn about the new, very important, element of this quest. The bar that you can see in the upper-right corner of the screen, represents the current state of the Great Hall defense. After you leave the Great Hall and focus on exploring the adjacent areas, it starts to deplete gradually. You cannot let it deplete completely, or you will fail the quest. What is even more, after it drops below 30%, Barris dies later in this quest. In general, I recommend that you break the process into smaller chunks. Return to the Great Hall each time you locate each one of the three veterans and the lyrium cache OR, when the bar drops below 50%. Each time after you return, you will have to fight monsters, but it is not going to be too difficult to win.
At the Great Hall, there is a Supply Cache. It is better to use it a bit later on, because you can do that only once.
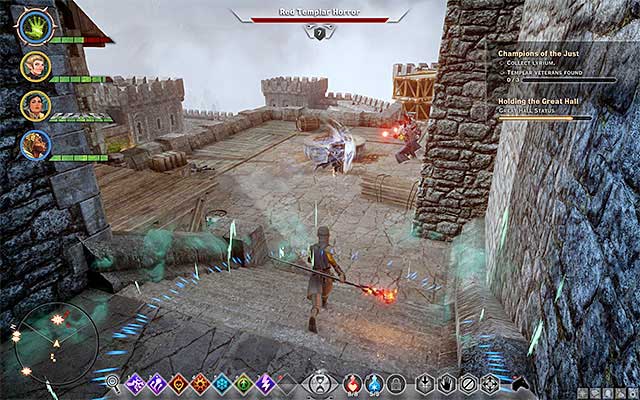
The areas adjacent to the Great hall can be explored in any order you want. To the South of the Hall, there are the Upper Barracks. You can get there by taking the door on the ground floor or, on the balconies above (M11,1s). Explore the barracks and, at the same time, eliminate the demons and the infected Templars. In the area, there are two veterans (M11,1t) - one of them is on the ground floor, in the North-Eastern part of the barracks, and one on the upper floor. After you reach each one, help him eliminate the hostile creatures and listen to a short conversation.
You do not need to explore the barracks that thoroughly right now. You can do that later on, i.e. when you will not have to race against time anymore.

To the North of the Great Hall, there are the Officers' Quarters. Also in this case, you can decide whether you want to take the passage on the ground floor or the one on the balconies above (M11,1u). Similarly, be prepared to fight monsters and try not to take too long. I recommend that you, first, reach the last, third veteran (M11,1t). He is staying on a large balcony on the upper level and also in this case, you need to help him fight a small group of monsters.

Go to the ground floor now and take the door in the middle, in the main yard. This way, you will get to Lucius' private chamber, where you meet Cole and find the Lord Seeker's Key. Apart from that, it is a good idea to explore the chamber thoroughly because, what you can find here, is a big chest with valuable loot.

Exit Lucius' chamber and head towards the door a bit to the West. Since you already have the key, you can open it and gain access to a new chamber. Climb up the stairs and locate the Lyrium Cache (M11,1w). You can now head back to the Great Hall (M11,1r).

I recommend that you start by opening the Supply Cache. Then, talk to Barris, after which a big battle, in the Great hall, ensues. Your task is to eliminate the infected Templars, who cross the magical barriers on a regular basis (M11,1x). You need to keep fighting up until the energy bar of the barrier, which you can see on the screen, depletes completely. I recommend that you pay attention to the deployment of the party members, during the battle and, e.g. deploy the ranged ones higher, on the wooden scaffoldings.

If, in the previous part of this quest, you allowed the health bar of the Templar defenders to drop below 30%, towards the end of this battle Barris dies. Otherwise, he remains alive. Regardless of the course of the action, thanks to deactivating the magic barriers grants you access to the den of the Envy Demon (M11,1y). Head Westwards but, before you climb the stairs, take a look around for another Supply Cache. Entering the den starts a short cutscene and starts the battle with the Envy Demon.
How to defeat the Envy Demon?
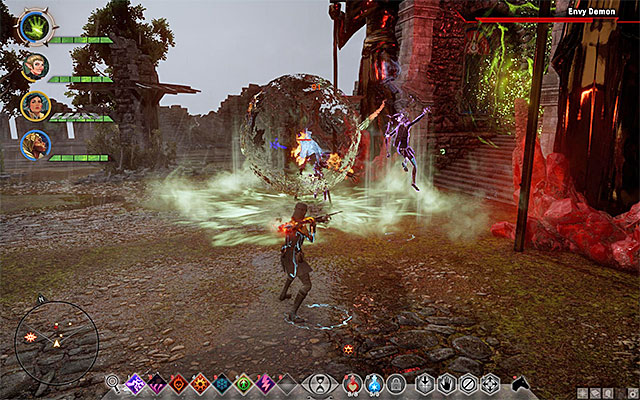
How difficult fighting the Envy Demon is going to be to you, depends on the development level of your party, because this will affect the damage that they take. Regardless of how strong they are, remember to change positions frequently, because the green markings on the ground mean that spikes will spring up here, in a moment.
The Envy Demon himself does not have too vast an array of attacks at his disposal, but his attacks are sufficiently damaging and annoying. First of all, try to keep the ranged party members away from the monster. Also, try to spread them over a vaster area, because the demon tends to use AoE attacks which, apart from damage they deal, make your party members get into a panic. Apart from that, you need to keep in mind that the enemy will move around the entire arena so, follow his position, on a regular basis.
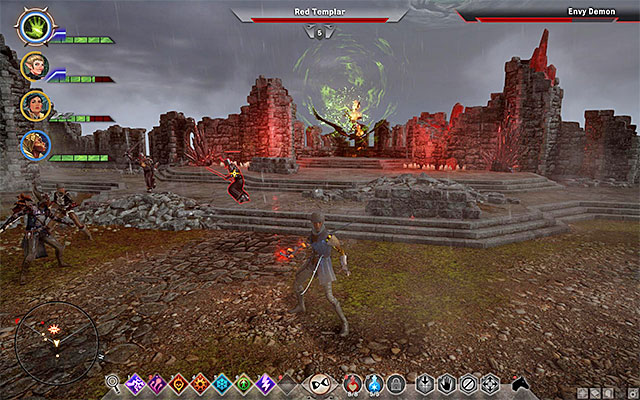
You can use all sorts of attacks to deal damage to the Envy Demon. You can, e.g. try to slow it down or damage the demon with fire or lightning.. Of course, keep an eye on the health bars of your party and heal them whenever they sustain damage, and bring them back to life after their health bars deplete. After you deprive the demon of a quarter of his health, he hides behind a barrier and sends a group of infected Templars your way. Defeating the Templars is not difficult.
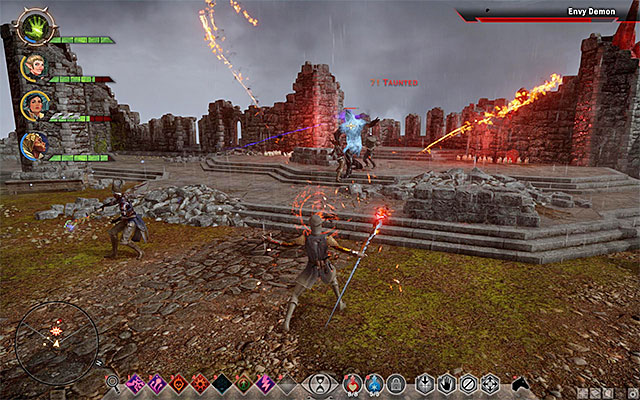
Later into the battle, the Envy Demon takes on the form of your character, which under no circumstances means changing the tactic. Continue using the same attacks that you did. Keep fighting up until you kill the Envy Demon and, after the victory, remember to search the body to collect a legendary weapon, among others.
What to do with the Templar Order?
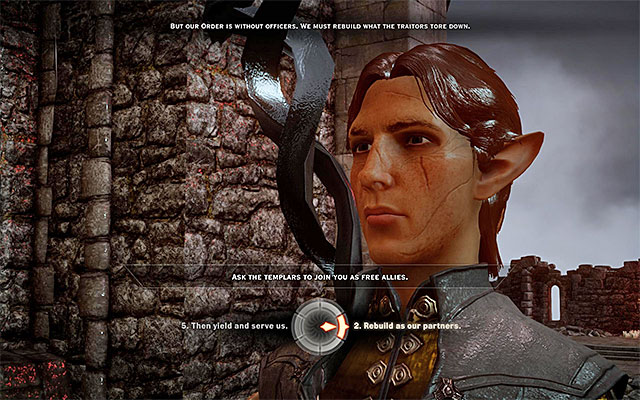
Try to leave the arena and you will meet the Templars. If Barris survived, it is him that you will talk to. Otherwise, you will talk to Fletcher. During the conversation, you will have to take an important decision (it has been presented in the above screenshot). You can:
- Enter the alliance with the Templars and let them keep their independence - This choice earns you Blackwall's, Cassandra's, Vivienne's and the Iron Bull's favor. The ones against this decision are Sera and Solas.
- Disband the chantry of Templars and include their soldiers into the Inquisition - This choice earns you Sera's and Solas's favor. The ones against it are Blackwall, Cassandra, Vivienne and the Iron Bull.
Regardless of what you do, you cut back to Haven.

After you return to the war room in Haven, listen to the conversations. One of them will be interrupted by Cole entering the room. You need to decide whether to take Cole into the party or try to kill him (this will end in a failure - he will erase that memory from the minds of the party members). I recommend, of course, that you allow him join the party. This is the end of this long quest.
Rewards for completing the quest:
- New main quest unlocked: In Your Heart Shall Burn
- New ally: Cole
- New location unlocked: Therinfal Redoubt
- Experience (lots)
- 1600 Influence points
- 3 Power points
- Dragon Age: Inquisition Game Guide & Walkthrough
- Dragon Age Inquisition: Walkthrough
- Dragon Age Inquisition: Main storyline quests (The Path of the Inquisitor)
- Dragon Age Inquisition: About main storyline
- Dragon Age Inquisition: The Wrath of Heaven
- Dragon Age Inquisition: The Threat Remains
- Dragon Age Inquisition: Champions of the Just (siding with templars)
- Dragon Age Inquisition: In Hushed Whispers (siding with mages)
- Dragon Age Inquisition: In Your Heart Shall Burn
- Dragon Age Inquisition: From Ashes
- Dragon Age Inquisition: Here Lies the Abyss
- Dragon Age Inquisition: Wicked Eyes and Wicked Hearts
- Dragon Age Inquisition: What Pride Had Wrought
- Dragon Age Inquisition: The Final Piece
- Dragon Age Inquisition: Doom Upon All the World
- Dragon Age Inquisition: Specializations for the Inquisitor
- Dragon Age Inquisition: Main storyline quests (The Path of the Inquisitor)
- Dragon Age Inquisition: Walkthrough
You are not permitted to copy any image, text or info from this page. This site is not associated with and/or endorsed by the developers and the publishers. All logos and images are copyrighted by their respective owners.
Copyright © 2000 - 2025 Webedia Polska SA for gamepressure.com, unofficial game guides, walkthroughs, secrets, game tips, maps & strategies for top games.
