BioShock: Welcome to Rapture 1
On this page of the BioShock game guide, you will find the first part of the Welcome to Rapture stage walkthrough. We have described all the places that you visit immediately after the start of the game and your first appearance in the underwater city. In the first minutes of the campaign, you can get a Wrench (the base weapon) and the first plasmid-Electro Bolt.
Attention - this place can't be returned later in the game.
How to use our Bioshock walkthrough guide?
The following user guide applies to the entirity of our BioShock game guide.
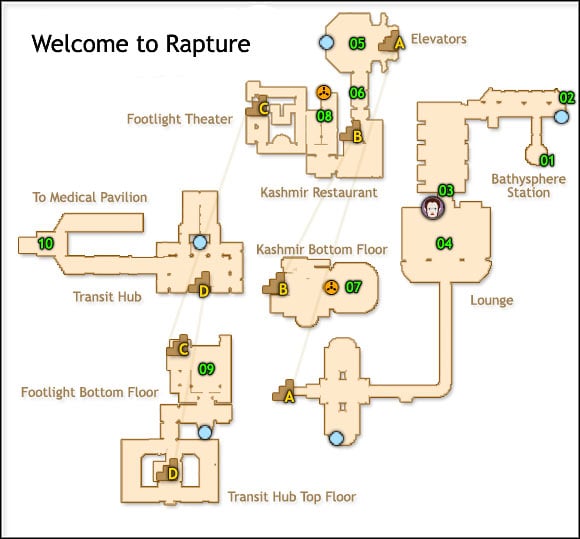
- There is a map of the surrounding area at the top of each page. Thanks to it, you should first familiarize yourself with the layout of the premises suitable for visiting.
- On the map, we marked first of all important places to explore-01, 02, 03, etc. In addition, yellow letters A, B, C, etc. were used to mark transitions between different sites were noted (for example adjacent rooms or different floors of the same structure). Additional icons on the map also indicate, for example, a vending machine or an upgrade unlock station.
- Below the map, you can find the most important information about the level it refers to. You can find out, for example, about the number of collectibles, interactive stations, or new hardware items.
- Also below are descriptions of points from the map. After reading the description of this point, you can find it on the map and thus easily determine which area it is located in.
- There are also different frames in the walkthrough guide. This is additional information that makes it easier to find, for example, the place where important weapons were purchased.
- In the step-by-step guide, we also used color coding. The names of the corresponding items (plasmids, weapons, tonics)that can be found at a certain level are written in blue. The green color indicates the location corresponding to the correct number on the map. The brown color distinguishes the audio logs that we collect during the game.
LEVEL INFORMATION:
Number of recordings: 2
Number of weapon upgrade stations: 0
New weapons: Wrench, Pistol
Plasmids | Tonics |
Electro Bolt | None |
The game starts with a scene where your plane crashes into the ocean. Floating among the flames, head to the nearby lighthouse. Get inside. There you will find an open bathysphere-enter it and press the [E] key on the Batysphere Lever ,and your journey to the underwater city of Rapture will begin.
By the time the bathysphere opens, you will have witnessed a bloody scene unfolding behind the glass. A voice is heard in the speaker-this is Atlas, one of the residents of the city, asking you to pick up the radio located in the bathyscaphe. Press [E] to pick it up. Since then, all communication with remote residents of the city will be carried out with this device.
 |  |
01-here we begin our adventure. To make the most of the guides, make sure to look at the map often and explore the level in the order indicated by the green numbers corresponding to the following rooms. This way you won't miss anything.
Go up to a higher level- Atlas suggests that you get to the upper levels to escape from the attacker and flooding rooms.
02 - there is a Vita-Chamber [ life chamber]- in such chambers the protagonist is reborn if killed during the game. You do not need to activate the chambers in any case - you will always go to the nearest one.
03-pick up the Wrench (weapon: Wrench). At the suggestion of Atlas, you pick up your first weapon from the ground-the Wrench. Until you find other weapons and ammunition, you fight using the wrench. (note: for more information about the available weapon types, See the Weapons section.) Use the wrench to break through the debris, then crouch [C] to go to the next room.

Note: in the game, you search everything and everyone. Every corpse, every closet. Collect all the items you find. There is nothing here that can poison, infect or harm your character. Only alcohol in greater quantities causes a temporary blackout. Even items that don't seem to be needed, can be used in further stages of the game, for example, to convert them into useful equipment.
 | 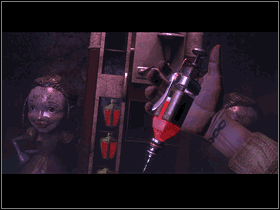 |
04-you are attacked by the first enemy: a Thuggish Splicer. Hit it with the Wrenc a few times and climb the stairs at the top. On the right, you will find a basket containing a first aid kit and an EVE syringe. The second injection is located in a similar basket on the left. Take your first plasmid - Electro Bolt -from the machine in the middle. After a short cutscene, use your new power to open the door: aim at the panel to the left and "shoot". Before you leave, grab a few more snacks from the table and you will replenish your strength.
note: the combination of the Wrench (and skills that increase its effectiveness) and the Electro Bolt (and its later versions) served us almost throughout the entire game as one of the most effective ways to get rid of opponents. To make the most of the opportunities provided by them, always first paralyze the enemy with lightning, and then run up to him and apply several blows with the wrench.
Note: Right-Click to switch between weapons and plasmids.
- Bioshock Game Guide
- BioShock: Game Guide
- BioShock: Walkthrough
- BioShock: Welcome to Rapture 1
- BioShock: Welcome to Rapture 2
- BioShock: Medical Pavillon 1
- BioShock: Medical Pavillon 2
- BioShock: Neptune's bounty 1
- BioShock: Neptune's Bounty 2
- BioShock: Smuggler's Hideout
- BioShock: Arcadia 1
- BioShock: Arcadia 2
- BioShock: Farmers Market
- BioShock: Arcadia once more
- BioShock: Fort Frolic 1
- BioShock: Fort Frolic 2
- BioShock: Hephaestus
- BioShock: Rapture Main Controls
- BioShock: Olympus Heights
- BioShock: Apollo Square
- BioShock: Point Prometheus
- BioShock: Proving Grounds
- BioShock: Le Grande Finale
- BioShock: Walkthrough
- BioShock: Game Guide
You are not permitted to copy any image, text or info from this page. This site is not associated with and/or endorsed by the developers and the publishers. All logos and images are copyrighted by their respective owners.
Copyright © 2000 - 2026 Webedia Polska SA for gamepressure.com, unofficial game guides, walkthroughs, secrets, game tips, maps & strategies for top games.
