Neptune's Bounty (2) | Bioshock Walkthrough
On this page of the BioShock game guide, we have included the second part of the Neptune's Bounty walkthrough. This stage forces you to defeat another mini-boss, namely Peach Wilkins. In addition, while exploring Neptune's Bounty, you will encounter the first weapons upgrade station.
09 - after the explosion, jump down through the window. Here you will find the next plasmid-Security Bullseye. There is a recording here, and another one further South.
Recording: "Adam Discovery" - Tenenbaum
Recording: Eden Leaking - McDonagh

10 - another recording at the fork.
Recording: "Fontaine's smugglers" - Tennenbaum.
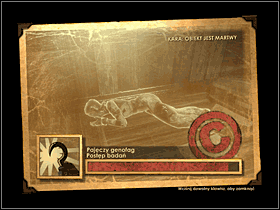
11-at Jet Postal, you will find one of the Spider Splicersthat you need to photograph. First defeat it (if it escapes to the ceiling, you can throw him off it with Electro Bolt), and then take a picture of it. You work with the camera the same way you work with any weapon. If you run out of cliches, you can buy them at the circus of values. Before you leave, grab another recording.
Recording: "Death Penalty in Rapture" - Andrew Ryan
12-to find the recording hidden here, you must enter the water next to the Vita-chamber and enter the ventilation shaft. Go to the other end of the tunnel.
Recording: "Meeting Ryan" - McDonagh
13-there is another recording and a safe in a small secret room. You will get to it by breaking the boxes that block a small passage in the wall.
Recording: "Rapture changing" - McDonagh
14- When returning from point (13), you will get here using the Electro Bolt on the panel at the door.
Recording: "Smuggling Ring" - Sullivan (center table)
Recording: "Working late again" - Andrew Ryan (table by the window)
 |  |
15-there are several proximity mines in the tavern's toilet. To enter it, you must throw $5 into the vending machine.
16-go up the stairs. On the upper floor of the tavern, you will be attacked by the last Spider Splicer. Take a picture of his corpse. Before returning to Peach, explore the tavern's upper floor. There is a recording in room no. 6 (use the Electro Bolt on the mechanism at the door to open it). The room 7 code is 7533. There, you will also find a recording as well as a tonic: shorter alarms . Before you leave the tavern, a little sister and daddy will appear-get rid of the latter and grab some Adam.
Recording: "Arresting Fontaine" - McDonagh
Recording: "Saw Masha today" - Mariska Lutz
17-a tonic appeared near the Gatherer's Garden: Wrench Lurker. Make the necessary purchases and go to the fish processing plant. Knock on Wilkins ' door-this time he will open it for you.
 |  |
18 - in a block of ice there is a frozen tonic-focused hacker. Use Incinerate! on it. If you don't have this plasmid among the active slots, you can use a nearby Gene Bank. Now you have to insert all your guns into the pneumatic relay.
19-You have to fight Peach Wilkins here. The difficulty is that you only have plasmids at your disposal. It's a good idea to secure support here by hacking the security camera. Thus, Peach will be under constant fire from bots. For your part, you should focus on throwing exploding canisters at him using telekinesis. He is highly resistant to Electro Bolt and Incinerate!.
 |  |
After the battle, take your weapons from another relay. Also, look around the area-any piece of ice and a pile of snow can be melted by Incinerate!.
20-Here you will find the first weapons upgrade station (power to the people). In this type of slot machine, you can always choose one optimization for the selected gun. You will get them for free, but the station will be permanently disabled. Before you go to the exit, once again inspect the warehouse on the right. There's a recording.
Recording: "Putting the screws on" - Peach Wilkins
21 - when you are ready, head for the exit from this level.
You are not permitted to copy any image, text or info from this page. This site is not associated with and/or endorsed by the 2K Games or 2K Boston. All logos and images are copyrighted by their respective owners.
Copyright © 2000 - 2025 Webedia Polska SA for gamepressure.com, unofficial game guides, walkthroughs, secrets, game tips, maps & strategies for top games.
