Neptune's bounty (1) | Bioshock Walkthrough
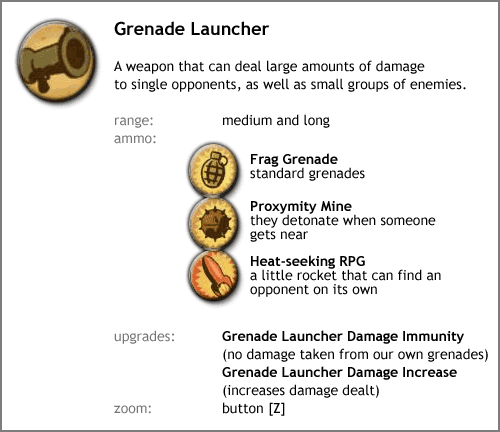
On this page of the BioShock game guide, we have included the first part of the Neptune's Bounty walkthrough. In the initial sections of this stage, there are two very valuable things to find - a grenade launcher (useful, for example, when fighting a Daddy) and a camera that will allow the hero to photograph enemies and conduct related research.

LEVEL INFORMATION:
Number of entries: 19
Number of weapon upgrade stations: 1
The Number Of Sisters: 3
New weapons: grenade launcher
Plasmids | Tonics |
Hypnotize Big Daddy (reward for saving 3 sisters to pick up at the Gathereras Garden) | Medical Expert |
Target Dummy(to buy) | Shorter Alarms |
Winter Blast (to buy) | Wrench Lurker |
Security Bullseye | Focused hacker |
Extra Nutrition (to buy) |
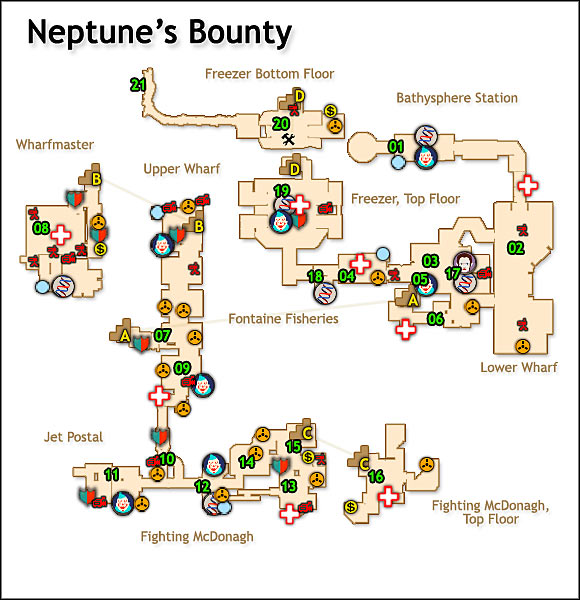
01 - walk down the corridor until you reach a large room.
02-there is a Little Sister protected a Big Daddy there.. The latter is a bit different from the one you've met before - it mostly uses firearms. Try to defeat it right away. There is a recording at the South end of the hall (you must squat down and go behind the security turret). In the center of the room is a tonic: medical expert .
Recording: "bathysphere Keys" - Sullivan
03 - In the Gatherer's Garden located here, you can buy new types of plasmids and tonics (Winter Blast, Target Dummy, Extra Nutrition, etc.). It is especially recommended to purchase an additional plasmid slot.
Note: when you save 3 sisters, this is where you will find a gift from Tenenbaum: 200 units of ADAM and a plasmid - Hypnotize Big Daddy.
 |  |
04-jump on the boxes and knock on the door. Peach Wilkins will answer. He will not let you in unless you bring him pictures of Spider Splicers. After a while, you will be attacked by a representative of this "race". Repel the attack, and Atlas will send you a bot to help. You deal too little damage to defeat it now-fortunately, it should escape after a while. Peach will send you a grenade launcher in the transmission lane to the right of the door.

05-go down the nearest stairs and follow the flooded corridor until you reach the combination lock. The combination is 5380(you can also hack it). Inside you will find a recording.
Recording: "Timmy H. Interrogation" - Sullivan
06-there is another recording in this corridor. To get to it, you must enter the hole in the floor and squat down to go to the marker visible on our map.
Recording: "Fontaine must go." - Andrew Ryan
07-head North, following this corridor to the end. On the way you will find recordings.
Recording: "Finding the Sea Slug" - Tenenbaum
Recording: "Picked Up Timmy H" - Sullivan (it is next to the corpse lying in the middle)
Recording: "Masha, come home" - Mariska Lutz (next to the vent of the Sisters)
Recording: "Watch Fontaine" - Andrew Ryan (near the Circus of Values))
 |  |
08-near the security turrets, go through the vent and you will find a recording and some ammunition (including grenades)
Recording: "Have my badge" - Sullivan
When you make your way through the turrets, go through the punched hole in the wall and follow the corridor until you find the camera. Take it and take a picture of the Spider Splicer behind the wall on the right.
NOTE: for more information about using the camera, see the Opponents and researching them section of this guide. The topic of researching opponents by photographing them is best solved immediately, so the chances that you will finish all the research before you get to the final of the adventure (it is impossible to continue the game after the main story is completed) increase.
You are not permitted to copy any image, text or info from this page. This site is not associated with and/or endorsed by the 2K Games or 2K Boston. All logos and images are copyrighted by their respective owners.
Copyright © 2000 - 2025 Webedia Polska SA for gamepressure.com, unofficial game guides, walkthroughs, secrets, game tips, maps & strategies for top games.
