BioShock: Playing on highest difficulty
On this page of the BioShock game guide, we explain the differences between the available difficulty levels. Our tutorial also contains a number of tips that should be useful when playing the game on one of the two higher difficulty levels-Hard or Survivor.
Available difficulty levels and differences between them
BioShock contains four difficulty levels-Easy (easy), Normal (Normal), Hard (High), and Survivor (High). All difficulty levels are available from the beginning of the game. You can also change the difficulty level selected earlier, already during the game, and this does not entail any punishment.
Playing on one of the higher difficulty levels (Hard or Survivor) does not change the game's storyline in any way, while opponents are much harder to kill and their attacks are more dangerous. Because of this, you need to show more wits and attention, and the game is much more likely to award stealth actions, in order to avoid unnecessary confrontations or laying traps on enemies.
Low difficulty level
The main features of the Easy difficulty level include:
- Opponents deal much less damage, and their ranged attacks are less accurate.
- Opponents move slower.
- Opponents have 40 percent less life points.
- Plasmids consume half the amount of EVE.
- Exploring areas allows you to find more loot.
Normal difficulty level
The key features of the Normal difficulty level are:
- Opponents deal default damage, and their ranged attacks have default accuracy.
- Opponents are moving at normal speed.
- Opponents have a default number of life points.
- Plasmids consume the default amount of EVE.
- In the game world, there is a default amount of loot.
This is the recommended difficulty level for completing a campaign for the first time. It will offer a fairly high level of difficulty, but at the same time should not cause huge disappointments as a result of too difficult fights with opponents.
High difficulty level
The main characteristics of the Hard difficulty level include:
- Opponents deal about twice as much damage, and their ranged attacks are more accurate.
- Opponents move faster.
- Opponents have 50 percent more life points.
- Plasmids consume 30 percent more EVE.
- When exploring the environment, less random loot is found.
The highest difficulty level
The main features of the Survivor difficulty level include:
- Opponents move much faster.
- Opponents have almost 150 percent more life points.
- The hero recovers much less EVE after being resurrected in the Vita-Chamber capsule.
- Exploration allows you to find very small quantities of loot. Each raw material is worth its weight in gold.
Additional note
- You can save the game easily and without restrictions at each level of difficulty. We strongly recommend that you use this option and save your progress. Do this first of all after each victory in the battle and before entering each new unknown location.
- You can add an additional obstacle and disable the Vita-Chamber capsules used to resurrect the character. The death of the hero means the end of the fun in this situation. Completing the game this way is required to achieve achievements I Choose the Impossible and Brass Balls.
- If you want to get the platinum trophy, you don't need to choose the survivor difficulty level. There is a "trick" that allows you to change the difficulty level just before the end of the campaign. For more information, see the description of the achievement I Choose the Impossible in our trophy guide.
How to play on high difficulty levels?
The following remarks, of course, do not apply only to the Hard and Survivor difficulty levels. You can use our tips at lower levels of difficulty, and they will be equally effective.
 |  |
Stealth is the optimal combination of tonics-SportBoost for walking faster, Wrench Lurker for quiet walking and, of course, Natural Camouflage.
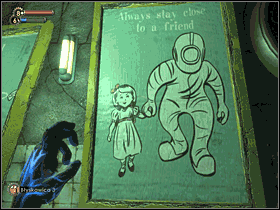
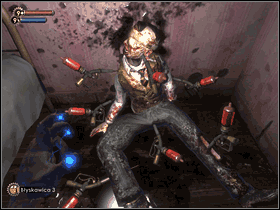
Big Daddies - the most difficult opponents to kill, and at the same time the easiest. The difficulty, of course, is in their physical resistance and the large injuries inflicted, in the fact that in their case, we choose the place and time of the fight. They do not attack themselves, so before the battle, it is necessary to prepare weapons with appropriate ammunition (armor-piercing rifle ammo, electric gel, grenades), as well as to prepare the battlefield. Until we have a chemical Blaster with electric gel, we must choose a place with some obstacles (a wide column, a thick tree, etc.), around which we will run and behind which we will hide from daddy. It is necessary to mine the territory between daddy and us, you can also put a gas cylinder or other exploding object in the way. Then shoot the Daddy, and the rushing monster falls into the prepared trap.
From the moment we get the chemical Blaster, the electric gel is enough-daddy has no chance, and he can't do anything with us, even if he is at arm's length from us. if using U-Invent stations you focus on crafting gel, you should have no problems with its stock.
 |  |
Daddies as bodyguards - the Hypnotize Big Daddy plasmid is extremely useful because there are a lot of daddies, they wander around locations, even when they no longer have Sisters to protect. However, it has two limitations - first, the Daddy will not attack opponents unless we attack them or the other way around. Secondly, we need to watch out for hitting a daddy by accident, who in this case will turn against us. Because of this, most likely, there is no use of explosive ammunition, grenades, and napalm in his presence. The best strategy is to look into the room, shoot at the enemies and hide-the daddy will successfully cope with the rest. For optimizers, if we distract the Daddy from the girl and use it against other opponents, the damage that he will receive during the battle with them will help us get it later, because the Daddy does not heal.
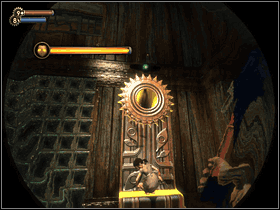
Cameras and turrets-hacking them is important as almost every time you enter a new room in the rest of the already discovered locations new opponents appear. Cameras and turrets will help us eliminate them without wasting time and precious ammunition. On the hard and Survivor difficulty levels, cameras are more important, which are never attacked by opponents, since the turrets quickly turn into a pile of scrap metal. If the camera is too high to reach it, it is worth to use telekinesis to bring some box and put it under the camera-after you jump on it, you will no longer have problems with reaching it.
 |  |
Effective spending of ADAM-especially when you rescue the girls, the effective management of ADAM is important. In every Gatherer's Garden, you can only buy one health and EVE boost, so if you don't want to go back, this should be your priority. Secondly, invest in additional slots for plasmids and tonics. On the other hand, don't buy tonics and plasmids if you really don't need them - they will be cheaper in the next location!
Crossbow-weapon of choice in later locations. One shot in the head destroys almost any opponent, except for daddy. And how to get a headshot when the enemy is rushing at you shouting wildly? Simply, stop him using Electro Bold (preferably version 3, this is a very reasonable investment), aim steadily and shoot. It works on all opponents but those resistant to electricity. In addition, in the case of a crossbow, the ability to restore ammunition leads to the fact that we have no problems with it.
 |  |
Photographing is very important - at the Hard and Survivor difficulty levels you will often photograph dead opponents, so it's worth making sure that when shooting corpses, you always have another character in the frame besides this one being photographed (Big Daddy, other corpses, etc.) - then you get a bonus for many objects. The same applies to photographing Sisters (always with a Daddy) and Daddies (always with a little sister).
{ramkaniebeska}summary: playing on one of the highest difficulty levels gives great satisfaction. To those really ambitious (maniacs?) we recommend playing without saving the game (except, of course, AutoSave and ending due to at least a little sleep). Good luck!{/ramkaniebieska}
You are not permitted to copy any image, text or info from this page. This site is not associated with and/or endorsed by the developers and the publishers. All logos and images are copyrighted by their respective owners.
Copyright © 2000 - 2025 Webedia Polska SA for gamepressure.com, unofficial game guides, walkthroughs, secrets, game tips, maps & strategies for top games.
