Sword Coast Legends: An Eye For An Eye - Main quest
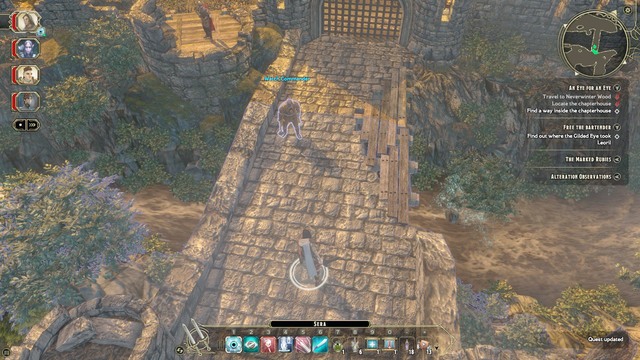
After the conversation with Raissa, leave the city via the nearest exit and set your destination to the Neverwinter Wood. After arriving, you will have to locate the enemy's hideout. In order to do so, head north, and you should reach a small bridge (M8, Watch Commander). To cross the said bridge, you can use three different methods. The first one requires you to complete a side quest called Big Game Hunting (there will be a secret passage at the end of the cave). The second needs you to buy a guild's badge, which will allow you to cross the bridge without initiating the fight. The badge can be purchased from an NPC called Hindryx, an elf standing right next to the bridge (M8, Hyndrix). The price for the artifact is quite high, being 1000 gold, but with a high enough charisma (CHA) attribute you can get it for free. The third, and the last method is to simply use force - you must eliminate all the members of the Gilded Eye. This approach is the best one, provided that you can handle those enemies. You will get a huge amount of experience points, and you will be able to loot some interesting items, as well as quite a sum of gold from the bodies. Regardless of your choice, hear to the main entrance of the Gilded Eye (M8, Gilded Eye Chapterhouse).
Note!
Right next to the entrance leading to the enemy headquarters you will be able to find a secret passage in the wall (M8,6). To open it, you must know the proper combination. It will be described in the builder's journal (M10, Remains), a book that can be acquired from the body in the Bear Den, associated with a side quest called Big Game Hunting. You must complete this side quest prior to entering the Gilded Eye Chapterhouse.
In the Javen's room, in a chest (M9,1) there will be a key (Gilded Eye Chapterhouse Key), which is required to open the doors leading to the prison. Acquiring and using the said key will reduce the amount of monsters you will have to face.
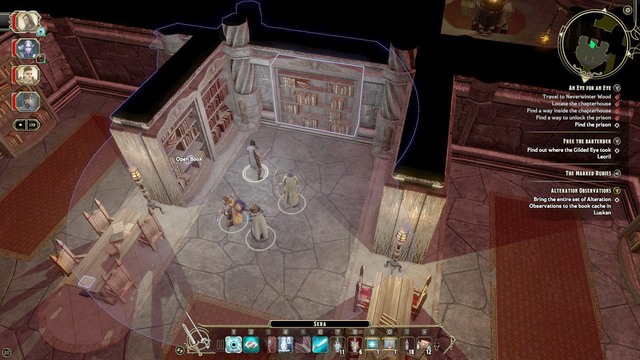
After acquiring the key, your task is to get to the underground prison. Make your way through the corridors of the chapterhouse, killing enemies along the way, and locate the entrance to the lower level. During your further march, you will reach a library, in which a secret passage can be found (M9,6). Your task is to acquire 3 books, which must be placed on the shelves (M9,7). The order in which it must be done is as follows:
- First, place the Holy Warrior book.
- Secondly, place The Coast Valor book.
- Finally, place the Courage Before the Fall book.
A chest containing valuable items is hidden behind the secret passage.
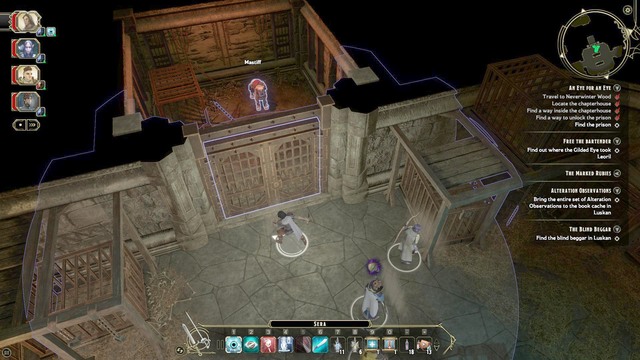
After completing the simple riddle, go to the catacombs. There will be hostile dogs, as well as members from the guild in one of the rooms (M9,8). As soon as you get rid of them, approach the trapped dog and try to set it free. If you open the cage right away, the dog will attack you. If you, however, give it some food (Feed the dog with some tender shortrib), the dog will be fighting at your side. The treat can be found on the first level of the Gilded Eye Chapterhouse (M9,4).
Note - the dog won't be accompanying you only during this mission. After completing the quest, it will go back to the camp with your companions and you will be able play with him whenever you are there, meaning that you will gain a permanent pet.
After freeing the animal, go to the adjacent room, where a next riddle awaits you. Your task is to set the pillars so that the symbols, visible on the wall behind them, are faced in your direction. After unlocking the passage, an encounter with the warden (M9, Warden) will await you here. At the beginning of the combat focus on the enemy dogs, and use your rogue character to eliminate the archers placed on the sides of the arena. The encounter is not that difficult, but remember to use potions and abilities that increase the damage output and defense of your team.
After the encounter ends, speak with Bryn. You've just acquired a new companion - Bryn. You can now summon the party customization window and let her join your party. When the conversation ends, search the bodies of the fallen enemies, especially the warden. During the conversation, other members of the enemy guild will close the main entrance and you will have to find an alternative route. There's a bartender (M9, Leoril) located in one of the cells, who must be freed to complete a side quest called Free the Bartender. The other cell holds an NPC called Morlesh (M9, Morlesh), from who you can acquire a side quest called Cult of Ghaundaur. The exit leading to the second level of the catacombs can be found between those two cells.
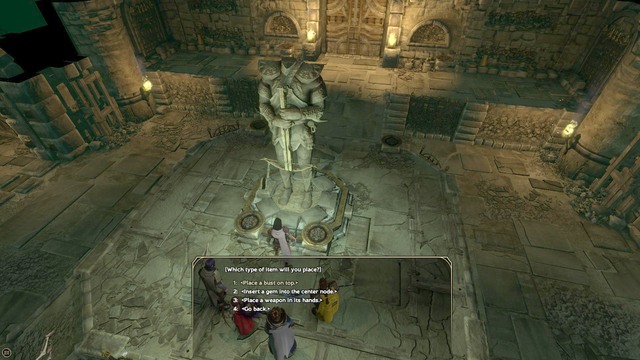
To leave the prison, you must first solve another puzzle. Approach the statue (M9, 16) shown on the above screenshot and interact with it. The statue will randomly present various heroes: a Wizard, a Fighter, or a Rogue. Your task is to assemble three elements that match with those three characters. The first one is the gem, the second one is the weapon, and the third one is the bust. Sets for each character are as follows:
- Rogue - Gem of Shadows, Crossbow and Rogue's Head Bust
- Wizard - Gem of Misticism, Staff and Wizard's Head Bust
- Fighter - Gem of Battle, Sword and Fighter's Head Bust
All of the mentioned elements can be found in the neighboring rooms. After unlocking the passageway, continue with your journey. At the end of the passage, the leader of the Gilded Eye's assassins, Jessia (M9, Jessia), will be waiting for you. During the encounter try to focus on her companions and take the leader out once they are dead. When the encounter ends, you will be able to leave the catacombs.
Reward: 7700 experience points.
- Sword Coast Legends Game Guide
- Sword Coast Legends: Game Guide
- Sword Coast Legends: Neverwinter Wood, Evermoors
- Sword Coast Legends: Introduction and Map Neverwinter Wood, Evermoors
- Sword Coast Legends: Gilded Eye Chapterhouse
- Sword Coast Legends: Rhylfang's Lair
- Sword Coast Legends: The Next Move - Main quest
- Sword Coast Legends: An Eye For An Eye - Main quest
- Sword Coast Legends: Chaos Breaks Loose - Main quest
- Sword Coast Legends: The Lair of Rhylfang - Main quest
- Sword Coast Legends: Free The Bartender - Side quest
- Sword Coast Legends: Big Game Hunting - Side quest
- Sword Coast Legends: List of Names - Side quest
- Sword Coast Legends: Cult of Ghaunadaur - Side quest
- Sword Coast Legends: Off in the Fog - Side quest
- Sword Coast Legends: Troll Patriarch - Side quest
- Sword Coast Legends: Neverwinter Wood, Evermoors
- Sword Coast Legends: Game Guide
You are not permitted to copy any image, text or info from this page. This site is not associated with and/or endorsed by the developers and the publishers. All logos and images are copyrighted by their respective owners.
Copyright © 2000 - 2026 Webedia Polska SA for gamepressure.com, unofficial game guides, walkthroughs, secrets, game tips, maps & strategies for top games.
