Battlefront 2: Specialist Class Guide
Last update:
A sniper. This class is exceptionally difficult in leveling up in the beginning. Not recommended for new players. The default weapon requires two shots in a head to kill an enemy; the scope's zoom isn't great too. Specialists aren't good at close distance (in the beginning), their durability is also low. The key is to have good positions, from which you can keep firing at your enemies.
Also, you need a great accuracy (if you don't kill your enemies fast they will start shooting back at you). Keep as much distance as possible - Officers and Assaults have an advantage over you at medium distance in both accuracy and rate of fire.
Class description
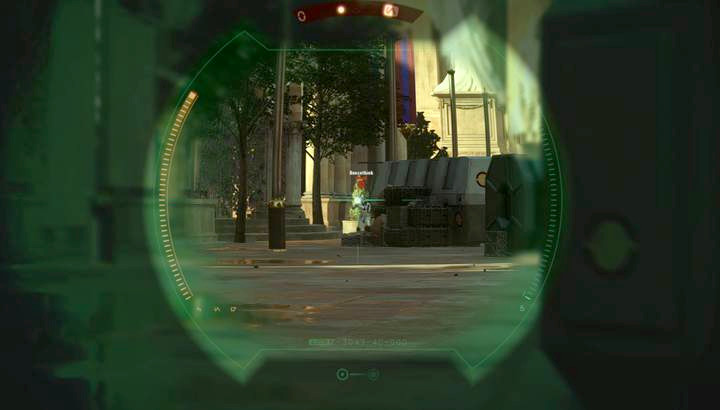
Specialty: Distance attacks, stealth
Mobility: Moderate
Team Roles: Sniping, traps
Durability: Low (100 health points)
Abilities:
- Shock Grenade: This grenade slows down enemies who were hit with it. They are paralyzed for 5 seconds but they can still shoot. An electric field stays on ground for few seconds and deals a small amount of damage to players who step on it. This ability isn't very good.
- Infiltration Replenish: Reveals all enemies on your scanner. Scramble enemy scanners in close proximity which allows you to infiltrate enemy positions. Increases your mobility greatly. When activated, your mid-range weapon (a three shots pistol) won't overheat. When you kill an enemy, the active time of the ability is replenished. This ability can be powerful in hands of a skilled player.
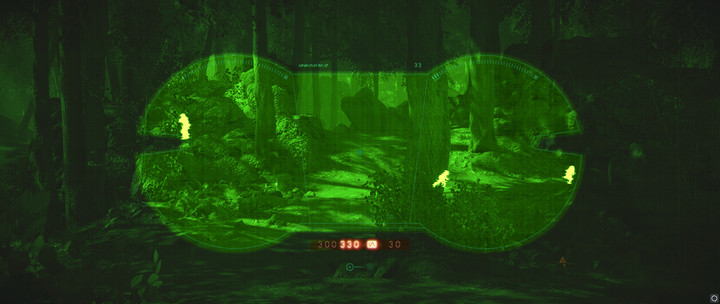
- Thermal Binoculars: You can see enemies hidden in dark and behind walls, locating them is much easier. Select the ability and press aim button to activate the binoculars. Duration and access is unlimited. Holding the aim button and switching between binoculars and weapon is a good idea.
Related Milestones and rewards
The table below represents Milestones and their requirements as well as rewards for completing them Specialist. These challenges can only be completed in multiplayer.
Milestone | Requirements | Reward | Note |
Become a Specialist | Play as a Specialist for 10 minutes | 250 credits | - |
Starting Specialist Training | Get 25 assists with Stinger Pistol | 50 crafting parts | This pistol is unlocked by purchasing Stinger Pistol card which replaces the default grenade. |
Specialist Trooper Medal | Play as a Specialist for 150 minutes | Veteran Specialist Crate | - |
Specialist Blaster Medal | Slowdown 30 enemies with Shock Grenades | Pistol Crate | - |
Stay True | Defeat 40 enemies by using Infiltration ability | Infiltration Crate | When this ability is active you can see nearby enemies on your radar but they can't see you - get behind their backs and start eliminating them. |
Thermal Binoculars | Reveal 100 enemies by using Thermal Binoculars | Stealth Crate
| You should switch between your sniper rifle and binoculars while you are holding aim button to find your targets faster. |
50 Specialist Kills | Kill 50 enemies | Unlock IQA-11 weapon; 200 credits | - |
200 Specialist Kills | Kill 200 enemies | Unlock A280-CFE weapon; 200 credits | - |
500 Specialist Kills | Kill 500 enemies | Unlock NT-242 weapon; 200 credits | - |
IQA-11 Training Session | Kill 50 enemies with IQA-11 | Dual Zoom | - |
IQA-11 Target Practice | Kill 150 enemies with IQA-11 | Bolt Speed | Blaster shots reach their targets faster - this modification is necessary for eliminating moving targets. |
IQA-11 Sharpshooter | Kill 200 enemies with IQA-11 | Improved Cooling | Bigger clip (2 more rounds) |
A280-CFE Training Session | Kill 50 enemies with A280-CFE | Dual Zoom | - |
A280-CFE Target Practice | Kill 150 enemies with A280-CFE | Burst Mode | Shoots a burst of 3 rounds just like in Assault's A280 |
A280-CFE Sharpshooter | Kill 200 enemies with A280-CFE | ION Shot | Weaker against infantry, works great on vehicles and shields |
NT-242 Training Session | Kill 50 enemies with NT-242 | Dual Zoom | - |
NT-242 Target Practice | Kill 50 enemies with NT-242 | Improved Cooling | Bigger clip |
NT-242 Sharpshooter | Kill 50 enemies with NT-242 | Disruptor Shot | Weaker against infantry, works great on shields and vehicles |
Weapons and modifications
This chapter contains descriptions of weapons and modifications available for a Specialist.
Level 1 (e.g. VALKEN-38X / DLT-19D)
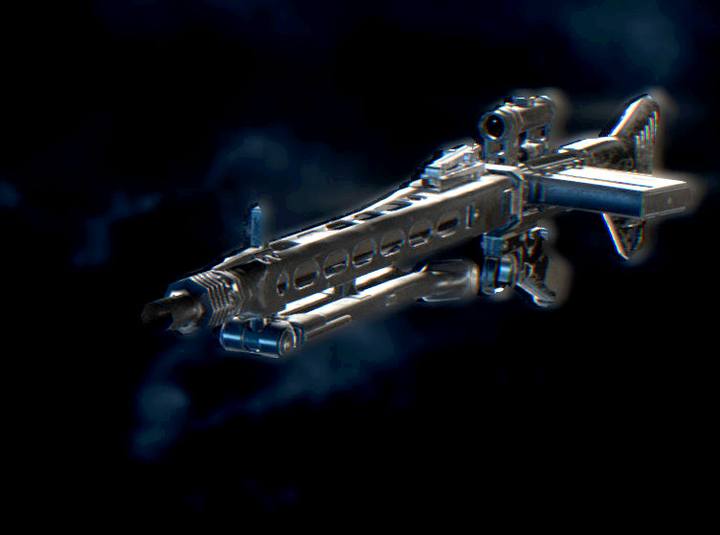
 | Clip: 6 rounds Reload: fast Use: mid/long distance Accuracy: high This default rifle is weak. Zoom and damage are both low. Shooting without using a scope is comfortable. Level up this class fast and unlock the second rifle. | details |
Modifications: none
Level 2 - IQA-11
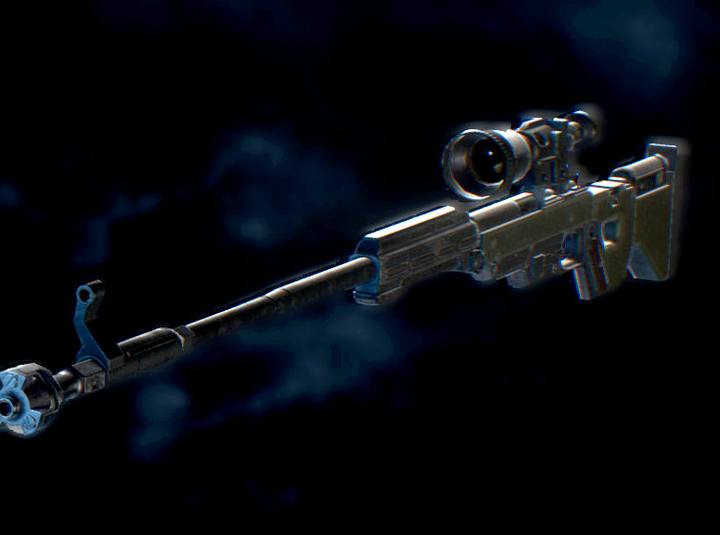
 | Clip: 5 rounds Reload: fast Use: mid - very long distance Accuracy: high A powerful rifle with low rate of fire, not as popular among players as A280-CFE. Deals about 90% damage with a headshot so always shoot twice. Without modifications, the projectiles are too slow to hit moving targets that are far away from you. | details |
Modifications:
- Dual Zoom - additional zoom (press melee button while aiming).
- Bolt Speed - in default, the projectiles are too slow to reach targets that are far away. This modification fixes that a little bit.
- Improved Cooling - this modification gives you 2 additional shots (7 rounds in total) before your weapon overheats.
Level 3 - A280-CFE
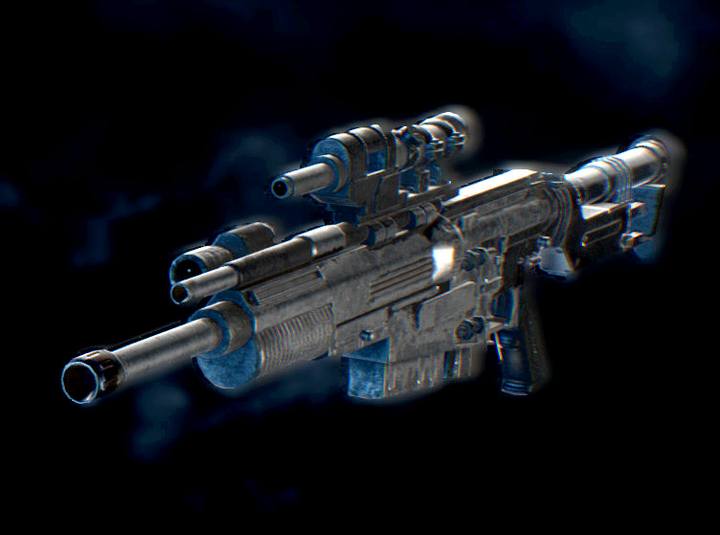
 | Clip: 6 rounds Reload: fast Use: short - long distance Accuracy: high This weapon works better as an assault rifle. Shoots great without using a scope. Headshots are recommended because the weapon doesn't deal a lot of damage. Popular on many maps. | details |
Modifications:
- Dual Zoom - additional zoom (press melee button while aiming).
- Burst Mode - shoot in bursts of three rounds just like in A280C. The recoil in this weapon is smaller which has a positive impact on how the rifle operates.
- ION Shot - increased damage to vehicles and shields, infantry damage reduced.
Level 4 - NT-242
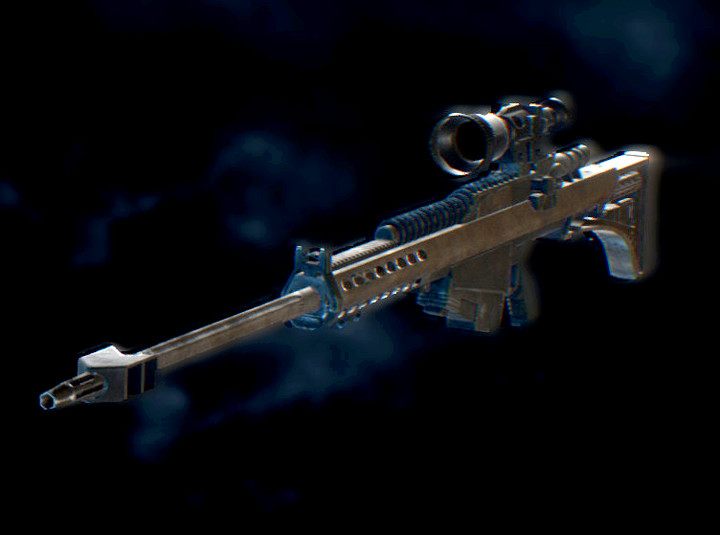
 | Clip: 3 rounds Reload: fast Use: long distance Accuracy: high Probably the most powerful weapon in the game. Can kill almost everyone with one headshot or two shots in torso. Works great even on support classes. Rate of fire is low but the weapon has great accuracy. Get Dual Zoom as fast as you can. | details |
Modifications:
- Dual Zoom.
- Improved Cooling - gives you one additional round in the clip.
- Disruptor Shot - an ION Shot: weaker against infantry, works great on vehicles and shields.
Star Cards
Here, you can find the list of all Star Cards for Specialist. Cards can be created out of crafting parts or found in crates. Each one of them has 4 upgrade levels that can improve abilities or reduce time of their recharge.
Boost Cards
Icon | Name | Effect | Note |
 | Stealth | You are invisible while shooting and deal more damage with melee attacks. | A very useful ability for a sniper - this class has no sidearms which means that you will have to use melee attacks a lot. |
 | Marksman | Headshot reduces weapon overheating and lowers amount of emitted heat until next overheating. | Effective only on medium distances (e.g. A208-CFE). |
 | Expert Weapons Handling | Effective weapon cooling lasts longer. | |
 | Brawler | Get a little bit of health and recharge your abilities after killing an enemy with a melee attack. | A very useful ability for a sniper - this class has no sidearms which means that you will have to use melee attacks a lot. |
 | Bodyguard | Reduces damage from explosions and toxins. | - |
 | Survivalist | Health regeneration starts sooner than usual. | - |
 | Bounty Hunter | You receive battle points faster. | - |
 | Resourceful | All abilities have a shortened recharge time. | - |
Abilities Cards
Icon | Name | Replaced ability | Effect | Note |
 | Improved Shock Grenade | Shock Grenade | Lasts longer and has greater radius. | - |
 | Stinger Pistol | Shock Grenade | Enemies hit with it can't regenerate, the pistol also deals a little bit of damage over time (additional damage to heroes). | A sidearm. Very low damage and accuracy. Not recommended due to ineffectiveness of its special effect that can be ignored a little bit by many characters. |
 | Repulsor Cannon | Shock Grenade | A shockwave with small blast radius, knocks enemies down. | There are 2 shots available. This weapon is useful when you know what to do with an enemy lying on the ground... (quick shot / melee / escape). |
 | Hardened Infiltration | Infiltration | Reduced damage while the ability is in use, shorter recharge. | The ability lasts 30 seconds (just like the basic version). |
 | Scramble Infiltration | Infiltration | Enemy scanners are jammed, your allies can see revealed enemies in your scanner's range. | A very good ability for team players. Duration: 20 seconds. |
 | Killstreak Infiltration | Infiltration | Killing enemies extends its duration. | - |
 | Improved Thermal Binoculars | Thermal Binoculars | Spotted enemies are marked on allies' scanners. | The most useful gadget for snipers. You can also use it to spot enemies: they will be marked on your allies' radars. |
 | Personal Shield | Thermal Binoculars | Creates a shield that blocks shots from all directions. You can't use weapons while it is active (but you can use melee attacks). | Good only for evacuations. Shield's durability isn't high even on its highest card level. You can be damaged if someone enters your shield. |
 | Trip Mine | Thermal Binoculars | A mine useful for traps. Can be placed on ground or on walls. Explodes when someone touches its laser. | Blast is powerful but it gets smaller really fast with distance from an explosion. Enemies who saw its laser won't get in your trap that easily. |
You are not permitted to copy any image, text or info from this page. This site is not associated with and/or endorsed by the Electronic Arts Inc. or EA DICE / Digital Illusions CE. All logos and images are copyrighted by their respective owners.
Copyright © 2000 - 2025 Webedia Polska SA for gamepressure.com, unofficial game guides, walkthroughs, secrets, game tips, maps & strategies for top games.
