Ratchet & Clank: Planet Batalia - Walkthrough
On this page of the guide to Ratchet & Clank, you will find a description of the tasks on the eighth planet - Batalia. Ice-bound planet Batalia is a place preoccupied with battle - you can hear gunfire all over the place, and the sky is full of flying machines. Your mission is to stop the Blarg invasion. To get here is a powerful missile launcher - Warmonger.
Frozen planet of Batalia is a place immersed in battle - artillery fire can be found almost everywhere, and the skies are filled with numerous flying objects. Your task here is to fight off the Blarg invasion on the planet. There will be a new weapon (Warmonger) to acquire here. Below you can find a detailed walkthrough of the location.
Items to unlock:
Warmonger - a weapon for purchase for 28,000 bolts.
Objectives:
Travel to the fort

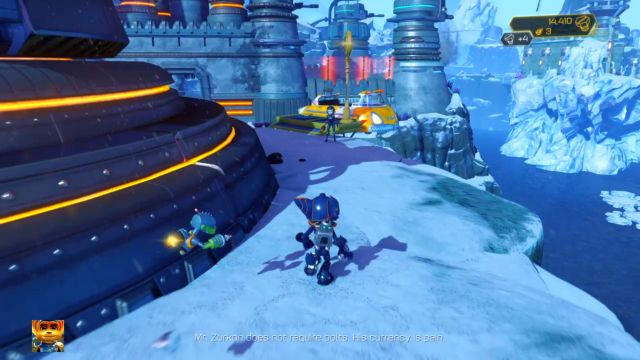
In contrast to other planets, you won't start right next to a store. After regaining control over your character, head to the platform located below your current position, and then use the harpoon to reach the next one. The store will be in this area - visit it in order to replenish health and ammo, or to upgrade your weapons. Additionally, there will be a new weapon for purchase here - Warmonger. This is an extremely powerful rocket launcher, dealing immense damage and allowing you to eliminate numerous enemies with a single rocket. The only drawback is the low amount of rockets you can carry, but that can be diminished a bit with upgrades.

After you're done shopping, ignore the platform leading upwards and head along the street, eliminating the enemies along the way. There will be some heavily-armored enemies here - a perfect opportunity to test out the Warmonger.
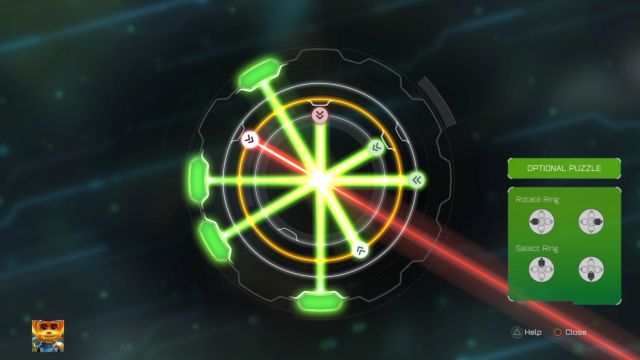
On your left side there will be a terminal with a Trespasser Puzzle - a proper arrangement of lasers can be found on the above screenshot (as well as in the chapter about this activity). Inside of the room you've just opened is one of the RYNO cards, or to be more specific the "IV" one.

Collect it and destroy nearby boxes. Leave the room and stand next to the Trespasser terminal again. On the sides of the entrance to the room you've just cleared there are walls that can be used to climb to the top of the building. Do so and pick up a Gold Bolt from the roof.

Jump down and continue along the street to reach a character awaiting you. Jump across the destroyed bridge and get rid of the enemies located there. You should soon reach a place with a hidden bridge. You must jump down (from the place the bridge should begin) and interact with the mechanism to draw the bridge so that it can be used to reach the other side. Eliminate the enemies, interact with the mechanism and get back on top.
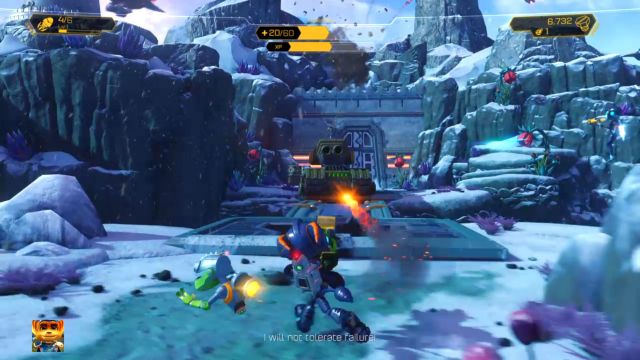
A heavily-armored tank will appear on the bridge you've just set up. The Warmonger is a perfect tool to get rid of it - 3 or 4 rockets should suffice to destroy the target. If you want to prevent the enemy from hitting you, stay in motion and jump from one side to the other. Cross the bridge but don't go to the left side yet.
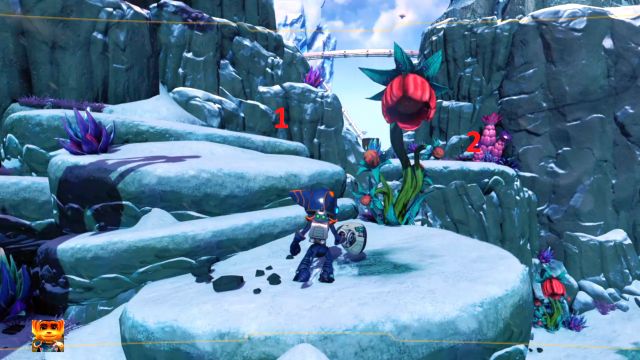
Instead, go to the right, climb up the ledges and jump to the other side. Jump on top of a small ledge with three boxes on it, destroy them, and continue straight ahead. Soon you should reach another Gold Bolt.
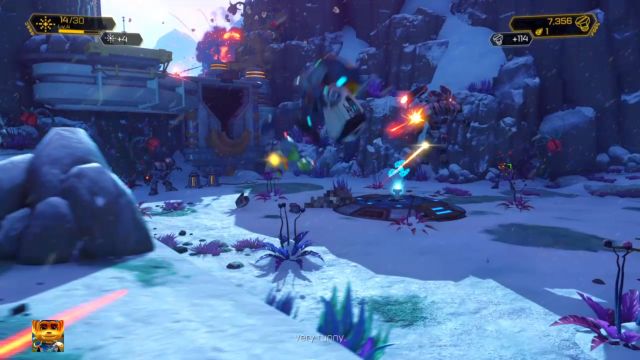
Get back to the place you've reached after crossing the bridge and head to the left. Slide down the frozen slope to reach a place filled with various types of enemies. The key is to remain in motion so that the attacks of your enemies won't reach you. After eliminating all the foes in the area, interact with the nearby mechanism to draw a second bridge and get back on top of the mountain.
Get to the Turret

There will be a store located on the other side of the bridge. Use this opportunity to replenish your supplies and upgrade your weapons. Leave the store and go a little further to activate a cut-scene, as well as a new objective. After regaining control, climb up the magnetic ramp on the left side.

You must get to the other side while avoiding contact with numerous traps. The lasers are easy to dodge (as all you have to do is jump above them) because they are moving slowly. There will be a single mine along the way - destroy it with a melee attack from the Omniwrench. At the end there's a flame trap - flames will erupt from the holes on the ground and will travel in a straight line like a firewall. Wait for the trap to activate and follow the trail - this will allow you to avoid taking damage from it.

You should soon reach the fort. Start by clearing the area of the enemies. Afterwards, climb up on the wall by using the pathway located in front of the hole in the wall you got here through. At the top of the wall there's a mechanism - interact with it to open the passage for your teammate. After you've done it, a new group of enemies will arrive at the fort - eliminate them.

Head towards a large building resembling a palace. When you reach it, the wall will be destroyed and a pair of tanks will emerge from inside of it. The easiest way to deal with them is to use the Warmonger - 3 or 4 rockets aimed at one of the tanks should be enough to get rid of both of them. Clear the area of any remaining enemies.

Before you use the mechanism located inside the area the two tanks came from, head left (looking from the side you came from) and go through a small breach in the wall. Afterwards, climb up the wall by using your Helipack (activated by pressing R1 button) and head to the right, where a Golt Bolt will be located. If you have problems with reaching the wall, head to the "Gold Bolt" section of this guide where a video showing the process can be found.

Get back down and activate the mechanism mentioned in the previous paragraph. It will open the passage and the bridge leading to the artillery. Activate the terminal right next to it - the proper arrangement of lasers can be found on the above screenshot. Afterwards, use the stairs to the left of the terminal to reach the top of the artillery and interact with it.
Destroy the Battleships

After seizing control over the AA battery, you will be given a new task - to destroy 4 enemy Battleships. Unfortunately, those are immune to the regular attacks of the battery you're using, and can only be destroyed with the ion cannon. The cannon needs time to charge - the progress of the charging can be checked by looking at the 7 squares located on top of the screen.

The ion cannon will charge slowly on its own, but you can speed up the process by destroying smaller enemy ships - this time with the machineguns. Additionally, it must be used to destroy the rockets that the enemies will launch at you. The battery has limited durability - if you take too much enemy fire it will be destroyed and you will have to start over from a checkpoint.
Charge the ion cannon and shoot at the enemy Battleships whenever it is ready. After you destroy all 4 of the enemy ships the objective will be completed and you will fight off the enemy invasion. Jump into the "taxi" which will take you to the starting point of your journey on this planet. Visit the shop, purchase whatever you need, leave it and head along the platform leading upwards.
Ride the rail

Jump on the rail to begin the grind. This section is relatively simple, as there aren't many traps and objects that can hurt Ratchet. At the first meeting point of two rails jump on the one located on the left side. Ignore the next rail located on the right side and continue along the one you're currently grinding. This will allow you to collect a holocard. Don't jump on the rail located directly behind the holocard. Instead, do a full round on the rail you're grinding on and then jump on the one located on the left side.

Grind to the very bottom of the looped rail and jump on the second one located on the right side. Ignore the rail on the left side as there's nothing there to collect. Continue the grind and avoid the obstacles on your wait - first by jumping to the left side and then immediately to the right side. Soon you will reach the destination of your grinding journey, which will activate a cut-scene with an infobot.
Use the nearby teleport to get back to the store, head back to the ship and use it to get to planet Quartu.
- Ratchet and Clank Game Guide & Walkthrough
- Ratchet & Clank: Game Guide
- Ratchet & Clank: Walkthrough
- Ratchet & Clank: List of planets
- Ratchet & Clank: Planet Veldin - Walkthrough
- Ratchet & Clank: Planet Novalis - Walkthrough
- Ratchet & Clank: Planet Kerwan - Walkthrough
- Ratchet & Clank: Planet Aridia - Walkthrough
- Ratchet & Clank: Planet Rilgar - Walkthrough
- Ratchet & Clank: Planet Nebula G34 - Walkthrough
- Ratchet & Clank: Planet Gaspar - Walkthrough
- Ratchet & Clank: Planet Batalia - Walkthrough
- Ratchet & Clank: Planet Quartu - Walkthrough
- Ratchet & Clank: Planet Pokitaru - Walkthrough
- Ratchet & Clank: Deplanetizer - Walkthrough
- Ratchet & Clank: Planet Kalebo 3 - Walkthrough
- Ratchet & Clank: Deplanetiser, revisit - Walkthrough
- Ratchet & Clank: Walkthrough
- Ratchet & Clank: Game Guide
You are not permitted to copy any image, text or info from this page. This site is not associated with and/or endorsed by the developers and the publishers. All logos and images are copyrighted by their respective owners.
Copyright © 2000 - 2026 Webedia Polska SA for gamepressure.com, unofficial game guides, walkthroughs, secrets, game tips, maps & strategies for top games.
