
Desperados 3: Mission 13 - map, badges
Last update:
This page of the World Atlas for Desperados 3 includes a detailed map of Mission 13 - A Cart Full of Gunpowder. You will find first and foremost all information about the main areas of the mine and how to reach them. In addition, we have prepared a transition description for the (badge) challenges. You'll find out m.in. where and how Dynamite can be used.
The full Mission 13 walkthrough can be found on the following pages of this chapter. Our walkthrough also contains links which refer back to the map. For example, the designation (M13,5) indicates that you should find a blue point numbered 5 on the map for Mission 13.
Mission 13: Markings on the map
- The red dots symbolize the opponents residing in the mine area, while the white dots symbolize other slaves from that location. They will not trigger an alarm even if you do some noisy activity in their surroundings.
- We have marked all important locations (worth visiting) with blue dots. Descriptions of these areas can be found just below the map.
Mission 13: General information
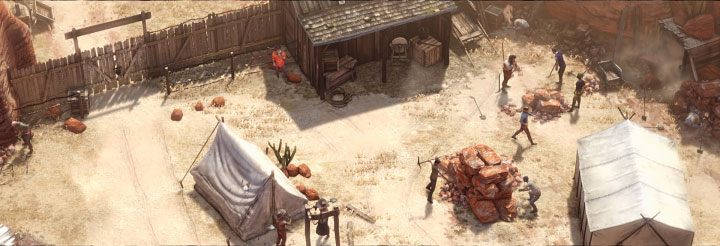
Mission 13 (A Cart full of Gunpowder) takes place in a mine which actually is a prison. Upon starting the Mission, 3 of the 5 Heroes (Isabelle, McCoy, and Sanchez) will be forced to work in the mine. The heroes begin the mission without weapons or equipment, and initially, only a few skills unrelated to the use of items from the inventory will be available. Your first priority will be to recover the equipment taken from the main characters.
Cooper and Kate are imprisoned in cages at the opposite end of the map. This means that for a large part of the mission, no activities can be performed at all. It is only in the final stages of the stage that the opportunity arises to liberate them, though even then only Kate will be able to use her skills and equipment.
The mission revolves around pushing a cart filled with gunpowder. This can seem like a big challenge, especially since the vehicle can explode after an enemy attack and cause the mission to collapse. Fortunately, this Problem can be easily neutralised by clearing the area around the tracks well in advance. You will be able to push the car to its destination even after you have cleared the entire map of all the opponents. While pushing the wagon, the track branches off and a different challenge is associated with each of the available 2 tracks.
Playable characters:
- Sanchez - he is in a labor camp (M13,1) and you can control him from the beginning of the mission. Sanchez's equipment can be recovered in the upper camp (M13,2).
- McCoy - is in a labor camp (M13,1) and you can control him from the beginning of the mission. McCoy's equipment can be recovered in the upper camp (M13,2).
- Isabelle - she is in a labor camp (M13,1) and you can control her from the beginning of the mission. Isabelle's equipment can be recovered in the upper camp (M13,2).
- Kate - she is imprisoned in a cage at the other end of the map (M13,15). The cage must be opened by McCoy. Kate will automatically recover all the equipment.
- Cooper - he is imprisoned in a cage at the other end of the map (M13,15). The cage must be opened by McCoy. Unfortunately, due to his injuries, Cooper will not be able to attack anyone and will not be able to use his skills and equipment.
Mission 13: Badges / Challenges
In Mission 13 there are 8 unlockable Badges. We have listed and explained them below. The challenges are initially hidden, although you can still unlock them during your first playthrough.
Challenges are unavailable if you play on the Beginner difficulty level. In order to access the challenges, you need to choose at least the normal difficulty level. The same goes for replaying missions to get the remaining challenges.
- Traverse the mine on the left side
- Traverse the right side of the mine
- Don't pick up the dynamite - Don't pick up the dynamite
- Kill 20 opponents with dynamite-Kill 20 people with dynamite
- Don't use Isabelle's connect ability
- Pick up McCoy's gear
- Speedrun: Complete the mission in under 15:00 minutes
- Complete the mission on Hard difficulty
Traverse the mine on the left side
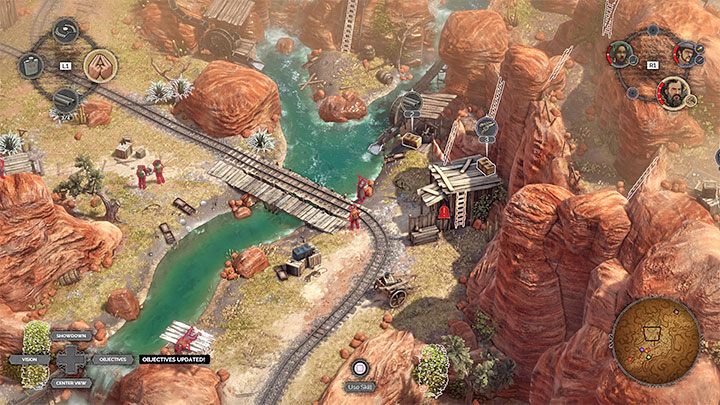
This and the next challenge are mutually exclusive. Even if you return to the starting point after going through the left part of the map and decide to go through the right part of the mine as well, the game will not unlock a second challenge as part of the same mission approach. Remember this when repeating a stage and choose a different path than before.
The choice of path is made after reaching the area with the mining wagon (M13,4). Choose the left path shown in the image (M13,6). You get the challenge at the end of it and you don't have to push the weight straight away.
Traverse the right side of the mine
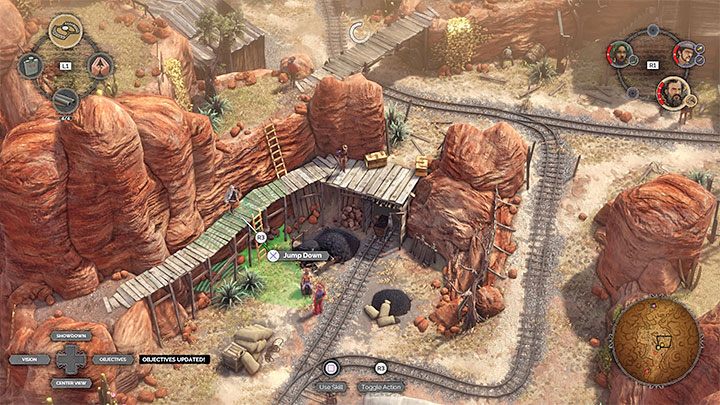
The choice of path is made after reaching the area with the mining wagon (M13,4). Choose the right path shown in the image (M13,10). You get the challenge at the end of it and you don't have to push the weight straight away.
Don't pick up the dynamite - Don't pick up the dynamite
It's a very easy challenge. A crate with dynamite can be found in the final part of the map, near the blast-proof gate (M13,16). Don't interact with the box. You won't need dynamite at all. What's more, using it is not appropriate to "quietly" pass the mission.
Kill 20 opponents with dynamite-Kill 20 people with dynamite
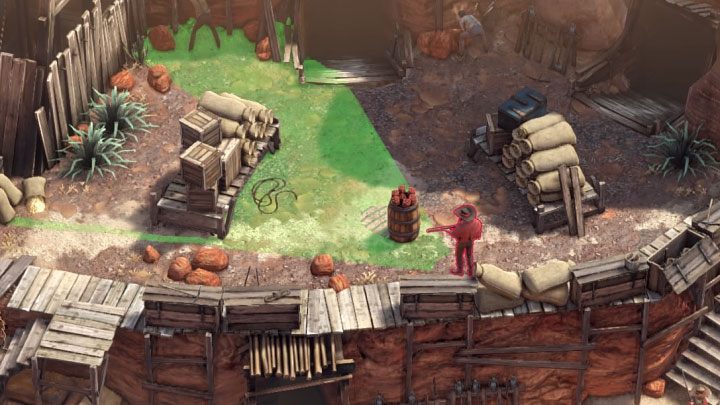
This and the challenge described above are mutually exclusive. This Badge is best used when repeating missions at a easy level of difficulty, and this is because any dynamite stick explosion will trigger an alarm.
The dynamite box can be found at the end of the map, which is in the back area of the mine. It is in a location with a large number of cave entrances (M13,16). As this area is being watched by opponents from the upper echelons, you should deal with some of them first. But don't kill too many nearby opponents to have someone to throw dynamite at later.
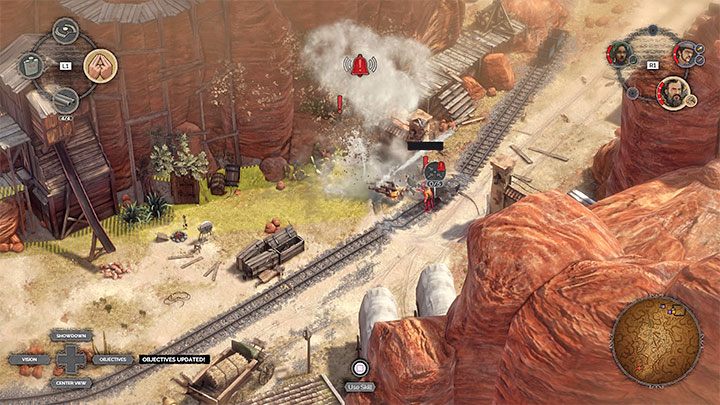
After you pick up the dynamite, you have a certain amount of time to throw it before it explodes. Target larger groups of opponents. After the first explosion, an alarm will be raised. Two 4-man groups of opponents should appear on the map and these are another good targets to attack using dynamite. After each successful throw, you can hide in the bushes in case enemies go to check the area from which the throw was made.
Don't use Isabelle's connect ability
In theory, you can fight for this challenge when passing missions for the first time, although without using this ability, it will be much harder for you to get rid of enemies standing close to you. It is best to set aside the challenge to play the stage again at the easy difficulty level.
As a substitute for this skill you can rely on, for example, whistling, throwing a medicine bag or using perfume.
Pick up McCoy's gear
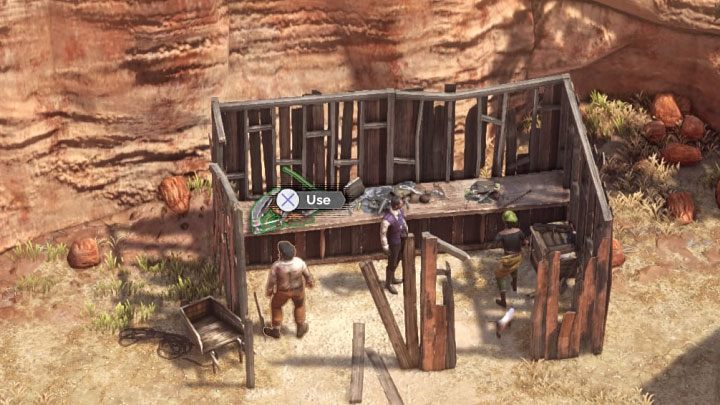
This challenge makes it difficult to travel across the map, and as a result, you will struggle to get it only when repeating the mission at the easy difficulty level.
Sanchez, Isabelle, and McCoy are able to recover the equipment taken from them soon after the start of the mission - it is stored in a damaged building in the upper camp (M13, 2). In order to unlock this Badge, don't pick up Hector's or Isabelle's belongings. This means you will not be able to use m.in. with WNYC, connection and mind control. Instead, it is allowed to rely on Hector whistling and sending Isabelle's cat to distract enemies. Hector and Isabelle will not become completely useless - they can still stun and bind opponents.
Speedrun: Complete the mission in under 15:00 minutes
Play on the easy difficulty level in order to encounter less problematic opponents on the map. Also, enemy reactions will be a little bit slower.
This mission traverses vast areas where the enemy's visual fields do not overlap as often as in some previous stages. Take advantage of this and eliminate or distract only those enemies that interfere with the completion of the mission. The left path (M13.6) should allow you to push the wagon a little faster. In the final part of the task, focus on opening the cages and getting rid of enemies set up by the tracks. Alternatively, you can try throwing dynamite to clear your way more quickly, without being noticed despite setting off an alarm.
Complete the mission on Hard difficulty
This is the best choice when completing the mission for the first time, but playing on a high level of difficulty means having to deal with uncomfortably positioned opponents. The mission described is much simpler. m.in. from those whose action took place in New Orleans. First of all, try to use sniper ammunition on a regular basis, because you'll find quite a lot of it. However, you can't renew the number using mind control, so leave that skill to your opponents from hard-to-reach locations. Fortunately, this challenge doesn't have a time limit, and you can save your progress freely.
You are not permitted to copy any image, text or info from this page. This site is not associated with and/or endorsed by the developers and the publishers. All logos and images are copyrighted by their respective owners.
Copyright © 2000 - 2026 Webedia Polska SA for gamepressure.com, unofficial game guides, walkthroughs, secrets, game tips, maps & strategies for top games.
