Uncharted 1: To the Tower - Chapter 9 walkthrough
Last update:
On this page of our guide to Uncharted Drake's Fortune you will find a detailed walkthrough of Chapter 9 - To the Tower. This stage also allows you to use a jet ski and this is combined with the elimination of another wave of enemies. In the further part of this chapter you have to come ashore and fight your opponents. Then you have to climb up over some ledges.
 |  |
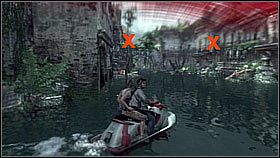
After passing through the gate, Drake stopped and Elena shot down two enemies.[1] There were three of opponents in the next area.[2] Also, Elena remembered to blow up the floating, explosive barrels.
 |  |
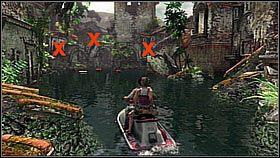
After sailing through another passage, two more shooters had to be defeated.[1] The situation was similar later on.[2]
 |  |
They have reached large ruins resembling castle walls. There were opponents on the left and on the walls. Heroes continued their journey. Another two enemies appeared - the one on the right had a grenade launcher.[1] After this encounter, our heroes had to get rid of the gate by shooting at its sides.[2]
 |  |
Then Nathan decided to search the area on his own. He went out on a small square and looked right into a narrow passage with water. On the other side he saw many enemies - he killed some of them from a safe position.[1] He swam through the muddy water and grabbed the edge on the other side - he killed a few enemies while hanging and then jumped out to reach the nearest cover and eliminated the rest of the bandits.[2]
 |  |
When it was safe, he climbed the building on the square and jumped onto the damaged balcony on the left. From there he moved on to the wall and then to another wall (L-shaped one). From there, he jumped on the single column which was in front of him and jumped further to the left in order to reach the balcony.[1] That's how he crossed the gate. On the other side, he immediately took cover - many enemies have arrived. More opponents appeared when Drake ran up to the second and third wall - he retreated and killed them from a safe spot. Behind the corner to the right, another group was waiting in the square. There was also an enemy equipped with a grenade launcher - he had to be eliminated quickly. [2]
 |  |
After Nate killed his enemies from this side, he ran further to the left into a row of columns - he saw his next targets straight ahead.[1] When he cleared the area, he used a grenade launcher obtained from the enemy he killed earlier (weapon was lying on the right side of the building). Then, he eliminated all enemies. Standing at the top, he quickly noticed two important things - a treasure in the corner of room (Golden Fish Charm (1)) and an exit (2).[2]
 |  |
Inside, Nathan met two opponents - he quickly eliminated them and activated the mechanism he found at the end. [1] Now he had to climb a chain to get to the higher level. A very difficult path was awaiting him - he had to climb up to reach the second chain mechanism. [2]
 |  |
When the chain moved to the other side, Drake had to circle the tower by using the ledges. When he got to a larger ledge (1) he made a jump to reach the next spot (2) and then he leaped to another ledge (3). From a fragment of the staircase he managed to reach the chain - he climbed up.[1] He defeated one enemy and went up until he got to the rope stretched over the water. He immediately descended from it.[2]
You are not permitted to copy any image, text or info from this page. This site is not associated with and/or endorsed by the Sony Interactive Entertainment or Bluepoint Games. All logos and images are copyrighted by their respective owners.
Copyright © 2000 - 2025 Webedia Polska SA for gamepressure.com, unofficial game guides, walkthroughs, secrets, game tips, maps & strategies for top games.
