Talos Principle 2: Grasslands Ring all puzzle solutions
On this page of our Talos Principle 2 guide you will find solutions to all Main Puzzles and Lost Puzzles in Grasslands Ring - Through the Door, Elevation, Entanglement.
Check out this guide Talos Principle 2 if you are having trouble with the main and missing puzzles in the Grasslands Ring. Here we show how to successfully solve even the most difficult puzzles, such as Self-Sufficiency, Castling, and Alternative Option.
- All puzzles
- Main Puzzle #1 - RGB Shifting
- Main Puzzle #2 - Reconnection
- Main Puzzle #3 - Castling
- Main Puzzle #4 - Alternative Option
- Main Puzzle #5 - Through the Door
- Main Puzzle #6 - Alternatives
- Main Puzzle #7 - Self-Sufficiency
- Main Puzzle #8 - Entanglement
- Lost Puzzle #1 - Elevation
- Lost Puzzle #2 - Interconnectivity
All puzzles
The Grasslands Ring in The Talos Principle 2 consists of:
- 8 main puzzles
- 2 lost puzzles
- 1 gold puzzle
- 1 lost lab
- 2 stars
Check out our video guide, in which we show you step by step how to solve the main and missing puzzles in the Grasslands Ring region. Gold puzzles will be unlocked when you solve all the main and missing puzzles in the game.
Main Puzzle #1 - RGB Shifting
- Pick up RGB Converter.
- With the RGB converter, make a connection between blue and green lasers, and finally connect it to the red button on the wall.
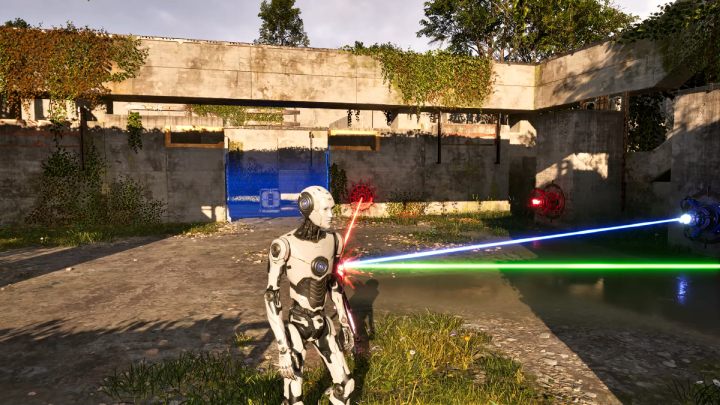
- When the barrier goes down, pick up the hexahedron and place it next to the green button.
- Pick up the RGB converter and make a connection between the red and green lasers and the blue button at the barrier.
- With the barrier removed, pick up the hexahedron.
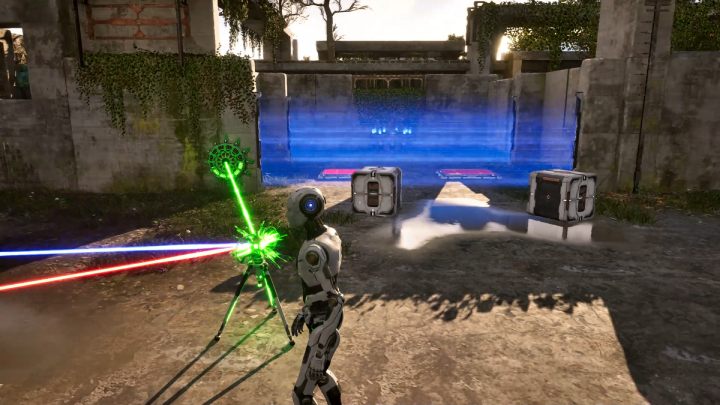
- Pick up the RGB converter and connect it with the red and blue laser. Connect it to the green button.
- Finally, place two hexahedrons on the platforms.
Main Puzzle #2 - Reconnection
- Connect the RGB converter to the green and blue lasers, and finally connect it to the red button.
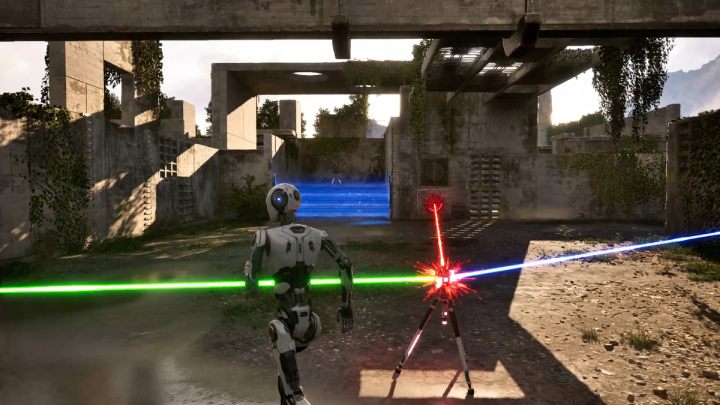
- Once the barrier is removed, bring the second converter around.
- Pick up the first converter and connect it to the red and blue lasers.
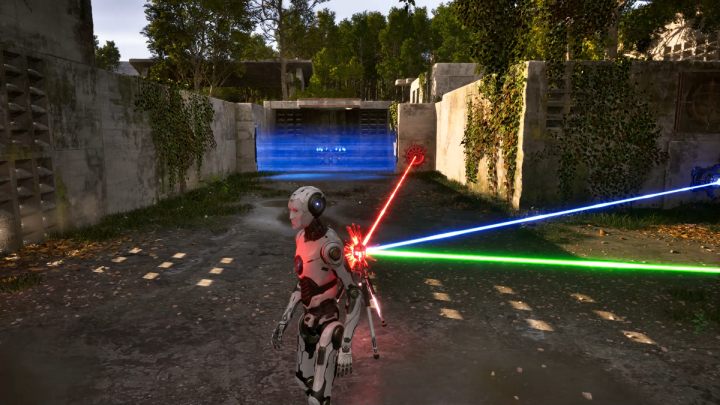
- Pick up the second converter and connect it to the first converter and the blue laser, finally connecting it to the red button at the terminal.
Main Puzzle #3 - Castling
- Take the RGB converter and place it on the platform near the barrier.
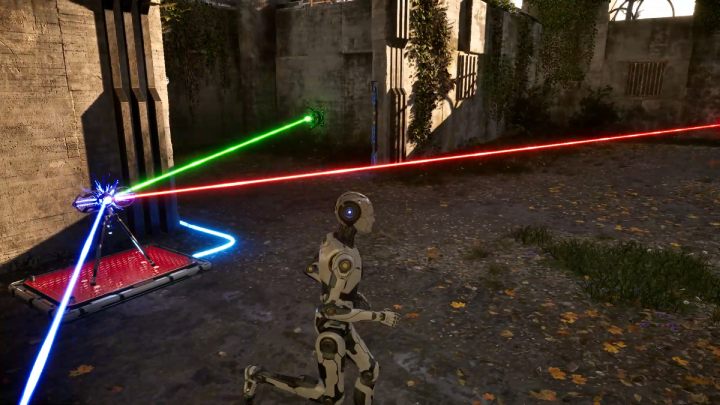
- Connect the RGB converter with the green and red laser and the blue button.
- Place the converter on the platform.
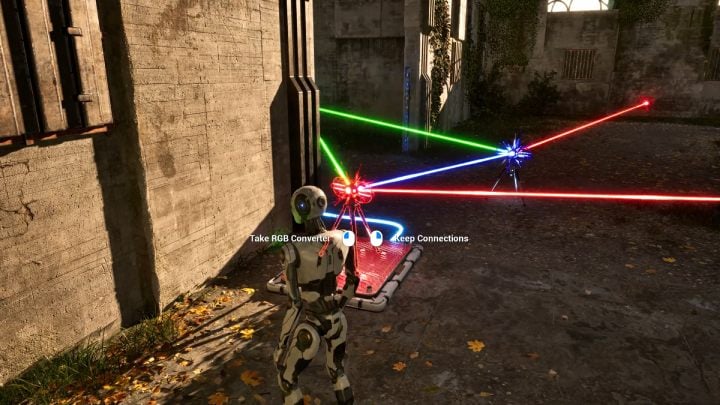
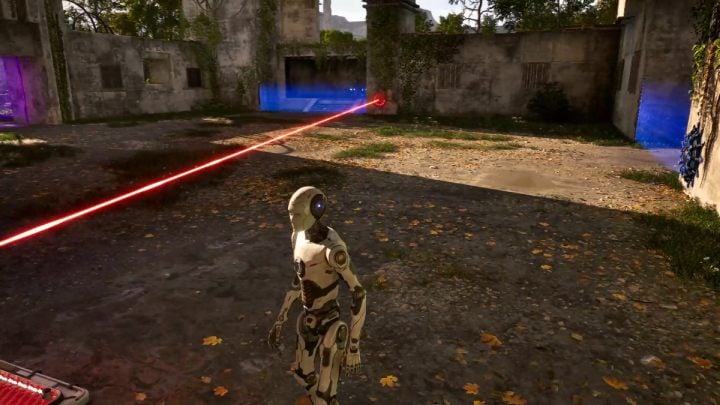
- Take the second converter and place it near the first.
- Pick up the RGB converter from the platform and make a connection between the green and red laser.
- Put this converter near the barrier.
- Pick up the second converter, connect it to the first converter and to the green laser, finally connecting it to the red button.
- Place this converter on the platform.
- With the barriers removed, you can now access the terminal.
Main Puzzle #4 - Alternative Option
- Pick up the converter.
- Turn on the switch on the wall and stand on the fan.
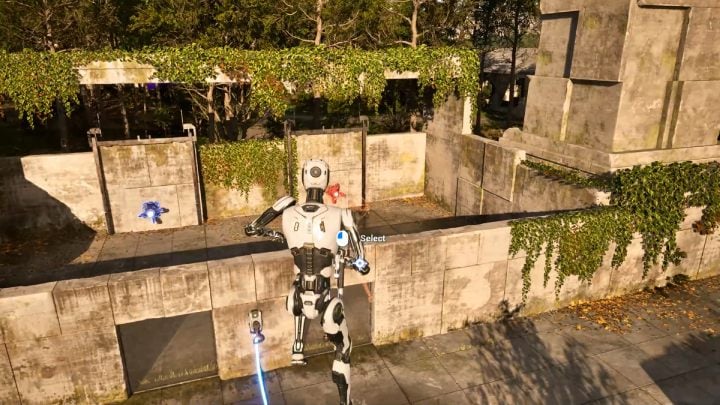
- When you are in the air, connect the RGB converter with the blue and red laser and the green button.
- Land on the surface and leave the converter.
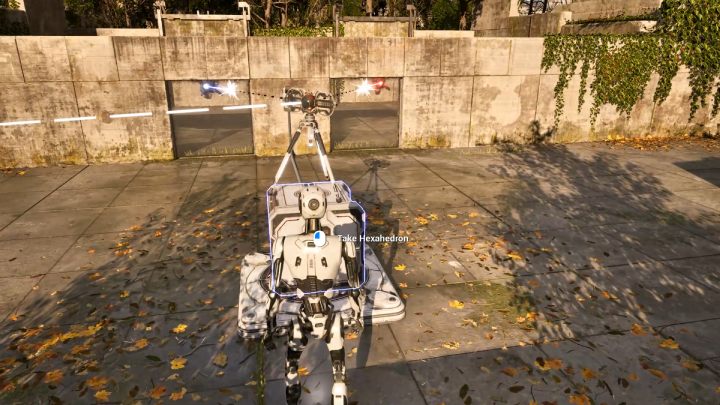
- Turn off the fan.
- Put the hexahedron on the fan.
- Maintaining the connection, place the RGB converter on the hexahedron.
- Turn on the fan.
- When the converter and the hexahedron go up into the air, the barrier at the terminal will deactivate.
Main Puzzle #5 - Through the Door
- Pick up the Connector and place it on the platform.
- Go past the purple barrier.
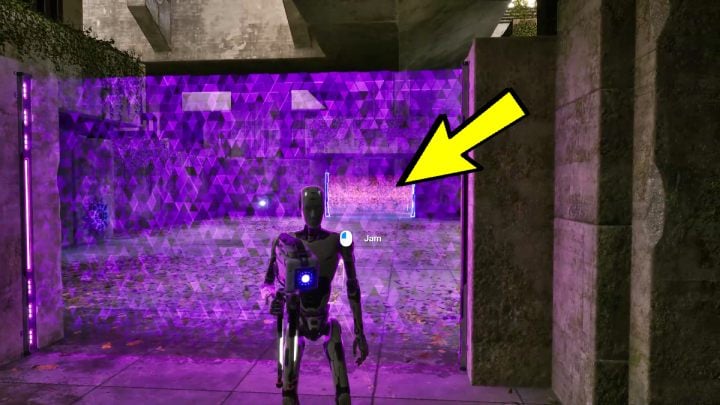
- Pick up the jammer and set it towards the opposite barrier.
- Go forward and pick up the RGB converter.
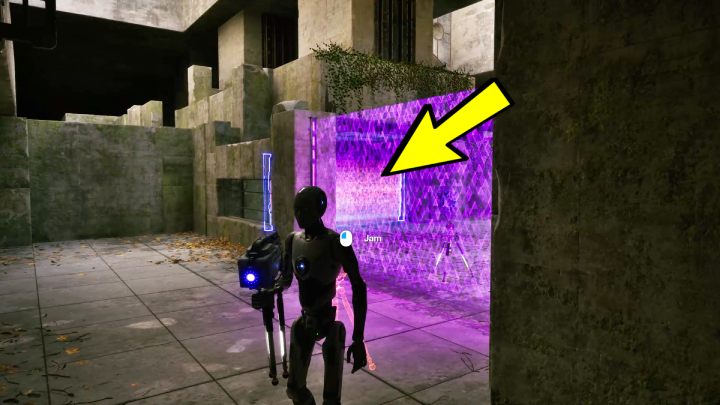
- Return to the jammer and set it towards the second barrier.
- Collect the converter and return to the previous room.
- Pick up the connector from the platform and put the converter in its place.
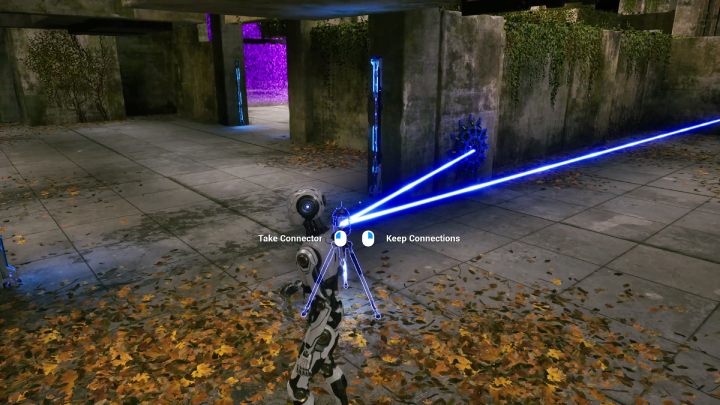
- Connect the connector with the blue laser and the blue button.
- Place the connected connector in the area shown in the screenshot above.
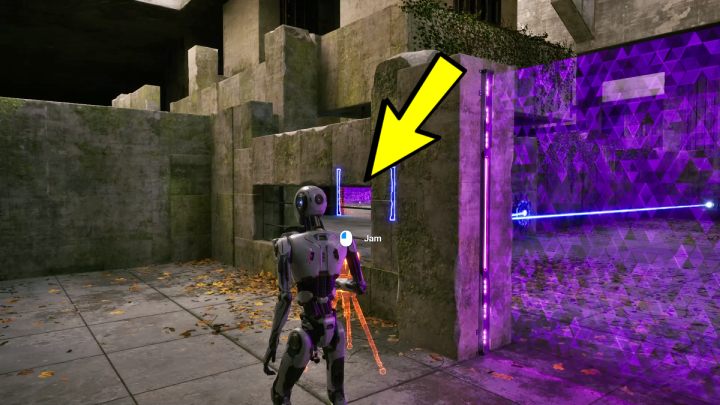
- Set the jammer to the last barrier.
- Take the RGB converter from the platform.
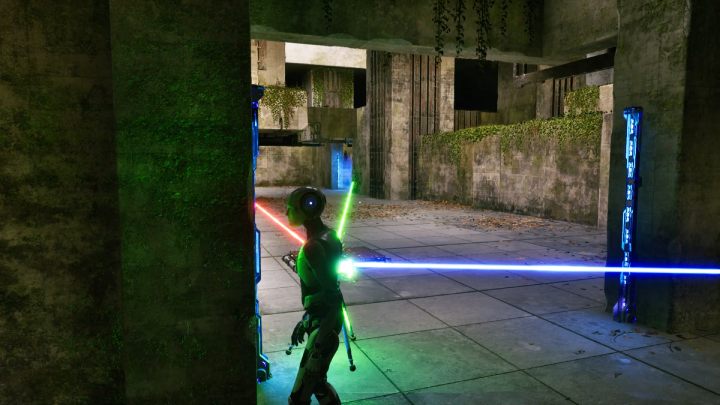
- Connect the RGB converter with the connector, red laser and green button.
- Put the converter in the place shown in the screenshot above.
Main Puzzle #6 - Alternatives
- Pick up the RGB converter and make a connection between the red and blue laser.
- Place the converter at the entrance to the puzzle.
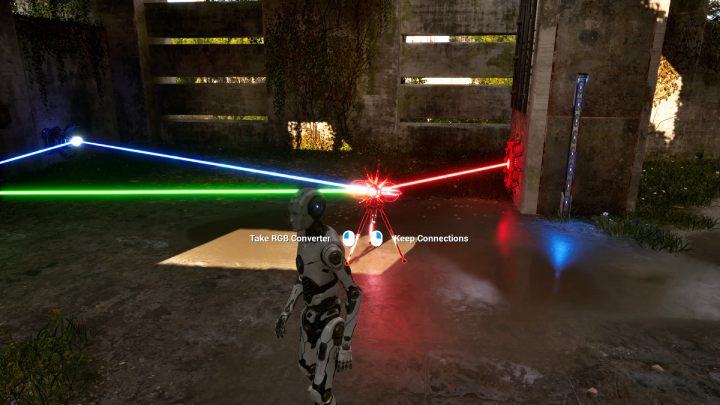
- Pick up the second converter and connect it with the first converter and the blue laser as well as the red button.
- With the barrier down, proceed forward.
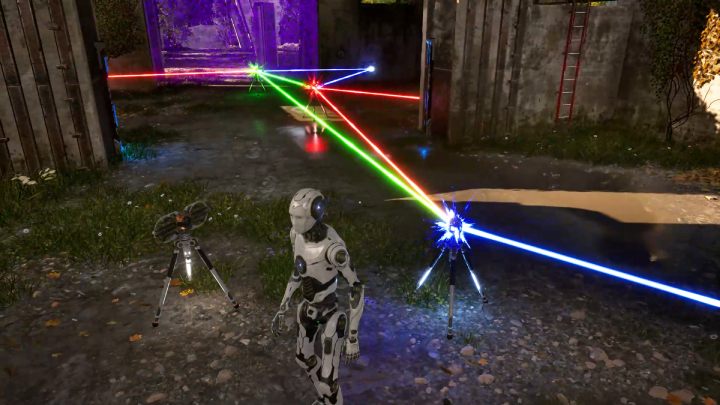
- Pick up the third converter and make a connection between the first (green) converter and the second (red) converter.
- Connect the third converter with the blue button.
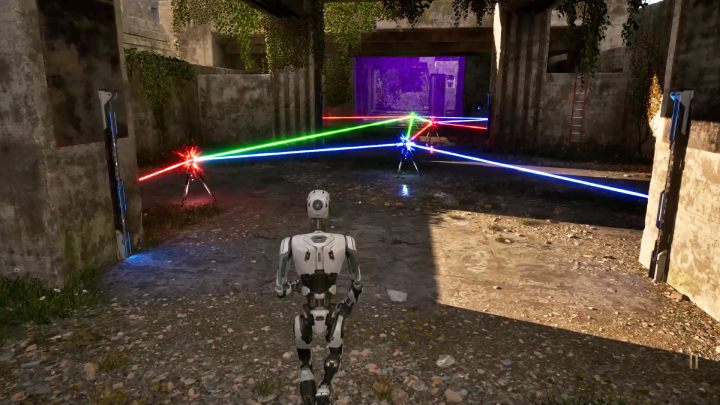
- Time to take the last, fourth converter.
- Connect the fourth converter with the blue converter and the green converter and the red button.
Main Puzzle #7 - Self-Sufficiency
- Pick up the fan.
- Place the fan on the platform next to the green button.
- Pick up the connector and place it next to the platform.
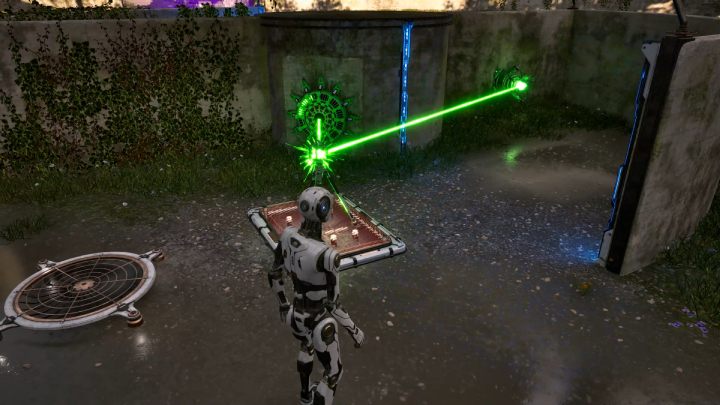
- Pick up the fan and place it aside.
- Pick up the connector, connect it with the green laser and the green button.
- Place the connector on the platform.
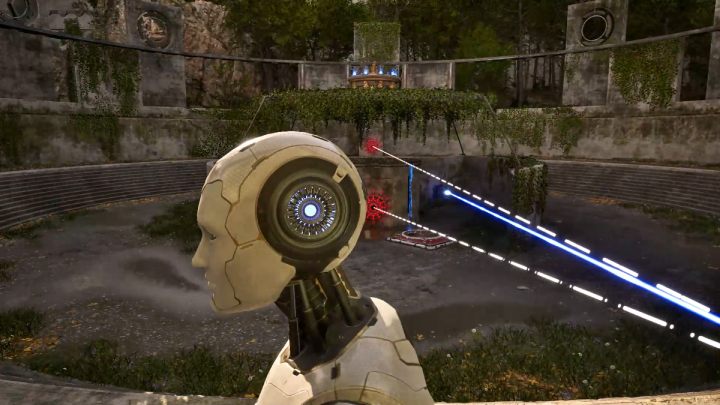
- Pick up the fan and place it on the platform next to the red button.
- Pick up the RGB converter.
- Make a connection between the two red buttons and the blue laser.
- Leave the RGB converter at the top of the stairs.
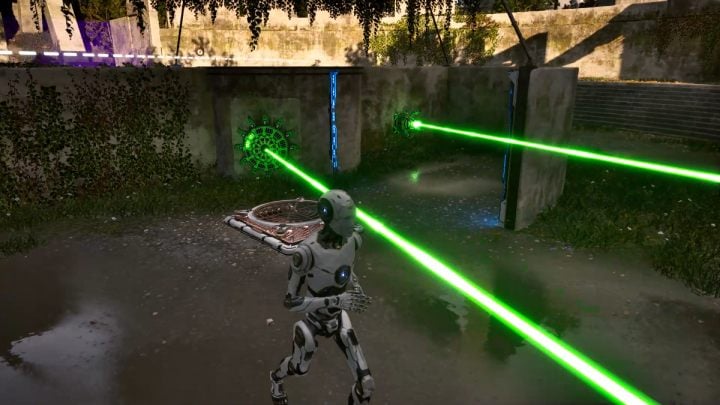
- Pick up the fan and leave it at the green button.
- Pick up the connector without breaking the connection and place it at the top of the stairs.
- Place the fan on the platform next to the green button.
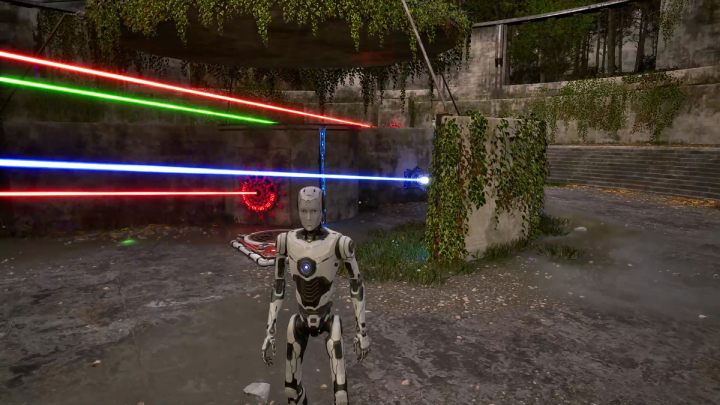
- Pick up the fan and put it on the platform next to the red button.
- Pick up the RGB converter without breaking the connection.
- connect the converter to to the connector.
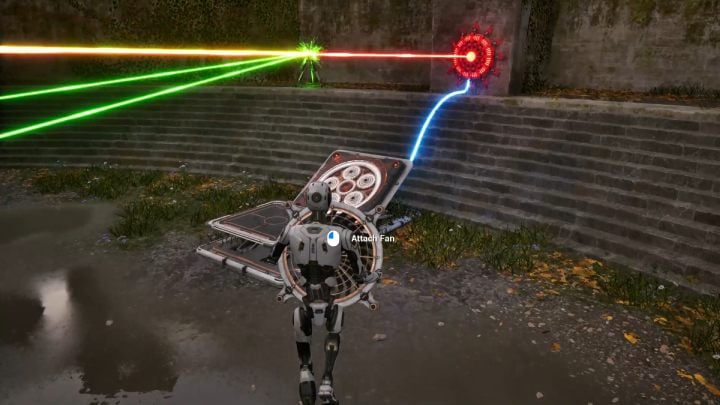
- When all the buttons are activated, you will be able to pick up the fan from the platform.
- Put the fan in its original place and jump into the gust.
- A Windstream will lead you to the terminal.
Main Puzzle #8 - Entanglement
- Pick up the connector and place it on the nearby platform.
- When the barrier is turned off, take the RGB converter.
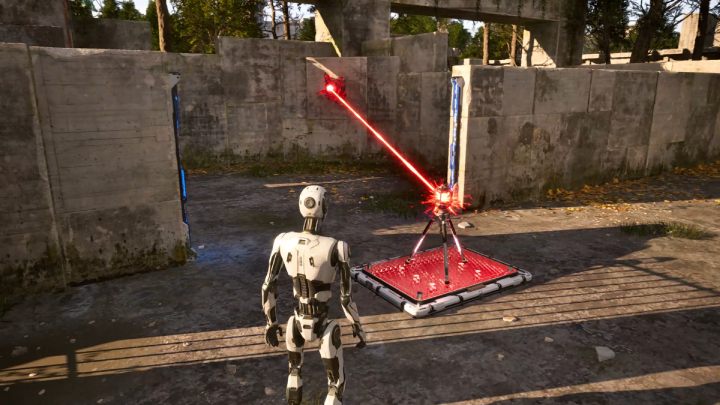
- Pick up the connector and connect it to the red laser.
- Put the connector on the platform by the red laser.
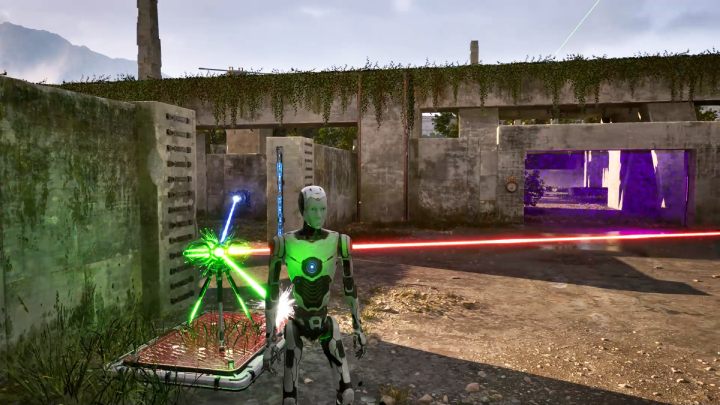
- Pick up the RGB converter and make a connection between the blue laser, the red connector and the green button at the barrier, behind which stands a hexahedron.
- Place the converter on the platform.
- Take the hexahedron.
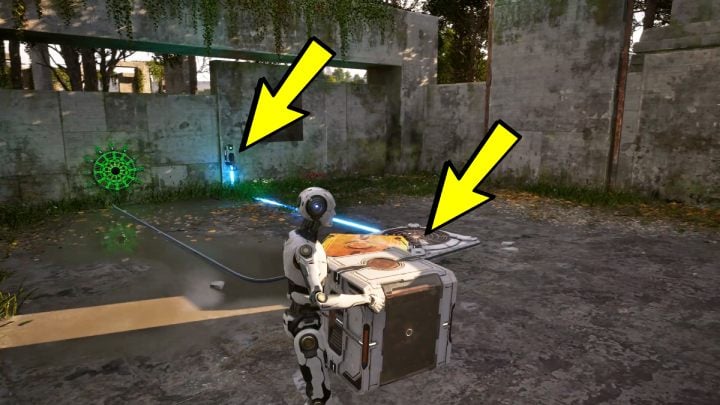
- Put the hexahedron on the fan.
- The switch on the wall must be turned on at all times.
- Pick up the converter to break the connection, and put it aside.
- Pick up the connector, breaking the connection, and place it on the second platform, where the converter stood just a moment ago.
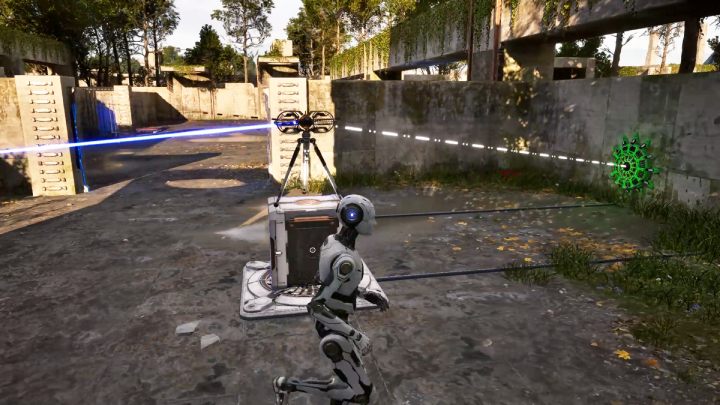
- Pick up the converter.
- Make a connection between the red laser and the blue laser.
- Add the green button next to the switch on the wall and the green button next to the terminal to this connection.
- Place the converter on the hexahedron.
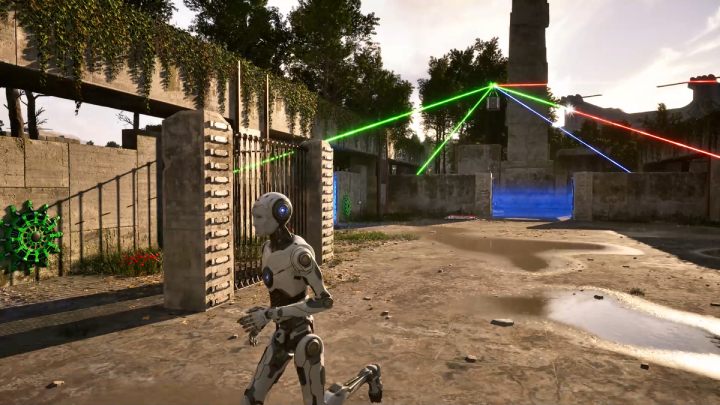
- Pick up the connector, connect it to the converter and the red laser.
- Put the connector on the platform by the red laser.
- Stand on the second platform.
- The hexahedron and with the converter should rise above the ground, but the laser will not yet reach the green button at the terminal.
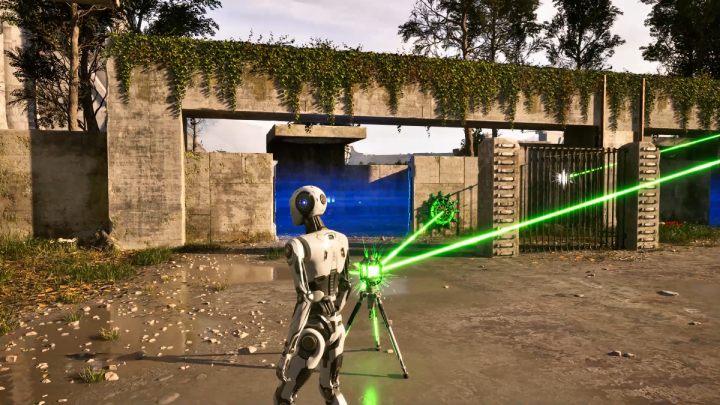
- Pick up the connector from the platform and break the connection.
- Make a connection between the connector, the converter and the green button, as shown in the picture above.
Lost Puzzle #1 - Elevation
This puzzle is encountered after Main Puzzle #4.
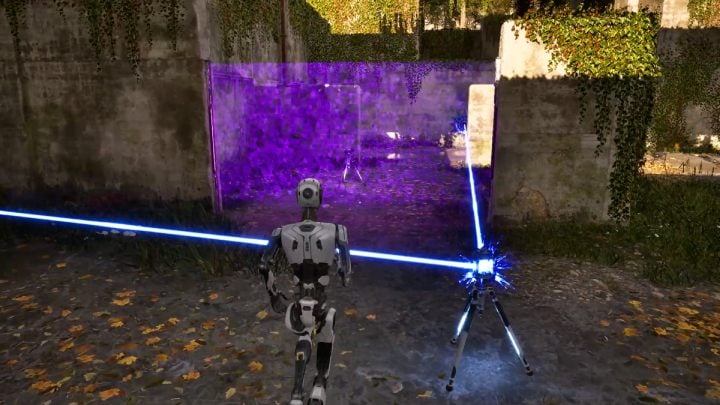
- Pick up the connector and make a connection between the blue laser and the blue button.
- Pick up the converter and place it on the platform.
- Take the hexahedron.
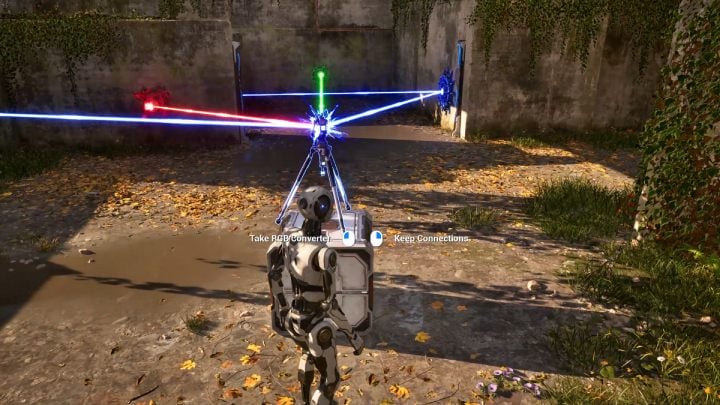
- Pick up the RGB converter, connect it with the green and red laser and the blue button.
- Place the converter on the hexahedron as shown in the screenshot above.
- Take the hexahedron on which you've placed the converter and place it on the platform.
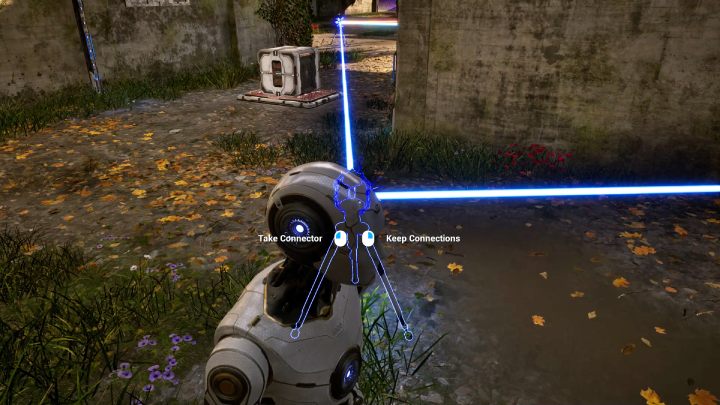
- Pick up the connector and connect it to the RGB converter and the blue button, as shown in the picture above.
Lost Puzzle #2 - Interconnectivity
This puzzle is encountered after Main Puzzle #7.
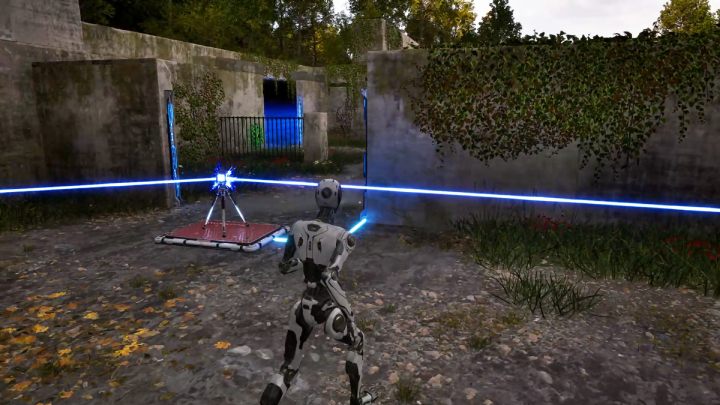
- Pick up the converter and place it on the platform.
- With the barrier down, proceed forward.
- Pick up the connector and place it on the platform
- Place the connector on the platform.
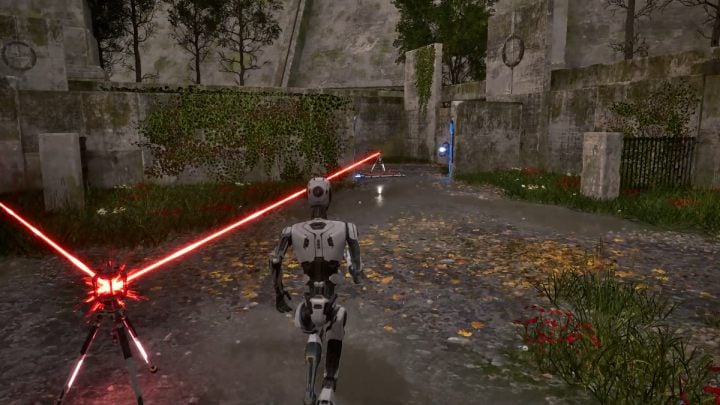
- Pick up the converter and place it at the connector.
- Pick up the connector and break the connections.
- Place the converter on the platform.
- Take the connector and make a connection between the converter and the red laser.
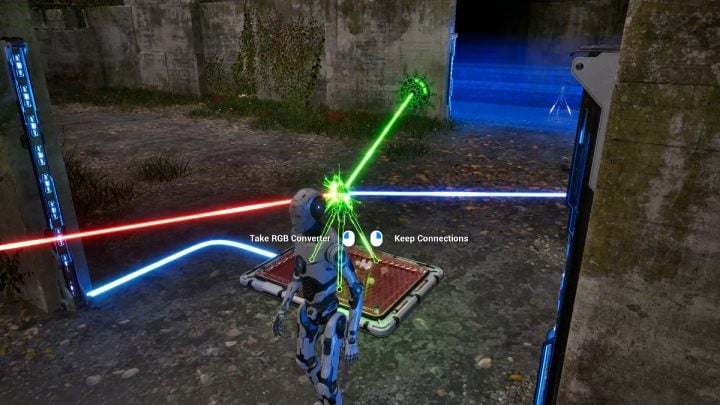
- Pick up the converter without interrupting the connection.
- Connect the converter with the blue laser and the green button and put it on the platform.
- In the new area available after turning off the barrier, pick up two connectors.
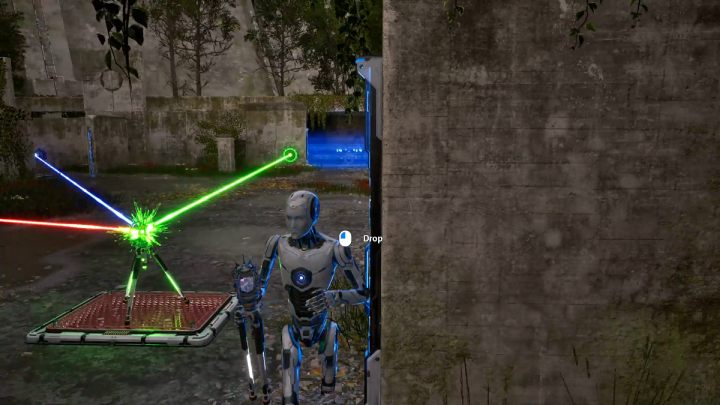
- Pick up the converter and sever the connection.
- Place one of the connectors on the platform where the converter just stood.
- Take the converter and go back to the first room of this puzzle.
- Make a connection between the red and blue laser and the green button at the terminal.
- Put the converter on the platform on which there is the connector.
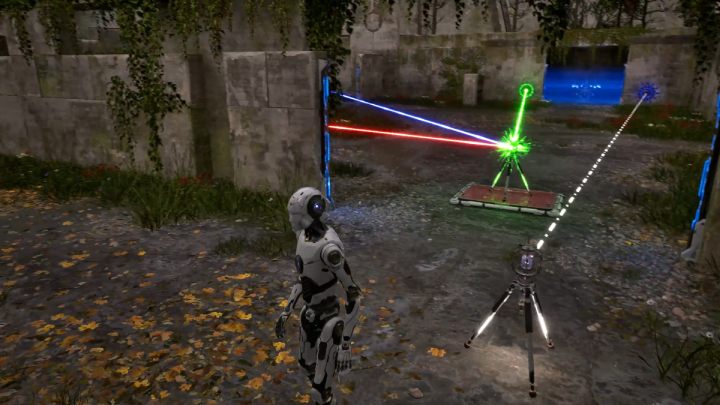
- Pick up the connector and connect it to the blue button on the terminal.
- Place the connector in the area shown in the screenshot above.
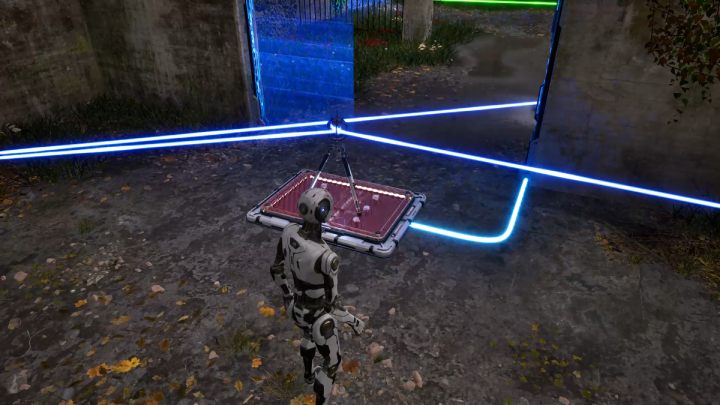
- Pick up the connector from the platform and connect it to the blue laser and blue button in the same room.
- Take this connector back to the platform.
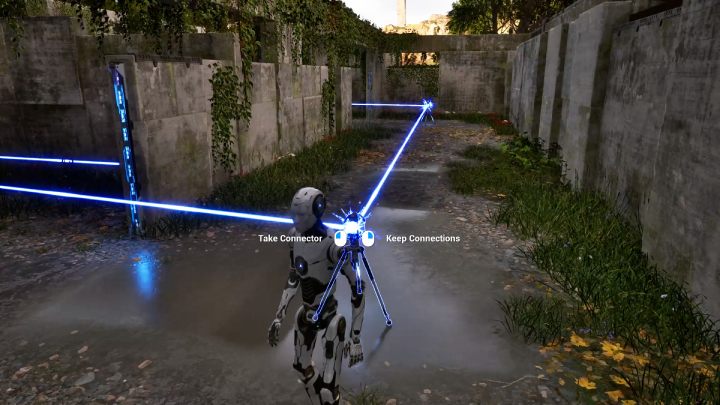
- Pick up the last connector and make a connection between the remaining two connectors.
- Move the connector to the area shown in the screenshot above.
- Now you can activate the terminal.
You are not permitted to copy any image, text or info from this page. This site is not associated with and/or endorsed by the developers and the publishers. All logos and images are copyrighted by their respective owners.
Copyright © 2000 - 2025 Webedia Polska SA for gamepressure.com, unofficial game guides, walkthroughs, secrets, game tips, maps & strategies for top games.
