Talos Principle 2: All puzzles in Eastern Wetlands
On this page of our Talos Principle 2 guide you'll find solutions to all the puzzles in Eastern Wetlands. You'll learn how to solve such puzzles as Imprisoned, Positional Interchange, Transposition.
The Eastern Wetlands are one of the locations you'll visit in Talos Principle 2. On this page of our guide, you can find step-by-step solutions to all Main and Lost puzzles appearing in this region. If a text-based walkthrough is not enough, our video guides will help solve even the most complex puzzles such as Refraction, Hidden, Backward Propagation, and Preconnected.
- All puzzles
- Inversion
- Energy Maintenance
- There and Back Again
- Refraction
- Imprisoned
- Hidden
- Backward Propagation
- Positional Interchange
- Transposition
- Preconnected
All puzzles
The Eastern Wetlands in The Talos Principle 2 consist of:
- 8 main puzzles
- 2 lost puzzles
- 1 gold puzzle
- 1 lost lab
- 2 stars
Our video guide will help you complete all the main puzzles and lost puzzles in the Eastern Wetlands region. The gold puzzle will be unlocked after solving all other puzzles in the game.
Inversion
- Pick up the first inverter.
- Make a connection between blue laser and the red button.
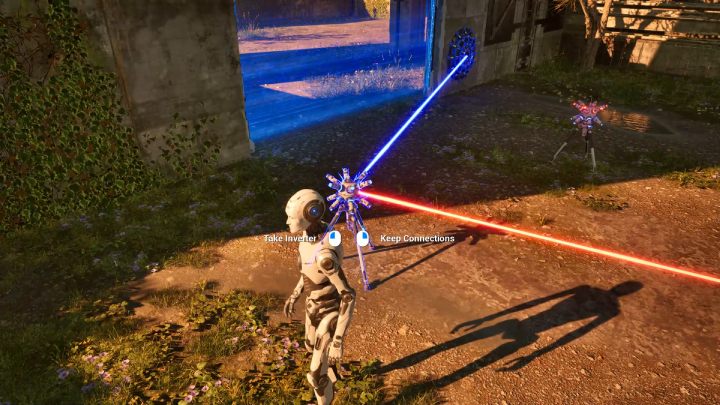
- With the barrier down, you can approach and pick up the second inverter.
- Pick up the first inverter and sever the connection.
- Make a connection between red laser and blue button.
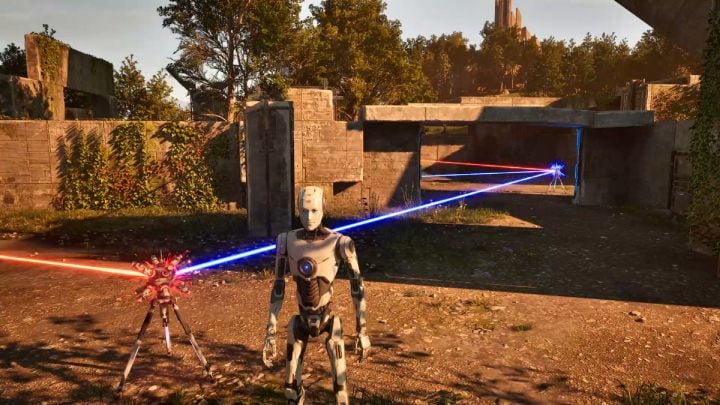
- Pick up the second inverter.
- Connect it to the first inverter and make a connection with the red button next to the terminal.
Energy Maintenance
- Pick up the first connector.
- Make a connection between blue laser and blue button.
- Pick up the inverter.
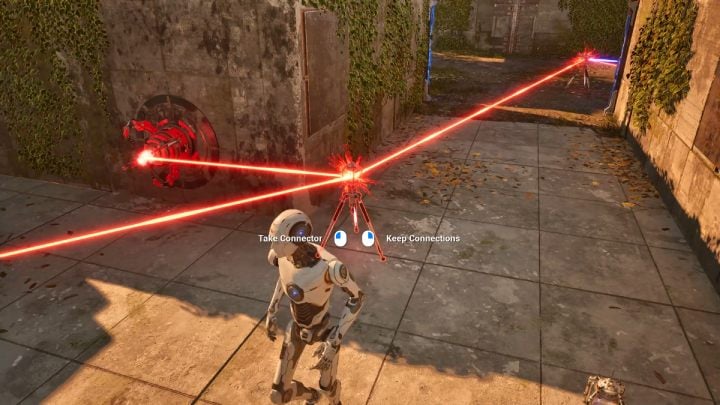
- With the inverter, make a connection between blue laser and red button.
- Pick up the first connector and break the connection.
- Make a connection between the inverter, red laser, and the red button next to the terminal.
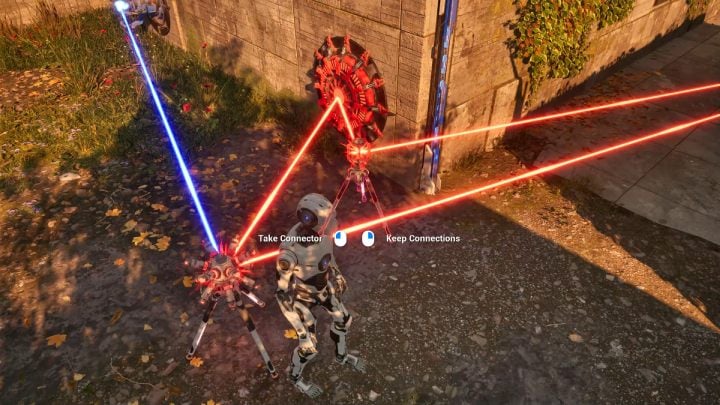
- Pick up the second connector.
- Connect it to the first connector and red button next to which there is the inverter as shown in the screenshot above.
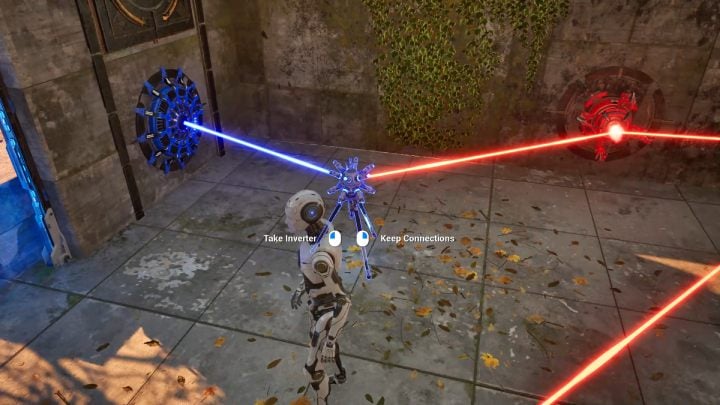
- Pick up the inverter and break the connection.
- Make a connection between red laser and blue button next to the terminal.
There and Back Again
- Pick up the connector.
- Connect the red laser with the red button.
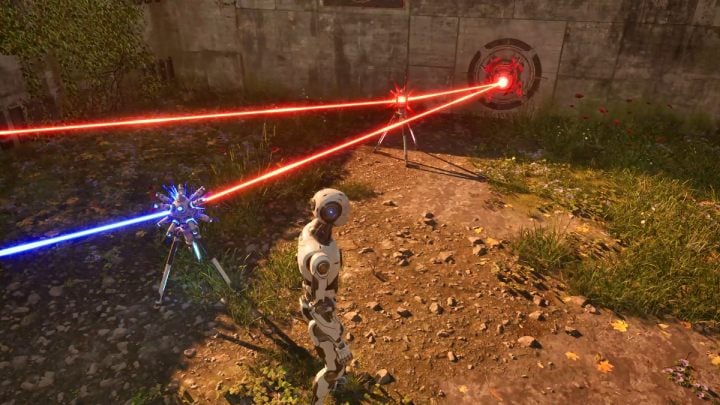
- Approach the inverter.
- Connect it to the connector and the blue button.
- The inverter and connector should be placed in the areas shown in the screenshot above.
- You can now pick up the connector.
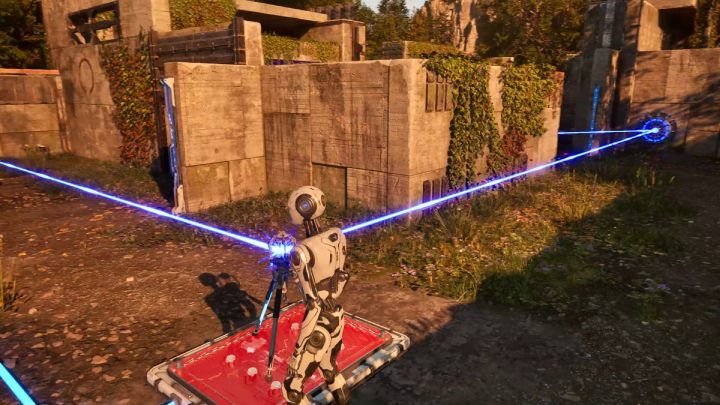
- Make a connection with the blue button to which you have an inverter connected.
- Connect the whole to the blue laser.
- Place the connector on the platform.
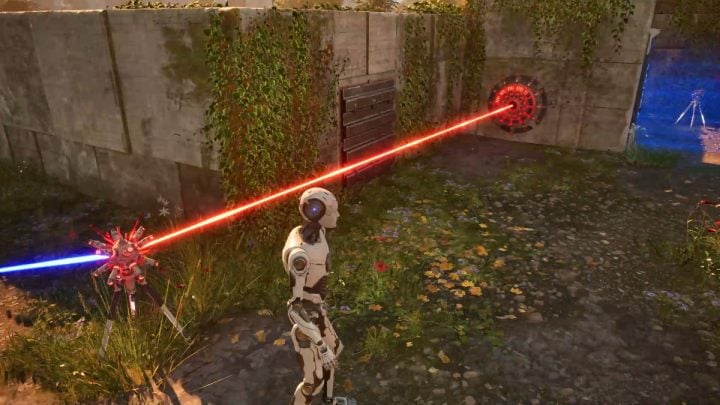
- Pick up the inverter and break the connection.
- Connect the inverter to the connector and to the red button next to RGB converter.
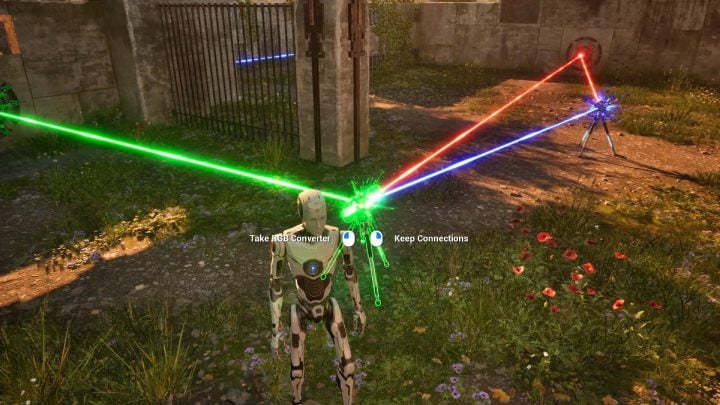
- Pick up the converter and leave it near the barrier behind which there is the terminal.
- Pick up the inverter and break the connection.
- Connect the inverter to red button and leave it in the middle of the room.
- Connect the converter to the red button and the inverter.
- Now connect the whole to the green button.
Refraction
- Pick up the first inverter.
- Make a connection between blue laser and the red button.
- With the barrier down, proceed forward.
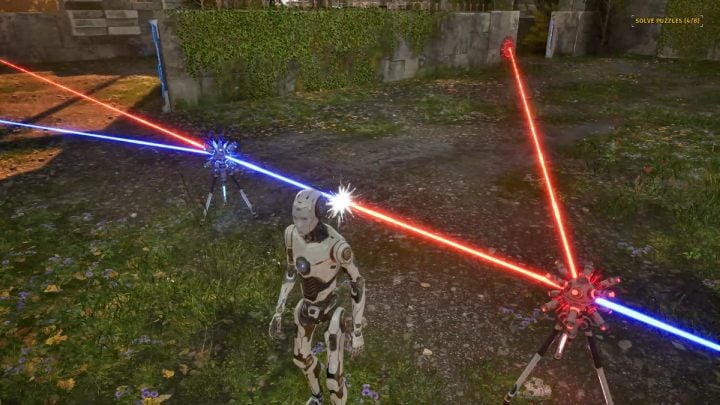
- Pick up the second inverter.
- Return to the previous room.
- Connect the second inverter to the first inverter, blue button and red laser which is obscured by the barrier.
- Now you can pick up the first inverter.
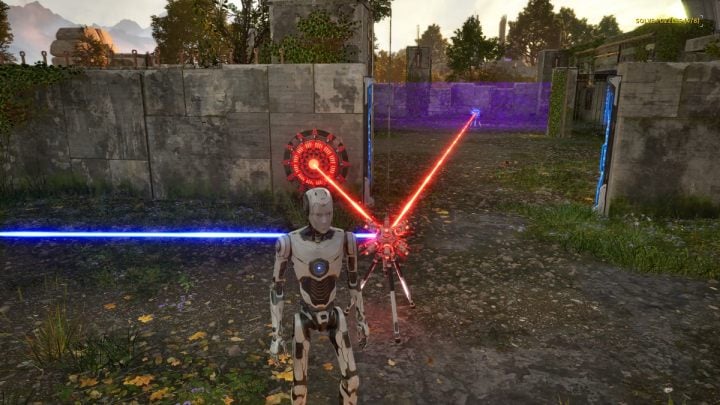
- Connect the first inverter to the second one and add the red button by the barrier and the third inverter behind the barrier to the link.
- Leave the first inverter in the area shown in the screenshot above.
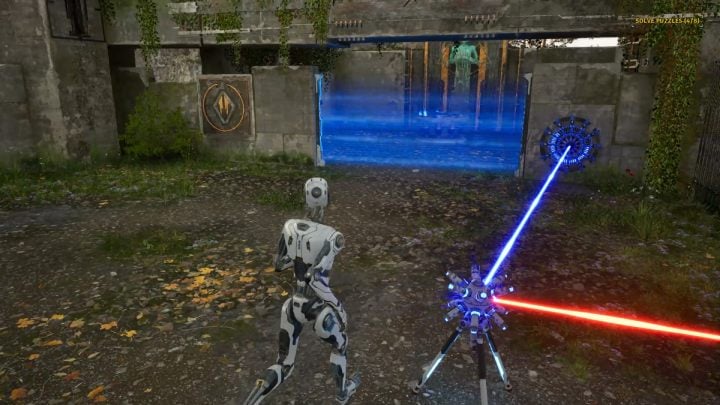
- Pick up the third inverter without breaking the links.
- Add the blue button to the connection.
Imprisoned
- Activate the switch on the wall.
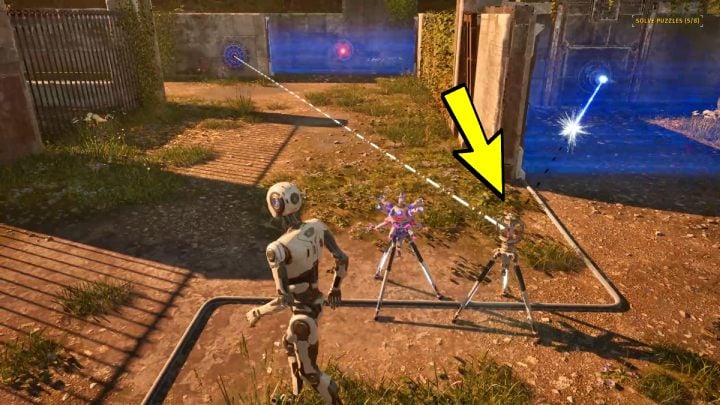
- Pick up the connector and make a connection between the blue laser and the blue button.
- Leave the connector in the area shown in the screenshot.
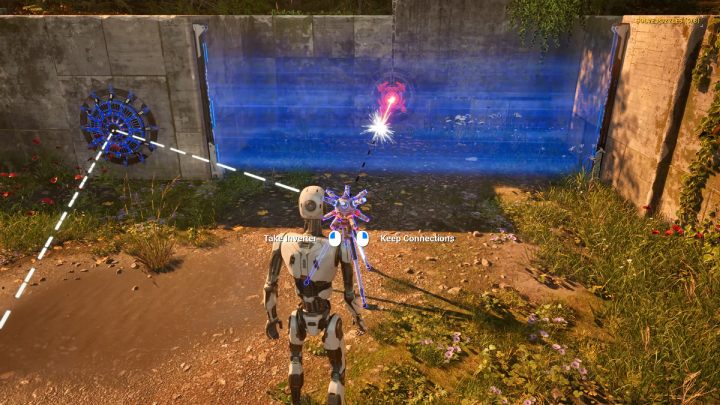
- Pick up the inverter.
- Create a connection between the red laser and blue button to which you already have the connector connected.
- Leave the inverter in the area shown in the screenshot above.
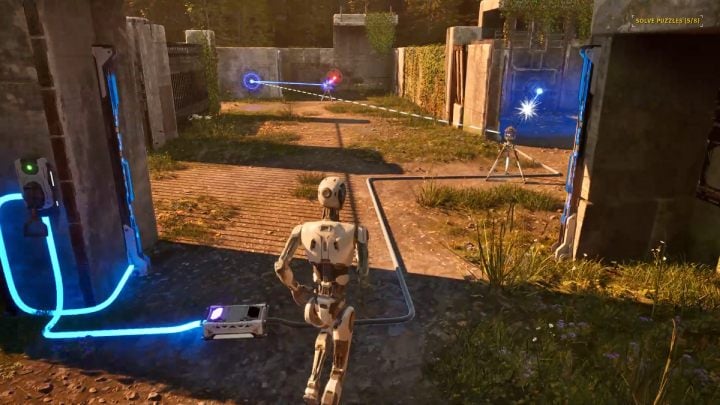
- Activate the switch on the wall.
- Both barriers should be disabled.
- Activate the switch on the wall again.
- The barrier in front of the inverter should be turned off, while the barrier in front of the connector should remain active.
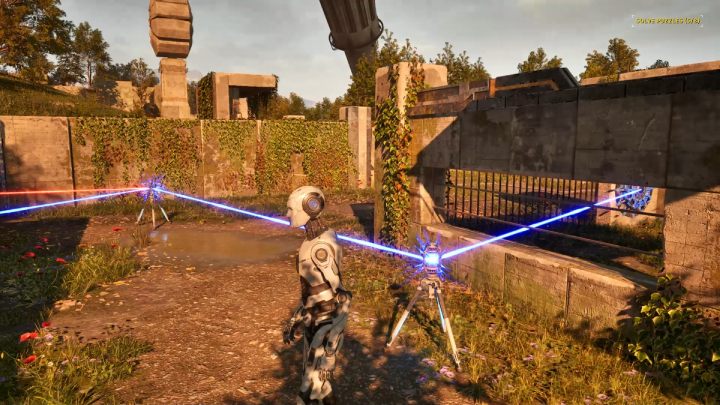
- Pick up the connector and break the connection.
- Connect the connector to the inverter and blue button near the terminal.
- Circle the room and activate the terminal.
Hidden
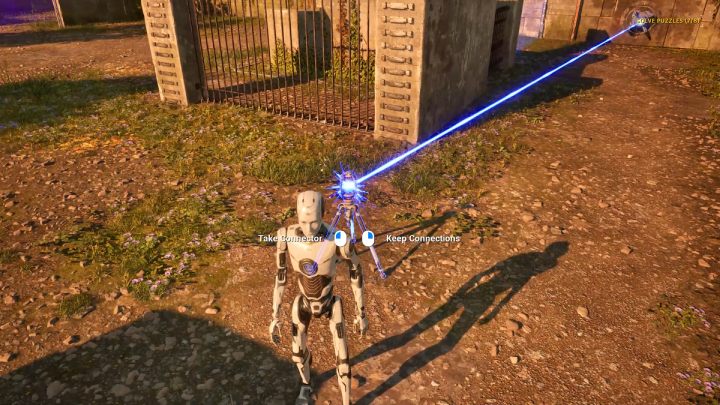
- Pick up the connector.
- Make a connection with the blue laser and leave it in the area shown in the screenshot above.
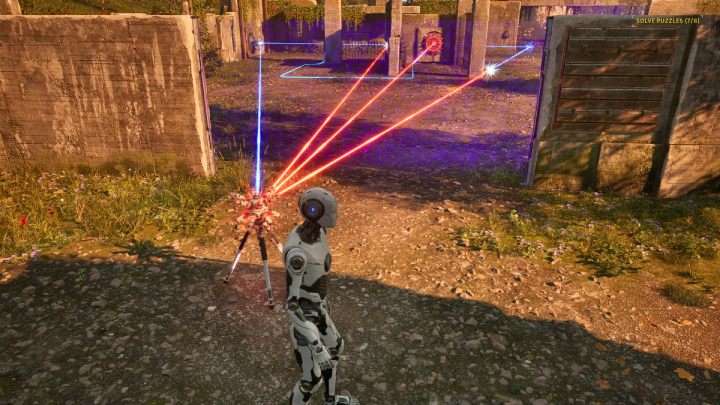
- Pick up the inverter.
- Create a link between the connector, red button, blue button, and blue laser.
- Leave the inverter in the same place, as shown in the screenshot above.
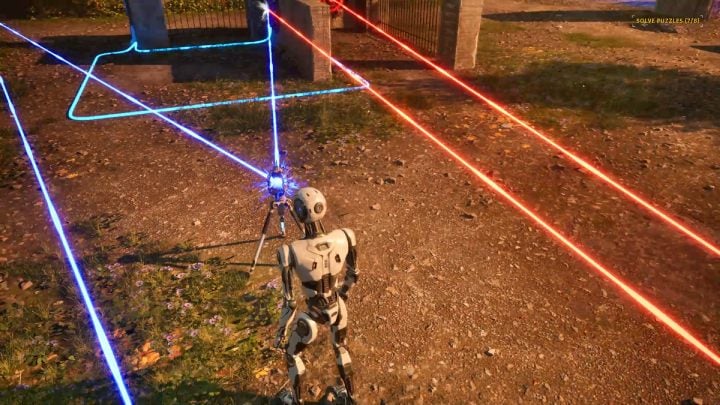
- Pick up the connector and break the connection.
- Connect the connector to blue laser and blue button.
- Leave the connector in the area shown in the screenshot above.
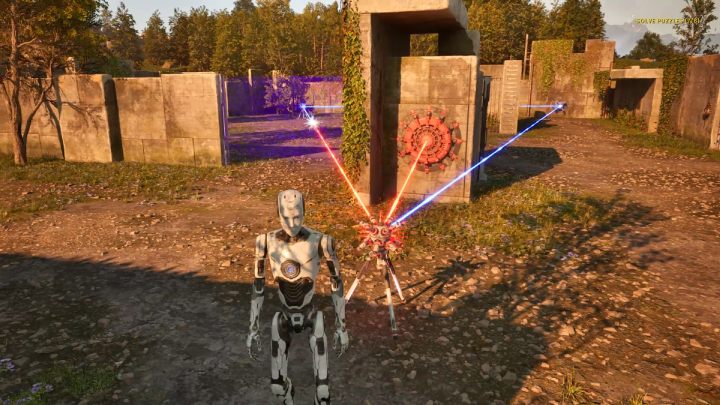
- Pick up the inverter and break the link.
- Connect the inverter with the connector, red button and blue laser.
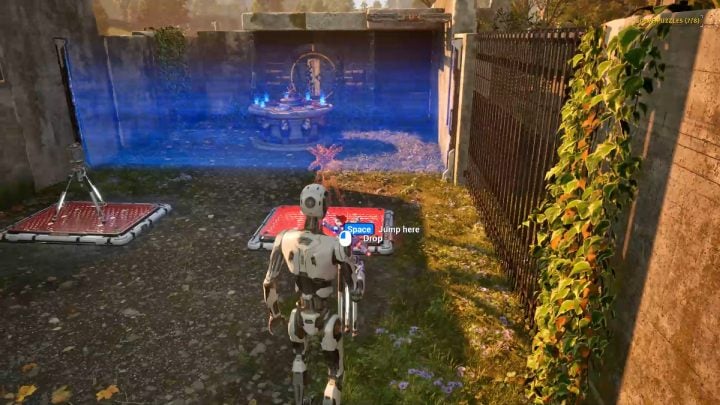
- Pick up the connector and leave it on one of the platforms before the terminal.
- Place the inverter on the remaining platform.
Backward Propagation
- Pick up the first inverter.
- Leave it on the platform.
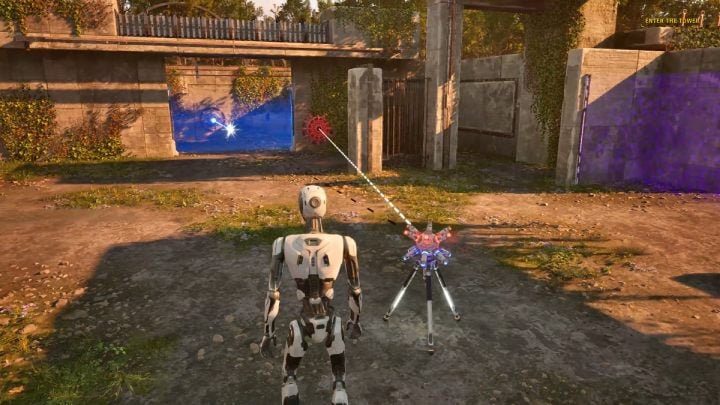
- Pick up the second inverter.
- Link the red button and the blue laser.
- Leave the second inverter in the area shown in the screenshot above.
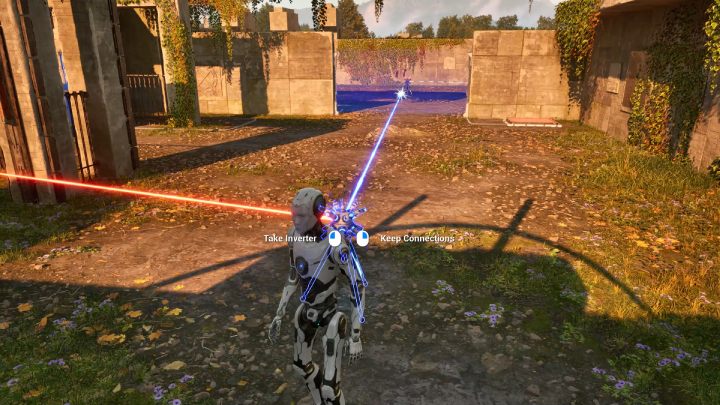
- Pick up the first inverter.
- Make a connection between the second inverter and red button.
- Leave the first inverter in the area shown in the screenshot above.
- Stand on the platform.
- When the laser reaches the red button near the second platform, you'll be able to leave the platform.
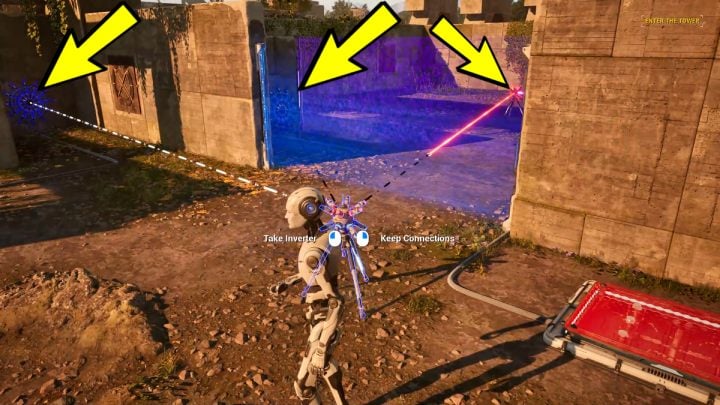
- Pick up the first inverter and break the connection.
- With the first inverter, link the second inverter and both blue buttons - one of them is behind the barrier.
- Leave the first inverter in the area shown in the screenshot above.
- Stand on the platform and wait until all buttons are activated.
- Now you can access the terminal.
Positional Interchange
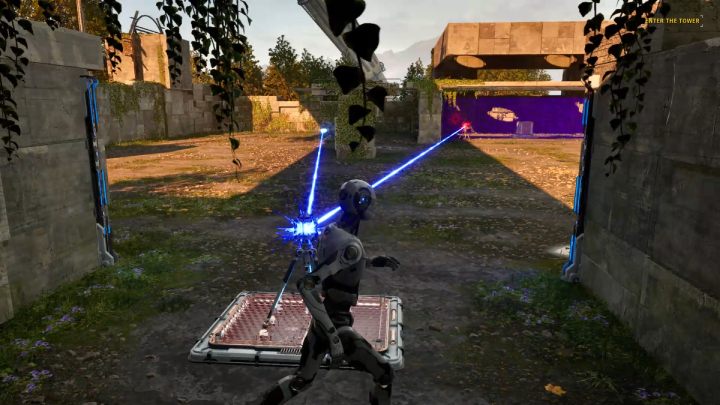
- Pick up the connector from the platform.
- Link the blue laser and the first inverter.
- Place the connector on the platform.
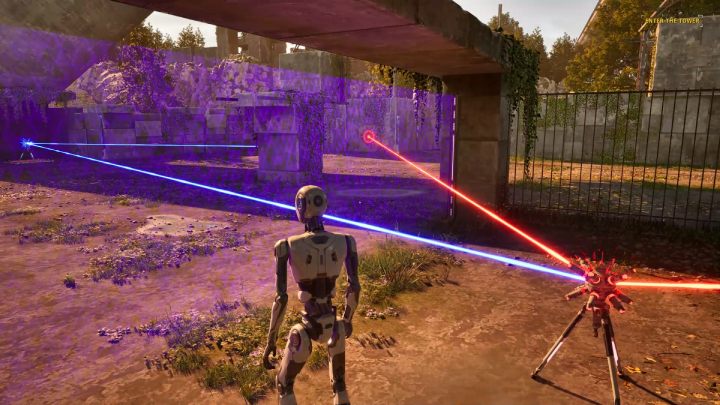
- Pick up the first inverter but don't break the connections.
- Add a connection to red button by the inverter and red button by the terminal.
- Leave the first inverter in the area shown in the screenshot above.
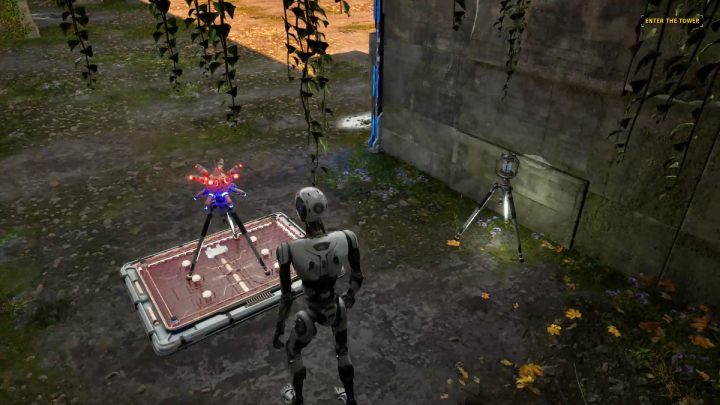
- Pick up the second inverter and leave it next to the connector.
- Pick up the connector and break the connection.
- Place the second inverter on the platform.
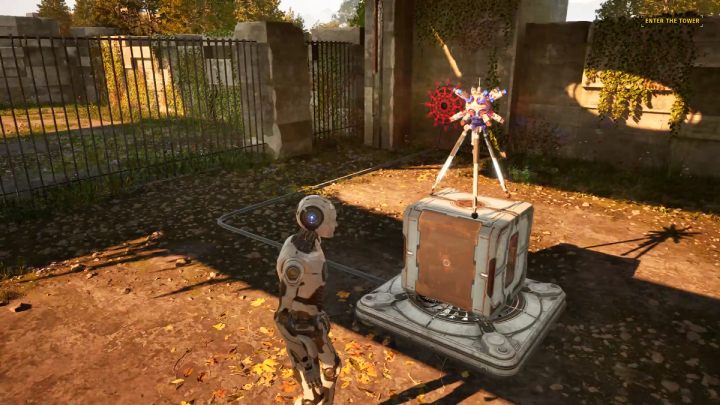
- Pick up the first inverter and break the links.
- Place the first inverter on top of the hexahedron.
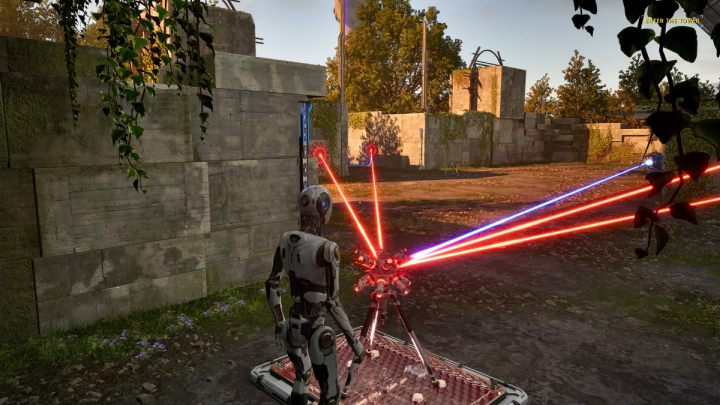
- Pick up the second inverter.
- Make links between the first inverter, red button next to it, blue laser, and two red buttons by the terminal.
- Leave the second inverter on the platform.
- The first inverter should rise upwards.
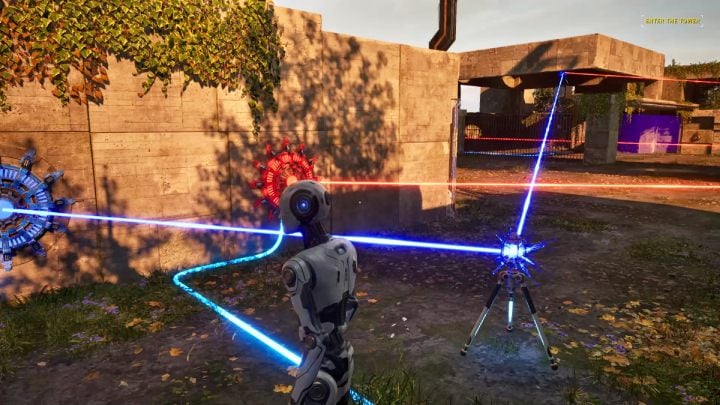
- Pick up the connector.
- Link the first inverter and the blue button by the terminal.
Transposition
This Lost Puzzle can be approached between Main Puzzle #4 (Refraction) and Main Puzzle #5 (Imprisoned).
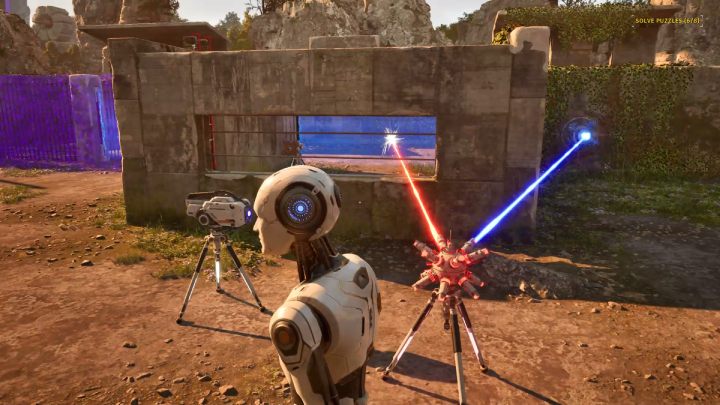
- Pick up the inverter.
- Make a link between the blue laser and the connector visible in the distance.
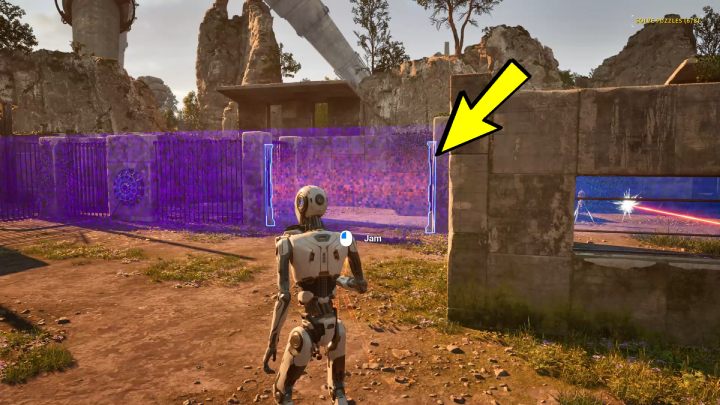
- Pick up the jammer and point it to the barrier shown in the screenshot above.
- Enter the new area and pick up the connector without breaking the connection.
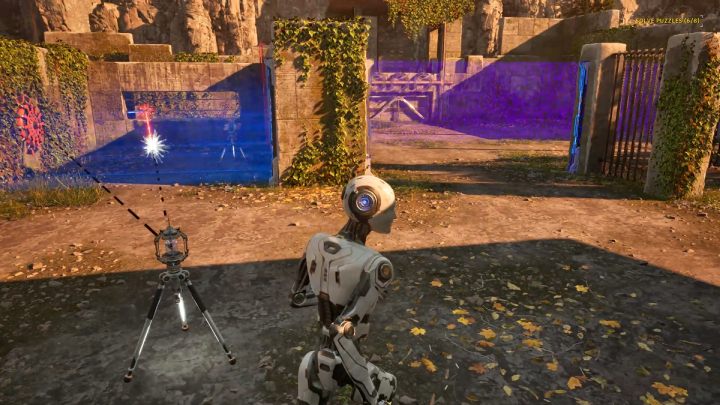
- Add an additional link to the red button behind the barrier.
- Put down the connector.
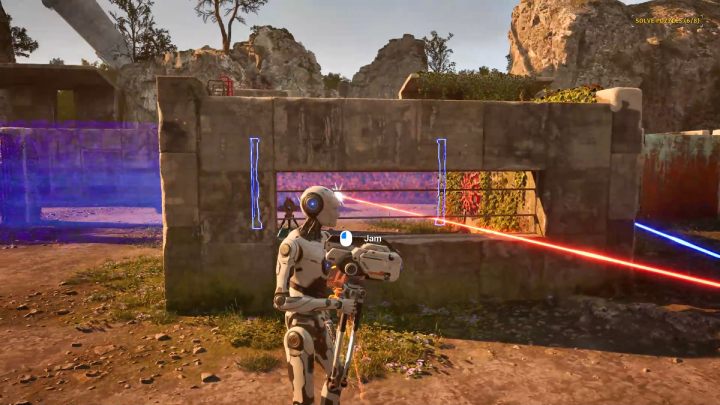
- Pick up the jammer.
- Point it to the barrier behind which there is a connector.
- Once the laser reaches the button, you'll be able to pick up the jammer.
- Point the jammer to the second barrier.
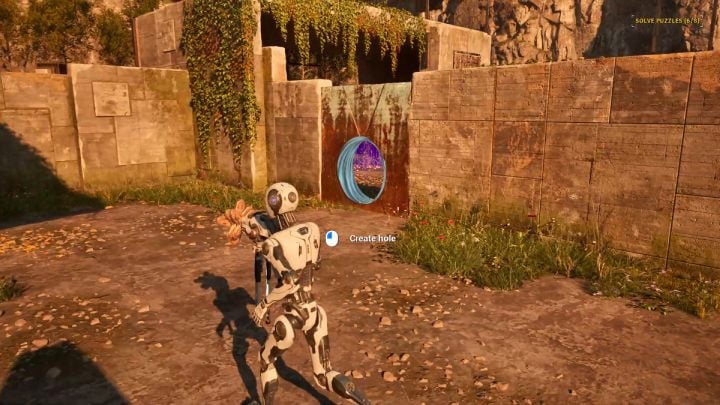
- Pick up the drill.
- Make a hole in the wall.
- Pick up the connector and break the connection.
- Transfer the connector through the hole in the wall.
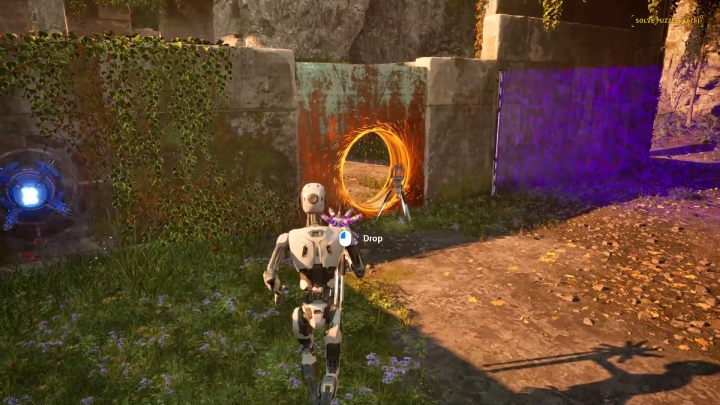
- Pick up the inverter and break the links.
- Put the inverter through the hole in the wall.
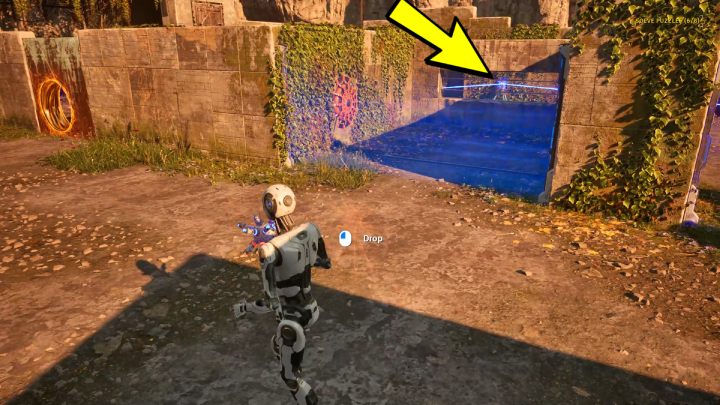
- Pick up the connector.
- Link the blue laser and the blue button by the terminal.
- Leave the connector in the area shown in the screenshot.
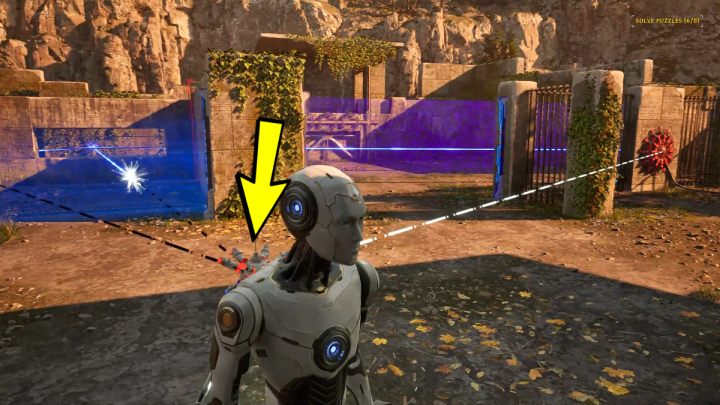
- Pick up the inverter.
- With the inverter, connect the connector, red button behind the barrier and red button by the terminal.
- Leave the inverter in the area shown in the screenshot above.
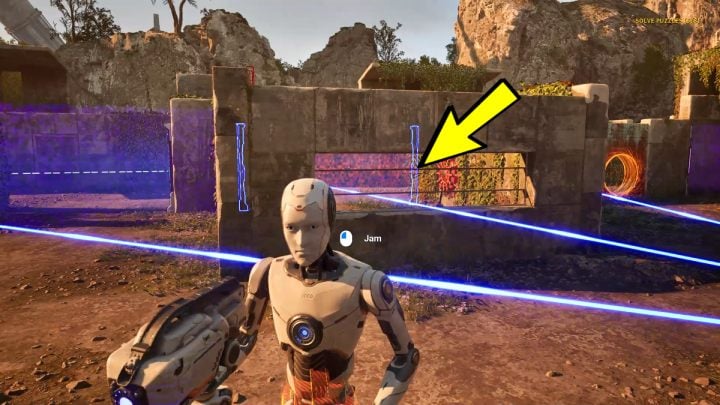
- Pick up the jammer.
- Point it to the barrier between the connector and the inverter.
- When the beam reaches the red button by the barrier, you'll be able to reach the terminal.
Preconnected
This Lost Puzzle can be approached between Main Puzzle #7 (Backward Propagation) and Main Puzzle #8 (Positional Interchange).
- Approach the hole and pick up the inverter.
- Connect the interter to the red laser.
- Leave the inverter on the platform.
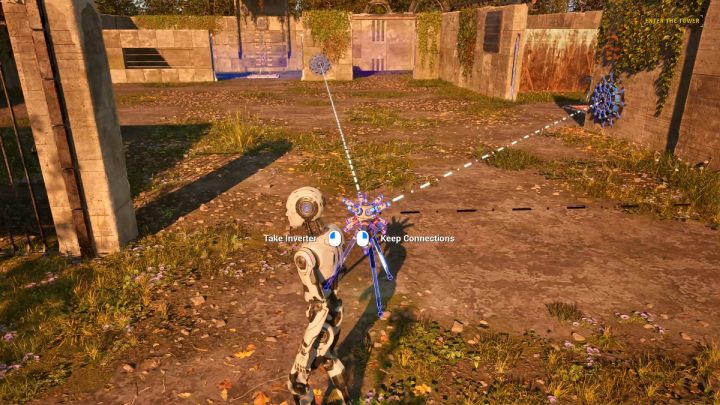
- Pick up the drill.
- Leave the drill next to the inverter.
- Pick up the inverter without breaking the connection.
- Bring the drill to the platform.
- Pick up the inverter and with it link both blue buttons.
- Leave the inverter in the area shown in the screenshot above.
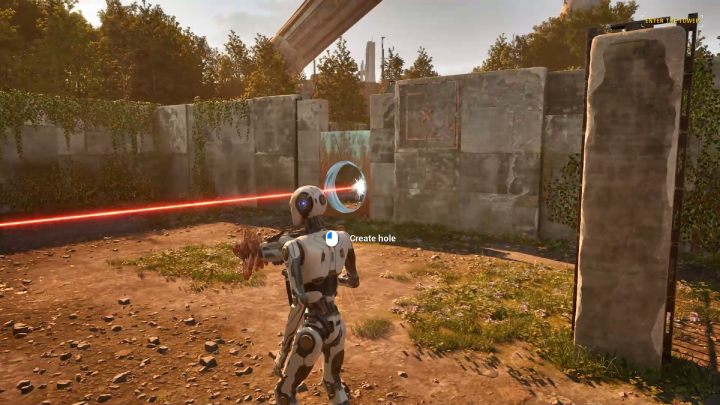
- Pick up the drill.
- Make a hole in the wall so the red laser can reach the inverter.
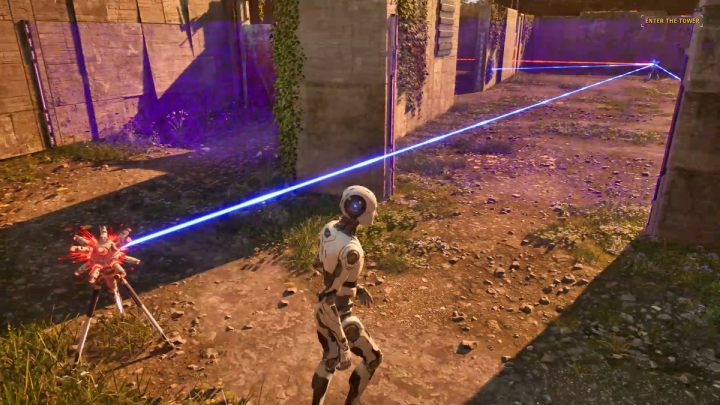
- With the barrier down, pick up the second inverter.
- Make a link between the second inverter and the first inverter, and leave it in the area shown in the screenshot above.
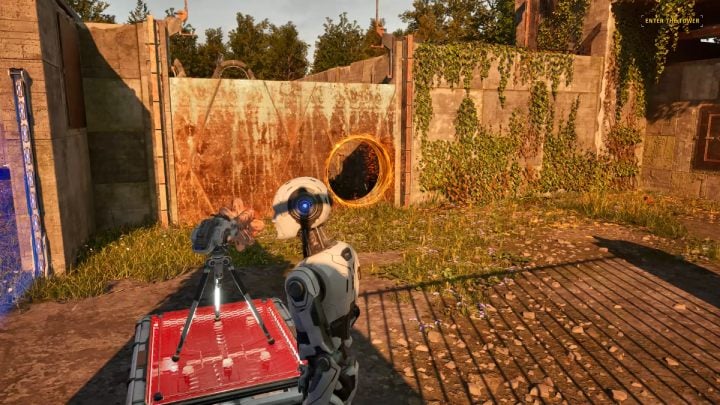
- Pick up the drill.
- Make a hole in the wall next to the platform.
- Put the drill on the platform.
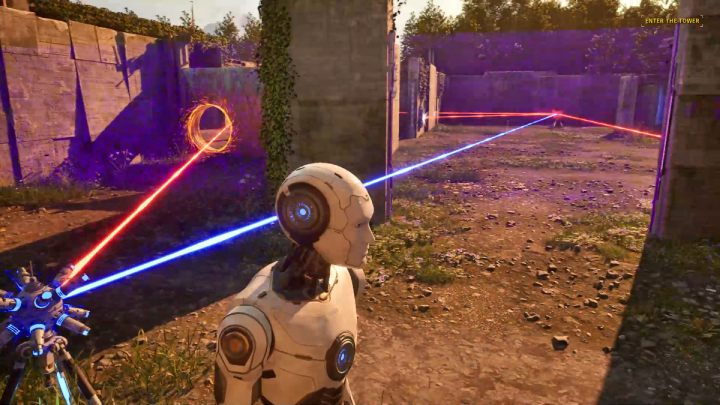
- Pick up the second inverter without breaking the links.
- Add a link to the red laser.
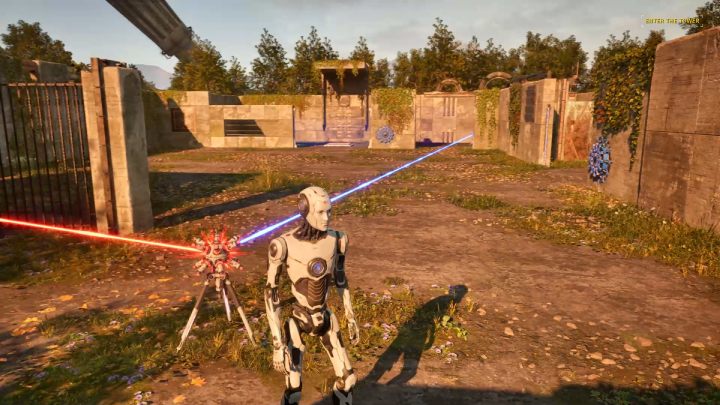
- Pick up the first inverter without breaking the connection.
- Add a link to the red button next to the terminal.
You are not permitted to copy any image, text or info from this page. This site is not associated with and/or endorsed by the Devolver Digital or Croteam. All logos and images are copyrighted by their respective owners.
Copyright © 2000 - 2025 Webedia Polska SA for gamepressure.com, unofficial game guides, walkthroughs, secrets, game tips, maps & strategies for top games.
