Monster Hunter Rise: Begginer's Guide
This guide page for Monster Hunter Rise contains tips for beginners. They cover the basic mechanics of the game, world exploration, and combat.
Starting your adventure in MH Rise, you may feel a little overwhelmed by the excess of information and rules. But don't worry about it! We have prepared a lot of practical tips that will make it easier for you to learn the most important aspects of the gameplay.
- Practice is crucial
- Choosing a weapon
- Eat before each hunt
- Start with the tasks in the village
- Side quests
- Camera settings
- Radial menu
- Guild chests
- Dog makes traveling faster
- Search the area thoroughly
- Observating monsters
- Sharpening weapons
- Canceling animation
- Wait command
- Transporting large objects
- Watch out for the others!
- Pausing the game
- Blacksmiths in the village
- A nest full of treasures
Practice is crucial
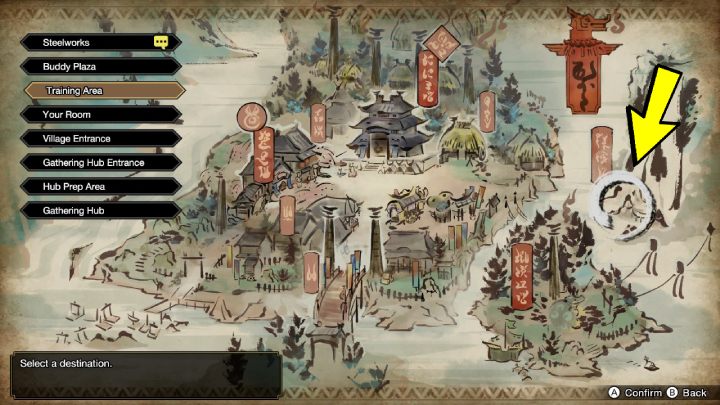
After getting acquainted with the area and its inhabitants, go to the training area located in the eastern part of the village. Approach the small boat on the lake and press A to swim to the training cave. You will be able to fast travel there only after you unlock this area.
Press the minus button to open a map of the village. Use the d-pad to select 1 of the 8 areas and press A to confirm.
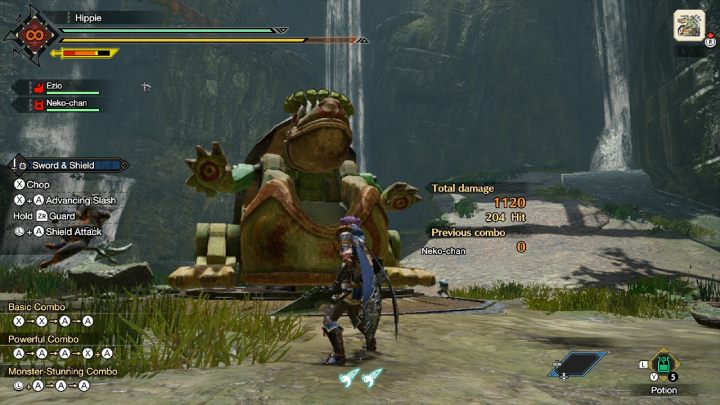
When you enter the training area, the combos for the currently equipped weapon will appear on the left side of the screen.
There is a large wooden training dummy on which you can practice attacks. Take a moment to familiarize yourself with the controls and practice attacks on the stationary opponent. Try also shooting the cannons located on wooden structures.
The full list of controls and combinations of attacks for each weapon type can be found in the game menu by pressing the plus button. Select the Information -> Hunter Notes -> Controls and combinations.
You can change the type of weapon in the chest found in the cave. Next to the chest, you will also find a companion board in which you will change the equipment of your furry companions.
Talk to Sekirei the trainer, the caretaker of this area, to change the training options. You can, e.g. change the position of the head of the puppet, increase the number of Wirebugs, and stop targets from moving.
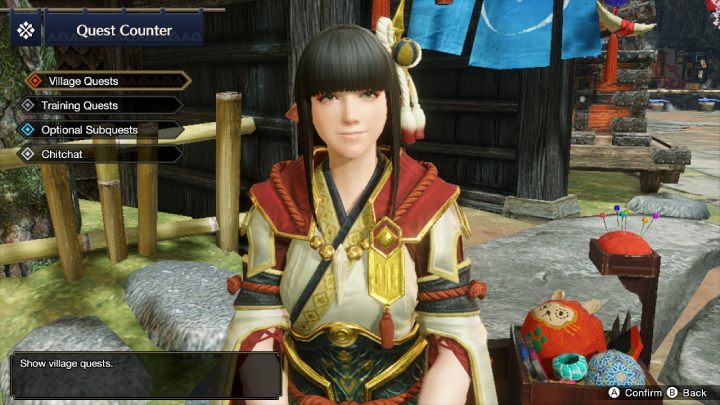
If you want to practice in the field, talk to the girl sitting on the red bench. Hinoa offers quests designed for single-player mode. Do Training Quests first. You can repeat them as many times as you want to learn the basics of controls, using Wirebugs, and fighting with a large opponent.
Choosing a weapon
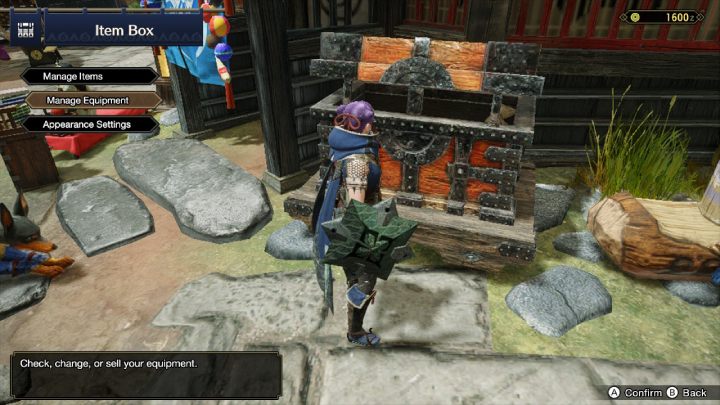
The basic equipment of your character is a long sword. You can access all 14 types of weapons right from the beginning. Go to the item box and press the A button. Then select Equipment management -> Change equipment.
There are several chests located in the village. They all contain the same things. If you put an item in the chest in your room, that item will also appear in the chest located in the training facility.
Novice players are advised to choose one of the following weapons:
- dual blades,
- sword and shield,
- long sword,
- light bowgun.
Eat before each hunt
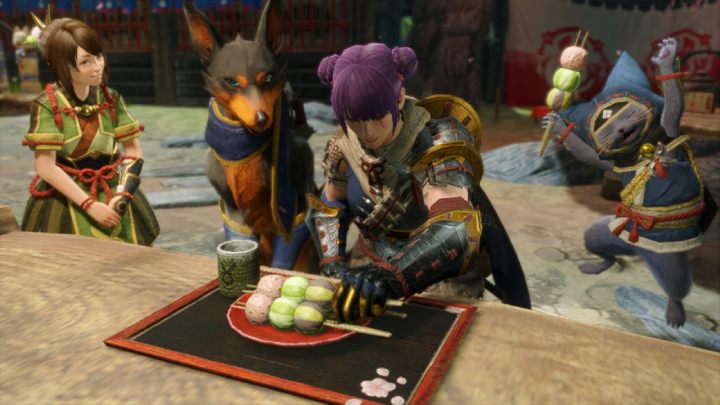
Before hunting, you should definitely go to the Tea Shop or sit at the table in the Gathering Hub. You can buy Bunny Dango with money or points. Eating them increases the maximum health and stamina until the next time you return to the village. Some Dango sets can activate various passive bonuses or elemental resistance.
Besides Bunny Dango, the chefs can also prepare Motley mixes for you, which convert materials into rations or meds. To prepare a Motley mix, you will need items that can be found during a hunt. Some mixes even require parts from defeated monsters. Making mixes will reward you with Dango tickets, which you can use to increase the chance of activating all your Dango skills.
Start with the tasks in the village
Start your adventure with Monster Hunter Rise by focusing on single-player quests, that is, Village Quests. Talk to Hinoa on the red bench. Her missions will gradually introduce you to the world of the game. Consider this as good training before facing the more demanding monsters in missions from the Gathiering Hub.
Side quests
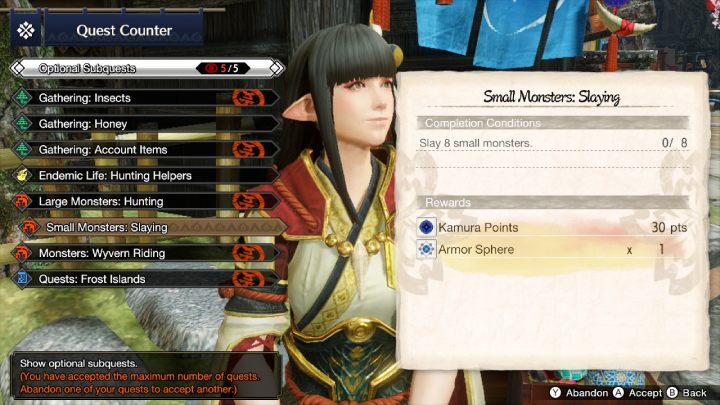
Before you go hunting, accept optional side tasks from Hinoa or Minoto. These are mostly simple tasks, such as killing small monsters or collecting herbs - you won't have problems with doing them during the main quests. These side tasks usually reward with points and special orbs that you can use to improve your equipment. You can accept up to 5 tasks at a time.
The rest of the villagers will also have small requests for you. Talk to anyone with a dialog bubble or check the available tasks on the map.
Camera settings
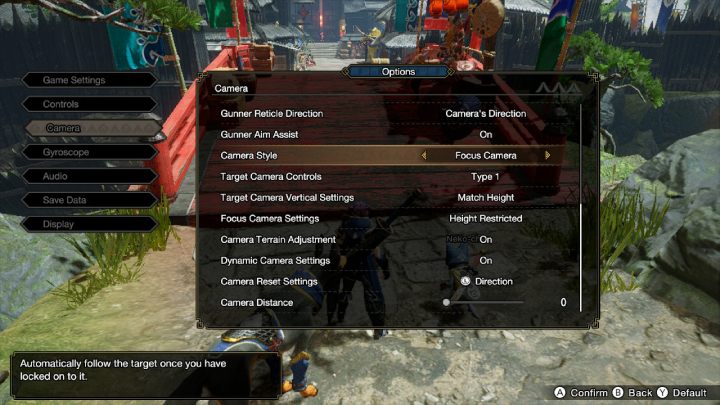
If you're having trouble keeping a target in the view while attacking, change your camera settings. Press the Plus button on your controller, then select Options from the System tab and go to the Camera. Change camera style from target camera to focus camera. Thanks to this, after locating the monster and pressing the right analog, the camera will focus on it and automatically begin to follow it. It only works on big monsters.
In target camera mode, pressing the right analog will highlight the monster on the minimap. The camera will begin to guide you to the location of the enemy. When you get close to it, the camera will automatically focus on him.
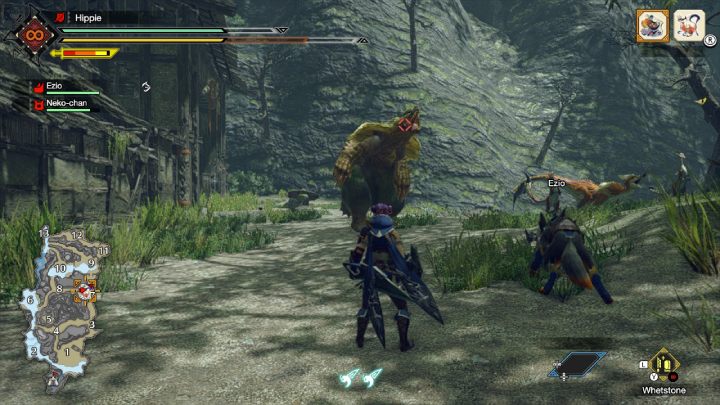
However, there is a serious drawback to using the target camera mode. If you want to move away from your opponent using Wirebugs, you can run straight at it. Before escaping, press the right analog again to disable the monster tracking mode.
In the camera options, you will find more settings that you can customize to your needs. You'll find there, e.g. the option to increase the distance of the camera and the aiming assist for ranged weapons.
Radial menu
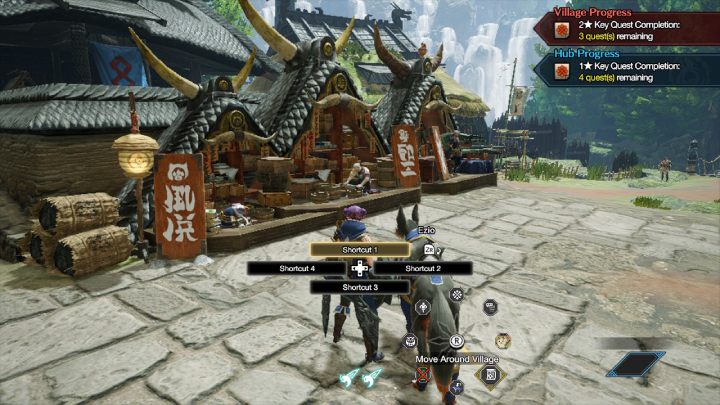
The radial menu consists of 32 shortcuts that you can use both in the village and on the hunt. To open the radial menu, press the L button. Then select 1 out of the 4 shortcut sets using the d-pad or ZR. Use the right analog to select a shortcut.
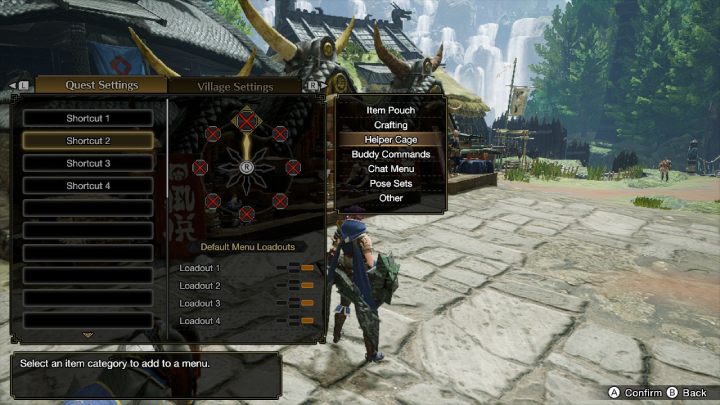
Each set contains 8 shortcuts, which you can freely change and set according to your needs. You can assign, e.g. items from your bag, local life forms from portable cages, or commands for your animals.
The radial menu is divided into 2 categories - while hunting and while staying in the village.
You can find the radial menu settings in the game menu by pressing the Plus button.
Guild chests
When the hunt begins, check out the blue box. You will find items left for you by the Guild which you can only use during the current quest. Use them before you use your own resources. If you're doing a single-player quest, take all the content. In multiplayer, leave something for the rest of the team.
The guild chest usually contains basic items such as potions, rations, bombs, traps, and ammunition.
There is also a tent nearby where you can change the elements of your equipment and craft the necessary items if you forgot to do it in the village.
Dog makes traveling faster
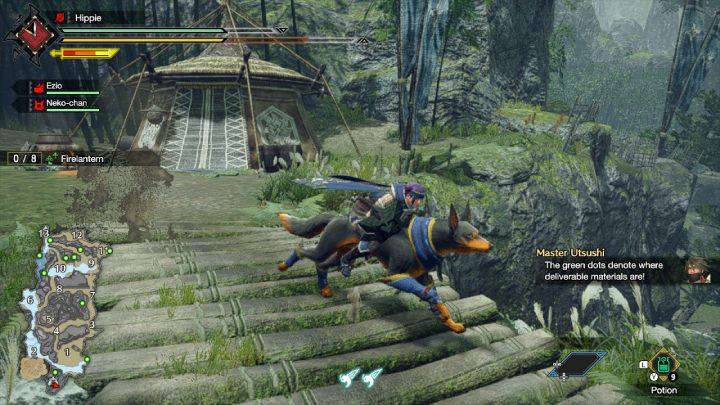
Your Palamute is not only useful in fights. Hold A for a few seconds to sit on its back - you will be moving much faster, and you will not deplete the stamina during normal running. Palamute can also climb walls of vines.
Don't worry if your buddy isn't around or is busy fighting. They'll come running at your every command, even when you're on the move. Just remember to holster your weapon before calling your Palamute.
When riding on a dog, you can use items, collect resources, and even sharpen weapons or attack monsters.
If you see a small entrance to the cave, get off your Palamute and crawl inside, your furry companions will follow you.
Below you will find the controls while riding on a Palamute:
 | Mount (Hold) |
 | Move |
 | Sprint (Hold) |
 | Jump |
 | Drift, run faster (During sprint) |
 | Attack |
 | Dismount |
Search the area thoroughly
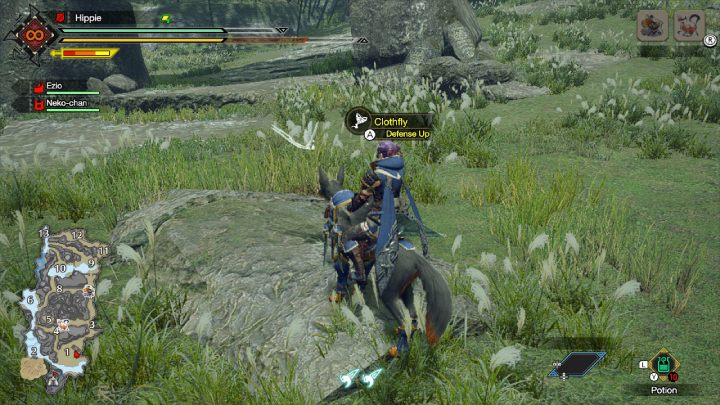
When a quest begins, take a good look around the area. By exploring the entire map, you can find herbs and materials for creating items and potions. Each hunting area is also full of local fauna (Endemic life).
Local life forms will increase your maximum level of health, stamina, attack, or defense for the duration of the hunt. The creature's color determines which stats increase when you interact with them.
Some small creatures provide temporary benefits, while others can be captured and used in combat as an item.
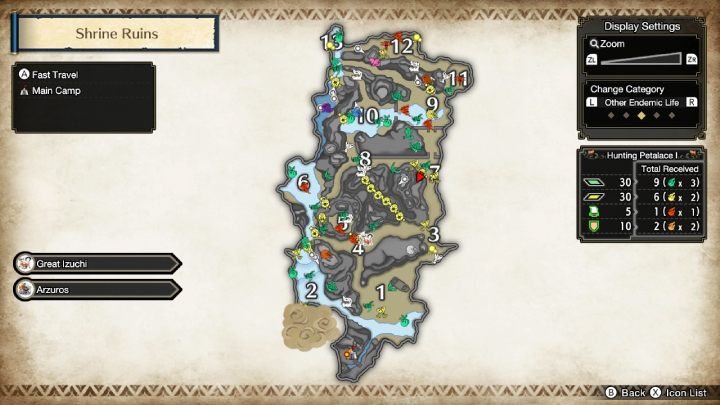
After discovering the whole area, you can check the exact location of the local fauna on the map. Hold down the Minus button to turn on the map, and press L or R to change the category of displayed resources.
Higher grounds have rarer objects and creatures. From the top, you will also have a better view of the entire area and be able to better plan the hunt. Climb all the hills, carefully search the forests and look into the encountered caves.
Observating monsters
Each monster has its own set of moves and attacks. Take a moment to observe and learn them. This way you'll know when to dodge or run to safety. Remember that you can use Wirebugs to get away from a monster fast. Just remember to holster your weapon before you use the Wirebugs.
Look for the best moments for your attacks or a series of strikes. Take advantage of the situations when the monster falls to the ground or starts getting tired.
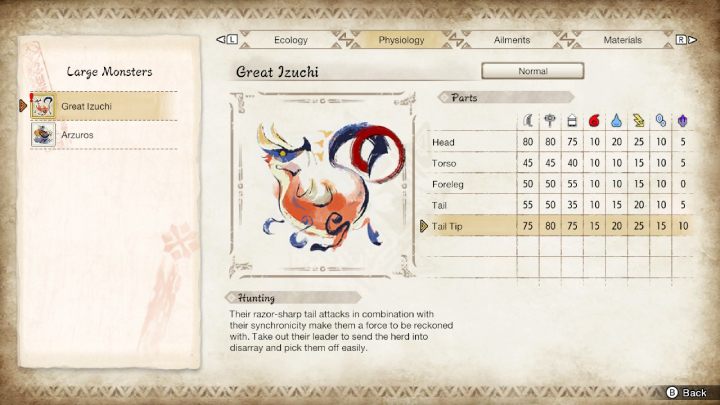
If the enemy is too difficult to defeat, go back to the village and check out Hunter's Notes. You will find useful information about the monster, its weak points, and its vulnerability to the elements. Get the right weapon and equip yourself with bombs and poisons. Good luck!
You can find information about monsters in the game menu by pressing the Plus button. Select Information -> Hunter Notes -> Large monsters.
Sharpening weapons
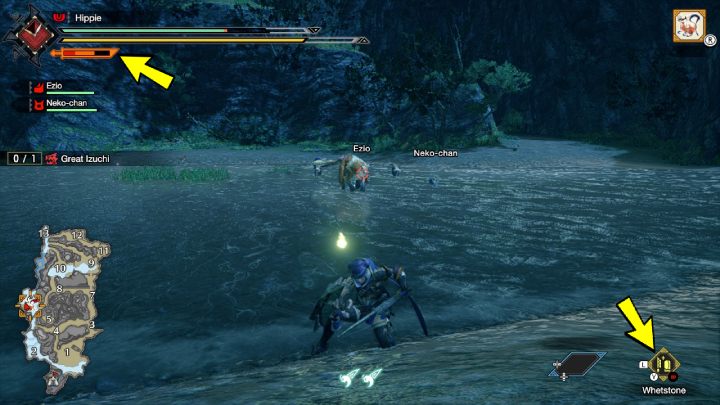
During the fight, your weapon's durability decreases. Unsharpened weapons will slide on the monster instead of inflicting damage. The weapon's sharpness bar is located under the stamina bar. When it turns orange, it means that your weapon loses sharpness.
Whetstone is the basic element of your equipment. While holding L, select it from the item bar with Y or A, and then use it by pressing Y.
The animation of sharpening weapons is quite long. If your character is attacked while using a whetstone, the action will be stopped and the weapon will remain unsharpened. Before using the whetstone, it is best to move away from the monster, or mount your Palamute and sharpen the weapon while riding.
Canceling animation
The animation of consuming potions or using objects can sometimes be too long. Especially when you are about to get hit by a monster. By pressing B, your character rolls and thus cancels the animations. If you roll while using a whetstone, your weapon will not be sharpened after you cancel the animation. If you were drinking a potion, the health will recover only partially.
Wait command
The action bar is located in the lower right corner of the screen. Use left and right on the d-pad to select an action, and up and down to activate or deactivate an action.
The action bar has wait and go commands. When you order your furry companions to wait, they will sit down. They will not attack your opponents, nor will they follow you. This command is useful if, for example, you want to sneak past the enemy. Ordering your Palamute and Palico to go, they will instantly appear next to your character.
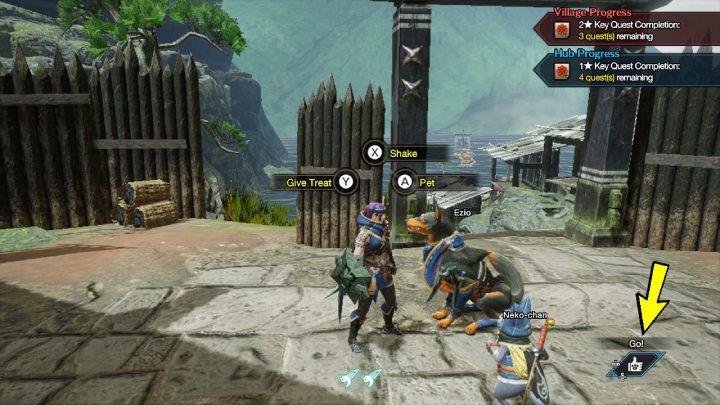
The wait command also has another function. Thanks to it, you will be able to pet, feed or play with your companions!
Transporting large objects
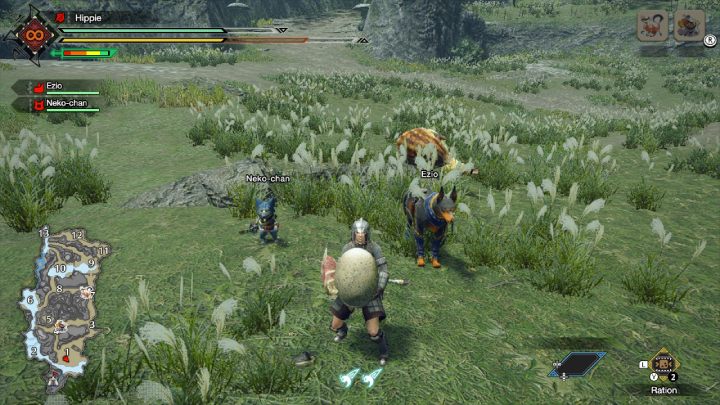
Some tasks require you to transport a larger object. The path to the chest, located near the camp at the starting point of the map, can be long and dangerous.
Before picking up a large object, make sure that there are no monsters nearby. If you are attacked by an enemy while carrying a larger item, you will drop it.
A fall from a great height can also break an object you are carrying. You pick up a large object with both hands meaning you will not be able to run or ride on the dog. If you try to fast travel to the camp, you will drop the object you are holding. However, you can use Wirebugs to quickly move to the camp. They will also allow you to land safely and protect the object you are carrying if you accidentally fall down.
Watch out for the others!
When fighting monsters in multiplayer mode, watch out for other players. Your weapon will not deal them damage, but some attacks can incapacitate them, especially when you use a long sword. If other players stand next to you, use only normal attacks.
Pausing the game
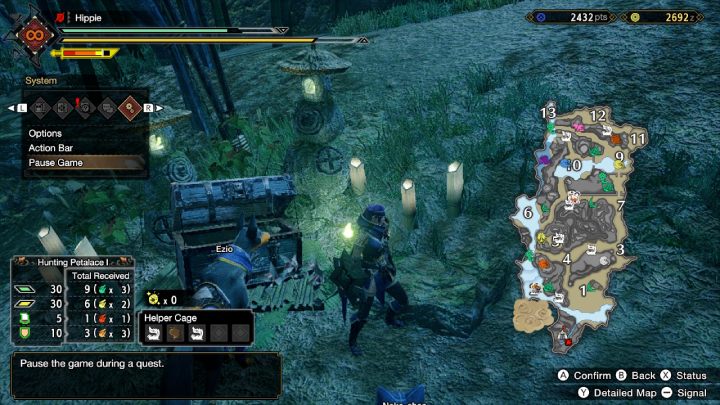
You can pause the game by going into the system tab - press Plus on the controller. Stopping the game is especially useful in multiplayer mode. The game will stop only for you.
The Home button can sometimes cause you to disconnect from a multiplayer quest so we recommend always stopping the game by going into the options menu.
Blacksmiths in the village
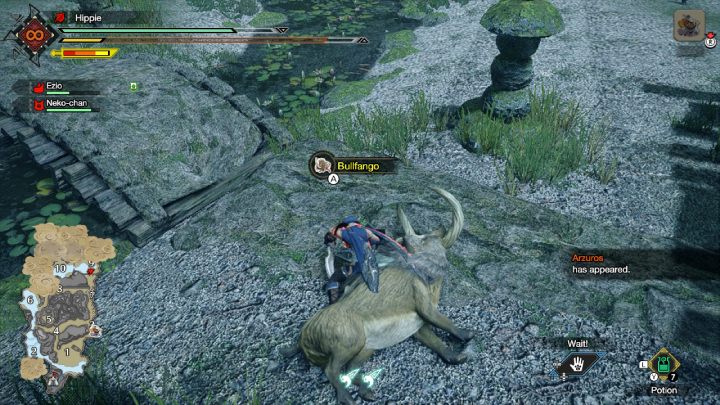
After killing monsters, be they small or large, do not forget to carve out parts from them. They will serve as materials for creating and improving weapons at the blacksmith in the village.
Remember, sometimes instead of killing a big monster, it's worth capturing it. Living monster will give you different materials.
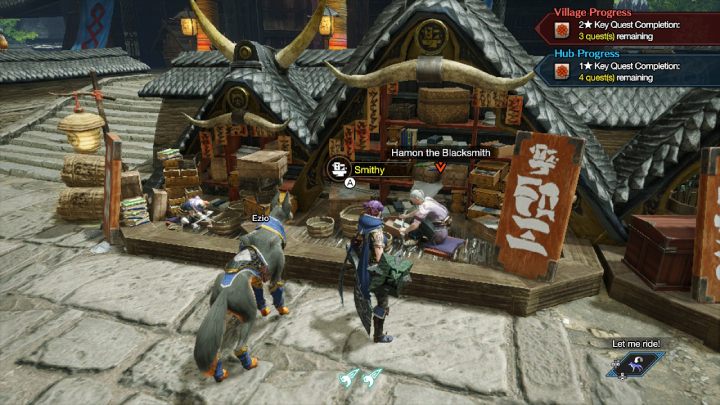
The blacksmiths' workshops are located on the main square of the village and in the Gathering Hub. To forge weapons and armor, you will need the right materials and money.
You will make equipment for your companions from scraps of materials left over from forging your weapons or armor. Use the services of the blacksmith Hamon, Buddy Smithy Kisaki, or visit the Buddy Smithy Kojiri located on the upper floor in the Gathering Hub.
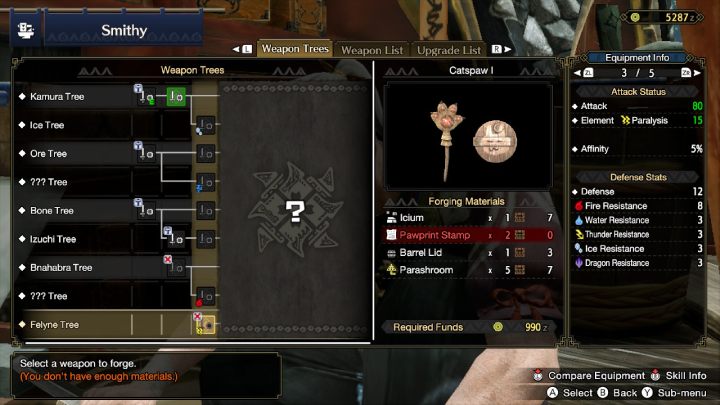
The statistics of the weapon you want to forge are displayed on the right side of the screen. Use ZL and ZR to view all tabs. By pressing the left analog, you will compare it with your current weapon. After pressing the right analog, you will find out what skills it offers.
Question marks instead of names indicate that you have not yet collected the relevant materials. Visit the forge regularly to see what gear branches have opened up for you since your last visit.
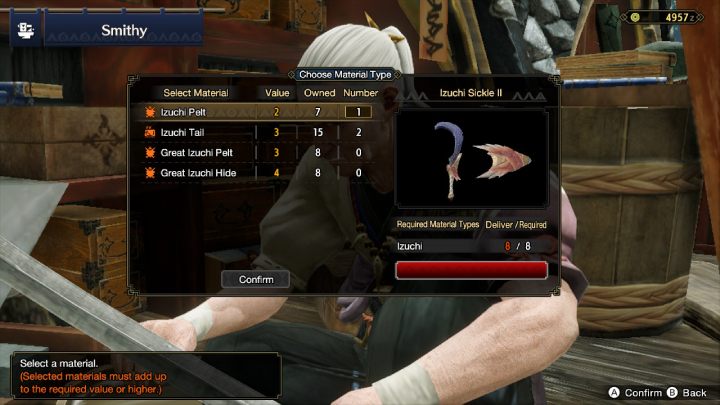
To upgrade some weapons, you will need materials from monsters - you can choose which parts you want to use. You can upgrade your armor by using Armor Spheres, acquired during side quests.
A nest full of treasures
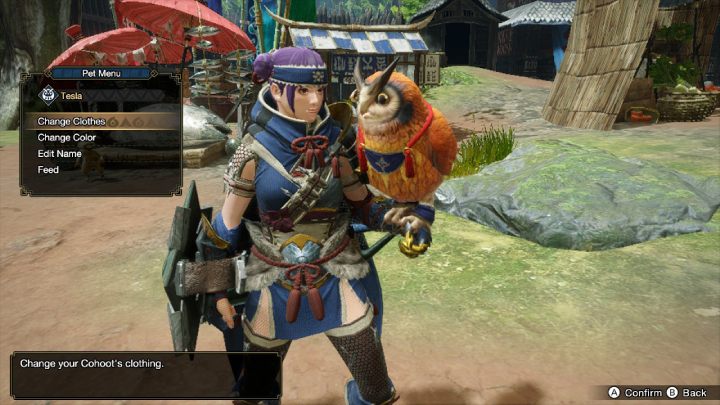
Cohoot is a new animal in the Monster Hunter series. You can only interact with it in Kamura village. At the beginning of each mission, your character will release a Cohoot to check out the area. Thanks to the animal, you will see locations of monsters on the map.
While in the village, select the Cohoot icon from the action bar located in the lower right corner of the screen. You will be able to feed, pet or change the animal's name and appearance. If an icon appears on the screen while holding the Cohoot, press ZR to see what happens.
The Cohoot Nest is located in a tree in the Buddy Plaza. Visit that place regularly to collect items, including the rare Steel Egg.
The exact location of the nest can be found on a separate page of the guide - The Cohoot Nest - where is it?.
- Monster Hunter Rise Guide
- Monster Hunter Rise: Game Guide
- Monster Hunter Rise: Basics
- Monster Hunter Rise: Begginer's Guide
- Monster Hunter Rise: Wirebugs
- Monster Hunter Rise: Combat Guide
- Monster Hunter Rise: Petalaces
- Monster Hunter Rise: All animals - fauna list
- Monster Hunter Rise: Buddies
- Monster Hunter Rise: Apex monsters
- Monster Hunter Rise: Talismans
- Monster Hunter Rise: Best builds
- Monster Hunter Rise: Basics
- Monster Hunter Rise: Game Guide
You are not permitted to copy any image, text or info from this page. This site is not associated with and/or endorsed by the developers and the publishers. All logos and images are copyrighted by their respective owners.
Copyright © 2000 - 2025 Webedia Polska SA for gamepressure.com, unofficial game guides, walkthroughs, secrets, game tips, maps & strategies for top games.
