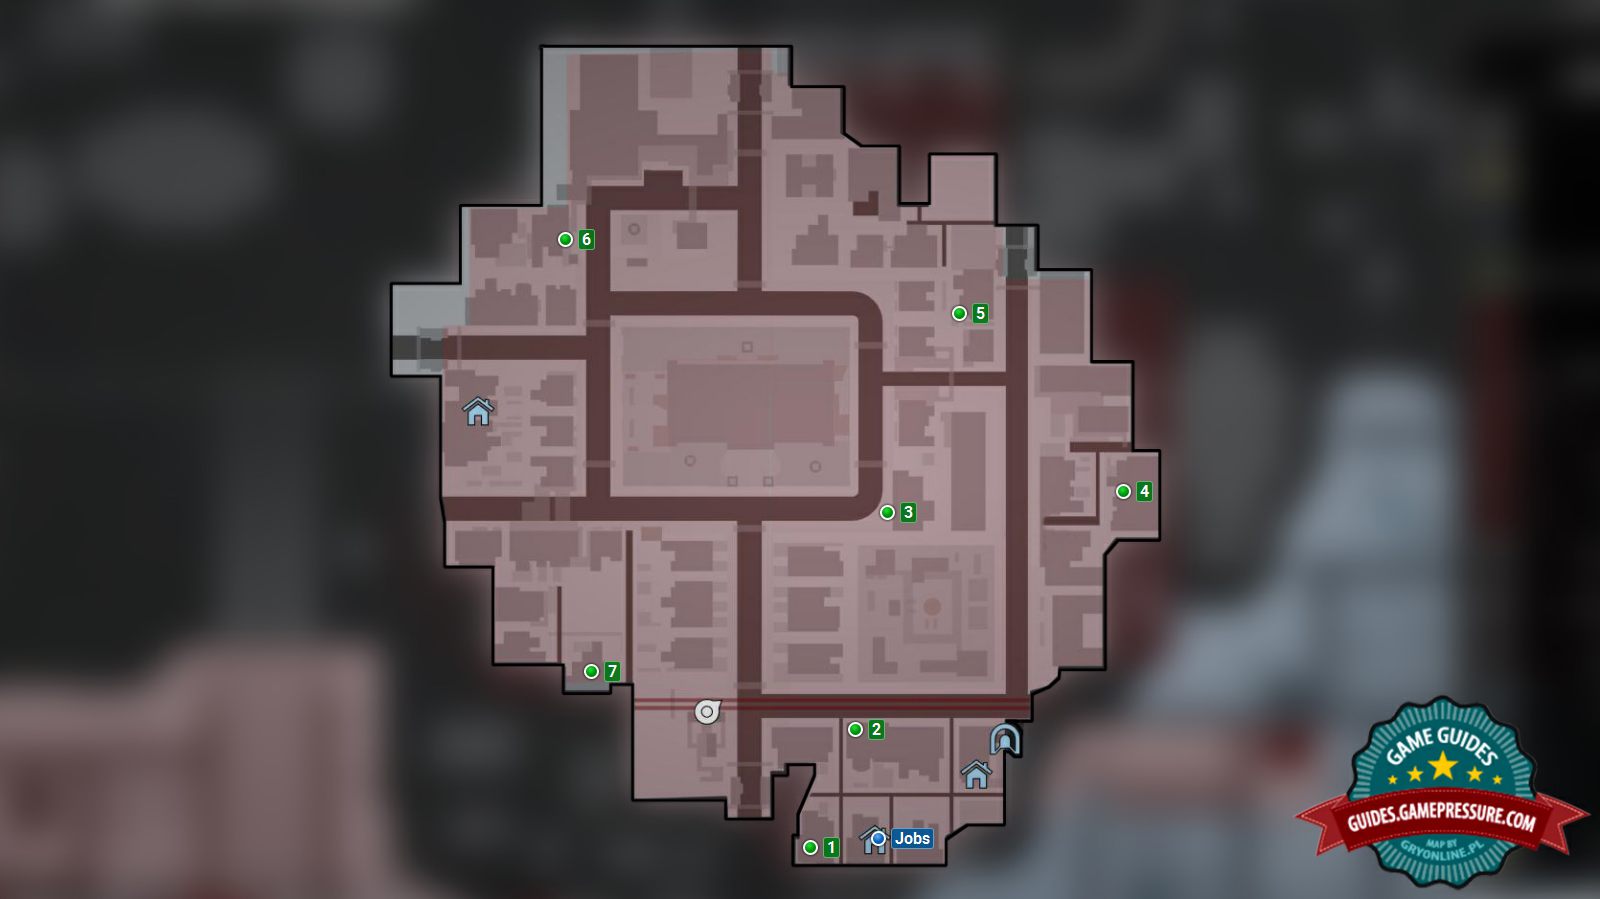
Ashgate - Yellow zone | Journals and jobs
Below you will find a list of jobs and journals in the Yellow Zone Ashgate.
Jobs
Changes Schedule
Your task will require you to identify the patrolling guards with your camera (you don't have to take a picture, just focus the camera on the target After identifying the particular number of guards, the task will end with a success and you will be granted 300$.
Recruiting Points
Your task will require you to take pictures of the KAL recruiting points in the Yellow Zone Ashgate. After taking a particular number of photos, the task will end with a success and you will be granted 150$.
Attention! Remember not to get identified yourself during this task. If this happens you will have to wait until the whole strategic point will restart or load a previously saved game.
Silent Assassin
Kill KAL soldiers with a tactical knife. Approach them from behind to eliminate them quietly. The task will grant you 500$.
Journal #1

The first warehouse lies in the building depicted above. Destroy the hinges on the cover to get into the area.
Journal #2

The second warehouse can be found in one of the flats in the building on the left, depicted above. TO the right a marked spot can be found from where you will be able to get yourself higher, onto a bridge connecting both constructions.
Journal #3

Warehouse #3 can be found in the back of the building. Use a car to get to the flat.
Journal #4

Warehouse #4 lies behind the building in the area depicted above. Use the entrance marked with a blue cloth.
Journal #5

Entrance to the fifth Warehouse is shown above. Use an adjoining building to get inside and then go through the bridge. In the back of the block on the right you will find a ladder leading up.
Journal #6

Entrance to the Warehouse #6 is depicted above. Use the scaffolding to get higher up and then jump onto the roof on the other side and block the boards blocking the window to get inside.
Journal #7

Warehouse #7's entrance is depicted above. Use a camper to get higher up. Then, go through a broken window to get into the flat.
You are not permitted to copy any image, text or info from this page. This site is not associated with and/or endorsed by the Deep Silver / Koch Media or Deep Silver Dambuster Studios. All logos and images are copyrighted by their respective owners.
Copyright © 2000 - 2025 Webedia Polska SA for gamepressure.com, unofficial game guides, walkthroughs, secrets, game tips, maps & strategies for top games.
