LEGO The Hobbit: Stage 1 (Greatest Kingdom in Middle-Earth)
Unique Treasure 1/4

Requirements: flail (e.g. Dori)
Way to obtain: Remain in the throne room in which the first stage of the game starts and use any character with flail to open the chest on the left.
Reward: Jester's Cane - each character that you hit with the can bursts out in uncontrollable laughter.
Minikit 1/10

Requirements: bow (e.g. Kili or any elf)
Way to obtain: You need to destroy a total of five nests in the throne room, where you start the first stage of the game. Keep destroying the nests, one after another, with ranged attacks, using the bow. The nest that is the most difficult to locate has been shown in the above screenshot. After you destroy all of the five nests, you will receive a minikit automatically.
Unique Treasure 2/4

Requirements: Saruman's staff
Way to obtain: While climbing the stairs, stop in the spot shown in the above screenshot. Switch to Saruman and use Saruman's Staff to smash the big silver (mithril) object.
Reward: Glowing Hammer - apart from its main functionality (pushing over of heavy items) illuminates the area around.
Minikit 2/10

Requirements: ability to set fire (e.g. Sam)
Way to obtain: You need to reach the chamber with two levers that unlock access to the room with the forge. Ignore the levers, for the time being, an explore the right side of this chamber. You need to smash a small, red cart here and hold down the building key/button. Switch to the character with the ability to start fire (e.g. to Sam) and stand on the small plate. Wait for the flames to consume the structure and jump towards the minikit.
Minikit 3/10
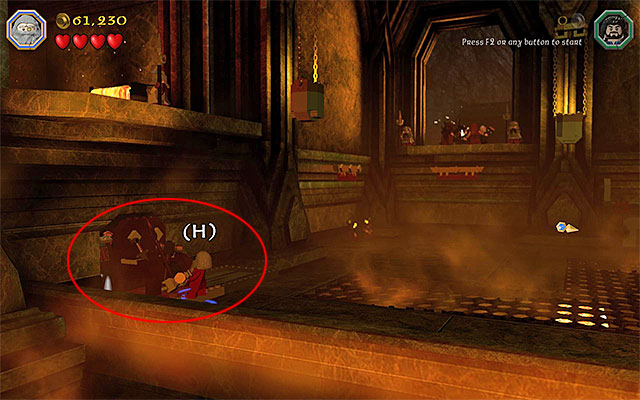
Requirements: Hammer (e.g. Dwalin)
Way to obtain: Explore the left side of the bug chamber with the forge and find the big element that can be pushed over. Use the Warhammer here and enter the stash, to collect the minikit.
Minikit 4/10

Requirements: bow (e.g. Kili or any elf), the Morgul Blade (Sauron)
Way to obtain: Explore the right side of the big chamber with the forge and find two targets, which you need to fire at, using a bow. after you have unlocked the access to the cage, switch to Sauron and use the Morgul Blade to gain access to the collectible.
Minikit 5/10
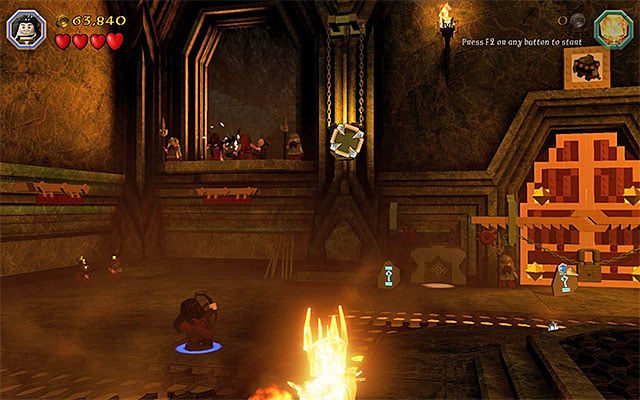
Requirements: bow (e.g. Kili or any elf)
Way to obtain: You need to destroy a total of five cauldrons in the big chamber with the forge. Keep destroying the cauldrons, one after another, with ranged attacks, using the bow (you need to fire several times at each cauldron). After you have destroyed all five, you will receive a minikit automatically.
Unique Treasure 3/4

Requirements: Morgul Blade
Way to obtain: After you reach the mine, explore the lower part of that area and locate the rope shown in the above screenshot, over which you can zip down. Make sure that you are playing as Sauron, walk into the dimly-lit area and use the Morgul Blade on the objects here. You can now collect the treasure.
Reward: Mining Hat - automatic illumination of the surrounding area
Minikit 6/10

Requirements: spade (e.g. Fili)
Way to obtain: After you reach the mine, explore the lower part of that area and locate the spot where you can use the spade to dig up several objects. Hold down the building key/button and interact with the rotary mechanism then. Wait for the load to be lifted and jump onto it, to collect the minikit.
Schematic 1/1
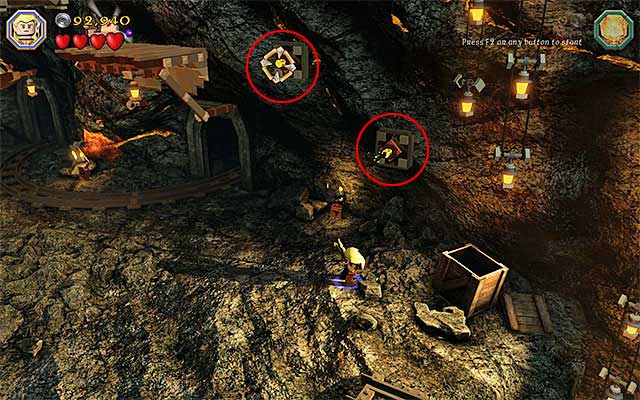
Requirements: bow (e.g. Kili or any elf), ability to take long jumps (any elf)
Way to obtain: After you reach the mine, explore its central part. You need to use the bow here, to fire at two different slots shown in the above screenshot. Switch to any elf now and jump towards the first arrow in the wall. Jump towards the other one, now and make it over to the ledge above, from there. You can now collect the schematic from here.
Reward: Mithril Mirror Armour Schematic
Minikit 7/10
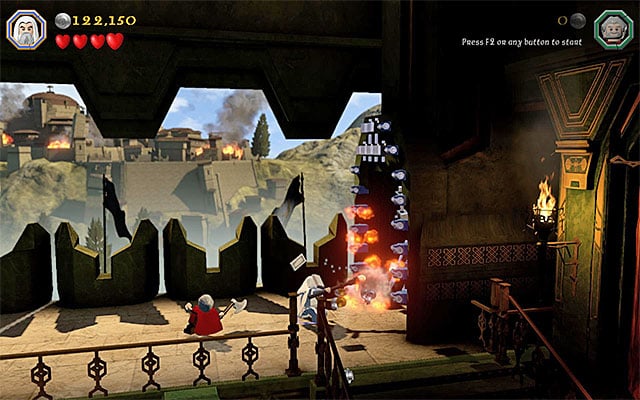
Requirements: Saruman's staff
Way to obtain: After you get to the first area that is constantly being attacked by Smaug, go to the right, as far as you can. Stop right at the stairs, which you should ignore for now. Switch to Saruman and use Saruman's Staff to cut through the big gate on the right and collect the minikit.
Minikit 8/10

Requirements: a staff (any wizard)
Way to obtain: Stop close to the treasure's entrance, i.e. in the area that has been partially destroyed by the dragon. Switch to any of the wizards (e.g. Gandalf or Saruman) and send the magic projectile towards the big blue object. Wait for that object to fall apart and collect the minikit.
Minikit 9/10
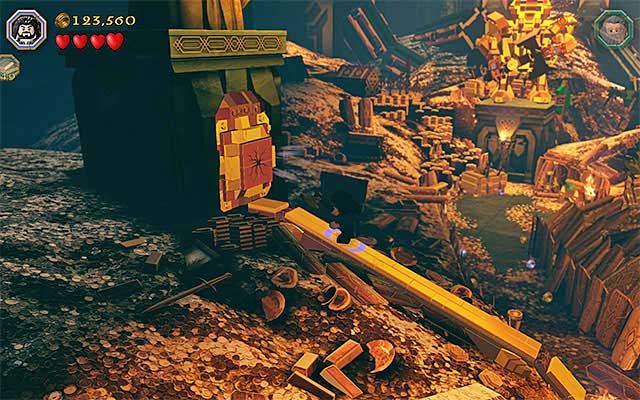
Requirements: axe (any dwarf)
Way to obtain: Right after you reach the treasure, take a look around for the narrow path on the left, shown in the above screenshot. Walk through that path and use the axe to cut through the cracked plate on the left. You can now collect a new minikit.
Unique Treasure 4/4
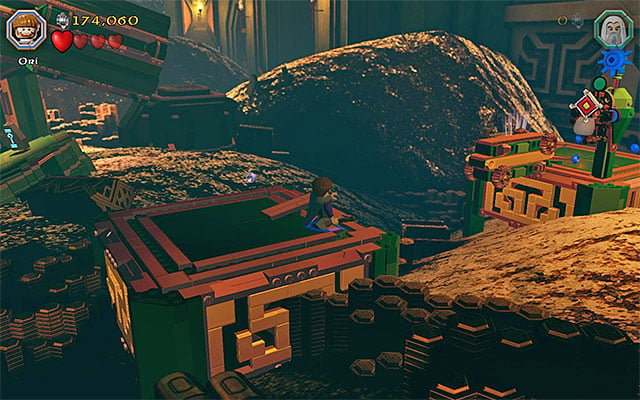
Requirements: slingshot (e.g. Ori), fishing rod (e.g. Bilbo)
Way to obtain: While exploring the treasure, stop in the spot where you need to use Dori's Flail. Do not do that now, and jump towards the small ledge on the right. Jump over, then, to the above ledge, shown in the above screenshot, and switch to the character with the slingshot.
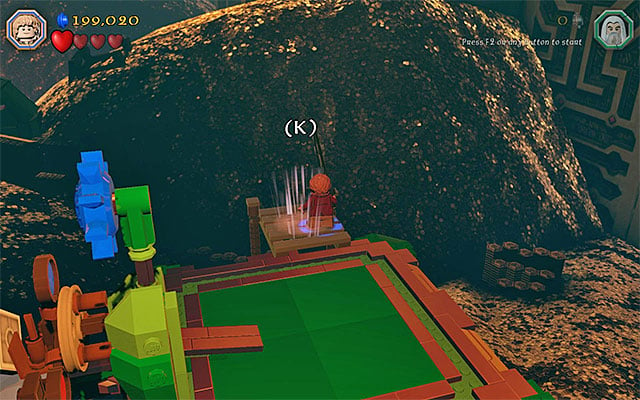
Use the slingshot, twice, on the target on the right and walk over the narrow bridge. Stand now in the spot where you need to use the fishing rod and select the character that has one (e.g. Bilbo). After you complete the fishing minigame, you will be rewarded with a minikit.
Reward: Shield of Song - playing of the sad song
Minikit 10/10

Requirements: -
Way to obtain: You can collect the last minikit during the escape from the dragon and you, virtually, cannot miss it.
Master Burglar
To obtain the Master Burglar Status, you need to amass, at least, 130000 studs. remember that you need to be on the lookout for the blue and violet studs (many of them are near the better-hidden collectibles) and try to complete the building minigame, at the mine, as well as possible.
- LEGO The Hobbit Game Guide & Walkthrough
- LEGO The Hobbit: Walkthrough, Collectibles, Maps
- LEGO The Hobbit: Main Stages - Collectibles
- LEGO The Hobbit: Introduction
- LEGO The Hobbit: Stage 1 (Greatest Kingdom in Middle-Earth)
- LEGO The Hobbit: Stage 2 (An Unexpected Party)
- LEGO The Hobbit: Stage 3 (Azog the Defiler)
- LEGO The Hobbit: Stage 4 (Roast Mutton)
- LEGO The Hobbit: Stage 5 (The Troll Hoard)
- LEGO The Hobbit: Stage 6 (Over Hill and Under Hill)
- LEGO The Hobbit: Stage 7 (Goblin-town)
- LEGO The Hobbit: Stage 8 (Out of the Frying Pan...)
- LEGO The Hobbit: Stage 9 (Queer Lodgings)
- LEGO The Hobbit: Stage 10 (Flies and Spiders)
- LEGO The Hobbit: Stage 11 (Barrels Out of Bond)
- LEGO The Hobbit: Stage 12 (A Warm Welcome)
- LEGO The Hobbit: Stage 13 (Looking for Proof)
- LEGO The Hobbit: Stage 14 (The Necromancer)
- LEGO The Hobbit: Stage 15 (On the Doorstep)
- LEGO The Hobbit: Stage 16 (Inside Information)
- LEGO The Hobbit: Main Stages - Collectibles
- LEGO The Hobbit: Walkthrough, Collectibles, Maps
You are not permitted to copy any image, text or info from this page. This site is not associated with and/or endorsed by the developers and the publishers. All logos and images are copyrighted by their respective owners.
Copyright © 2000 - 2025 Webedia Polska SA for gamepressure.com, unofficial game guides, walkthroughs, secrets, game tips, maps & strategies for top games.
