LEGO The Hobbit: Middle-Earth and its exploration

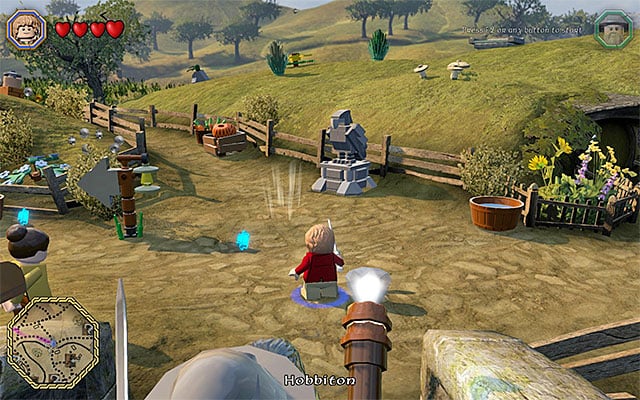
In LEGO The Hobbit, just like in LEGO The Lord of the Rings, You can explore the Middle Earth in between the individual missions. The game attempts to diversify that experience in a multitude of ways and the majority of attractions have been described further in this chapter. I recommend that you decide on the exploration of the world after you have completed the storyline , because many of the areas will be inaccessible to you at first (a river, a barricade, a destroyed bridge, etc.), which is the result of insufficient progress in the storyline mode.
Note - The world map can be freely zoomed in and out, as well as moved. To do that, you use the keys that you use to manipulate the camera view.


You can travel the individual locations, on the world map, in two different ways. The first one assumes using main paths, which have been traced on the map with small dots. The second variant is the fast-travel option, which becomes available after you have completed the eighth chapter of the game (Out of the Frying Pan...), i.e. after the second encounter with Azog the defiler. If you want to travel, quickly, to a different location, you need to find, in the game world, or select the Eagle Statue - the above screenshots) and define your destination. This is a definitely superior way to travel, especially if you want to reach a distant location quickly.
Note - The icons of a door and an arrow symbolize the locations where you can access some other, separate locations (e.g. a cottage, a cave, etc.).

In LEGO The Hobbit there is no full day and night cycle, although it is possible to choose between the day and night. The purpose of this is, predominantly, to ensure yourself with access to the individual additional activities in the Middle Earth, because some of the side quests, collectibles or playable characters become available, in the given area of the map, e.g. only at night. If you want to change the current time of day, you need to visit one of the encampments and take rest at the campfire. This action is free of charge and it does not include any adverse consequences )e.g. supply loss, etc.).

On the world map, there are many different icons and the game does not really help you find out about what they refer to, because the legend is missing. A frequent sight are the red and white question marks, which symbolize the starting points for side missions (an example in the above screenshot) and the consecutive small tasks, of this kind, are unlocked with your progress in the game's storyline. Detailed descriptions for each of these tasks have been provided in the main walkthrough for the game and they usually require you to perform some simple actions r to complete a minigame. I recommend that you take them on, on a regular basis, because they are rewarded with coins, mithril bricks or silver bricks.
Important note - not all of the side missions that you unlock are available at a given moment. The moon and sun icons mean that the appropriate moment to start them is the right time of the day!

Another category of icons are the ones that symbolize special locations. each such location is unique and an example of such a place is the storage building for the minikits that you find, in Rivendell.
Note - Special locations appear on the map only after you discover that. It is crucial, therefore that you explore, the cities and villages that you visit for the first time, thoroughly (you should especially look for icons with door, which inform you of entrances to separate locations).

On the map of the Middle Earth, also whereabouts of the select collectibles have been marked. These are the mithril bricks (the white brick icon) and schematics (the icon of a closed envelope; to learn more about this, see step 9). Still, I recommend against looking for these collectibles at the very beginning of the game, because the access to many of these is hindered and requires you to have more "advanced" items or characters in your party.

The last important category of icons, displayed on the world map, are the images of characters. The mode of operation is simple in this case - if you reach that location, you will be able to recruit that character. Very often, the characters that you unlock, bring in unique abilities, or equipment, to the party. Also, in this case, haste is not recommended, because hiring a given character, almost always, means expenses of the order of several hundreds of thousands of coins (Studs).
Note - not all of the additional characters are available at a given moment. The Sun and the Moon icons symbolize when you need to meet up with the character in question.
- LEGO The Hobbit Game Guide & Walkthrough
- LEGO The Hobbit: LEGO The Hobbit in 10 Easy Steps
- LEGO The Hobbit: LEGO The Hobbit in 10 Easy Steps - Introduction
- LEGO The Hobbit: The storyline
- LEGO The Hobbit: Middle-Earth and its exploration
- LEGO The Hobbit: Interaction with the environment
- LEGO The Hobbit: Enemies and other dangers
- LEGO The Hobbit: Cooperation
- LEGO The Hobbit: Studs (Coins)
- LEGO The Hobbit: Resources (Loot)
- LEGO The Hobbit: Minigames
- LEGO The Hobbit: Collectibles
- LEGO The Hobbit: Completing the game in 100%
- LEGO The Hobbit: LEGO The Hobbit in 10 Easy Steps
You are not permitted to copy any image, text or info from this page. This site is not associated with and/or endorsed by the developers and the publishers. All logos and images are copyrighted by their respective owners.
Copyright © 2000 - 2025 Webedia Polska SA for gamepressure.com, unofficial game guides, walkthroughs, secrets, game tips, maps & strategies for top games.
