
The Gutter | Walkthrough
Key points of Dark Souls 2 - The Gutter/Black Gulch
Passage to another location
Trap
Shortcut/Passage/Area
Landmark/Switch
Bonfire
NPC (friendly)
Item
Rare opponent/Boss
Shortcut/Passage/Area
The passage (1) – From the spot marked on the map, you can jump down over the ledges, thanks to which you will get to another platform.
Passage (2) – Starting with the spot, where you obtained the Black Firebomb, climb down the ladder. While facing it, turn by 180 degrees and jump to the very bottom. On the right, you will notice a small platform, from which you can jump down to a lower level. Now, turn by 180 degrees and jump to the very bottom again - there, you will find a zombie.
Descent – After you defeat the long earthworm, light the torch and look past the cliff's edge. You should notice a small escarpment that you can jump down onto. Then, climb down from the escarpment, onto another cliff on the left. You will face the entrance to a large cave.
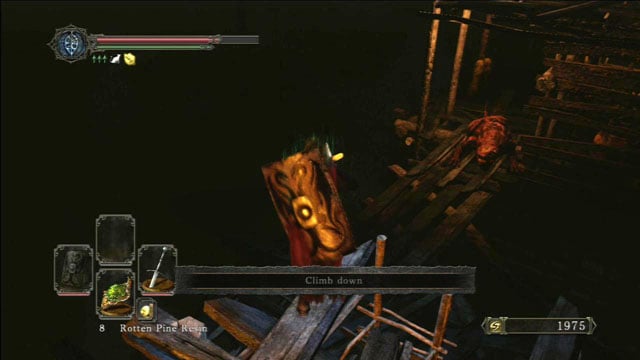
Shortcut – You simply need to smash several loose planks.
Bonfire
Bonfire (!) – Upper Gutter. Once you walk onto the cliff with the statuettes, destroy them all. Then, jump down to the wooden ramp ahead and go down the path. Here, fall to another ramp below. NOTE! You should not go up the ramp, towards the ledge with the single zombie and the urn on it, because this way you will miss a bonfire! You should go down the ramp - the floor will colapse under your weight and you will land on the ramp with the bonfire.
Trap
A TRAP (1) – After you cross the first bridge, it is necessary that you keep to the right of the platform. Only after you reach the second bridge, you can move left and put the light on.
A TRAP (2) – A hole in the very center of the platform.
Item
Ring of Life Protection – After you take the first passage, climb onto the wooden structure and jump towards the chest.
Twinkling Titanite – From the spot where you obtained the Ring of Life Protection, turn towards the wooden structure. Below the stone ledge, on which you are standing, you will notice a spot that you can jump/roll towards. Inside, there is a chest with the item.
Havel's Armor Set – Requires the Forgotten Key (Black Gulch). The armor is inside one of the jars.
Dark Pyromancy Flame – After you spring the second trap, walk over the bridge and turn right. The item is inside one of the jars.
Black Firebomb x3 – In the chest on the upper level
Titanite Chunk – After you cross the second passage, you should notice two jars within the structure, The item is inside one of them.
Tattered Cloth Armor Set – Set After you cross the second passage and kill the zombie, turn around and jump into the passage that you can see. THe set is inside the jar.
Ring of Evil Eye – From the spot, where you obtained the Tattered Cloth Armor Set, jump ahead, towards the ramp. At the other end of the ramp, there is a chest with the ring.
From the spot, where you obtained the Ring of Evil Eye, climb up the ladder, to the very top. The item is inside the jar, in a small structure in the middle of the platform. NOTE! The jars are watched over by an exploding mummy!
Rotten Pine Resin x3 – After you take the ladder, jump down to the platform with the jars. The item is inside.
Great Club – From the spot, in which you obtained the Rotten Pine resin, jump over to the platform with the jar and, from there, onto another one with a chest. The item is inside.
Lifegem x20 – At the very bottom, inside one of the jars.
Dark Fog – At the very bottom, inside one of the jars.
Ring of Giants +1 – 1 Ring of Giants +1 and Petrified Dragon Bone
Landmark/Switch
Platform (1) – You need to spring the first trap and take a long jump.
Zipline (the beginning) – On the rooftop above the spot where you found the Bandit Greataxe
Ladder – It is hidden behind two jars (there is Dung Pie x2 next to them)
NPC (friendly)
Giant Ant Queen – Harmless. Its fumes heal poisoning (but they partially damage your equipment).
Lucatiel of Mirrah – Right before the bottleneck with the oil slicks on the ground, you should light a torch and look down the cliff. You willl notice a small stone ledge that you can fall onto. Inside, there is the Lucatiel.
Darkdiver Grandahl – Requires the Forgotten Key. It is past the door, in the descent.
Rare opponent/Boss
Invasion: Melinda the Butcher – Appears along your way back from the ledge with the Ring of Life Protection.
Boss - The Rotten
Giants (Forgotten Key) – You will reach here after you take the described passage. The opponents drop the Forgotten Key.

Watch out for stone statues because they shoot poisoned darts. Try to approach them from the side or back and destroy them. You can't break them with a regular bow or crossbow.

After you break the statues, jump to the wooden bridges. Light a torch because it's really dark here. You can also light some lamps on the way. Jump down to the lower bridge and go up. Kill the zombie and stand on the right. You'll see a bonfire in the distance. Run up to the ledge and jump towards the bonfire to light it.

Cross the bridge and go forward. You'll see a mutant dog. It attacks with its paws so the best way to fight it is to jump back and attack.

After you kill the dog, jump down and destroy the statues. Cross the bridge to get to the farther part of the location.
You'll find more zombies. Climb the ladder to the roof of a wooden shack. You can kill a mutant dog from here to avoid confrontation. There's a chest there as well.
Go down and towards a shack. You have to watch out because there's quite a lot of stone statues. Climb the ladder and kill a zombie in the corner with a torch.

Cross the bridge and kill an exploding zombie and a mutant dog. Cross another bridge and go along the wall.

You'll see a cave entrance on the left. There are some zombies inside. Kill them, take the items and open the chest.

Keep going along the wall and jump down at the end of the bridge. You can take the opportunity and attack the dog below. Destroy the vases to take the Poison Arrow and walk through the fog.

Inside you'll see some ladders leading down. They all lead to the same place. But before you use it, destroy one of the walls to reach another bonfire.

Use one of the ladders. At the bottom kill all the exploding zombies. After you do that, go towards the "hearts" and destroy them from a distance. Knives are the best for that. Don't destroy them when you're close because they release acid that destroys your equipment.

Jump to the lower level and take the Fragrant Branch Of Yore. Run forward and walk through the fog. You'll see a tunnel. Turn left at the end of it and light a bonfire.

You are not permitted to copy any image, text or info from this page. This site is not associated with and/or endorsed by the Bandai Namco Games or From Software. All logos and images are copyrighted by their respective owners.
Copyright © 2000 - 2025 Webedia Polska SA for gamepressure.com, unofficial game guides, walkthroughs, secrets, game tips, maps & strategies for top games.