Dead Space Part 2 | Walkthrough

guides

Last update:

Download Guide
Table of Contents

Restore power to the bridges

1 - Dead Space Part 2 | Walkthrough - Walkthrough - Dead Space Game Guide & Walkthrough
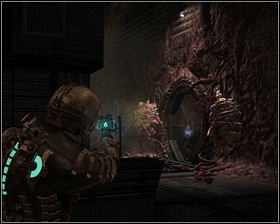
Hiding behind the column cut off the tentacles of the two creatures blocking the hatch, then dispose of their children using the line gun - Dead Space Part 2 | Walkthrough - Walkthrough - Dead Space Game Guide & Walkthrough

Hiding behind the column cut off the tentacles of the two creatures blocking the hatch, then dispose of their children using the line gun. You can use the Store, Save station and the Stasis recharger or just check the nearby lockers. Get through the hatch.

2 - Dead Space Part 2 | Walkthrough - Walkthrough - Dead Space Game Guide & Walkthrough
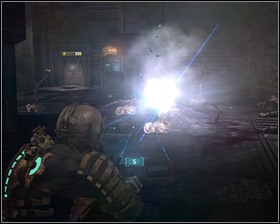
The tunnel has no gravity, so you can just dodge obstacles by jumping around them - Dead Space Part 2 | Walkthrough - Walkthrough - Dead Space Game Guide & Walkthrough

The tunnel has no gravity, so you can just dodge obstacles by jumping around them. On your way through the tunnel you will encounter some necromorphs.

3 - Dead Space Part 2 | Walkthrough - Walkthrough - Dead Space Game Guide & Walkthrough
Jump in front of the control panel and use kinesis to flip the switch - Dead Space Part 2 | Walkthrough - Walkthrough - Dead Space Game Guide & Walkthrough

Jump in front of the control panel and use kinesis to flip the switch. There are two crates here as well as a Stasis recharger. Look up and jump back.

4 - Dead Space Part 2 | Walkthrough - Walkthrough - Dead Space Game Guide & Walkthrough
Two fans block your way, you will need to slow them down using stasis - Dead Space Part 2 | Walkthrough - Walkthrough - Dead Space Game Guide & Walkthrough

Two fans block your way, you will need to slow them down using stasis. You will have to jump under the first one, but you can just run under the other. Leave the tunnel and check the locker to get Large med pack.

Take the Marker to the Pedestal Chamber (2)

5 - Dead Space Part 2 | Walkthrough - Walkthrough - Dead Space Game Guide & Walkthrough
Another familiar necromorph will pop up - slow it down with stasis, shoot it in the groin to sewer the limbs from the body - Dead Space Part 2 | Walkthrough - Walkthrough - Dead Space Game Guide & Walkthrough

Another familiar necromorph will pop up - slow it down with stasis, shoot it in the groin to sewer the limbs from the body. You will get a Power node for killing it. Save the game and get back to the Marker.

6 - Dead Space Part 2 | Walkthrough - Walkthrough - Dead Space Game Guide & Walkthrough
Open the bridge, slow it down and move the Marker - Dead Space Part 2 | Walkthrough - Walkthrough - Dead Space Game Guide & Walkthrough

Open the bridge, slow it down and move the Marker. Only one more gate left. Activate the terminal.

7 - Dead Space Part 2 | Walkthrough - Walkthrough - Dead Space Game Guide & Walkthrough
Repeat the sequence in this room, but look around carefully - there are some lockers here (including a one with the Power Node) and containers - Dead Space Part 2 | Walkthrough - Walkthrough - Dead Space Game Guide & Walkthrough

Repeat the sequence in this room, but look around carefully - there are some lockers here (including a one with the Power Node) and containers.

8 - Dead Space Part 2 | Walkthrough - Walkthrough - Dead Space Game Guide & Walkthrough
Before moving the Marker an inch forward restock on ammo by looting the crates, then pull the Marker to the end of the platform killing the enemies on your way - Dead Space Part 2 | Walkthrough - Walkthrough - Dead Space Game Guide & Walkthrough

Before moving the Marker an inch forward restock on ammo by looting the crates, then pull the Marker to the end of the platform killing the enemies on your way.

9 - Dead Space Part 2 | Walkthrough - Walkthrough - Dead Space Game Guide & Walkthrough
Once you get to the end of the rail activate the console, watch a brief cut-scene - Dead Space Part 2 | Walkthrough - Walkthrough - Dead Space Game Guide & Walkthrough

Once you get to the end of the rail activate the console, watch a brief cut-scene. And leave through the door leading to the shuttle. Watch another cut-scene - that's not the end of your problems.

Return to the shuttle

10 - Dead Space Part 2 | Walkthrough - Walkthrough - Dead Space Game Guide & Walkthrough
Heading towards the shuttle check all the lockers (including one with a Power node) and containers - Dead Space Part 2 | Walkthrough - Walkthrough - Dead Space Game Guide & Walkthrough

Heading towards the shuttle check all the lockers (including one with a Power node) and containers. You will also reach a small storage through which you will get to the familiar room with the Upgrade bench, Store and the Save point. One more fight left, so:

  • sell all the useless items
  • restock on Plasma energy
  • Don't be cheap when buying the Med packs;
  • upgrade the Plasma cutter and your suit (RIG) to the maximum. If needed, buy additional Power nodes;
  • save the game
11 - Dead Space Part 2 | Walkthrough - Walkthrough - Dead Space Game Guide & Walkthrough
Aim for the yellow spots around the mouth - Dead Space Part 2 | Walkthrough - Walkthrough - Dead Space Game Guide & Walkthrough

Aim for the yellow spots around the mouth. Keep moving, especially when the monster flexes preparing to hit you. At some point you will be grabbed and will have to end the first part of the fight from a rather uncomfortable view.

12 - Dead Space Part 2 | Walkthrough - Walkthrough - Dead Space Game Guide & Walkthrough
In the second part of the fight aim for the yellow cocoons - Dead Space Part 2 | Walkthrough - Walkthrough - Dead Space Game Guide & Walkthrough

In the second part of the fight aim for the yellow cocoons. Additionally, throw the exploding barrels at it using kinesis. After the last cocoon is gone, the monster will die. Get to the shuttle and watch the final scene.

Dead Space (2008)

October 14, 2008

PC PlayStation Xbox
Rate It!

You are not permitted to copy any image, text or info from this page. This site is not associated with and/or endorsed by the Electronic Arts or EA Games. All logos and images are copyrighted by their respective owners.

Copyright © 2000 - 2025 Webedia Polska SA for gamepressure.com, unofficial game guides, walkthroughs, secrets, game tips, maps & strategies for top games.