Battlefield 5: Narwik Map - Frontlines Mode
Last update:
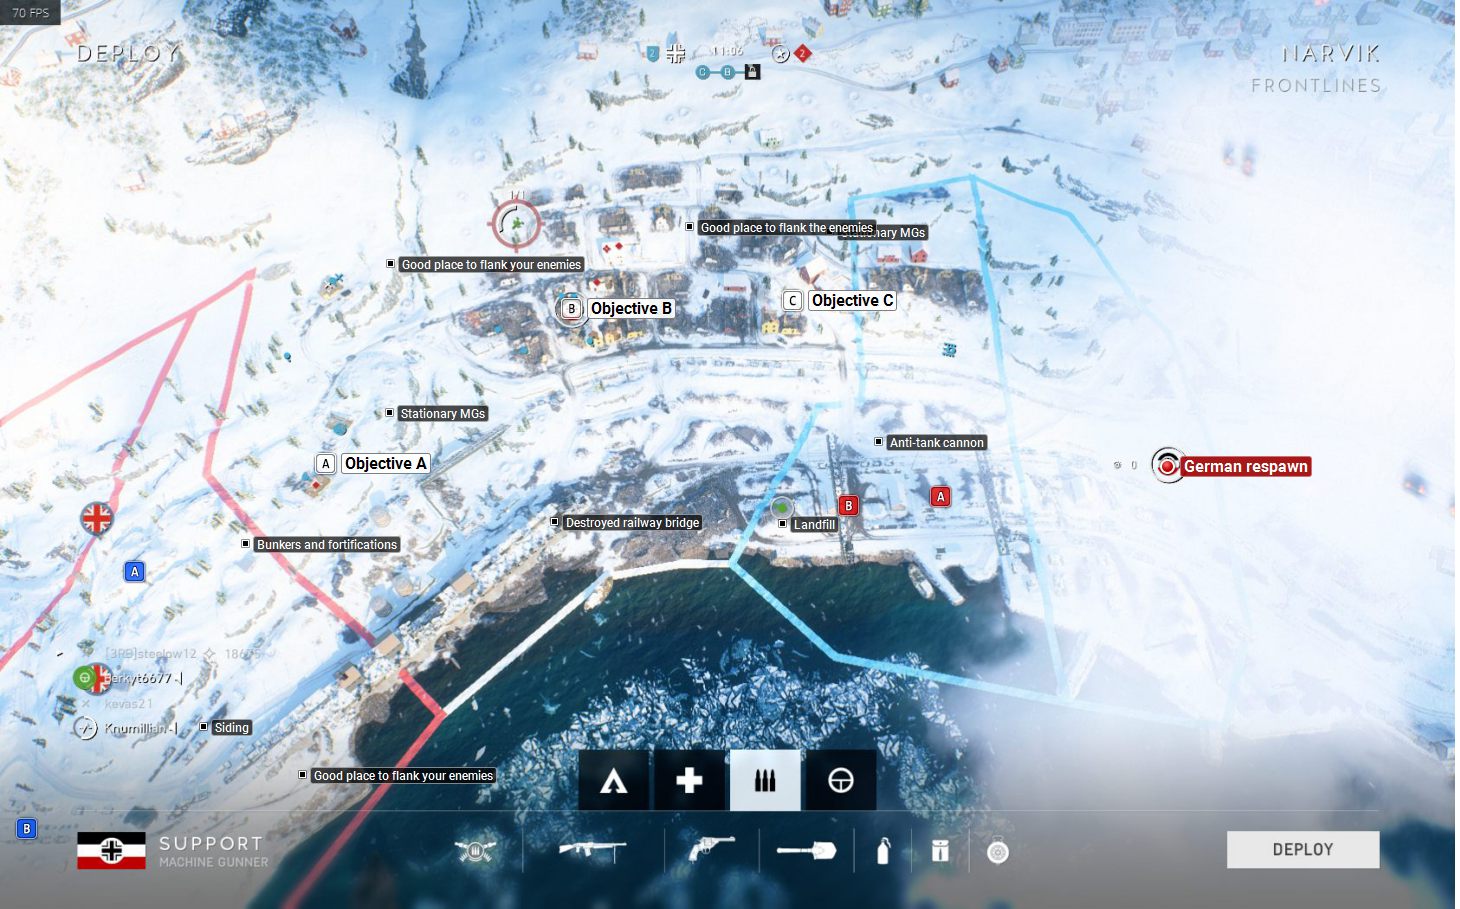
In this chapter you will find the map of Narvik in the Frontlines mode. The chapter contains a general characteristic of the map, map legend, as well as descriptions of flags in terms of available covering spots. The Battlefield 5 game guide will guide you on the battlefield.
Characteristic of the map
The map for the first day is very similar to the one from the Conquest mode - the only difference is that the points must be captured in order, one after another, pushing the frontline. The game in this mode can be very long, lasting up to an hour. Generally a good idea here is to fortify the previously captured points in case the storm on the further ones is unsuccessful.
Most of those points are located in the same places as the flags in the Conquest mode. Some of them are located in the city - there are multiple cover spots, as well as ruins located there that can be used to hide from enemy fire. The map is of average size, although it is still advised to make use of a tank support.
After capturing 3 flags by your team, your task will be to destroy 2 points near the enemy base. In the scenario in which the enemy captured 3 flags, your team will be forced to defend its own points near the base. Regardless of the side controlling the flags, the attacking side has a limited amount of tickets to perform the assault. The game ends once all of the points are destroyed or when at the end of the map one of the sides has more defensive points. Playing as part of a team is crucial here - if you do not have it or there is no one alive at the moment, you will need to travel back to the battlefield from the last captured point.
Objectives near the British base are harder to destroy due to the open field - use the terrain to find some cover. There are wagons near point B - those are good shooting positions, especially for the defending side. The attacking side should flank those points from the north or south.
- Battlefield V Guide
- Battlefield 5: Game Guide
- Battlefield 5: Maps
- Battlefield 5: Frontlines
- Battlefield 5: Aerodrome Map - Frontlines
- Battlefield 5: Arras Map - Frontlines
- Battlefield 5: Devastation Map - Frontlines Mode
- Battlefield 5: Fjell 652 Map - Frontlines Mode
- Battlefield 5: Hamada Map - Frontlines Mode
- Battlefield 5: Narwik Map - Frontlines Mode
- Battlefield 5: Rotterdam Map - Frontlines Mode
- Battlefield 5: Twisted Steel Map - Frontlines Mode
- Battlefield 5: Frontlines
- Battlefield 5: Maps
- Battlefield 5: Game Guide
You are not permitted to copy any image, text or info from this page. This site is not associated with and/or endorsed by the developers and the publishers. All logos and images are copyrighted by their respective owners.
Copyright © 2000 - 2026 Webedia Polska SA for gamepressure.com, unofficial game guides, walkthroughs, secrets, game tips, maps & strategies for top games.
