Battlefield 5: Hamada Map - Frontlines Mode
Last update:
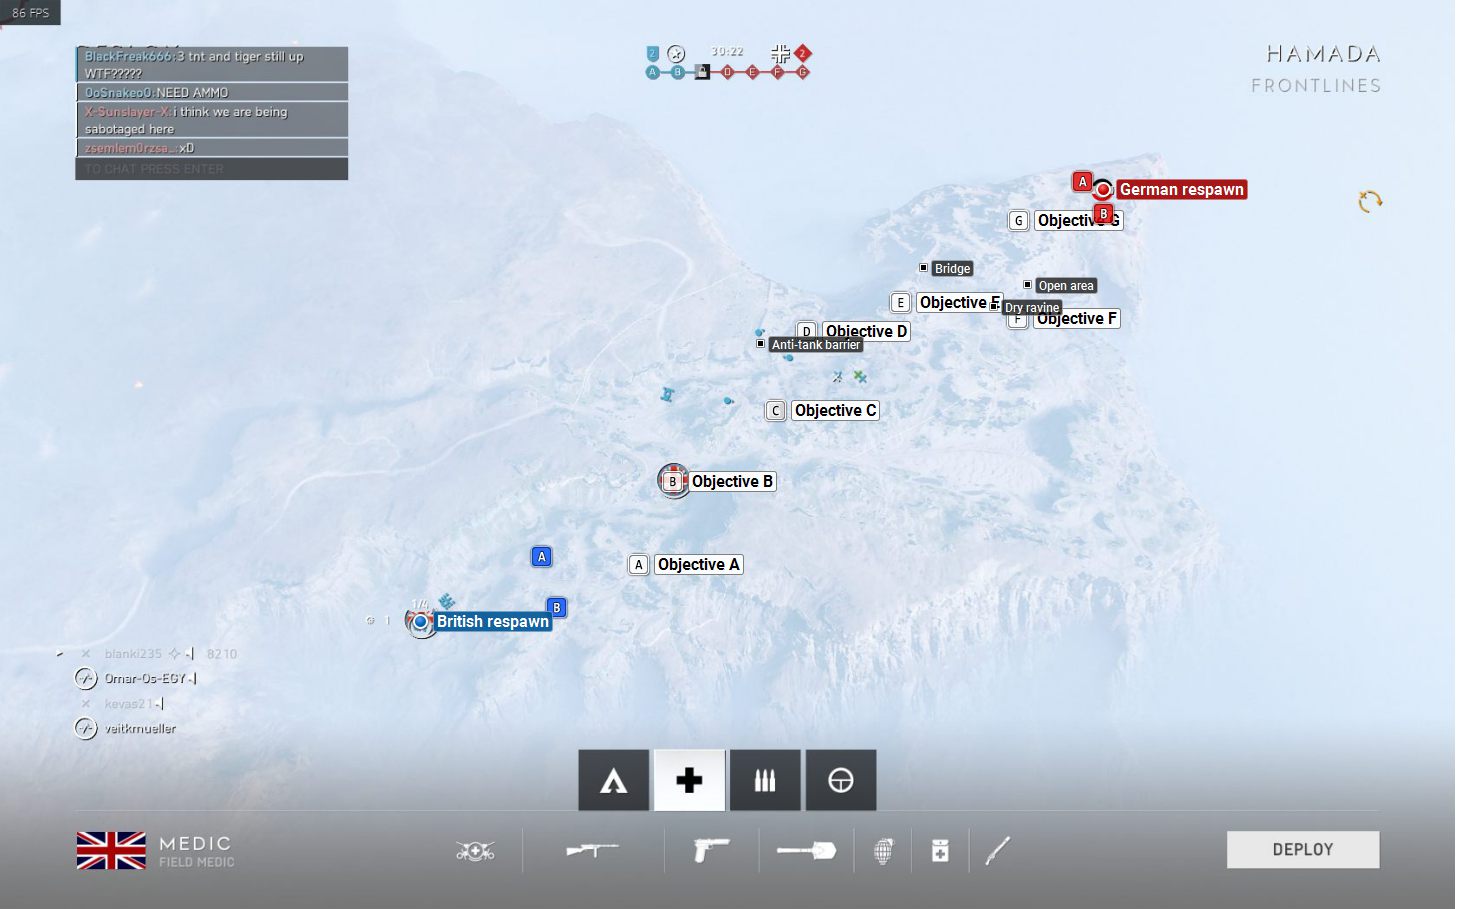
In this chapter you will find the map of Hamada in the Frontlines mode. The chapter contains a general characteristic of the map, map legend, as well as descriptions of flags in terms of available covering spots. The Battlefield 5 game guide will guide you on the battlefield.
Characteristic of the map
The action of Hamada map takes place somewhere between Egypt and Libya. There are 7 points to capture here. Given the size and the terrain of the map, you should be using tanks and other armored vehicles. All of the capture points are located in places similar to the Conquest version of the map. Some of those points, closer to the British base, are located on an open field, making it a necessity to the shape of the terrain to find some cover. The closer you get to the German base, the more cover spots and ruins there will be.
After capturing 7 flags by your team, your task will be to destroy 2 points near the enemy base. In the scenario in which the enemy captured 7 flags, your team will be forced to defend its own points near the base. Regardless of the side controlling the flags, the attacking side has a limited amount of tickets to perform the assault. The game ends once all of the points are destroyed or when at the end of the map one of the sides has more defensive points. Playing as part of a team is crucial here - if you do not have it or there is no one alive at the moment, you will need to travel back to the battlefield from the last captured point.
Points to destroy, both near the German and British sides, are located in an open field. Both sides must use terrain to find cover, especially the side attacking the objectives near the British base. While attacking the objectives near the German base, you will find two hills that can be used as a cover.
- Battlefield V Guide
- Battlefield 5: Game Guide
- Battlefield 5: Maps
- Battlefield 5: Frontlines
- Battlefield 5: Aerodrome Map - Frontlines
- Battlefield 5: Arras Map - Frontlines
- Battlefield 5: Devastation Map - Frontlines Mode
- Battlefield 5: Fjell 652 Map - Frontlines Mode
- Battlefield 5: Hamada Map - Frontlines Mode
- Battlefield 5: Narwik Map - Frontlines Mode
- Battlefield 5: Rotterdam Map - Frontlines Mode
- Battlefield 5: Twisted Steel Map - Frontlines Mode
- Battlefield 5: Frontlines
- Battlefield 5: Maps
- Battlefield 5: Game Guide
You are not permitted to copy any image, text or info from this page. This site is not associated with and/or endorsed by the developers and the publishers. All logos and images are copyrighted by their respective owners.
Copyright © 2000 - 2025 Webedia Polska SA for gamepressure.com, unofficial game guides, walkthroughs, secrets, game tips, maps & strategies for top games.
