Uncharted 3: Chapter 8 - The Citadel part 2 walkthrough
This page of the guide contains the walkthrough of the second part of chapter 8 of Uncharted 3 Drake's Deception. This chapter is titled The Citadel and during it Nathan Drake must continue eliminating enemies from this location. Small puzzles with a spyglass, as well as ones with pressure plates are found along the way.
 |  |
We climb up under fire and jump onto the chains. We will use them to get to a small window [1] through which we can get back to the tower. We need to take out the enemies firing at our companions located below. In the center of the room we will find wooden doors [2].
![When we try to open them, a muscle head in a vest jumps out at us [1] - Uncharted 3: Chapter 8 - The Citadel part 2 walkthrough - Walkthrough - Uncharted 3 Drakes Deception Guide](/uncharted-3-drakes-deception/gfx/word/113849109.jpg)
When we try to open them, a muscle head in a vest jumps out at us [1]. We take him out using fists and then open the door again to get to the top of the tower.
 | ![We go out on a small elevation [1] to join Charlie and together with him solve the mystery of the hidden entrance - Uncharted 3: Chapter 8 - The Citadel part 2 walkthrough - Walkthrough - Uncharted 3 Drakes Deception Guide](/uncharted-3-drakes-deception/gfx/word/113849140.jpg) |
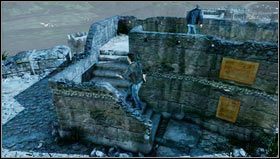
We go out on a small elevation [1] to join Charlie and together with him solve the mystery of the hidden entrance. After a short conversation, we stand on the sign on the ground [2] and look through the telescope into the sky.
 | ![We need to find the Pole Star (we can use the notepad to remind ourselves of its position [1]) - Uncharted 3: Chapter 8 - The Citadel part 2 walkthrough - Walkthrough - Uncharted 3 Drakes Deception Guide](/uncharted-3-drakes-deception/gfx/word/113849171.jpg) |
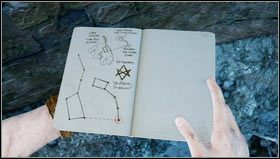
We need to find the Pole Star (we can use the notepad to remind ourselves of its position [1]). Once we point the telescope on the star (Drake will inform us about it), we lower the sight vertically to aim at the gate of the distant tower [2].
 | ![Once we do that, several missiles will fly towards us and we will have to run quickly across the wall [1] - Uncharted 3: Chapter 8 - The Citadel part 2 walkthrough - Walkthrough - Uncharted 3 Drakes Deception Guide](/uncharted-3-drakes-deception/gfx/word/113849203.jpg) |
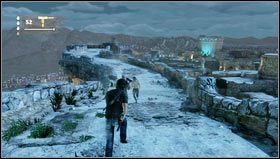
Once we do that, several missiles will fly towards us and we will have to run quickly across the wall [1]. When we reach its end, our companions will hide behind covers and we will have to pick up the Dragon sniper rifle [2]. This a low fire-rate weapon designed for a long range combat.
![Equipped with a sniper rifle, we hide behind decent cover and take out the enemies using rocket launchers [1] - Uncharted 3: Chapter 8 - The Citadel part 2 walkthrough - Walkthrough - Uncharted 3 Drakes Deception Guide](/uncharted-3-drakes-deception/gfx/word/113849218.jpg)
Equipped with a sniper rifle, we hide behind decent cover and take out the enemies using rocket launchers [1]. We must keep in mind that a direct hit from a rocket will result in an instant death.
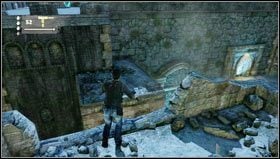 |  |
Once we get rid of the attackers, Sullivan and Chloe will slide down using a rope. Together with Charlie we will be knocked down by a rocket onto the nearby buildings. Now we must quickly follow Charlie, performing several dangerous jumps on the run [1] to eventually get into the yard [2] guarded by thugs.

The territory is quite vast and rich in people who want to kill us. We carefully eliminate opponents from the most secure position. An especially dangerous foe will be a professional equipped with a Kevlar and a sawn-off shotgun, as he can withstand several shots. Once the battle is over, we head with our companion towards the gate [1] which we saw through the telescope.

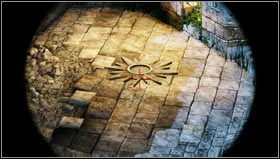
Behind the gate we will find an ordinary storeroom, but our attention will be drawn by two statues placed on the sides of the entrance. In front of one of them, on the ground, we will find a stone slab with the symbol [1]. We step on it and look around the castle area with the spyglass.
![On the lower level, on the ground, we will find a symbol of the star (sun) [1] - Uncharted 3: Chapter 8 - The Citadel part 2 walkthrough - Walkthrough - Uncharted 3 Drakes Deception Guide](/uncharted-3-drakes-deception/gfx/word/113849296.jpg)
On the lower level, on the ground, we will find a symbol of the star (sun) [1].
 | ![We look at it through the telescope [1] and then we look up (still through the telescope) to see that the columns are decorated with symbols [2] - Uncharted 3: Chapter 8 - The Citadel part 2 walkthrough - Walkthrough - Uncharted 3 Drakes Deception Guide](/uncharted-3-drakes-deception/gfx/word/113849328.jpg) |
We look at it through the telescope [1] and then we look up (still through the telescope) to see that the columns are decorated with symbols [2].
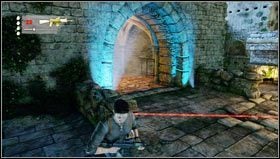 | 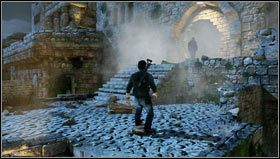 |
At this point, we will be attacked by a large group of enemies and we will have to leave our heavily exposed position as soon as possible. A good place is the zone with the star symbol. We jump on it and hide in a small recess [1]. From here we have a good position to shoot at enemies. Sullivan will help us. Once the enemies are dealt with, we follow Charlie, go through the hole in the wall [2] and climb up to meet with the recently lost companions.
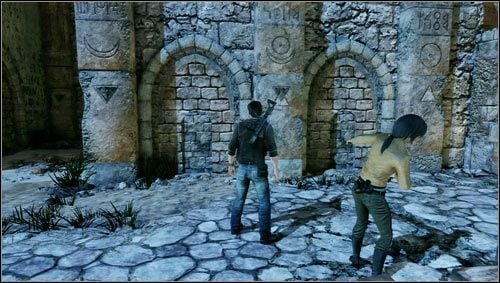
Now we have to solve the puzzle with the pillars. Once we enter a dark alley on the left, Charlie will be attacked using an unspecified drug and will lose his notebook. All we need to do now is to approach the middle pillar [1], move it and go through the hidden entrance.
- Uncharted 3 Drake's Deception Guide
- Uncharted 3: Game Guide
- Uncharted 3: Walkthrough
- Uncharted 3: Chapter 1 - Prologue walkthrough
- Uncharted 3: Chapter 2 - Greatness from Small Beginnings walkthrough
- Uncharted 3: Chapter 3 - Second-Story Work walkthrough
- Uncharted 3: Chapter 4 - Run to Ground walkthrough
- Uncharted 3: Chapter 5 - London Underground walkthrough
- Uncharted 3: Chapter 6 - The Chateau part 1 walkthrough
- Uncharted 3: Chapter 6 - The Chateau part 2 walkthrough
- Uncharted 3: Chapter 7 - Stay in the Light walkthrough
- Uncharted 3: Chapter 8 - The Citadel part 1 walkthrough
- Uncharted 3: Chapter 8 - The Citadel part 2 walkthrough
- Uncharted 3: Chapter 9 - The Middle Way walkthrough
- Uncharted 3: Chapter 10 - Historical Research walkthrough
- Uncharted 3: Chapter 11 - As Above, So Below part 1 walkthrough
- Uncharted 3: Chapter 11 - As Above, So Below part 2 walkthrough
- Uncharted 3: Chapter 12 - Abducted part 1 walkthrough
- Uncharted 3: Chapter 12 - Abducted part 2 walkthrough
- Uncharted 3: Chapter 13 - Rough Seas walkthrough
- Uncharted 3: Chapter 14 - Cruisin for a Bruisin walkthrough
- Uncharted 3: Chapter 15 - Sink or Swim walkthrough
- Uncharted 3: Chapter 16 - One Shot at This walkthrough
- Uncharted 3: Chapter 17 - Stowaway walkthrough
- Uncharted 3: Chapter 18 - The Rub al Khali walkthrough
- Uncharted 3: Chapter 19 - The Settlement walkthrough
- Uncharted 3: Chapter 20 - Caravan walkthrough
- Uncharted 3: Chapter 21 - The Atlantis of the Sands walkthrough
- Uncharted 3: Chapter 22 - The Dreamers of the Day walkthrough, Talbot boss fight
- Uncharted 3: Walkthrough
- Uncharted 3: Game Guide
You are not permitted to copy any image, text or info from this page. This site is not associated with and/or endorsed by the developers and the publishers. All logos and images are copyrighted by their respective owners.
Copyright © 2000 - 2026 Webedia Polska SA for gamepressure.com, unofficial game guides, walkthroughs, secrets, game tips, maps & strategies for top games.
