Daedric Quests part II | Other

guides

Last update:

Table of Contents

Namira

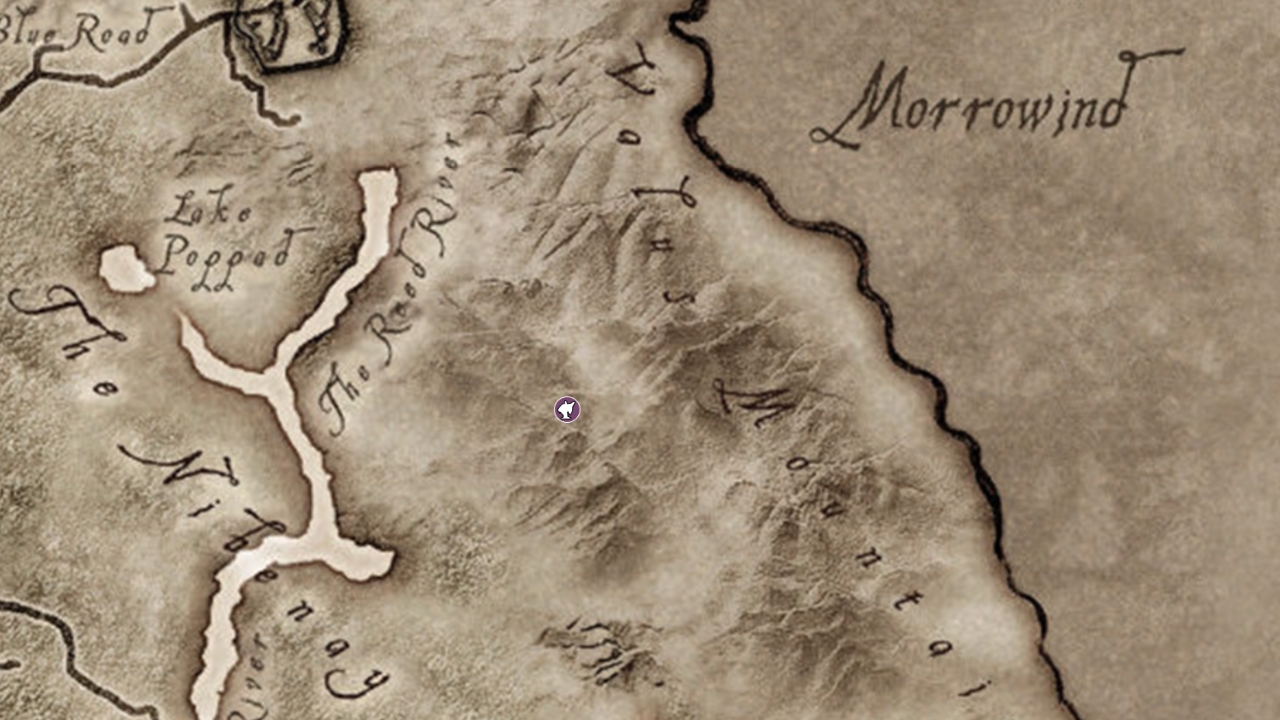
Location: 6s15;

Offering: your own ugliness;

Required level: 5;

Hjolfrodi the Harrier tell you that you are far too pretty to worship Namira. You now have to lower your Personality to about 20. Use some magic and alchemy to do so. Alcohol works pretty well, too - especially Cheap Wine, found in every inn around Cyrodiil.

1 - Daedric Quests part II - Other - The Elder Scrolls IV: Oblivion - Game Guide and Walkthrough
When you're as ugly as you can get, talk to Hjolfrodi again, and she'll let you speak to Namira - Daedric Quests part II - Other - The Elder Scrolls IV: Oblivion - Game Guide and Walkthrough

When you're as ugly as you can get, talk to Hjolfrodi again, and she'll let you speak to Namira. Daedric princess wants you go to the ruins of Anga. In there, you have to find four priests that try to help ruins' savage inhabitants. Cast Namira's Shround on each of them - that will take out their torches, the only thing that is keeping the locals from killing them. Afterwards, you can just watch as those savages deal with the priests the hard way. You don't have to engage in combat in any way.

Namira will give you a Ring of Namira (Reflect Damage 12% and Reflect Spell 10%).

Nocturnal

Location: 7s24;

Offering: none;

Required level: 10;

Talk to Mor gra-Gamorn - this time you won't be making any offering, just approach the shrine and listen to what Nocturnal has to say. You have to find a missing artifact, that is supposedly somewhere in Leyawiin.

Go to Weebam-Na's house to question the owner and Bejeen about the Eye of Nocturnal - Daedric Quests part II - Other - The Elder Scrolls IV: Oblivion - Game Guide and Walkthrough

Go to Weebam-Na's house to question the owner and Bejeen about the Eye of Nocturnal. You'll have to eavesdrop a bit - leave, and enter again, but this time in Sneak. You'll overhear that the artifact is hidden in Tidewater Cave.

Skeleton Key - every thief's dream. - Daedric Quests part II - Other - The Elder Scrolls IV: Oblivion - Game Guide and Walkthrough
Skeleton Key - every thief's dream.

You'll find the item by following the map marker - you'll have to dive for it. When you get it back to Nocturnal, you'll get a great reward - an unbreakable lockpick Skeleton Key. No more "out of lockpicks" for you!

Peryite

Location: 8s18;

Offering: none;

Required level: 10;

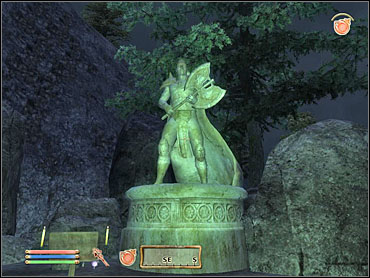
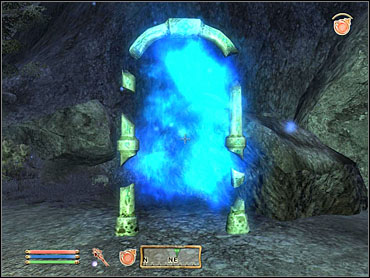
When you reach the Shrine of Peryite, you'll find his followers in a kind of weird trance. Approach the statue and touch it. Peryite wants to teleport you to Oblivion, where you'll have to find five of his followers' souls, trapped between worlds.

2 - Daedric Quests part II - Other - The Elder Scrolls IV: Oblivion - Game Guide and Walkthrough
This task is very simple, but long as heck - Daedric Quests part II - Other - The Elder Scrolls IV: Oblivion - Game Guide and Walkthrough

This task is very simple, but long as heck. Just follow the map markers to find the followers - the map is very big, so you'll be doing a lot of running. When you gather all 5, Peryite will open a portal for you. Talk to the statue again, and you'll get a powerful shield known as the Spell Breaker.

Sanguine

Location: 2s31;

Offering: Cyrodilic Brandy;

Required level: 8;

Engorm will tell you to bring a bottle of Cyrodilic Brandy as your offering. You can buy it in The Main Ingredient in Imperial City Market District.

Sanguine wants you to go to Leyawiin and spice up the countess' party by casting the spell Stark Reality on her guests. Go to Leyawiin Castle.

Bow before the party-god. - Daedric Quests part II - Other - The Elder Scrolls IV: Oblivion - Game Guide and Walkthrough
Bow before the party-god.

Go to the locked door marked on your map. Wait until evening (about 7 P.M.), and a guard will appear in front of it. Talk to him - he'll let you in if you're dressed for the party (forget about armor, get yourself some finery). If he doesn't seem to cooperate, use Speechcraft to raise his disposition.

If Alesia Caro is not there, wait 24h and try again. When everyone's at the party, cast a spell on them and run for it. You'll probably be caught by one of the guards: either go to jail or try to run out of the castle resisting arrest. Notice that you actually lost all your equipment and are running around in you undies - don't panic, though. You'll get it back.

3 - Daedric Quests part II - Other - The Elder Scrolls IV: Oblivion - Game Guide and Walkthrough
Go back to Sanguine's Shrine - Daedric Quests part II - Other - The Elder Scrolls IV: Oblivion - Game Guide and Walkthrough

Go back to Sanguine's Shrine. You'll get a staff called Sanguine Rose. Your lost equipment is in the chest nearby.

Sheogorath

Location: 7s28;

Offering: Lesser Soul Gem, Lettuce, Yarn

Required level: 2;

Sheogorath's followers are a bunch of weirdos. You have to get the prince a lesser soul gem, a lettuce, and some yarn. These can be found in various random locations, in all assortment of chests, barrels, shops etc. Once you have all three items, talk to Sheogorath - you have to go to Border Watch.

Talk to Ri'bassa - Daedric Quests part II - Other - The Elder Scrolls IV: Oblivion - Game Guide and Walkthrough

Talk to Ri'bassa. Your goal is to make their ancient prophecy of armageddon come true. The signs that they are looking forward to are invasion of rats and cattle disease.

Go to Border Watch Inn. Talk to the proprietor S'thasa about the Cheese. The one you want, a rare sample of Olroy Cheese, is on display near the entrance. Open the Display Case (or steal the key from S'thasa) and get Olroy Cheese from there.

The Olroy Cheese. - Daedric Quests part II - Other - The Elder Scrolls IV: Oblivion - Game Guide and Walkthrough
The Olroy Cheese.
The Cooking Pot. - Daedric Quests part II - Other - The Elder Scrolls IV: Oblivion - Game Guide and Walkthrough
The Cooking Pot.

Use the Cooking Pot in the middle of the town - you'll automatically put cheese in there. Wait for an hour and the whole village will be crawling with rats. Ri'bassa will be dropping Rat Poison here and there to get rid of them. Take one sample and use it on the Feeding Trough near the sheep. Poor animals just have to die.

HINT: If you can't find the poison, you can just as well kill all the sheep the traditional way.

4 - Daedric Quests part II - Other - The Elder Scrolls IV: Oblivion - Game Guide and Walkthrough
Sheogorath will speak to you - Daedric Quests part II - Other - The Elder Scrolls IV: Oblivion - Game Guide and Walkthrough

Sheogorath will speak to you. Go to the town square and fair for the final sign to come to pass. When the show ends, go back to the shrine. You'll get a funny staff called Wabbajack, which allows you to randomly morph one creature into another. You can use it to turn Liches into Rats, if you're lucky. If you're not, it might work just the other way round.

Vaermina

Location: 9s14;

Offering: Black Soul Gem

Required level: 5;

Talk to Aymar Douar. He'll tell you to get a Black Soul Gem for his master - an "evil" version of common soul gems, used by necromancers. How to get it? You've surely come across some of them already, if you're doing the Mages Guild. The easiest and quickest way to get one is to do the "Cheydinhal Recommendation" quest.

When you make the offering, Vaermina will speak to you. She wants you to find her lost jewel, stolen by a man named Arkved. His tower is south of the shrine.

5 - Daedric Quests part II - Other - The Elder Scrolls IV: Oblivion - Game Guide and Walkthrough
Enter and go forth - Daedric Quests part II - Other - The Elder Scrolls IV: Oblivion - Game Guide and Walkthrough

Enter and go forth. You'll eventually meet two monsters. Defeat them and enter Arkved's Void. Quite a nice place to live indeed. Follow the map marker and reach Arkved's Lost Halls, then Hall of Changes. In there, you'll find a trap door to Arkved's Rending Halls. Defeat all the monsters on your way and *finally* enter Arkved's private quarters.

6 - Daedric Quests part II - Other - The Elder Scrolls IV: Oblivion - Game Guide and Walkthrough
Don't expect any epic fight with the owner of all these insanities around - Daedric Quests part II - Other - The Elder Scrolls IV: Oblivion - Game Guide and Walkthrough

Don't expect any epic fight with the owner of all these insanities around. He's sleeping, trapped in some kind of magical coma. Take the jewel from a table and leave, using the door that lead directly back to the ground level.

Go back to Shrine of Vaermina to get your reward, a staff called Skull of Corruption.

Hermaeous Mora

Location: 3s18;

If your character is on at least level 20, you've performed all the daedric quests above, and you've beaten the "Blood of the Daedra" quest in the main plot, you'll be approached by Hermaeous Mora's servant next time you rest. This works identically as encounters with Lucien from the Dark Brotherhood or Gray Fox' messengers in Thieves Guild quests.

Hermaeous Mora wants you to pay a visit to his Shrine - Daedric Quests part II - Other - The Elder Scrolls IV: Oblivion - Game Guide and Walkthrough

Hermaeous Mora wants you to pay a visit to his Shrine. Go there and talk to him. You have to gather 10 souls for him, one for each race inhabiting Cyrodiil. As I said in Dark Brotherhood's Introduction section, killing random people doesn't pay in Oblivion, as you might accidentally block your way to complete some quests.

The solution is very simple, though. You just have to visit other daedric shrines, killing the princes' followers. They've already player their role in the game and aren't meant to do anything else for you. Heck, you can even kill Hermaeous' followers as well. They are all unarmed, weak and don't defend each other, meaning you don't have to fight the whole group when you attack one of them.

Hermaeous is the most grotesque of all princes, that's for sure. - Daedric Quests part II - Other - The Elder Scrolls IV: Oblivion - Game Guide and Walkthrough
Hermaeous is the most grotesque of all princes, that's for sure.

You need to get yourself souls of: Altmer, Argonian, Bosmer, Breton, Dunmer, Imperial, Khajiit, Nord, Orc, and Redguard. The procedure of soul-gathering would be very simple indeed, if not for a certain glitch. Everything should work this way: you cast a spell called Mora's Soul Trap on somebody, then kill him within two minutes of the spell's durability. Unfortunately, some bug keeps the spell from working most of the time, which can cause some unnecessary problems.

In my case, the following trick did the thing. I was to cast a spell twice on another person (meaning not the one I wanted soul from), then cast it twice again, but this time on the right character - the second time there appeared a warning that the character is already under the spell. That meant that the trick worked, and I could now kill the person to get his or her soul. Let's hope this issue is fixed soon by some patch.

When you gather all 10 souls, get back to Hermaeous. He has something special for you: a book entitles Oghma Infinium. When you read it, you will be given a choice about which path you want to follow: Steel, Shadow, or Spirit.

Steel - increases you Blade, Heavy Armor and Blunt abilities;

Shadow - increases your Sneak, Security and Light Armor abilities;

Spirit - increases your Destruction, Conjuration and Restoration abilities.

You are not permitted to copy any image, text or info from this page. This site is not associated with and/or endorsed by the 2K Games or Bethesda Softworks. All logos and images are copyrighted by their respective owners.

Copyright © 2000 - 2025 Webedia Polska SA for gamepressure.com, unofficial game guides, walkthroughs, secrets, game tips, maps & strategies for top games.