Sudden Strike 4: Mission 6 - Battle of Hurtgen Forest
Last update:
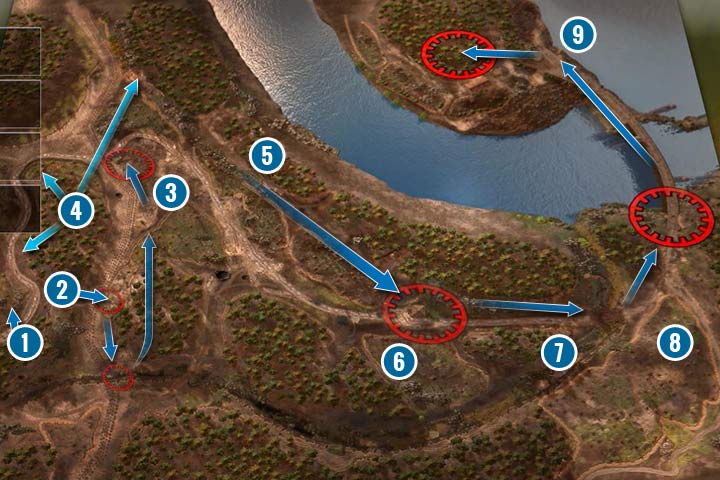
Mission objectives:
- Breach the Siegfried line
- Secure the German Drop zone
- Eliminate the defenders and secure the dam
- Eliminate remaining enemies in the training camp
The support doctrine is the best for this mission, especially Camouflage and Demolition Kits. You can also choose the infantry doctrine because for the major part of the mission you will have to use your soldiers. The problems in this mission are: no additional ammo and fuel supplies as well as dense forest and hidden enemies.
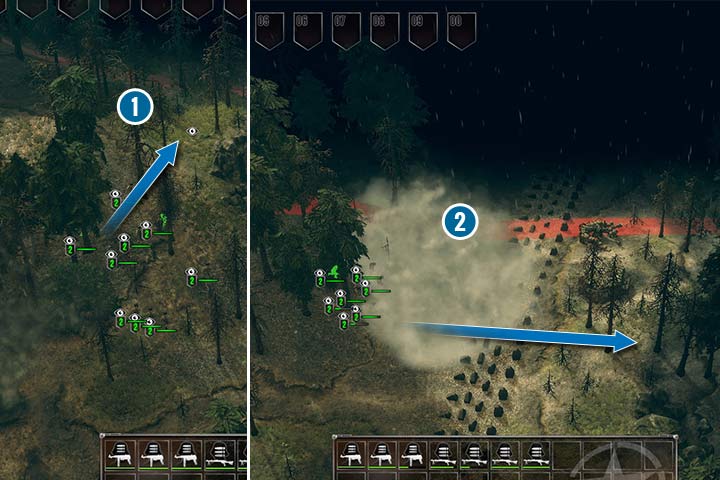
In the beginning of the mission you receive a very big infantry squad. Before you proceed with identifying enemy positions you should take care of the enemy officer right above the rocks (1). The enemy has two howitzers nearby that can quickly destroy your squads. Make a group that consist only of regular riflemen and those with pistols and machine guns. Move to the upper edge of the map and place your soldiers in the forest. However, you have to turn off "Fire at will". Throw smoke grenades in front of the enemy wires and after that you must "Five an order to move to the position behind the cannon (2). Now, you can turn "Fire at will" on or you can point targets by yourself. The enemy infantry will move here from a forest. It is better to eliminate them quickly because there is another howitzer at the bottom. Stabilize the situation, heal the injured and prepare for another attack. Sneak up on the second cannon and eliminate the crew by using the dense forest (2). Soon, those two cannons will be very useful to you. The last location to capture is the one on the south which is defended by a few soldiers.
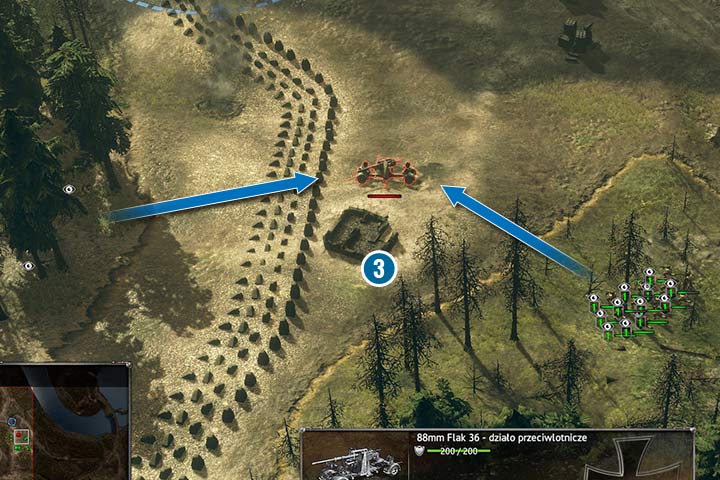
Now, it is time to clear another part of Siegfried line. Use the captured howitzers to destroy the bunker in the north (3). The rest of the infantry should be lurking on the right from its position. Here, you can also find an 88mm Flak cannon that can be very useful in destroying tanks. You can destroy it by using the artillery or place two infantry groups on its opposite sides. The group that has a clear line of fire should fire first at the crew that is not protected by the armor. When the cannon turns you must order the first group to hold their fire and order the second one to start shooting. Thanks to that you can eliminate the crew while the cannon is still functional. This will be useful in destroying tanks in the area, although you can't tow this weapon and take it to a new place. After destroying the vehicles there is also a bunker, two anti-tank guns and an infantry group all near the gate (3). Use the howitzers to deal as much damage to the enemy infantry as possible and order your soldiers to capture the cannons.
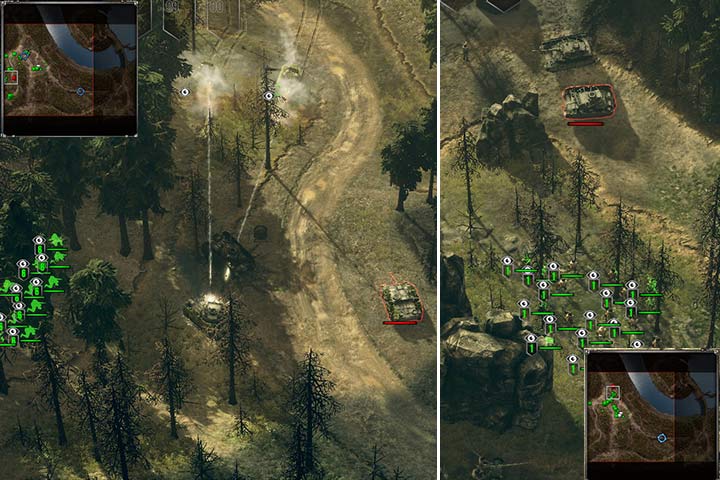
After eliminating the enemies you will receive reinforcements - tank destroyers and an additional infantry group (4). For now, you should stop those squads. The enemy set two traps on the way to the gate. The first one is right after a turn from the starting position - there are three Stug tank destroyers. Further ahead there are two Panzer IV and Panther tanks. Use the captured cannons to destroy the group on the top and send the new soldiers to flank the Stug positions. Then, gather your vehicles near the gate. If you put the attack on the enemy tanks on hold for a few minutes and position your men then you will receive another support group. This time, they will appear on the road that leads to the gate but behind the enemy tanks. You can use those tanks to eliminate the Germans by hitting them in their backs. There is another group of tanks north from the gate which usually attacks you in a least expected moment, especially when you start marching on the dam. Place your units in a such way that allows you to attack first and deal as much damage as possible. This is very simple to do if you have extended camouflage for your tanks and tank destroyers. Place your vehicles in a dense forest and fire at the most exposed enemies.
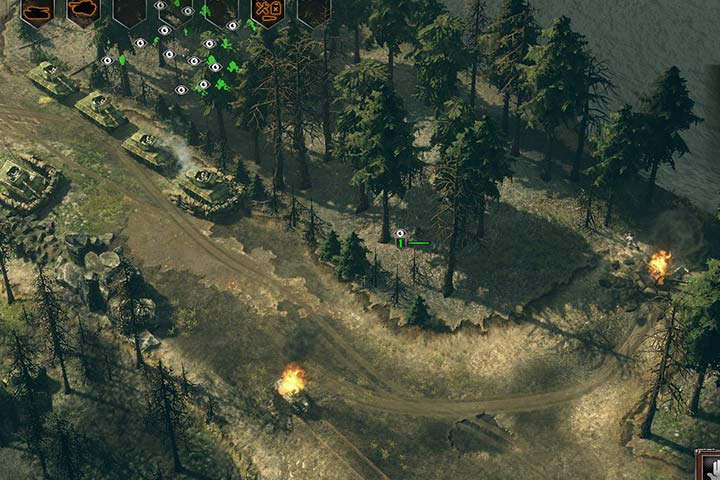
It is time to march at the dam (5). The best way to do it is to get on the higher positions and move through the forest on foot. When you are on your way you can find 4 artillery positions with small groups of enemies. Keep your tanks close because every attack can provoke an enemy tanks which are located near a watchtower on the east. Move slowly, capture every cannon and try to eliminate as many tanks as possible. Wait for them to retreat and fire only when their backs are exposed to your tank destroyers. Thanks to that you can eliminate the enemy armored units. If there are still some tanks left near the watchtower you can try to carefully move and deploy as many tanks on the hill as possible. Now, you can scout the area by sending your infantry. Use the captured cannons to bombard the area (6). The last howitzer is on the other side, south from your location. If you start your attack and eliminate the enemy tanks you must quickly move to that place and eliminate the threat.
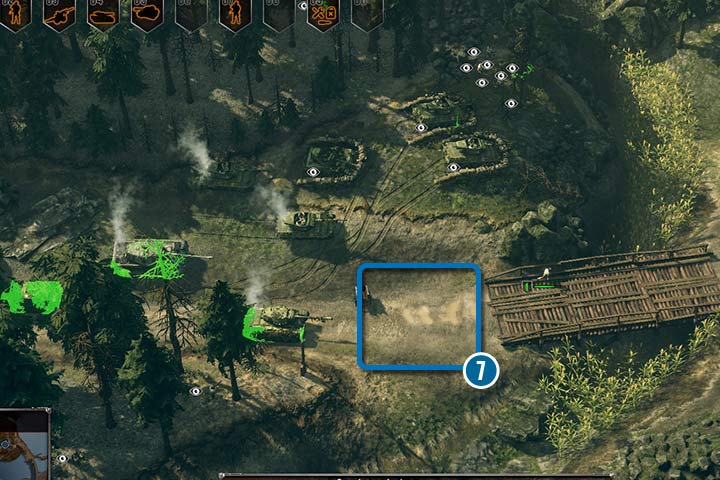
Now it is important to select all your infantry units that has at least one regular rifleman. There are mines in front of the wooden bridge (7) that can only be detected by this type of soldiers. The detected mines can be destroyed or disarmed. Gather all your forces in this place. On the other side there is a small infantry group and right before the dam there is the last tank squad. Deploy your cannons and tanks near the bridge and use the infantry to lure the enemies. Use shoot and run tactic. After a short salvo you can start retreating towards your forces. When you eliminate the infantry you will have the reach advantage over the enemy tanks (8). Now, you must move your tanks and cannons to a sparse forest south from the dam and use the infantry to lure out the tanks.
During the last part of the mission you must clear the other side of the dam from enemy soldiers (9). Order all vehicle and cannon crews to join your infantry. Gather them all into one group and move them through the dam. None of the vehicles can move on this road and you won't be attacked from any other side. Eliminate the medium machine gun on the hill and get rid of all enemy infantry units in the area.
- Sudden Strike 4 Game Guide
- Sudden Strike 4: Game Guide
- Sudden Strike 4: Campaign
- Sudden Strike 4: Allied
- Sudden Strike 4: Mission 1 - Operation Overlord
- Sudden Strike 4: Mission 2 - Battle of the Hedgerows
- Sudden Strike 4: Mission 3 - Battle of the Falaise Pocket
- Sudden Strike 4: Mission 4 - Operation Market Garden
- Sudden Strike 4: Mission 5 - Battle of the Bulge
- Sudden Strike 4: Mission 6 - Battle of Hurtgen Forest
- Sudden Strike 4: Mission 7 - Operation Plunder
- Sudden Strike 4: Allied
- Sudden Strike 4: Campaign
- Sudden Strike 4: Game Guide
You are not permitted to copy any image, text or info from this page. This site is not associated with and/or endorsed by the developers and the publishers. All logos and images are copyrighted by their respective owners.
Copyright © 2000 - 2026 Webedia Polska SA for gamepressure.com, unofficial game guides, walkthroughs, secrets, game tips, maps & strategies for top games.
