Mission 3 - Battle of the Falaise Pocket | Allied | Campaign
Last update:
Mission objectives:
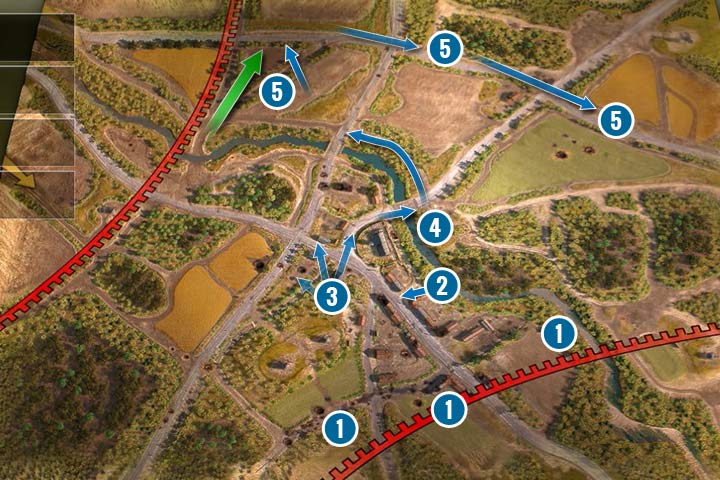
- Attack enemy line
- Join the Americans and complete the encirclement
- Secure the outpost on the other side
- Attack the Germans to tighten the noose around them
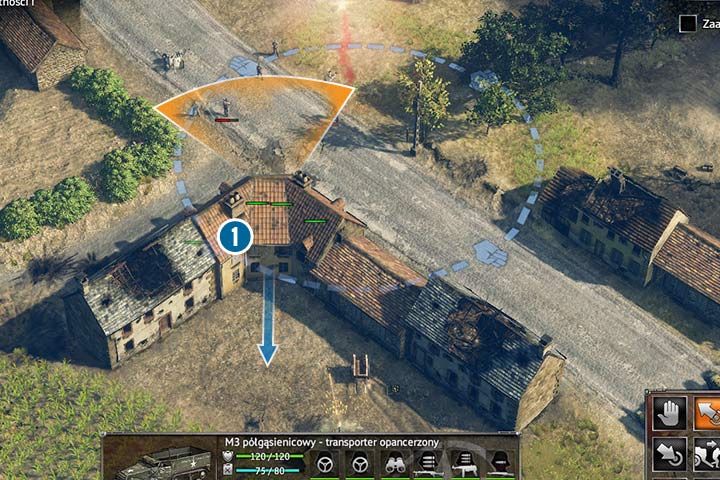
Your task is to clear the city from Germans and clear the area from enemy forces. An armored doctrine would be useful here (especially additional armor) or you can use support doctrine (camouflage for tanks and smoke discharge system). In the beginning you get rather strong squads including powerful Churchill tanks. First, you should order your infantry to leave vehicles and merge them into one big unit (mortars should be a separate squad). Don't go down the street but instead you should go behind the buildings on the left and enter the corner building (1). From there you can eliminate enemy squads and an anti-tank gun. Now, you should get there with your tanks and eliminate reinforcements. If your soldiers are hurt or the building may collapse at any moment, then you should order your troops to leave it by using the back exit and enter another one. You must use your infantry in the same way again and clear the positions on the sides in the same way. However, you shouldn't go left because you can find heavy tanks there.
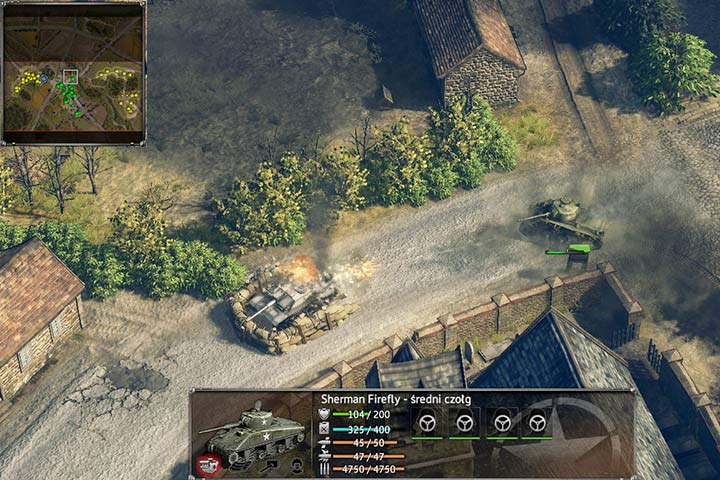
Your next task is to go deeper into the city. The enemy heavy tanks start to retreat but some of the defenders will stay. Further down the road there are two cannons and one Panzer IV tank (2). You should do the same as before. Select your infantry, stay close to the back of the buildings on the left side of the road and enter another corner building. At the same time you can lead your tanks. In the north, above a church, there is a fortified Stug, in the west there are two anti-tank guns and down below the road there is an artillery cannon and infantry (3). Take your men and start with howitzers. After that you can eliminate cannons. The tank can be approached from behind because sandbags will keep you in one place. You complete the mission objective but north from the city, right next to the river, there are two more heavy tanks. In the meantime, you should receive reinforcements, including Priest self-propelled artillery. Send an observer to help the Priests to fire on their position.

Now, you must clear the area behind the bridge (4). It is easier to eliminate the location on the right and use the forest to sneak up on the second position. Gather your tanks in small forest right next to the river (remember about the camouflage for the tanks). Next, you must let your scout go first and order him to slowly crawl towards the vehicles until your tanks have a better range. When that happens you can order them to start firing. You can also send your reconnaissance aircraft which will make things much easier. After destroying the location on the right you must take a few of your tanks and move them into the forest between the bridges. Now, you must save the game. Eliminating the second group of tanks shouldn't be difficult if you send your scout first and shoot at the enemies from a distance.
Your next objective is to avoid the asphalt road. Literally right after receiving the communicate a column of heavy tanks will start driving on three roads. You won't be able to stop them nor this is your objective (although it is possible to destroy many vehicles by using mines, well-placed cannons and tanks). The convoys follow a specific path and they won't leave it even when they are under fire. However, the will fire back. You must keep as many units as possible for the next stage of the mission. When skull icons disappear, another enemy column will appear. The vehicles start to attack your units although their goal is to reach the other side.
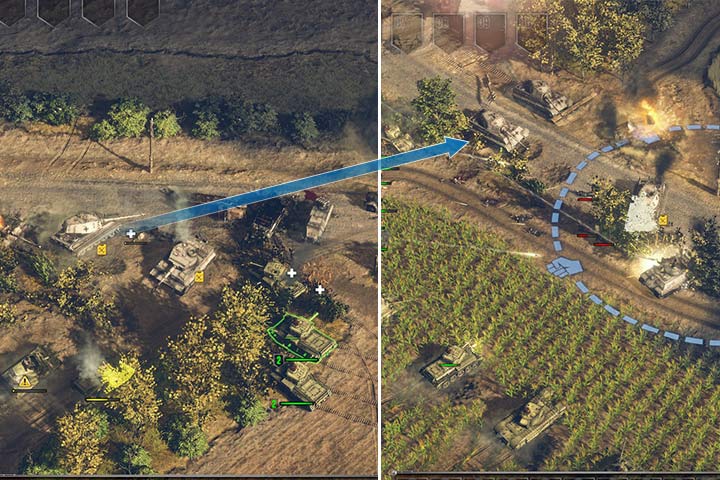
Your last objective is to complete the encirclement by destroying three enemy positions (5). You get additional reinforcements. If you add them to your forces that you have since the beginning of the mission you can even have a group of a few dozens of tanks and an infantry squad consisting of many soldiers. It is recommended to coordinate your attack on the position on the left with the attack of your ally. Thanks to that you can suffer fewer losses and you can eliminate your enemy quicker. Each one of the three locations has an abandoned Tiger in versions 1 and 2, although their tanks are empty. You can use them to destroy other enemy groups. The position on the right is the hardest one to attack. The enemy has a lot of units there and it will receive reinforcements. However, the Germans will start to surrender when they suffer enough losses.
You are not permitted to copy any image, text or info from this page. This site is not associated with and/or endorsed by the Kalypso Media or Kite Games. All logos and images are copyrighted by their respective owners.
Copyright © 2000 - 2025 Webedia Polska SA for gamepressure.com, unofficial game guides, walkthroughs, secrets, game tips, maps & strategies for top games.
