My Summer Car: Suspension and steering system of the Satsuma car
Last update:
In this part of the guide to My Summer Car, you will learn how to install the suspension and steering system in the Satsuma car. We will show you what parts you need and how to mount them. We will also tell you what size of keys you need to create a suspension and steering system in My Summer Car.
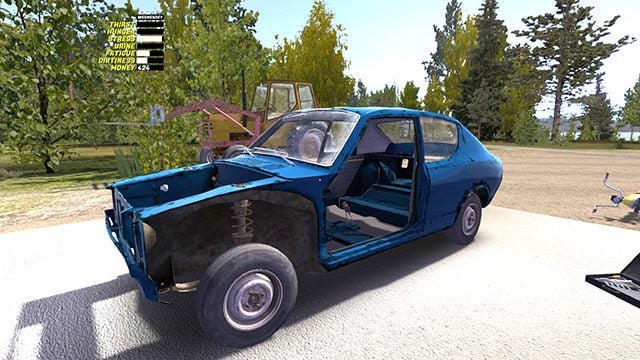
Front suspension
All the necessary parts for the suspension can be found on the garage's floor, on the left. If you want, you can use the CAR JACK to lift the front and then the back of the car. However, this is not necessary - proper placement of the part will raise the car. But the Car Jack adds to the atmosphere! The order doesn't matter, but we are starting with the front elements.
We start by taking the SUB FRAME part (size 10 wrench), called a stroller or a sled, on which the key elements in the front of the car will lean. Grab them like in the picture and attach them to the underbody below the future engine - keep doing it until the OK sign appears.
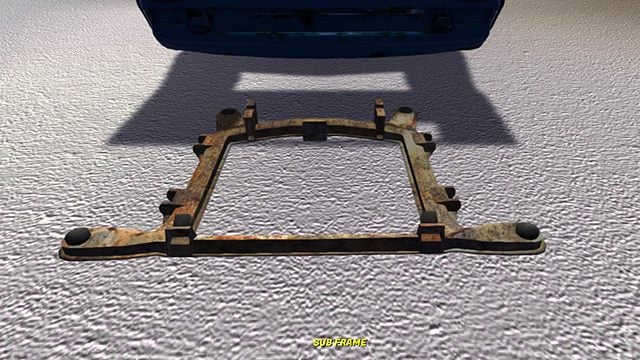

The sled is attached with four bolts and a size 10 wrench. Screws are around the corners of the parts. The right side is a mirror image of the left side. Watch out for the rear screws because they aren't visible from above. You will find them under the upholstery in the cabin - press Q to grab and C to crouch to find them.


Time for WISHBONE (size 10 wrench), that is two swingarms. Be careful because they are assigned to the left (FL) and the right (FR) side. Attach them as shown in the picture and tighten with two size 10 bolts.


SPINDLES are next (size 12 wrench). Watch out, because they are for the right (FR) and left (FL) side. Get them close to WISHBONES to install them and tighten with size 12 wrench.

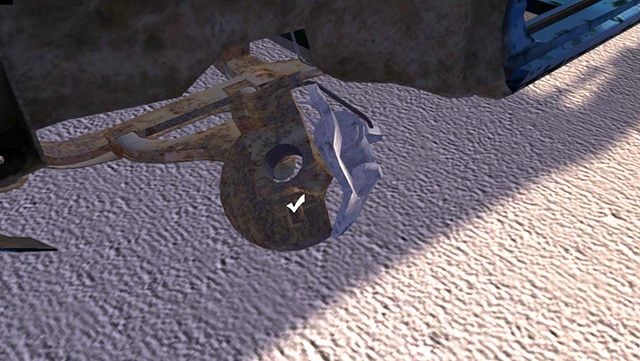

They are attached with a size 12 bolt.
Time for the STRUT - they are also unique to the right (FR) and left (FL) side.

Apply it vertically above the WISHBONE.
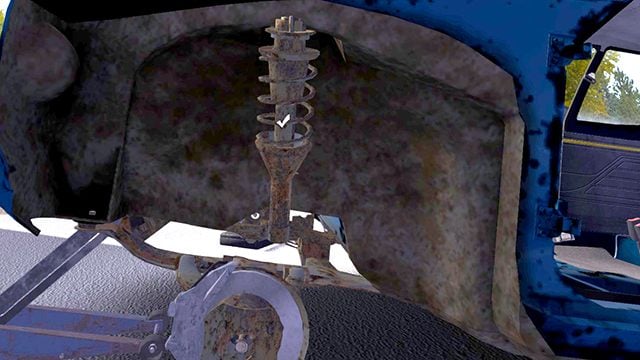
Attach it to the chassis with three size 10 bolts.

Next, attach four size 9 bolts to the SPINDLE.
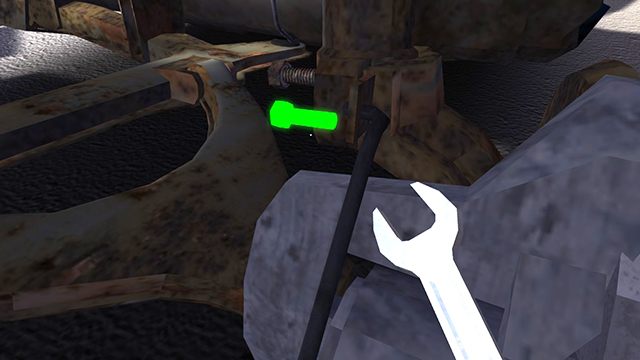
Now install the disc brakes (DISC BRAKE) but don't screw them yet.

If you want to attach the wheels, you first need to place HALF SHAFTS in steering knuckles. It doesn't matter which is left, which is right - keep only the correct layout, the flat end inside.


Tighten the HALF SHAFT which is currently hidden behind the brake with a size 14 wrench.

Now place the front wheels and tighten them up with four size 13 bolts.
 ?
?

Rear suspension
Since the front wheels are raised, align the level by installing the Car Jack from the back - the installation will be more convenient.

Prepare two TRAIL ARM for the back. Again, pay attention to the symbols - RR for the right, and RL for the left. Install them in the front of the rear compartment for the wheels with two symmetrically arranged size 12 bolts.
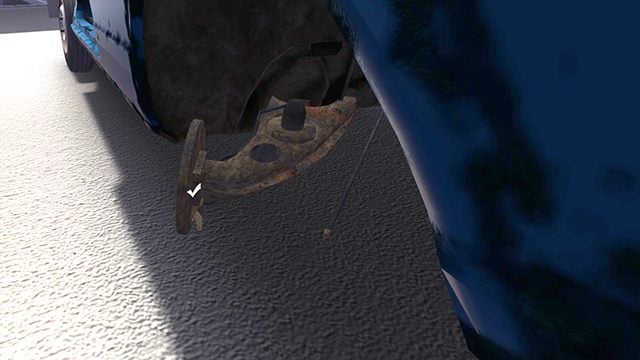
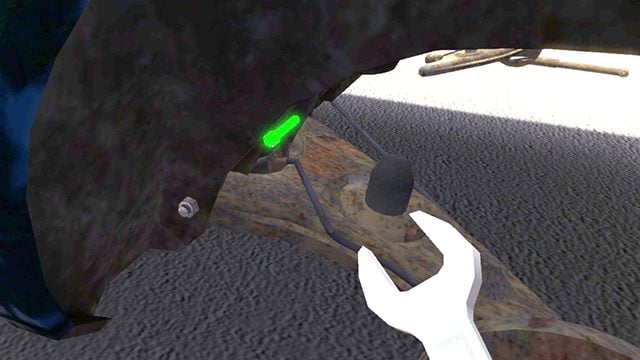
Now, you need to insert tow COIL SPRINGS without any screws. Place them vertically over the black tip of the TRAIL ARM.

Now, connect all with a SHOCK ABSORBER. The installation is identical on the left and right sides. Install them vertically on the TRAIL ARM.

The SHOCK ABSORBER is attached to the body from the trunk with a size 12 wrench.

And to the TRAIL ARM with two size 6 bolts.

Time for DRUM BRAKE. It doesn't matter which side you attach it to. Attach them to the TRAIL ARM and then tighten with one size 14 bolt.


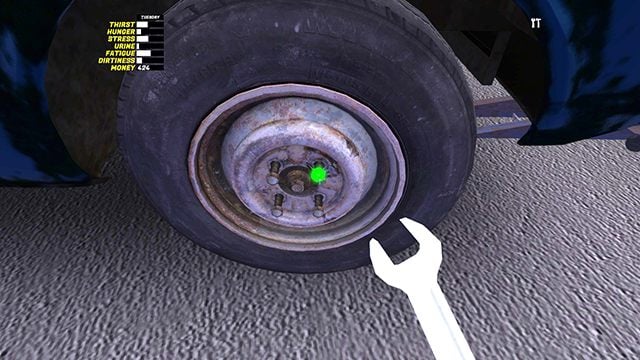
The last thing you need to do is to attach the wheels.

Steering system
The front suspension is partially connected to the steering system. Go back to the front of the car and install STEERING RACK in the sled. You attach it to the sled with four size 9 bolts.


Next, attach STEERING RODS on the left and right. Both are the same so it doesn't matter where you install them. The rods fit horizontally between the center rod and the suspension column. You screw them with a size 12 bolt to the column of the suspension in a fairly hidden place. Keep moving the wrench around until you see the green color (move the mouse wheel up).

Their mounting place is a bit difficult to see, but both are arranged in this way:


Size 12 wrench screws one bolt of the side rods.
After installing the rods and half shafts, the engine compartment should look like this:

Time for the main part - STEERING COLUMN.

Install it from inside the cabin in the obvious place.
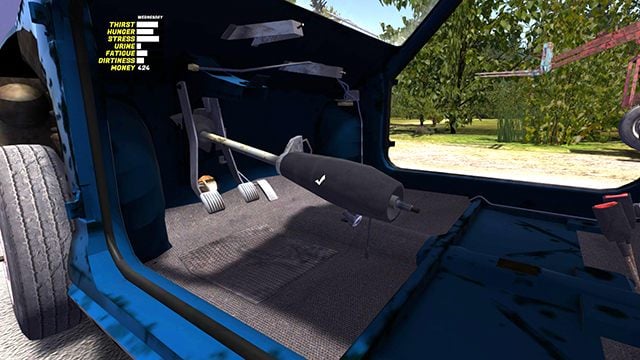
Then, screw to the middle rod with two size 8 screws. The steering wheel doesn't need to be installed yet. You don't need it now anyway.

- My Summer Car Guide
- My Summer Car: Game Guide
- My Summer Car: Assembling the Satsuma car
- My Summer Car: Assembling the Satsuma car - the basics
- My Summer Car: Suspension and steering system of the Satsuma car
- My Summer Car: Engine and Gearbox of the Satsuma car
- My Summer Car: Installing the engine in the car
- My Summer Car: Battery and electrical system installation of the Satsuma car
- My Summer Car: Body and interior of the Satsuma car
- My Summer Car: First engine start of the Satsuma car
- My Summer Car: Assembling the Satsuma car
- My Summer Car: Game Guide
You are not permitted to copy any image, text or info from this page. This site is not associated with and/or endorsed by the developers and the publishers. All logos and images are copyrighted by their respective owners.
Copyright © 2000 - 2026 Webedia Polska SA for gamepressure.com, unofficial game guides, walkthroughs, secrets, game tips, maps & strategies for top games.
