Metal Gear Rising Revengeance: R-04 Hostile Takedown
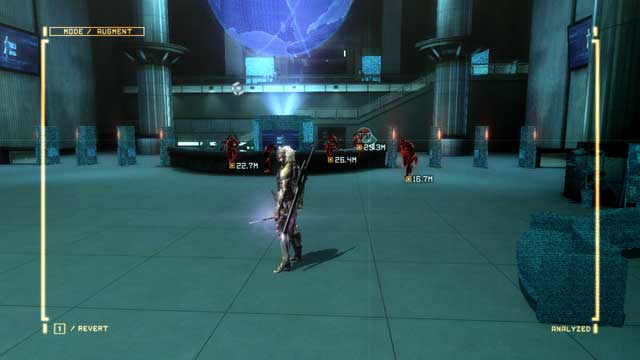
Another long mission, overflowing with collectibles, during which you will square off against three bosses. The mission starts in the office - approach the receptionist robot which will summon reinforcements after a while (ninja cyborgs). One of the cyborgs is a lefty (1/8) - claim its arm and deal with the rest of the enemies.
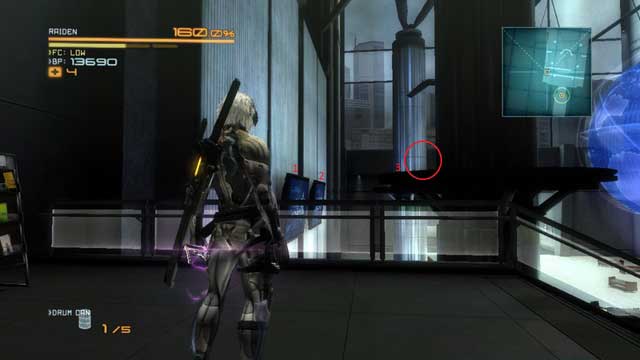
After a while, climb up the stairs and go right, towards the screens hanging on the wall. Jump over them to reach the platform on the column, where you will find a Data Storage (1/4).

Return to the stairs and empty the cabinets -you will find a VRM computer (1/5) in one of them. Collect it and go towards the elevators. It will turn out that the elevators are not working and you need to win some time before the Doctor brings them back online. From the location that you came from, new enemies should start to arrive -one of the enemies with shields is a lefty (2/8). You can use the minigun cannon to eliminate the enemies, before they approach you. After a while, the elevator should come online again - go up then.

Right after you exit the elevator, use the AR to locate enemies - one of them is another lefty (3/8). Another cyborg that you can deprive of its arm appears after you destroy 2 -3 control panels without alarming the enemy. So, take to silent elimination of enemies, in the first place.


Once you have cleared this floor, you will have to find two VRM computers on this floor. Once you have obtained them, run around this floor a bit with the AR on - your task is to find 3 control panels that are invisible in regular vision (they glow orange in the AR).
Once you have destroyed 2 panels, you will receive information that there appeared a new enemy - this is the abovementioned lefty (4/8) so, do not forget to cut its arm off.
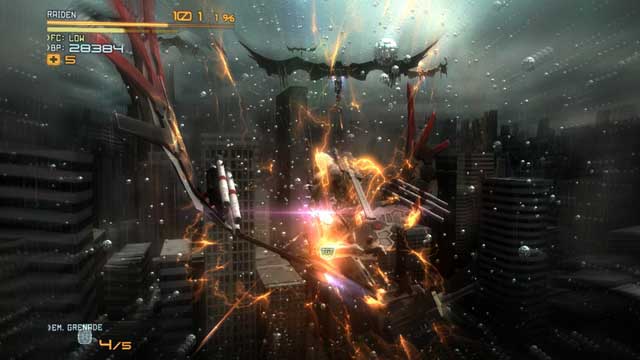
As soon as you have dealt with it, find the third control panel (near the lefty that you have just killed), destroy it and go to the gate. Now, you will have to Ninja Run and avoid the enemy bullets - you can either spend some time fighting each and every enemy jumping out from behind corners, or simply take it to the heels and run headlong. The choice is yours.

Eventually, you should make it into a Japanese garden. After a while, you will be welcomed by a group of enemies - eliminate the cyborgs with RPGs and another lefty (5/8) will appear. After you have killed every last of them, smash the wall of the house and kill the cyborg with the RPG inside. Then, leave through the other exit. Look up - above, there is a palace that you can climb onto, by jumping over lamps. On the top, there is a flagpole - cut it down and you will receive the Menace to Society achievement.
Once you are on top, take a look around. Down below, there is another lefty (6/8) waiting but, to get to him, you need to rack your brains a little. The best idea is to reach him undetected by the enemy, because on the rooftops, on both sides of the street, there are Mastiffs - fighting two at a time is a real nightmare. If you do not want to over the possible approaches, and play seek and destroy, you can raise the alarm and lure all of the enemies to yourself - the choice is yours.
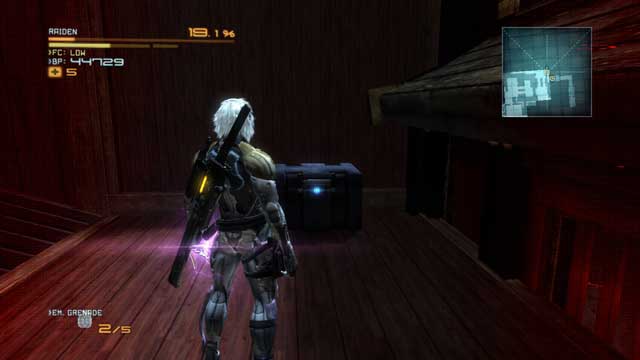
Then, approach the marker on your radar - close to it, on the rooftop, you will find a crate with a Data Storage (2/4) inside. Go towards the marked direction to reach an elevator room. One of the enemies patrolling here is a lefty (6/8).

After you have cleared this area, find two green containers, climb onto them and cut through the metal gate. Inside the containers, there is the Endurance Plus. Eventually, climb onto the elevator to start it.
You are up for a long, and quite exhausting a battle. Defeat all of the enemies to be interrupted by a cutscene, at some moment. In the cinematic, two cyborgs set fire to the elevator you are on. From now on, the Doctor will be reminding you to jump onto the neighboring elevator but, do not do that. Keep eliminating the enemies, until a heavily armored cyborg arrives. After being killed, it drops a Data Storage (3/4). Jump, quickly, onto the neighboring lift, before the one you are on drops down and you will have to repeat from the last checkpoint.
On the other lift, you will have to fight again a cyborg with a sledgehammer that additionally is a lefty (7/8), and a few Sliders. Try not to wipe out all of them (leave, at least, two of them "alive") because they will be replaced with two Mastiffs otherwise, which is not going to end up well for you, in an area that much limited.
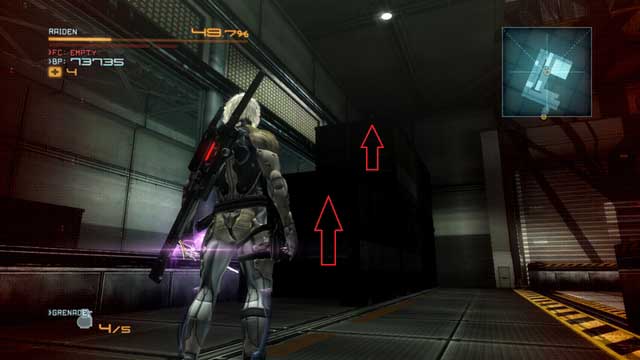
Once the elevator stops, climb onto the containers opposite and slide through the opening. You will find a Man in the Box.

Deal with it and leave that room. Find big red crates. Smash them and you will gain access to a VRM computer (4/5). Then, follow the marker into the server room where you will have to fight.
Boss - Mistral + Monsoon
You are going to fight the bosses that you have already fought - fortunately enough, you do not need to fight them both simultaneously. The fights with the copies of Mistral and Monsoon is identical as in the case of their originals so, there is no point in describing this again - in case of any problems, see the respective chapters devoted to the bosses.

After the fights finish, go to the server room to have a talk with Sundowner. After you regain control over your character, run up the stairs and to the left, then to the right and left again (the above screenshot presents the location in which you should now be - approach the point marked in red). After you run over the pipes, you will reach a Data Storage (4/4).
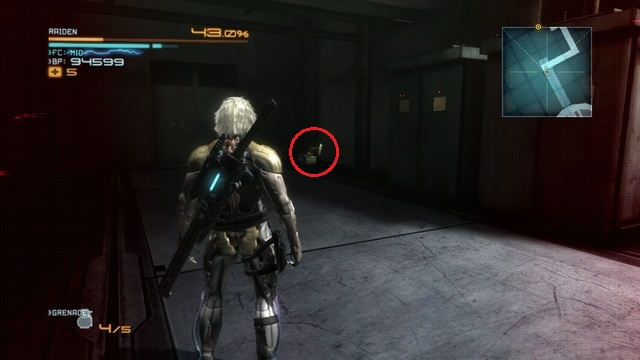
After you have collected it, return to the stairs and follow the marker. In the middle of the room, there is a VRM computer (5/5). Continue towards the marker until you walk out into the open. Do not run towards the boss yet and turn left - on the balcony opposite, there is a Gekko Mimic, which you can destroy with the rocket launcher. Then, go to the fight with the boss.
Boss - Sundowner
Is not too difficult a boss, but it requires to handle the Blade Mode in a flawless, perfect way (i.e. to aim your slashes accurately). If you have problems with that and you usually cut without rhyme or reason, you will have quite a problem with this enemy.
Sundowner has the reactive armor, which means that each your attempt at a frontal attack, with the blade, ends up in receiving severe damage, because the boss's armor explodes. The way to defeat it is to parry its regular attacks to bring about the situation in which you can use the Blade Mode.
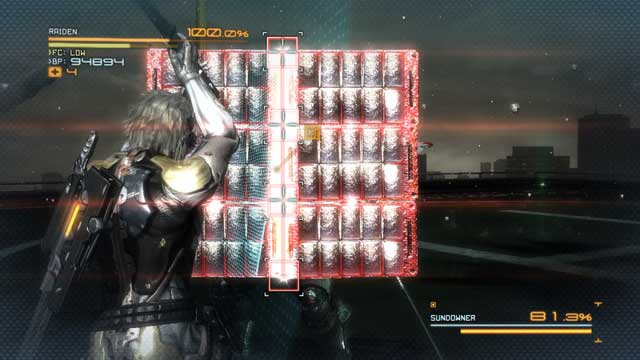
Once you use it, you will see spots, in which the armor can be penetrated, without the risk of explosion, displayed. If you manage to do that, the boss will lose its explosive armor for a dozen of seconds, and you will be able to fight in a regular way. If you fail, the armor will explode and deal quite a considerable damage to you. An additional obstacle is the helicopter that circles around the arena and may interrupt your Blade Mode with rockets - use the rocket launcher to shake the chopper off, for a moment.
Sundowner's typical attacks:
- Charge with the explosive armor in front - if you do not want to take damage, you need to dodge this attack by skipping (Defensive Offense)
- Attack combo - you can (and even have to) parry them all. After the successful block, you will get the opportunity to use the Blade Mode.
- Takedown - Sundowner will flash in gold and, after a while, it skips forward. If it manages to catch you this way, you will receive a lot of damage. Just like in the case of each "gold" attack, this one can be neither blocked nor countered and you simply need to avoid it, by moving as far away as possible.
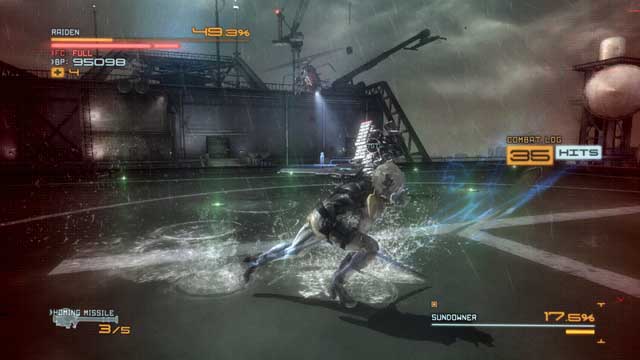
If there is no way in which you can defeat Sundowner in the way presented above, there is yet another way, however common. It consists in running up to the enemy constantly, landing a few quick blows with the sword (best into the back) and jump away from Sundowner, before it reacts. Several minutes of such running will handle the boss down. Once its health bar drops to 10%, the usual QTE sequence will start. After that, Raiden will cut up the boss and the mission will be over.
- Metal Gear Rising: Revengeance Game Guide & Walkthrough
- Metal Gear Rising Revengeance: Game Guide
- Metal Gear Rising Revengeance: The Main Campaign - walkthrough
- Metal Gear Rising Revengeance: R-00 Guard Duty
- Metal Gear Rising Revengeance: R-01 Coup d'Etat
- Metal Gear Rising Revengeance: R-02 Research Facility
- Metal Gear Rising Revengeance: R-03 Mile High
- Metal Gear Rising Revengeance: R-04 Hostile Takedown
- Metal Gear Rising Revengeance: R-05 Escape From Denver
- Metal Gear Rising Revengeance: R-06 Badlands Showdown
- Metal Gear Rising Revengeance: R-07 Assassination Attempt
- Metal Gear Rising Revengeance: DLC - Jetstream Sam - walkthrough
- Metal Gear Rising Revengeance: Boss - Blade Wolf
- Metal Gear Rising Revengeance: Boss - Metal Gear Ray
- Metal Gear Rising Revengeance: Boss - Armstrong
- Metal Gear Rising Revengeance: DLC - Blade Wolf - walkthrough
- Metal Gear Rising Revengeance: VR Training - Africa
- Metal Gear Rising Revengeance: VR Training - Denver
- Metal Gear Rising Revengeance: VR Training - Denver Offices
- Metal Gear Rising Revengeance: VR Training - Platforming
- Metal Gear Rising Revengeance: Abkhazia Dilapidated Town
- Metal Gear Rising Revengeance: Abkhazia Main Street
- Metal Gear Rising Revengeance: Boss - Khamsin
- Metal Gear Rising Revengeance: The Main Campaign - walkthrough
- Metal Gear Rising Revengeance: Game Guide
You are not permitted to copy any image, text or info from this page. This site is not associated with and/or endorsed by the developers and the publishers. All logos and images are copyrighted by their respective owners.
Copyright © 2000 - 2025 Webedia Polska SA for gamepressure.com, unofficial game guides, walkthroughs, secrets, game tips, maps & strategies for top games.
