Elex: On Behalf of the Claws - Walkthrough
On Behalf of the Claws is a side quest connected to the Claws organization that resembles a thieves' guild. This quest becomes available when you join the Claws and during it, you must steal valuable items from NPCs.
How to unlock this quest: Speak with Hector in Domed City and join the Claws.
SPOILER – If your actions during the quest lead to Domed City being attacked and conquered by the Albs, the Claws’s hideout will be accessible only through the secret southern sewer entrance.
- Getting new missions
- 'Supply Crates from Goliet' mission
- Job - ‘Blueprints for a Fighting Colossus’
- Job - ‘Cleric Research’
- Jon - ‘A Compromising Recording’
- Job - ‘Elex for the Claws’
- Job - ‘Mad Bob’s Weapon Cache’
- Ending the quest
Getting new missions

You can get this quest by meeting with Hector in the Claws' hideout located in the sewers under Domed City and saying that you want to join his group (more details can be found in the walkthrough for A Strange Mechanism quest on the previous page of this guide). Hector gives you a few items and one of them is Key for the Job Trunk – you can get new contracts from that chest.
'Supply Crates from Goliet' mission

Take Claws’ Mission: Supply Crates from Goliet from the Job Trunk. Go to Goliet village and find Oran, the owner of the tavern. You must sneak on him (the best way to do that is when he leaves the tavern) and then use Pickpocket ability to steal Oran’s Cellar Key (the picture).

Find one of the two entrances that lead to the basement, located under the tavern, and enter the main room (the one with big barrels). You must find a hidden lock presented in the picture. Use Oran's key and you unlock a passage that leads to a hiding place in the basement. Take Supplies with you (800XP).
Stolen goods can be placed in any of the Claws' Drop Boxes. One of them is near Oran's tavern. Go back to the Claws' hideout. You receive congratulations from Darius and Hector as well as another mission (100XP).
Job - ‘Blueprints for a Fighting Colossus’

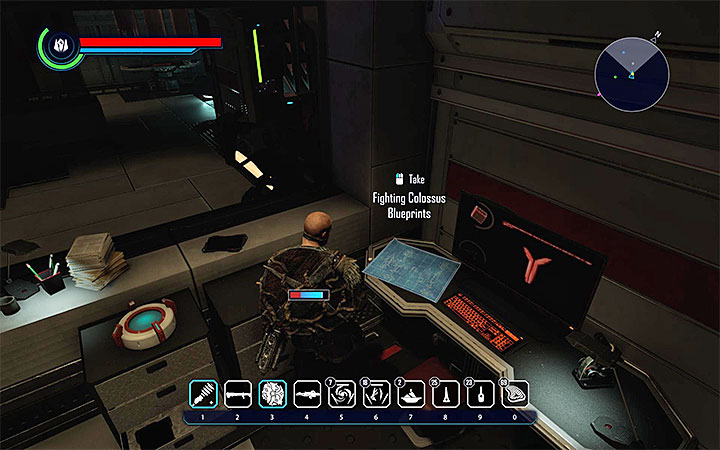
Pick up Claws’ Mission: Blueprints for a Fighting Colossus from the Job Trunk. You’ll have to go to the Clerics’ HQ – The Hort. Once you reach the city, head for the factory’s upper floor (use the ladder or the jet pack). The Fighting Colossus Blueprints you’re searching for are in an unguarded room shown on the screenshot above (200XP).
Job - ‘Cleric Research’

Pick up Claws’ Mission: Cleric Research from the Job Trunk, and head for the Cathedral in The Hort.
You’ll have to gain access to the archives in the Cathedral basement. You can enter them following the steps described in the walkthrough for the side-quest Question of Faith. Just to remind you, you can wait until late evening for Karl to leave his post for evening prayer. Another option is to use the console shown on the screenshot above. If you have at least 3 points in Crafting, you can add yourself to the list of persons authorized to enter the archives. Your last option is to join the Clerics and gain a rank of Acolyte or higher.

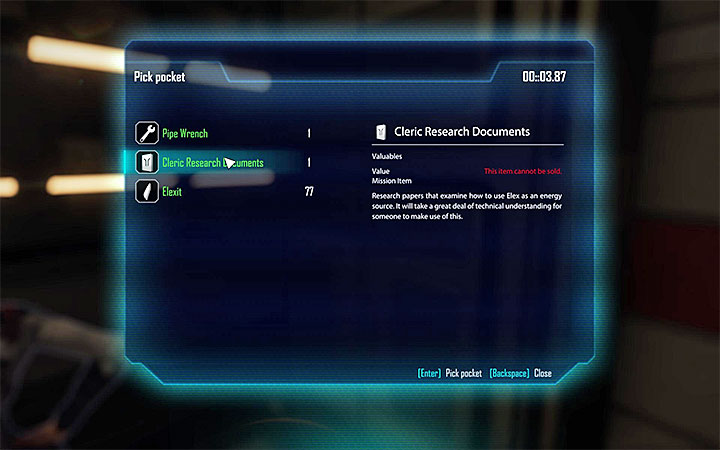
You’ll need to acquire four pieces of Cleric Research Documents. Two of them can be found on shelves in the archive. The remaining two are a bit harder to find, as they are held by NPCs (above you see an example of an inventory of a document carrying NPC). You’ll need to succeed in stealing the papers from them, using the Pickpocket skill (200XP).
Having completed the new tasks and placed the stolen items in one of the Drop Boxes, return to the Claws’ hideout in Domed City. You can now pick up three new jobs from the Job Trunk (100XP).
Jon - ‘A Compromising Recording’

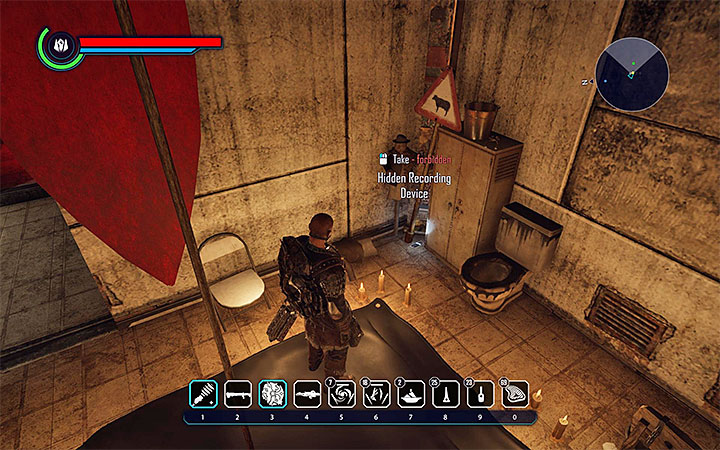
Head for The Fort (the residence of the Outaws) and go to Hank’s bar. You’ll have to examine one of the guestrooms; which have restricted access. Sneak in by night or quickly run into the room, grab the Hidden Recording Device shown on the picture and escape before you’re caught and attacked by angry bar staff (200XP).
Job - ‘Elex for the Claws’

You’ll have to head west of The Fort and find the hideout in the gorge with lava, as shown on the screenshot above. Your only option is violence – you’ll have to kill two common Reavers and their stronger leader, Slater. Watch out, because Slater uses a flamethrower at range at is a heavy hitter in melee (you can either throw explosives at him, or quickly approach Slater to prevent him from using the flamethrower). Having defeated the enemies (375XP) search Slater’s body and pick up Logan’s Notes. Read then to learn the combination to the Duke’s safe, which is 8641.
Note – The code to the safe can also be acquired without having to fight the bandits. The code remains the same, so you can rely on the guide for that matter.

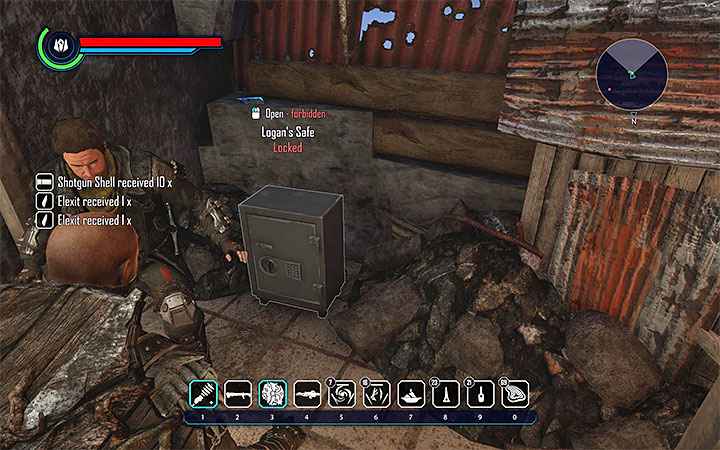
Now, reach the Duke’s Bunker in The Fort. Go to the upper floor and take a look at the guarded room. You can kill the guard, but it may cause some trouble. It’s better to use the bed and wait for the night. The guard will leave his post, and you can sneak your way into the Duke’s stash. The most important element is of course the safe, visible on the screenshot above – use the code 8641 to open it and collect 10 Natural Elex and 350 Elexit (200XP). Additionally, the stash will contain additional stuff, including the legendary shotgun Thunderclap.
Job - ‘Mad Bob’s Weapon Cache’

Find Mad bob in The Fort. You’ll have to steal from him, which means you need to have the Pickpocket skill. Place yourself behind Mad Bob and make sure nobody’s looking. You’ll need to swipe Mad Bob’s Key (see the screenshot) (400XP).
Now you can place all the stuff in any of the Drop Boxes. You’ll find a Message from H.
Ending the quest
Return to the Claws’ hideout in Domed City for the last time and talk to Hector (100XP), who’ll tell you that you’ve completed all tasks his group could offer. For completing this long questline you’ll receive 2000XP and Hector’s Chest Key (it should contain large amounts of Elexit, among other things).
- Elex Game Guide
- Elex: Walkthrough
- Elex: Side quests
- Elex: Abessa
- Elex: Minor quests in Abessa - Walkthrough
- Elex: Minor quests in Domed City - Walkthrough
- Elex: Locked Out - Walkthrough
- Elex: Helping Hands - Walkthrough
- Elex: A Strange Mechanism - Walkthrough
- Elex: On Behalf of the Claws - Walkthrough
- Elex: The Abessa Dispute - Walkthrough
- Elex: A Bounty Hunter - Walkthrough
- Elex: Abessa
- Elex: Side quests
- Elex: Walkthrough
You are not permitted to copy any image, text or info from this page. This site is not associated with and/or endorsed by the developers and the publishers. All logos and images are copyrighted by their respective owners.
Copyright © 2000 - 2025 Webedia Polska SA for gamepressure.com, unofficial game guides, walkthroughs, secrets, game tips, maps & strategies for top games.
