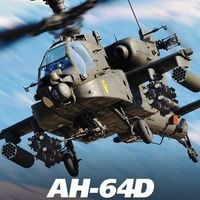
DCS AH-64D Apache: PNVS - Pilot Night Vision System - how to use night vision?
PNVS - Pilot Night Vision System for Night Terrain Surveillance. How to fly at night and get the most out of PNVS, TADS, and NVG night vision goggles. Operating instructions for the Apache helicopter exterior and cockpit lighting.
Last update:
In this chapter of the DCS AH-64D Apache guide, we describe the PNVS - Pilot Night Vision System. Our guide explains the operation of the PNVS for the pilot and the TADS for the copilot/gunner. We advise how to fly at night effectively and when to use different night vision systems available onboard. We also show how to operate the interior lighting in the cockpit and the external lighting of the helicopter.
- Required keybinds
- Night Vision Systems in AH-64D Apache
- Interior lighting
- Exterior lighting
- PNVS - how to use?
- TADS - how to use?
- Night Vision Goggles - how to use?
Required keybinds
- NVS Select Switch PNVS - switches the night vision camera to PNVS;
- NVS Select Switch TADS - switches the night vision camera to TADS;
- Polarity Switch PLRT - switches between Black Hot / White Hot polarity;
- Toggle Goggles - enables standard NVG night vision goggles with IHADSS turned off (RShift + H);
- Gain Goggles Up - increases the gain of NVG goggles (LCtrl + RShift + H);
- Gain Goggles Down - decreases the gain of NVG goggles (LAlt + RShift + H);
- Flashlight - turns on / off the flashlight (LAlt + L);
- IHADSS Show - enables / disables IHADSS;
- Sight Select Switch TADS (Right) - CPG category - sets the TADS as the active sight;
- Slave - CPG category - slaves the TADS camera with helmet's sight.
Night Vision Systems in AH-64D Apache
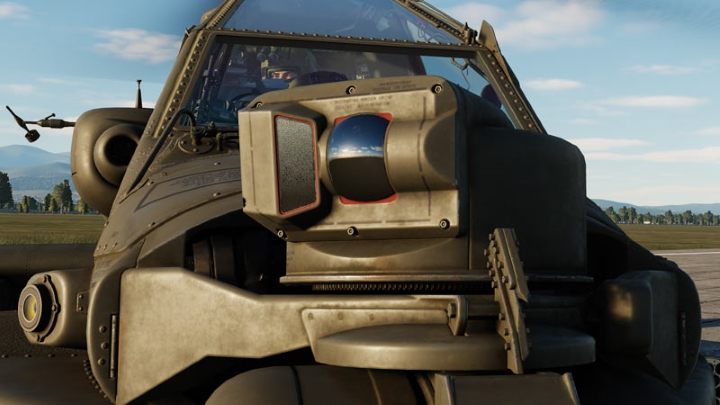
The AH-64D Apache crew has different night vision systems for night operations:
- PNVS (Pilot Night Vision System) - the main night vision system for the pilot with an infrared camera;
- TADS - the target acquisition system for the copilot / gunner with an infrared camera;
- NVG Goggles - standard night vision goggles mounted on the helmet;
- Flashlight - a handy flashlight in the cockpit.
PNVS - Pilot Night Vision System
AN / AAQ-11 Modernized Pilot Night Vision Sensor (M-PNVS) is the main system used by the pilot to see at night with the FLIR infrared camera. The camera is mounted on the helicopter's nose and projects its image onto pilot's IHADSS helmet display. It follows the pilot's line of sight in the following range: 20 degrees up, 45 degrees down, 90 degrees to the right and 90 degrees to the left at a speed of 120 degrees per second. Comparing to standard night vision goggles, it displays all the IHADSS flight data and infrared spectrum of "hot" targets in "Black Hot" or "White Hot" polarization. It also allows to adjust the image in terms of brightness, contrast and saturation levels. Thanks to image adjustments, the PNVS can be useful also during the day. However, the PNVS does not show tracers of Anti-Aircraft Artillery fire.
TADS - Target Acquisition Designation Sight
AN / ASQ-170 Modernized Target Acquisition Designation Sight (M-TADS) is a targeting system with an infrared FLIR camera. It is intended mainly for the copilot / gunner, who uses it in all lighting conditions for target designation, and also for terrain observation at night.
In special cases, the pilot can switch the camera view from PNVS to TADS, changing the source device - then the CPG receives the image from the PNVS. However, the TADS camera moves two times slower than the PNVS, at 60 degrees per second, so there is always a delay when looking around. The pilot cannot use TADS for target acquisition and designation - he can only observe the terrain.
Night Vision Goggles
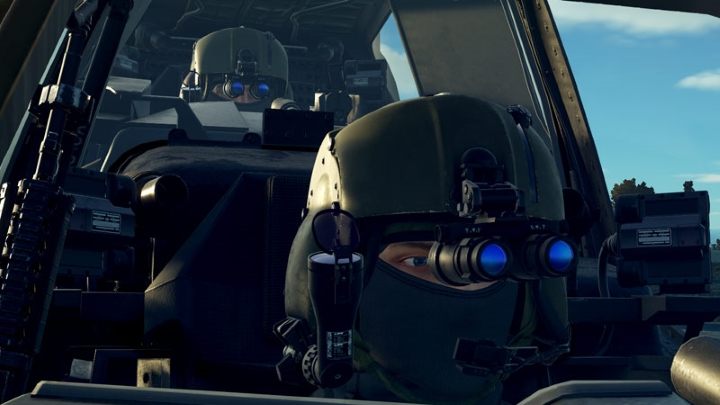
Both crew members wear the AN / AVS-6 Aviator Night Vision Goggles - standard night vision goggles that allows to see at night. The standard NVG can not be used simultaneously with the IHADSS monocle, so in this case you will not see any flight parameters or target designation. For this reason, their usefulness is severely limited and generally only advisable for a crew member who is not currently piloting the aircraft and not searching for targets, or if safe flight is possible in VFR conditions. The NVG allow crew members to see Anti-Aircraft Artillery tracer fire.
Interior lighting
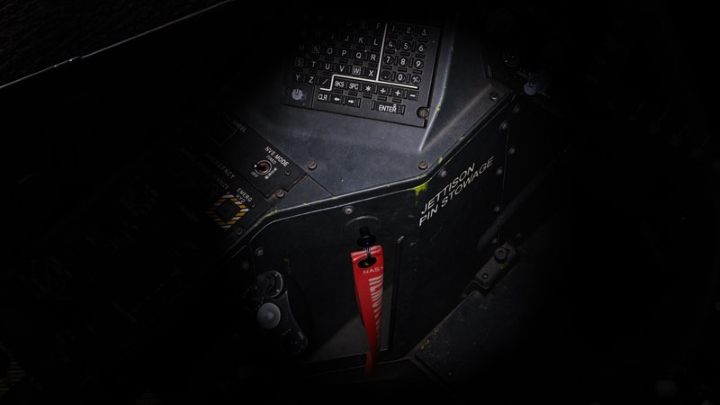
When entering a cold and dark cockpit, first you can switch on a flashlight with the LAlt + L keys.
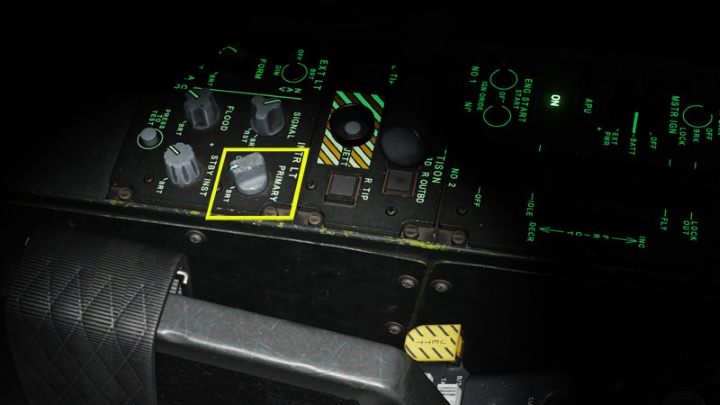
The Interior Lights panel is located on the left console. The PRIMARY knob adjusts the brightness of all switches and knobs.
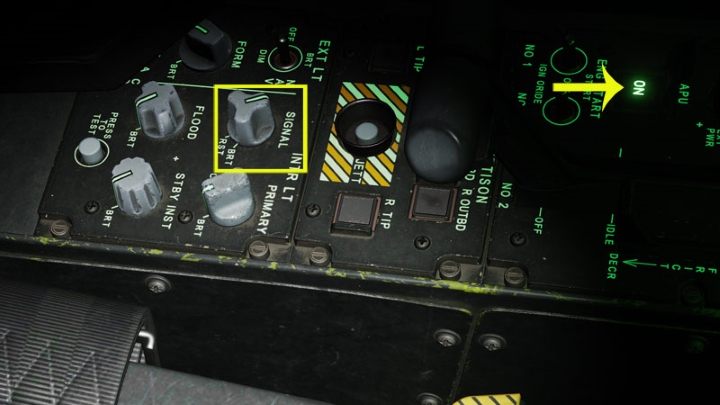
The SIGNAL knob adjusts the brightness of all warning lights such as Master Caution.
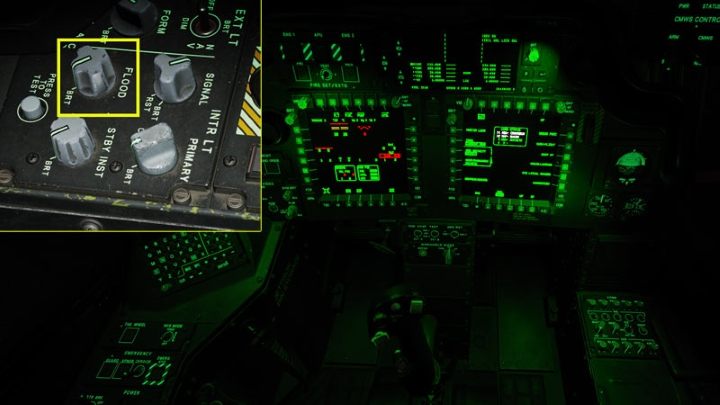
The FLOOD knob adjusts the brightness of the entire cockpit illumination.
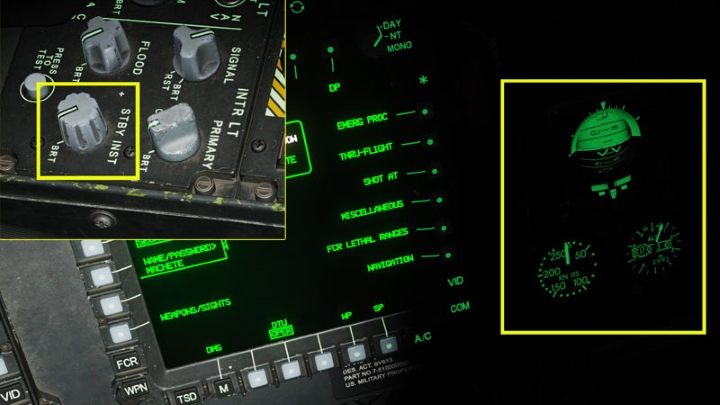
The STBY INST knob adjusts the backlight of the analog backup instruments.
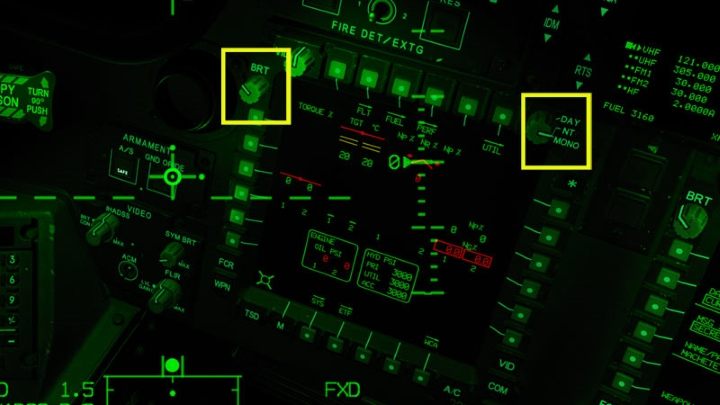
You can adjust the brightness of the monitors to night conditions with the BRT knob and switch them to NT (Night) or MONO (only green tones image).
Exterior lighting
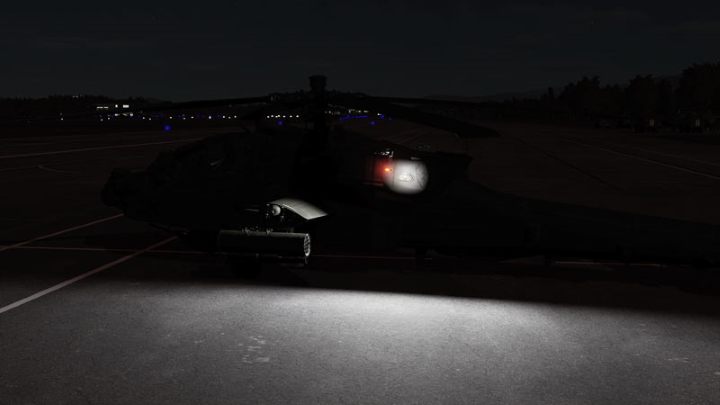
The Exterior Lights panel is located on the left console next to the interior lights. The available switches:
- NAV - switches on position (navigation) lights: BRT (bright), DIM (dimmed), OFF (off);
- FORM - turns on formation flying lights, the knowb allows smooth brightness adjustment;
- ANTI COL - switches on anti-collision lights: WHT (white), RED (red), OFF (off).
PNVS - how to use?
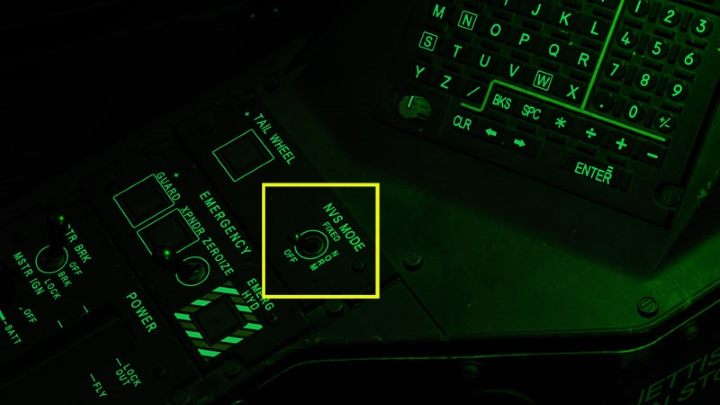
Make sure you have the IHADSS monocle turned on, set the NVS MODE switch under the keyboard to:
- NORM - the camera follows the line of sight of the IHADSS;
- FIXED - fixed point of view of the camera aimed straight ahead and 4.9 degrees downwards.
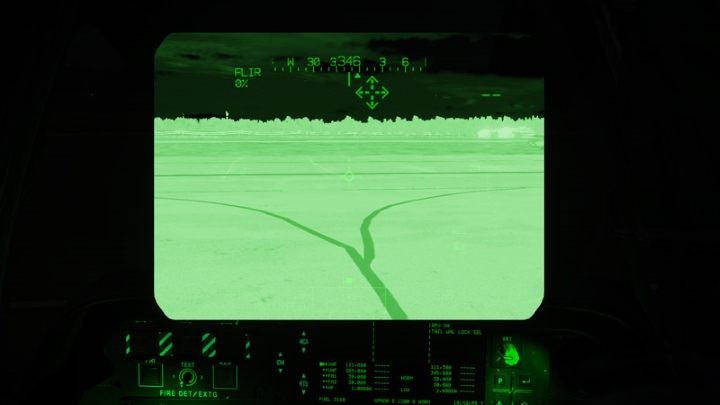
The default settings usually give too bright or too dark image.
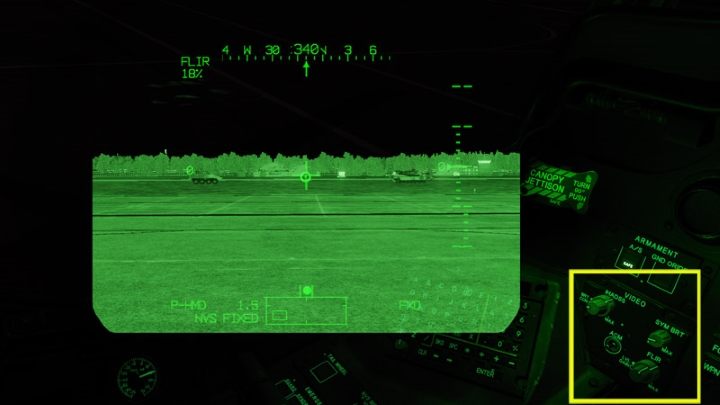
Adjust the FLIR camera image to the current conditions with the knobs next to the left monitor:
- SYM BRT - adjusts the brightness of text and symbols on the PNVS / IHADSS;
- IHADSS - the outer knob adjusts the brightness of the image, the inner (smaller) knob adjusts the contrast;
- FLIR - the outer knob adjusts the level of the image, the inner (smaller) knob adjusts the gain.
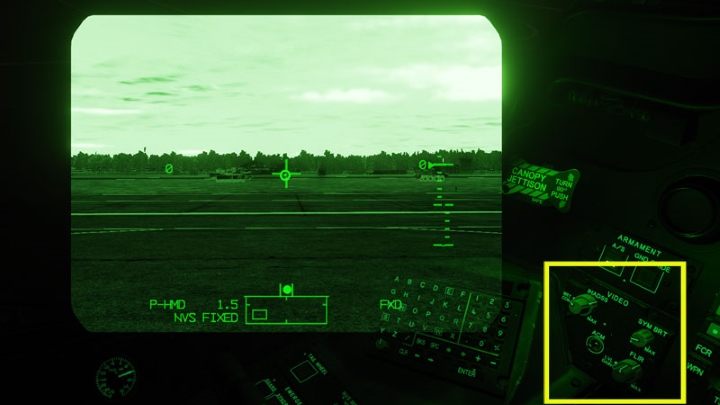
By pressing the POLARITY button on the collective, you can switch the polarity from BLACK HOT to WHITE HOT. Different polarity always requires to readjust the image to the current conditions.
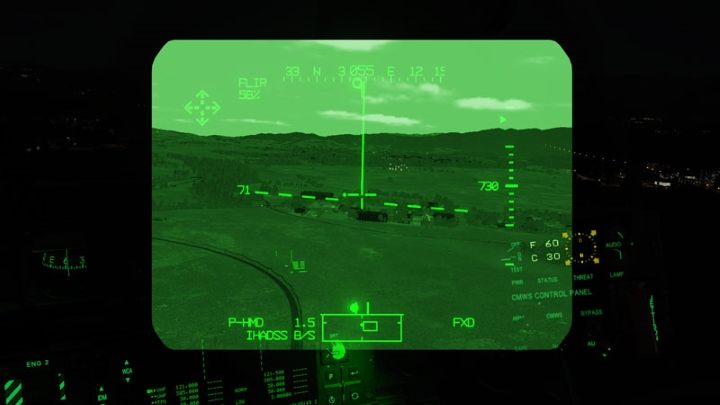
The PNVS camera will follow the pilot's head movements with the NORM setting or will always show the area in front of the helicopter with the FIXED setting on the collective.
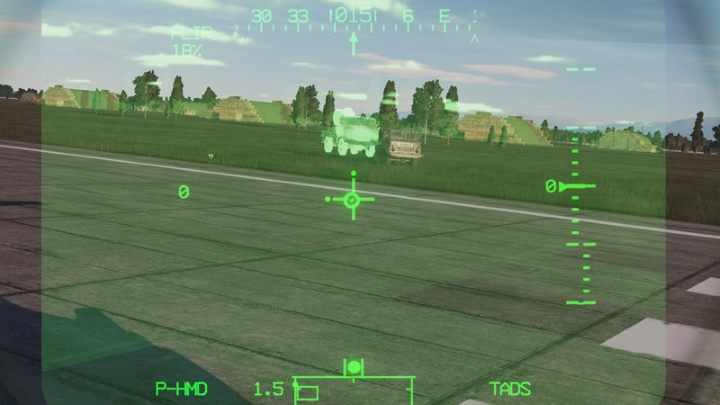
Remember that through the PNVS you see the perspective from the camera mounted on the helicopter's nose, and not directly from the pilot's eyes, so the object's precise location can slightly differ. It is important when estimating the position and distance of objects very close to the helicopter, e.g. during hover and landing.
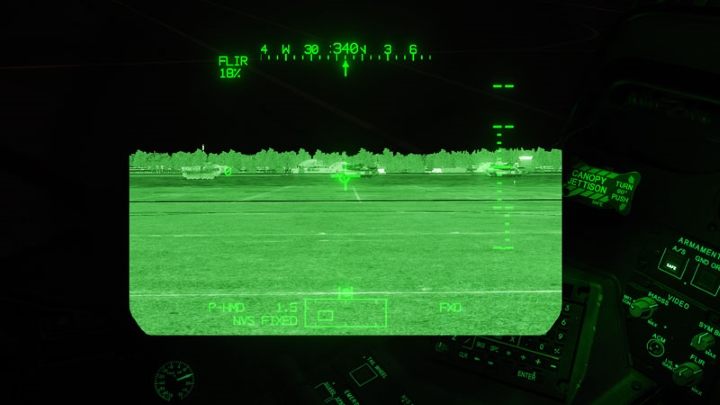
If necessary, switch the camera from the PNVS to the TADS with the NVS Select button. The main difference is slower following the head's movement - the flight parameters and crosshair symbols stay the same. You will notice a quick image flash when switching between systems.
TADS - how to use?
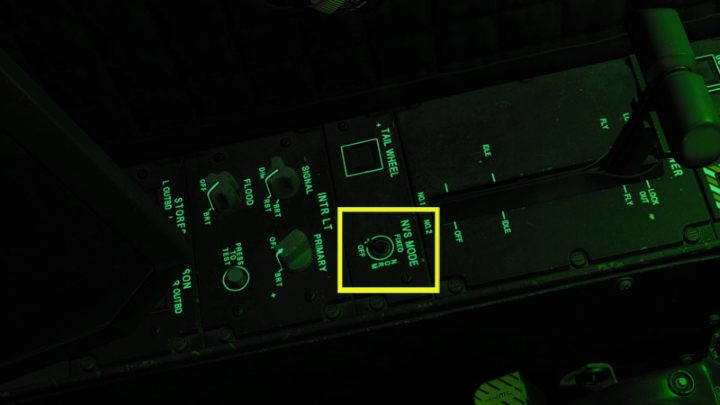
The TADS targeting system can be also used for night vision by the copilot / gunner. With IHADSS turned on, set the NVS MODE switch to NORM (line of sight) or FIXED (fixed straight).
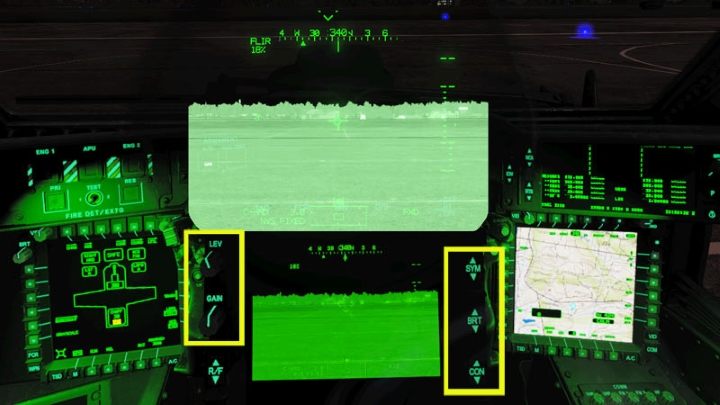
You can adjust the image using the knobs and switches on the TADS screen:
- LEV - adjusts the level;
- GAIN - adjusts the gain;
- BRT - adjusts the brightness;
- CON - adjusts the contrast;
- SYM - adjusts the brightness of the text and symbols.
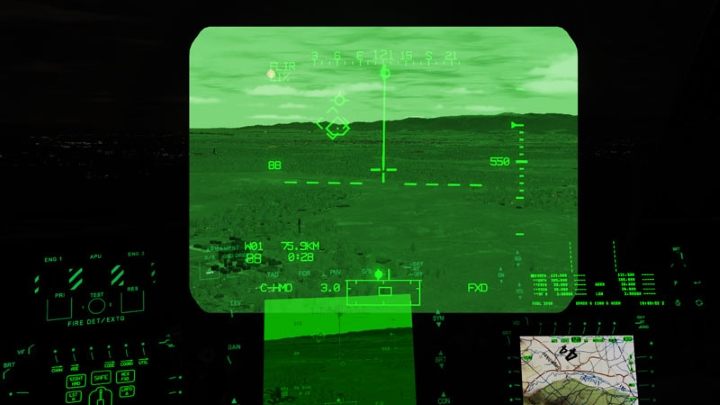
In NVS NORM or FIXED mode, the TADS system is used only for terrain observation - it cannot be used for target designation, also the zoom function does not work.
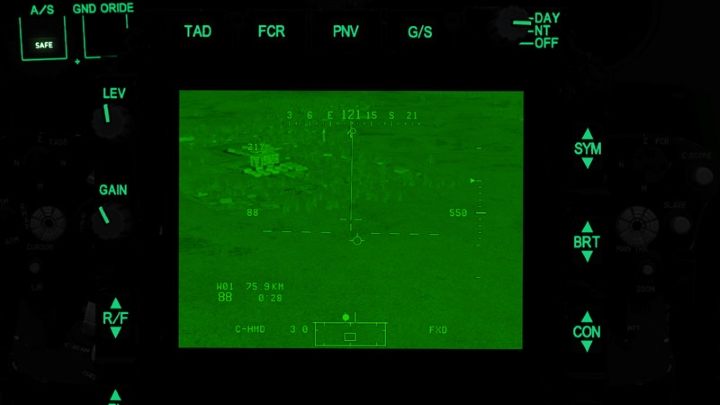
Note that the IHADSS flight parameters appear also on the TADS monitor.
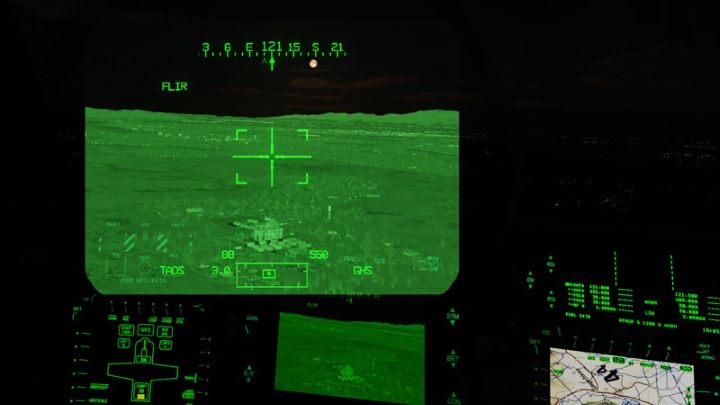
If you want to search and designate targets, turn off night vision mode with NVS SELECT to OFF position), set the active sight to TADS with the Sight Select Switch TADS (Right), set the "acquisition" source to the GHS (gunner's helmet sight) and press SLAVE on the right hand grip. The TADS camera will then follow the CPG's head movements. You can also zoom the image and designate targets. Detailed instructions on target acquisition and designation can be found in this chapter: Sight and Acquisition and TADS.
Night Vision Goggles - how to use?
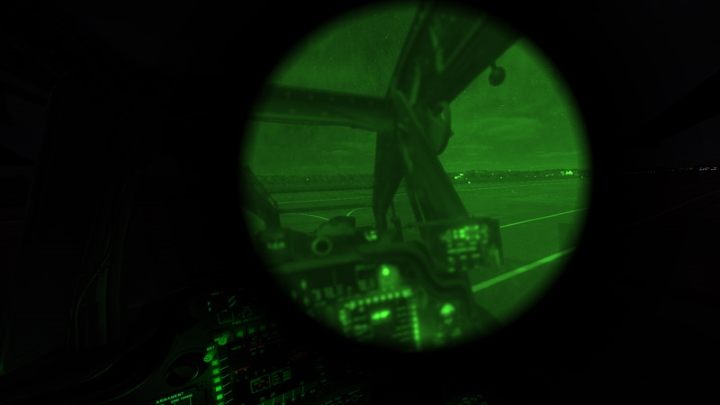
Make sure the IHADSS monocle is turned off with the "I" key. Press the RShift + H keys to put on the NVG headset.
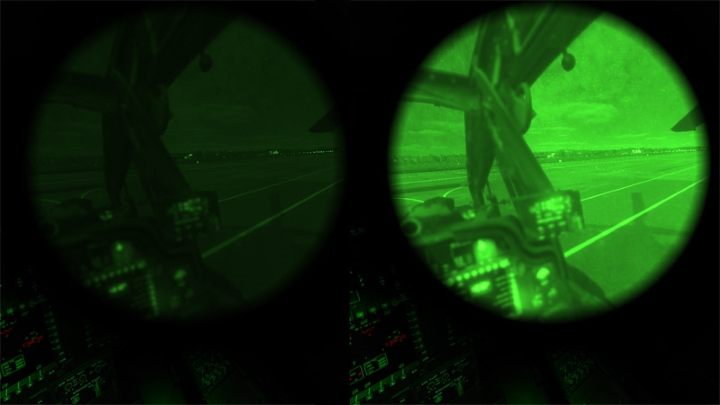
If necessary, use the RShift + RCtrl + H and RShift + RAlt + H keys to adjust the image.
- DCS AH-64 Apache Guide
- DCS AH-64D Apache: Game guide
- DCS AH-64D Apache: Systems and Sensors
- DCS AH-64D Apache: Sight Source and Acquisition Source
- DCS AH-64D Apache: TADS - Target Acquisition and Designation Sight
- DCS AH-64D Apache: PNVS - Pilot Night Vision System - how to use night vision?
- DCS AH-64D Apache: TSD - Tactical Situation Display
- DCS AH-64D Apache: ASE - Aircraft Survivability Equipment
- DCS AH-64D Apache: Radio Communication - how to use radios?
- DCS AH-64D Apache: Systems and Sensors
- DCS AH-64D Apache: Game guide
You are not permitted to copy any image, text or info from this page. This site is not associated with and/or endorsed by the developers and the publishers. All logos and images are copyrighted by their respective owners.
Copyright © 2000 - 2025 Webedia Polska SA for gamepressure.com, unofficial game guides, walkthroughs, secrets, game tips, maps & strategies for top games.
