WoW Warlords of Draenor: Skyreach

Skyreach is the last dungeon meant for the leveling characters. You gain access to this dungeon after you reach level 97. Here, you are going to fight four new bosses, thanks to which you can obtain new hear. At the Normal difficulty level, the item level is 600, whereas at the Heroic level - 630.
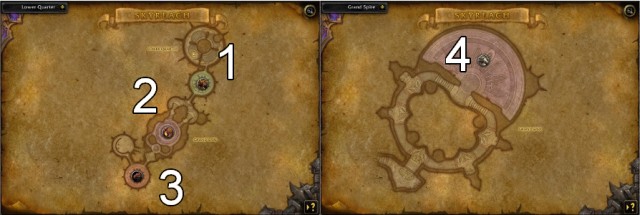
This time, you will be transferred to the Skyreach fortress. It is one of the most interesting dungeons, both when it comes to the feel of it and to the boss battles. Each one is going to require a slightly different tactic of you, as well as watching both yours and your party members' steps.
1. Ranjit
Your first task is to deal with several larger groups of monsters. You need to be careful here - if you attract too many enemies, you can die right at the very beginning of the dungeon. After you do full circle, you face Ranjit - the firs tactual boss.
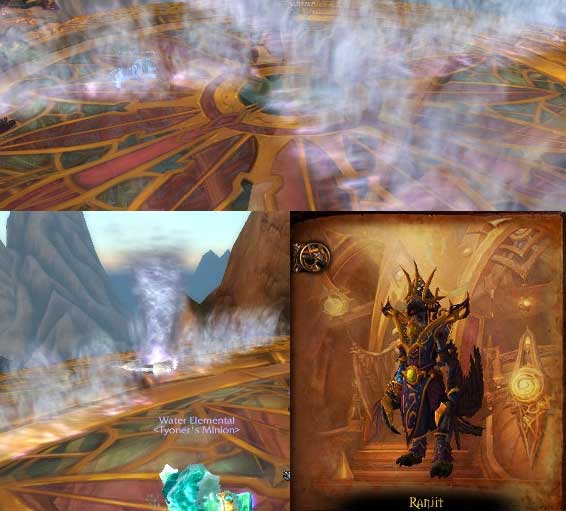
Ranjit mainly uses three main abilities that are not too dangerous, as long as you have learned them. The first one is [Piercing Rush]. While performing it, Ranjit picks one of the party members, faces him and prepares a quick attack, whose aim is to pierce the opponent. In such a situation, you need to get off the line of attack or you are severely battered. The remaining two abilities are similar to each other. [Windwall] forms a wall of wind that crosses the battlefield slowly. You need to avoid those, because staying within their reach may deal lots of damage. A much more dangerous ability is [Four Winds]. In the center of the arena, it forms a whirlwind with four walls of air spreading from it. The direction, in which the walls whirl, is random and entering into them ends in taking lots of damage. Fortunately, their whirling speed is low so, you should have no problems moving with them. So, as you can see, defeating the opponent is much dependent on avoiding his attacks - if you see what is going on and react fast enough, Ranjit should be no challenge to you. An the last thing to remember: do not fall off the platform that you fight on. There is nothing worse than an unnecessary death.
2. Araknath
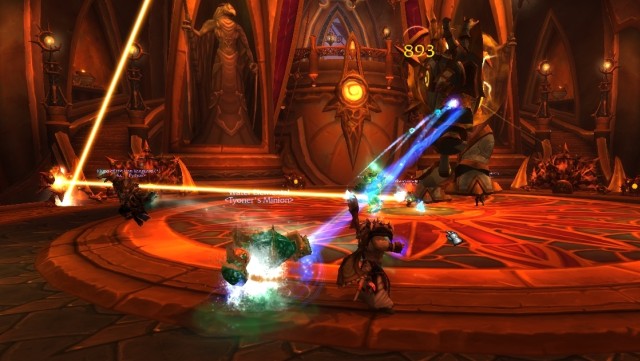
Your second serious opponent is Araknath. The battle is quite easy and in it is mainly about launching your abilities quickly, to obtain as high damage per second (DPS) as possible. The only abilities of the opponents that you should watch out for, is [Smash] and [Burst]. [Smash] concentrates on your tanks and deals tremendous damage but, it is easy to avoid, if only you notice that Araknath is preparing the attack. As for the other ability, you cannot avoid it, it deals damage to all party members. So, as you can see, this opponent is a test of how well party members do, at what they do in the battlefield. The tank needs to lure the opponent away from the others, the healer needs to watch health of all the party members, and the rest should strive for the highest DPS possible. Occasionally, you may notice a beam of light from the sky, which then touches to Araknath. It is a healing beam (heals around 0.75% per second). To terminate the beam, you simply need to walk into it, to prevent the beam from reaching the opponent.
3. Rukhran
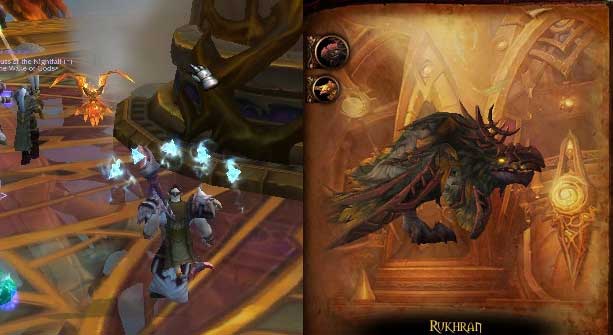
The third boss is Rukhan. Before you fight him though, you need to clear the platform that he is on. You need to do this carefully, the individual groups of enemies should be eliminated one-by-one. Rukhan himself is an easy target, he is standing, or rather floating, above one spot and does not move too much. Unfortunately, you will have to attach lots of attention to this battle. During the fight, Rukhan uses [Summon Solar Flare], which summons a phoenix. The bird locks in on one party member and flies up to that character slowly. The most important thing here is to stop it. If the Solar Flare touches to you, the explosion deals around 80-90k damage. It is easy to figure out that it takes two birds only to die. This is why, it is immensely important for the entire party to work together, while killing the birds. Of course, you can escape, but you are then useless to the rest of the party. It is much better to eliminate the bird and return to Rukhan.
4. High Sage Viryx
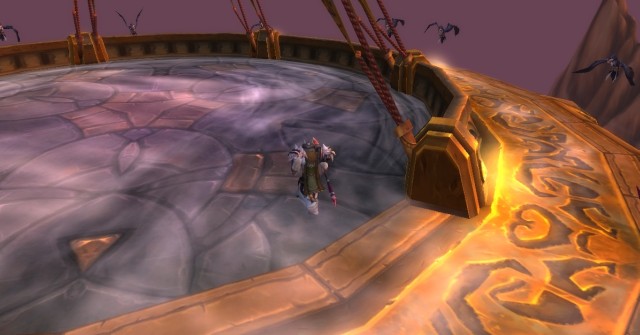
Before you reach your last opponent, you need to cross the "air tunnel". The most important thing is to keep in the middle of the route and on the roundabout in the middle of the route, take no shortcuts and walk around near the edge.
Eventually, your opponent - Viryx - is going to require, of you, attention and quick switching between targets during the battle. His strongest weapon is [Cast Down]. This ability summons to the battlefield the Solar Zealot, who attacks a random party member, lifts him above the ground and flies slowly towards the edge of the arena. At this point, every party member should focus on attacking that opponent. If the Solar Zealot reaches the edge of the platform, he drops the party member into the void, which results in death. Fortunately, a moment before that, you can see which one of the party members is the target of the attack, when a smudge of light appears above his head.

During the battle, Viryx may also summon the Skyreach Shield Construct, which ensures 50% protection against any attack. In such a case, it is better to destroy the Construct first, and focus on the main opponent later. You should also avoid the [Lens flare] that forms area, where you take damage. In this case, however, it is enough not to enter that area at all.
- World of Warcraft: Warlords of Draenor Game Guide
- WoW Warlords of Draenor: Detailed guide
- WoW Warlords of Draenor: Detailed guide to WOW Warlords of Draenor
- WoW Warlords of Draenor: Markings in this guide
- WoW Warlords of Draenor: The garrison
- WoW Warlords of Draenor: The purpose and functions of the garrison
- WoW Warlords of Draenor: Garrison management
- WoW Warlords of Draenor: The suggested order to expand your garrison
- WoW Warlords of Draenor: How to obtain new resources
- WoW Warlords of Draenor: Buildings (big)
- WoW Warlords of Draenor: Buildings (medium)
- WoW Warlords of Draenor: Buildings (small)
- WoW Warlords of Draenor: Miscellaneous buildings
- WoW Warlords of Draenor: Outposts
- WoW Warlords of Draenor: The system of followers
- WoW Warlords of Draenor: Picking and dispatching followers on missions
- WoW Warlords of Draenor: Recruiting new allies
- WoW Warlords of Draenor: Dungeons
- WoW Warlords of Draenor: Bloodmaul Slag Mines
- WoW Warlords of Draenor: Iron Docks
- WoW Warlords of Draenor: Auchindoun
- WoW Warlords of Draenor: Skyreach
- WoW Warlords of Draenor: Grimrail Depot
- WoW Warlords of Draenor: Shadowmoon Burial Grounds
- WoW Warlords of Draenor: The Everbloom
- WoW Warlords of Draenor: Upper Blackrock Spire
- WoW Warlords of Draenor: Mounts
- WoW Warlords of Draenor: Achievement-related mounts
- WoW Warlords of Draenor: Garrison-related mounts
- WoW Warlords of Draenor: Profession-related mounts
- WoW Warlords of Draenor: Reputation-related mounts
- WoW Warlords of Draenor: Mounts that you obtain after you defeat an opponent
- WoW Warlords of Draenor: Mounts that you obtain from PvP duels
- WoW Warlords of Draenor: Remaining mounts
- WoW Warlords of Draenor: Fieldcane Add-ons
- WoW Warlords of Draenor: Curse
- WoW Warlords of Draenor: Garrison Mission Manager + Master Plan
- WoW Warlords of Draenor: HandyNotes
- WoW Warlords of Draenor: Bagnon
- WoW Warlords of Draenor: System requirements
- WoW Warlords of Draenor: Detailed guide
You are not permitted to copy any image, text or info from this page. This site is not associated with and/or endorsed by the developers and the publishers. All logos and images are copyrighted by their respective owners.
Copyright © 2000 - 2026 Webedia Polska SA for gamepressure.com, unofficial game guides, walkthroughs, secrets, game tips, maps & strategies for top games.
