The Witcher 3 Blood and Wine: Scavenger Hunt Grandmaster Manticore Gear - diagrams and item statistics
On this page you will find descriptions of all six Grandmaster Manticore Gear diagrams - two swords, armor, boots, trousers and gauntlets. You will also find here their requirements and statistics.
This treasure hunt quest is about finding all six diagrams from the grandmaster Witcher manticore school. The easiest way to unlock this quest is by meeting with the master smith Zdravko in Beauclair as a part of the Master Master Master Master! side quest, however it can also appear in Geralt's journal after he finds one of the diagrams on his own. Theoretically you can collect the diagrams in any order you want, but it's best to follow the steps of this quest. The reason for that is because Geralt except for finding new diagrams will also come across various notes helpful in finding other schematics.
- Map of the Manticore school diagrams
- Steel sword diagram
- Armor diagram
- Trousers and boots diagrams
- Silver sword diagram
- Gauntlets diagram
- Manticore school gear statistics
Important - You can receive bonuses to Geralt's statistics by wearing more than one item from the Manticore school. These bonuses are as following:
- Wearing at least three Manticore grandmaster gear pieces - Critical hit chance and critical hit damage also apply to bombs.
- Wearing all six Manticore grandmaster gear pieces - The maximum number of charges for each alchemy item is increased by 1.
Map of the Manticore school diagrams
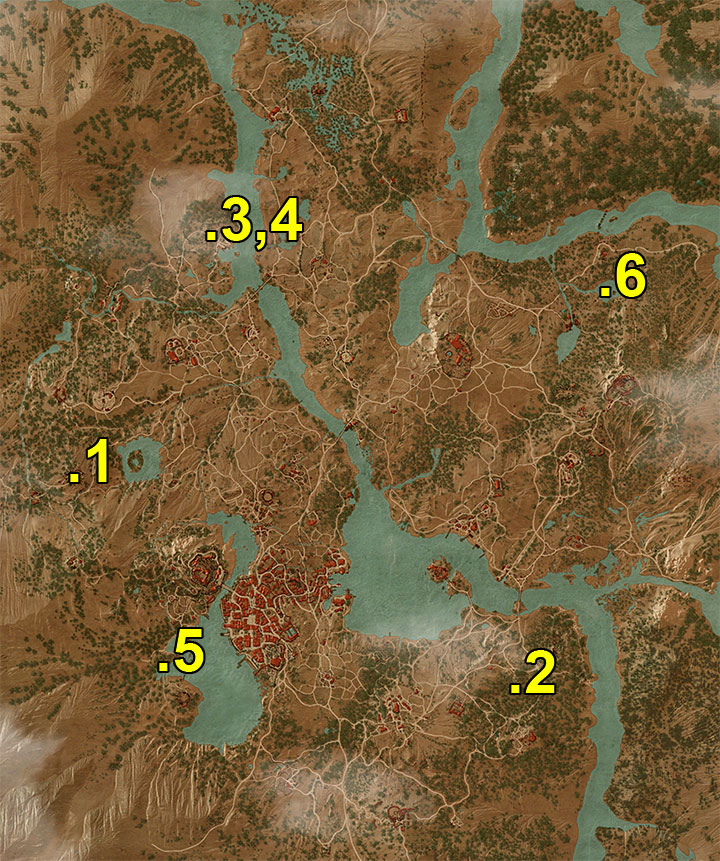
Explanation of the numbers from the map:
1 - Bastoy Prison ruins - Manticore steel sword diagram
2 - Cave - Manticore armor diagram
3,4 - Lebioda's temple - Manticore trousers and Manticore boots diagrams
5 - Cave with the hidden chapel - Manticore silver sword diagram
6 - Lake of Cleansing - Manticore gauntlets diagram
Steel sword diagram
Go to the ruins of the Bastoy prison
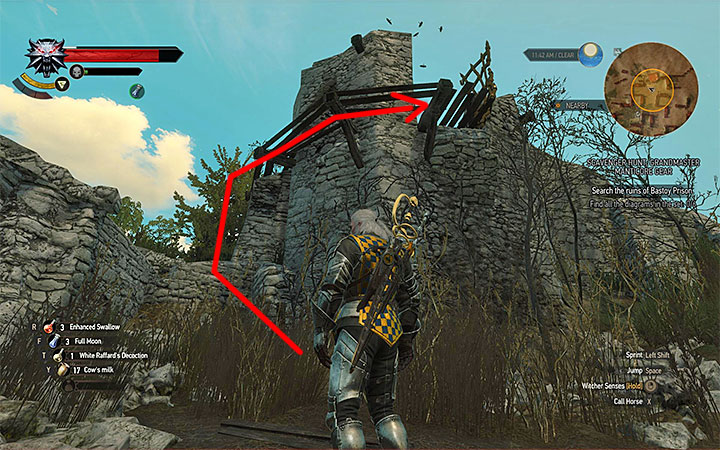
The Bastoy Prison ruins are located in the western part of Toussaint. Begin exploring the ruins after you've reached your destination. Don't get too close to a Hooded woman which you may notice while checking the ruins, because she's a very powerful vampire and killing her is a part of an entirely different side quest - The Toussaint Prison Experiment. Instead of engaging her in battle focus on locating a ruined prison tower from the screen above. Climb on a brick wall to the left of the tower and then on a small wooden balcony. Use the balcony to get to the tower.
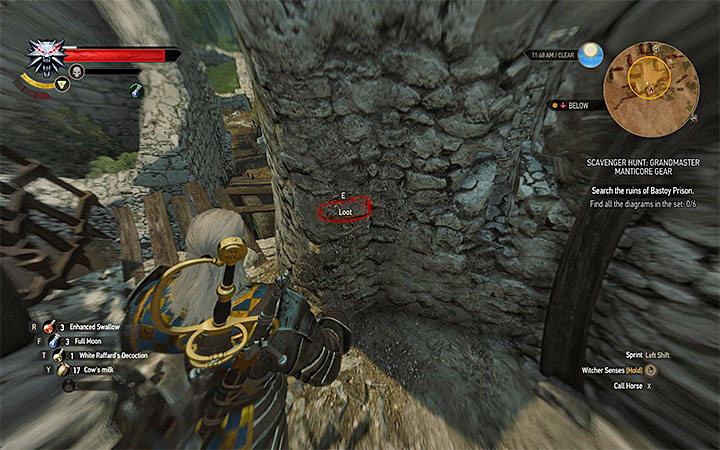
There's a small stash in the wall to the left. It contains a diagram of a Manticore steel sword and the Prisoner's Journal. Make sure to read the journal so that you'll find out that you must search a cave to locate the next diagram.
Armor diagram
Go to the cave where Lebioda once stayed
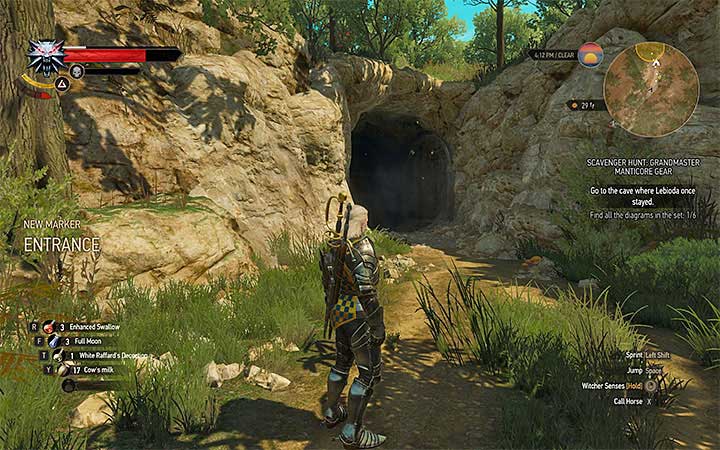
The cave is located in the south-eastern part of Toussaint. Two panthers will most likely interfere with gaining access to the cave. Consider applying a beast oil onto your sword before engaging them in combat. After the battle has started use dodges more often than usual, because the panthers are very quick. You should also be focused on only panther at a time. Once they're dead enter the cave and proceed to the last chamber.
Search the chamber
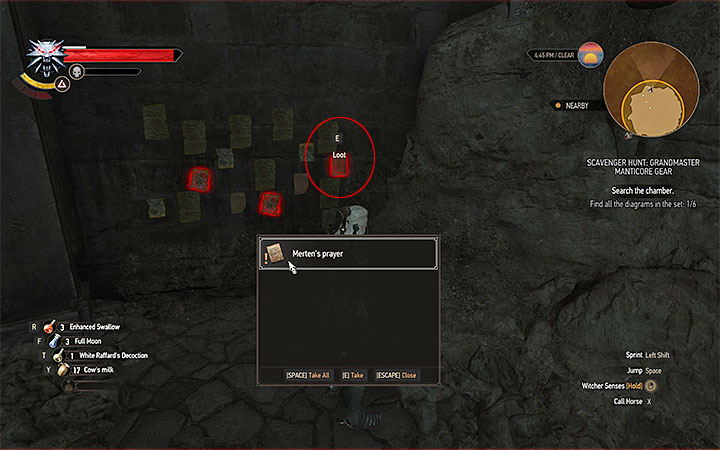
After entering the last chamber you can take some time to read the messages from the walls and to examine notes with the help from the Witcher senses. Ultimately you must examine a note from the wall displayed on the screen above. Collect Merten's prayer. Doing this will automatically grant you with a diagram of a Manticore armor and you'll also obtain intel on where to search for the next artifact.
Trousers and boots diagrams
Go to Lebioda's temple
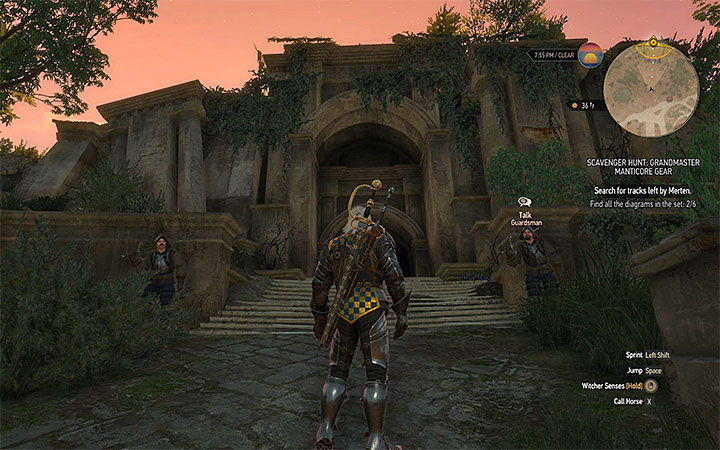
The next place to visit is the Prophet Lebioda Statue and it can be found in the north-western part of Toussaint. Once you've reached your destination locate a large entrance leading to an abandoned temple. Head inside and find a weaker part of the wall. Use the Aard sign to destroy that wall and to unlock access to the next chamber.
Search for tracks left by Merten
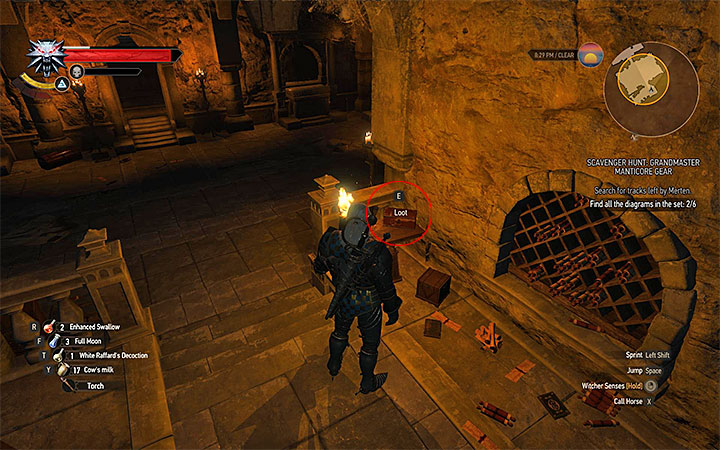
You have to be careful here, because as soon as you've destroyed the wall and entered a new room Geralt will be attacked by a level 40 Great Beggar's Ghost. The Yrden sign may prove to be very helpful in defeating the ghost - wait for it to appear inside the magical ring and then attack it. Once you've won the battle you'll have a chance to explore the chamber in peace. Your objective is to find a small box displayed on the screen above. The box contains a diagram of Manticore trousers, a diagram of Manticore boots and The Great Beggar's journal. Make sure to read the journal you've just picked up so you'll obtain the next clue.
Silver sword diagram
Go to the cave with the hidden chapel
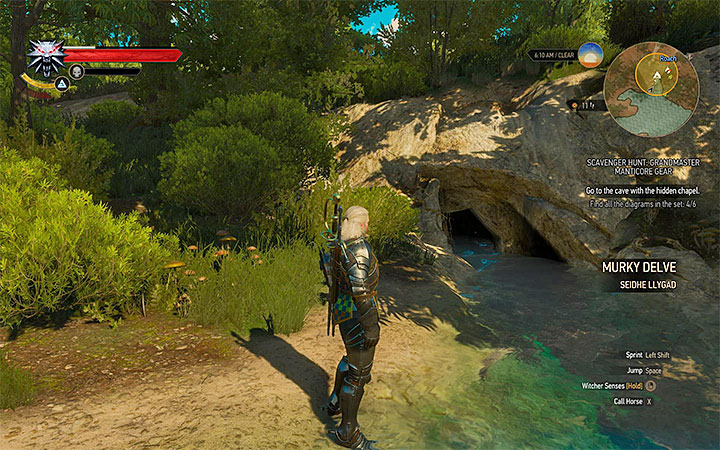
The Cave with the hidden chapel is located in the south-western part of Toussaint, to the south of the Palace Gardens. Look for a small entrance found next to the water.
Search the hidden chapel

Begin a rather linear exploration of the cave system. After you've entered one of the larger chambers Geralt will spot two naked women and they'll soon turn into bruxas (vampires). Start off by checking your inventory if you have some items for fighting vampires - vampire oil, Moon Dust bomb and Black Blood elixir. Once you've joined the fight start using the Yrden sign and attack the bruxas only when at least one of them is inside the magical ring so that she'll receive much more damage. After you've won you'll discover that this one of the trials caused by the hallucinations.
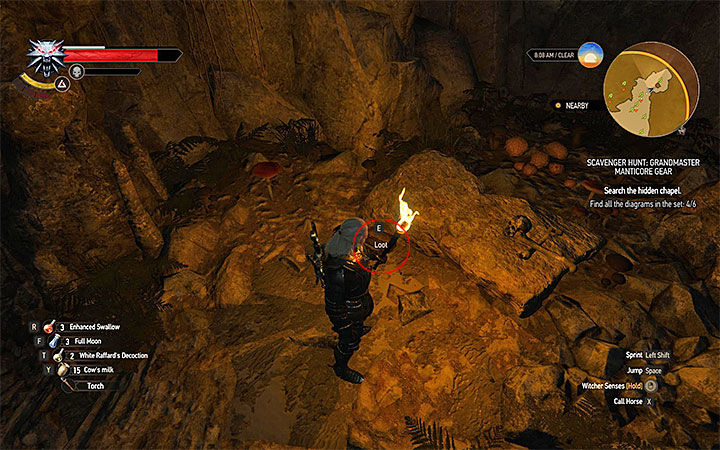
You may continue the exploration. One of the next chambers will feature five beggars. Decide to give a gold coin to each of the beggars so that they'll disappear. Head on further into the caves. You'll soon encounter a man surrounded by Kikimora workers. Begin attacking those monsters. Using an insectoid oil, White Honey and the Igni sign will help you in defeating them.
Keep exploring the chapel and choose the right path in the next area. You'll encounter a Mystery Man and you must approach him. Once he'll disappear examine a skull and a small container to the left displayed on the screen above. It contains a diagram of a Manticore silver sword and Merten's notes. Open the journal and read the notes to discover the location of the last diagram.
Gauntlets diagram
Go to the Lake of Cleansing
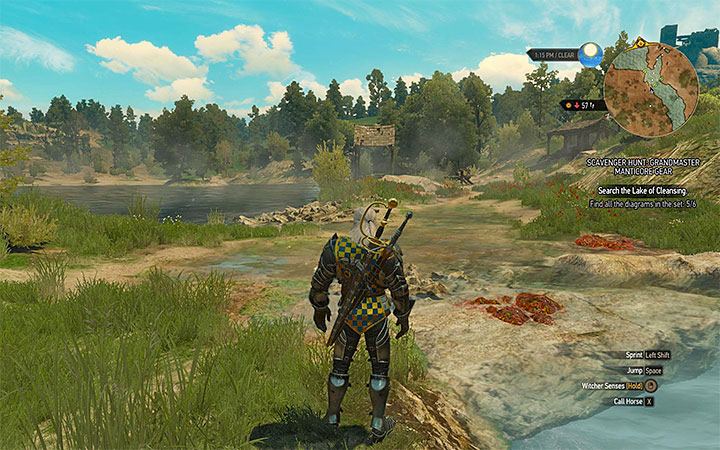
The Lake of Cleansing is located in the eastern part of Toussaint. You may encounter a group of bandits near the lake and it's up to you if you want to attack them or if you want to avoid them from a safe distance.
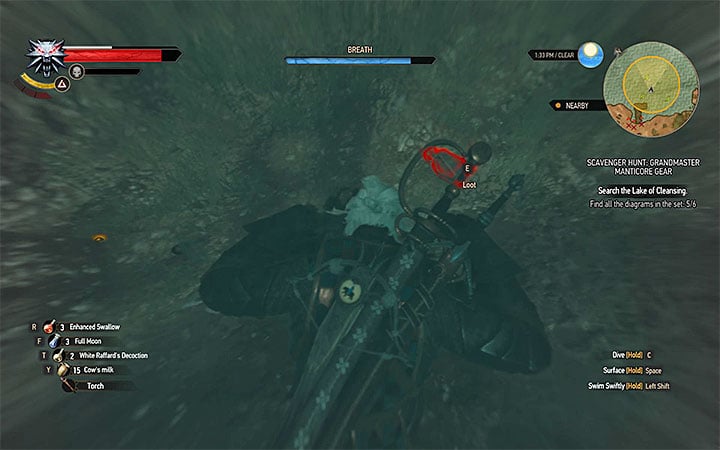
Jump into the water, dive in and activate the Witcher senses. You must locate a container from the screen above which will be lying at the bottom of the lake. Open the container to collect a diagram of Manticore gauntlets and Merten's Last Letter. Read the letter in order to end this quest.
Manticore school gear statistics
Grandmaster Manticore Witcher School Steel Sword
- Required level: 40
- Required craftsman: Smith, grandmaster
- Required crafting materials: leather scraps x2, dimeritum ingot x2, ruby dust x1, monster saliva x1
- Number of slots: 3
- Damage: 335-409
- +250 armor piercing
- +50% critical hit damage bonus
- +5% critical hit chance
- +10% chance to cause bleeding
- +5% bonus experience from humans and nonhumans
Grandmaster Manticore Witcher School Armor
- Required level: 40
- Required craftsman: Smith, grandmaster
- Required crafting materials: cured draconid leather x2, dimeritum plate x2, monster ear x2, monster eye x2
- Number of slots: 3
- Armor: 240 (medium weight armor)
- 10 Toxicity
- +19% resistance to piercing damage
- +24% resistance to slashing damage
- +31% resistance to damage from monsters
- +25% critical hit damage bonus
Grandmaster Manticore Witcher School Trousers
- Required level: 40
- Required craftsman: Smith, grandmaster
- Required crafting materials: cured draconid leather x1, dimeritum ingot x1, monster claw x1, monster blood x2
- Number of slots: 2
- Armor: 91 (medium weight armor)
- 10 Toxicity
- +9% resistance to slashing damage
- +11% resistance to damage from monsters
- +33% resistance to elemental damage
- +5% critical hit chance
Grandmaster Manticore Witcher School Boots
- Required level: 40
- Required craftsman: Smith, grandmaster
- Required crafting materials: cured draconid leather x1, dimeritium plate x1, monster claw x4, monster blood x2
- Number of slots: 2
- Armor: 91 (medium weight armor)
- 5 Toxicity
- +5% resistance to piercing damage
- +6% resistance to slashing damage
- +6% resistance to damage from monsters
- +25% critical hit damage bonus
Grandmaster Manticore Witcher School Silver Sword
- Required level: 40
- Required craftsman: Smith, grandmaster
- Required crafting materials: leather scraps x2, dimeritum ingot x2, ruby x1, monster brain x1
- Number of slots: 3
- Damage: 472-576
- +250 armor piercing
- +50% critical hit damage bonus
- +5% critical hit chance
- +10% chance to cause bleeding
- +5% bonus experience from monsters
Grandmaster Manticore Witcher School Gauntlets
- Required level: 40
- Required craftsman: Smith, grandmaster
- Required crafting materials: cured draconid leather x1, meteorite silver plate x1, monster hair x1, monster blood x1
- Number of slots: 2
- Armor: 87 (medium weight armor)
- 5 Toxicity
- +5% resistance to piercing damage
- +6% resistance to slashing damage
- +12% resistance to elemental damage
- +5% critical hit chance
- The Witcher 3: Blood and Wine Game Guide
- The Witcher 3 Blood and Wine: Game Guide
- The Witcher 3 Blood and Wine: Grandmaster Witcher Gear - quests, diagrams and item statistics
- The Witcher 3 Blood and Wine: New Grandmaster Witcher Gear - basic information
- The Witcher 3 Blood and Wine: Scavenger Hunt Grandmaster Manticore Gear - diagrams and item statistics
- The Witcher 3 Blood and Wine: Scavenger Hunt Grandmaster Wolven Gear - diagrams and item statistics
- The Witcher 3 Blood and Wine: Scavenger Hunt Grandmaster Feline Gear - diagrams and item statistics
- The Witcher 3 Blood and Wine: Scavenger Hunt Grandmaster Griffin Gear - diagrams and item statistics
- The Witcher 3 Blood and Wine: Scavenger Hunt Grandmaster Ursine Gear - diagrams and item statistics
- The Witcher 3 Blood and Wine: Grandmaster Witcher Gear - quests, diagrams and item statistics
- The Witcher 3 Blood and Wine: Game Guide
You are not permitted to copy any image, text or info from this page. This site is not associated with and/or endorsed by the developers and the publishers. All logos and images are copyrighted by their respective owners.
Copyright © 2000 - 2026 Webedia Polska SA for gamepressure.com, unofficial game guides, walkthroughs, secrets, game tips, maps & strategies for top games.
