Main quests - Wasteland Main - part 2 | Main quests
 |  |
Command the Blues to use the knob. That's how you will open the passage to the next part of the stage. You'll get to the huge chasm and the stone which circles above it. Once the stone approaches you and your minions, get on it and eliminate all the snails which are there.
 |  |
You'll have an opportunity to collect another piece of the Towerheart and get to next part of the level while flying on the stone. The teleport will open after you've reached the ground and the game will be saved then.
 | ![The further way leads through the village of possessed people [4] - Main quests - Wasteland Main - part 2 - Main quests - Overlord II - Game Guide and Walkthrough](/overlordii/gfx/word/-1359193093.jpg) |
The further way leads through the village of possessed people [4]. There's no sense in fighting with them - there are plenty of them. Destroy the nearby barricade instead. You'll find the command upgrade [E] (it increases the number of your Minions) behind it and another piece of the Towerheart.
 |  |
The further way leads through the open gate. You'll find some soldiers of the Empire and the elf behind it. Kill the legionnaires and listen to the elf.
 | ![Follow the elf and watch out for the ooze that falls form the slope [5] (on your left) - Main quests - Wasteland Main - part 2 - Main quests - Overlord II - Game Guide and Walkthrough](/overlordii/gfx/word/-1359193031.jpg) |
Follow the elf and watch out for the ooze that falls form the slope [5] (on your left). You won't gain anything interesting then but remember the place.
The elf will take you to the local sanctuary. You'll watch the cut-scene. After it follow the elf. He will take you to the already visited village of possessed people.
 |  |
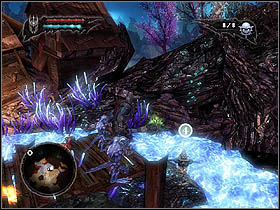
The elf will open the gate to the next part of the level. Walk through the gate so you'll get to place filled with the harmful for the Overlord ooze [6]. Use the nearby pit to call the Blues (it's good to have only Blues at this moment).
 |  |
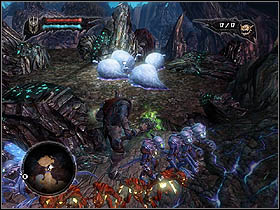
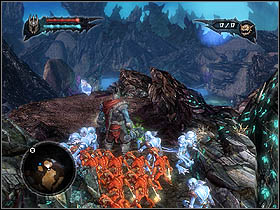
Let the Minions go 2 meters in front of the Overlord - he won't be hurt then. You'll find the majority of the pieces of the Towerheart in the area. Some of them are behind the flames [7] or toxic vapours [8].
 |  |
Notice that in the middle of the area there are Minion spawning pits - call two green Minions and two Reds to get to all of the pieces you're looking for.
You'll find there something similar to the ruins of a stronghold. It's guarded by several enemies but they're not a big deal for you. There's the spell catalyst in the ruins [F].
 | ![Once you've reached 11 out of 12 pieces of the Towerheart, the elf will guide you to the gate [9] - Main quests - Wasteland Main - part 2 - Main quests - Overlord II - Game Guide and Walkthrough](/overlordii/gfx/word/-1359192906.jpg) |
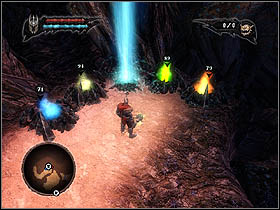
Once you've reached 11 out of 12 pieces of the Towerheart, the elf will guide you to the gate [9]. He will open it so that you will be able to fetch the artefact.
There's only one problem. The last piece of the Towerheart is guarded by quite tough opponent - the enormous snail [10]. You can defeat it without your Minions' help. Your enemy is slow. You can attack it from behind and from one side. Then you'll harm the snail without suffering any damages. If you kill the opponent, take the last piece of the Towerheart.
 |  |
You'll encounter some forces of the Empire after the fight with the snail. Hide in the blue Minions' pit - the enemy soldiers won't approach. There'll appear the Gargantuan too. Try to pass by that creature and get to the path which the Gargantuan has already followed [11]. You'll encounter a barricade but some punches. Yes, that will do nicely.
 |  |
There you'll encounter another Gargantuan. Command your Minions to use the knob to open the nearby gate.
Go forward, follow the mountain path partly covered by the blue ooze.
 |  |
You'll encounter another blockade on your way - that's not a big deal for the Overlord. Then you'll meet three soldiers of the Empire. If you don't want to fight with them, use the magic.
 | ![Notice that there's a slope covered by the thick ooze [5] behind the soldiers - Main quests - Wasteland Main - part 2 - Main quests - Overlord II - Game Guide and Walkthrough](/overlordii/gfx/word/-1359192781.jpg) |
Notice that there's a slope covered by the thick ooze [5] behind the soldiers. The ooze isn't dangerous so you can slip off the slope. Then go to the local sanctuary [P1].
You are not permitted to copy any image, text or info from this page. This site is not associated with and/or endorsed by the Codemasters or Triumph Studios. All logos and images are copyrighted by their respective owners.
Copyright © 2000 - 2025 Webedia Polska SA for gamepressure.com, unofficial game guides, walkthroughs, secrets, game tips, maps & strategies for top games.
