inFamous Second Son: Chapter 5, part 2 - things to do outside the game
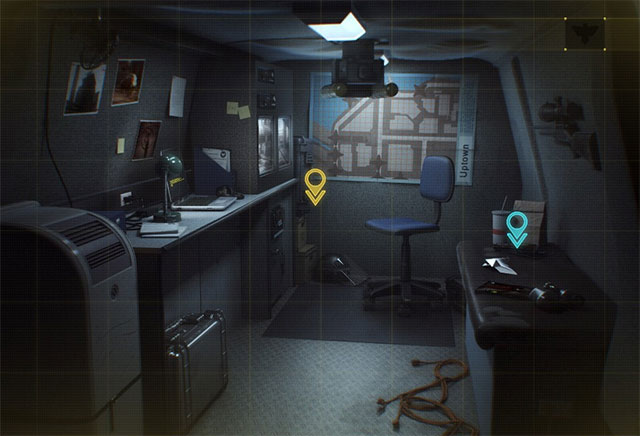
Log on to http://infamouspapertrail.com/ again, and access the profile window. Select the only option from the list, i.e. the one connected with investigating the van's interior Gudino's Landscaping Van. wait for the game to load the view from the inside of the van. Start by collecting the origami dove (the blue icon) from the table on the right. After you see all three screens, walk deeper into the van (the yellow icon).
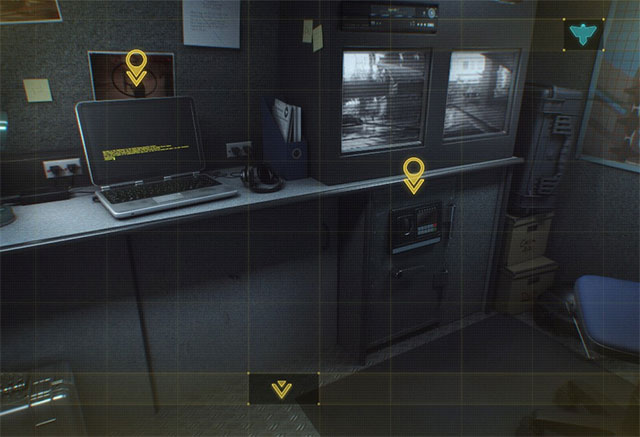
Also here, there are two interactive spots. Ignore the one on the left, for the time being, and turn your interest to the safe on the right. Soon, the game will load a new screen and you will have to open the safe.
Note - if the navigation around the van is inactive, or if it is not possible to solve the below puzzles, this may mean that you are using a browser that is not fully compatible with the page. Check, e.g. if the JavaScript processing is not disabled, or use another browser.
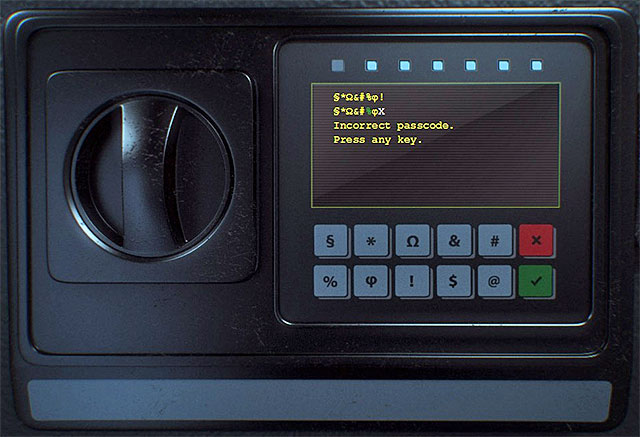
To open the safe, you need to solve another puzzle and its assumptions are similar to those of the puzzle with the drone, which you had to deal with in the first chapter of the inFamous Paper Trail. The plan assumes that you determine the safe combination and you need to do that on your own, because it is randomly generated.
Start by entering any string of eight symbols (the gray buttons) and make sure that each one is different than the rest (the symbols do not repeat). Wait for the safe computer to respond and analyze the response. The white letter X, under a given symbol, means that it does not appear in the combination. Green color means that the given symbol is in the right position. To sum up, with each next attempt, you need to leave the symbol where it is correct (green color) and experiment with the remaining ones (yellow color and the ones that you have not tried at the beginning of the puzzle).
An additional handicap here is the fact that you only have seven attempts to go with. I recommend, therefore, that you perform PrintScreen of all the feedbacks from the computer in the safe, thanks to which you will be able to improve on your results with each consecutive attempt. If, in spite of that, you fail to guess the correct combination, it will be reset and the fun start s over.
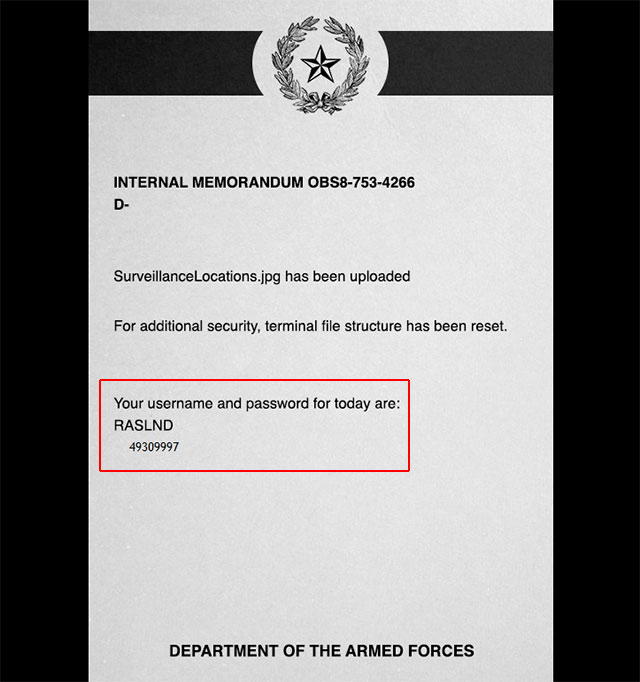
Click on the document that was inside the safe and start reading it, thoroughly. I recommend that you especially read the page with the information and hints on using computer terminals. You are going to need this, in a moment. Very carefully, also read the last page. In the area shown in the above screenshot, there are a login and a password (it is randomly generated). Take this information down.

Return to the previous screen and click on the computer on the left. Wait for the screen to load. First of all, you need to take two steps:
- Enter the login raslnd - it is set by default
- Enter the password- it is randomly generated and you need to copy it from the document that you found in the safe
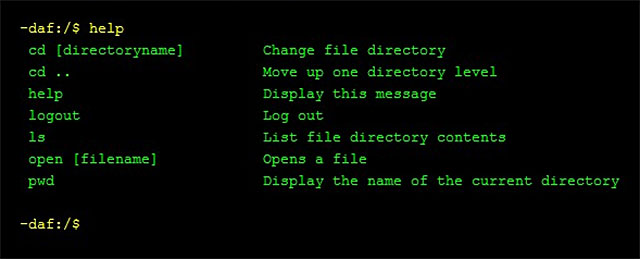
You are now going to take on the most difficult and the most demanding puzzle, so far. It consists in finding, on the hard drive, the SurveillanceLocations.jpg file. It is placed in a random folder so, you need to locate it on your own. For all of that, you are going to be using an UNIX terminal and you will be entering various commands.
First of all, take a look at the available commands, whose functions and example use have been included in the document that you found in the safe. This is the full command list:
- cd x - change folder to x (instead of x you need to enter the folder name, e.g. cd src_2)
- cd .. - goes a level up on the folder tree (it may also be taken as the return to the previously examined folder)
- help - displays the command list
- logout - logs out - not useful
- ls - displays the contents of the current folder
- open x - open folder x (you are going to need it towards the end)
- pwd - displays the name of the current folder - not useful
Note! The remaining typical UNIX commands are unavailable during the puzzle and you are not going to need them.
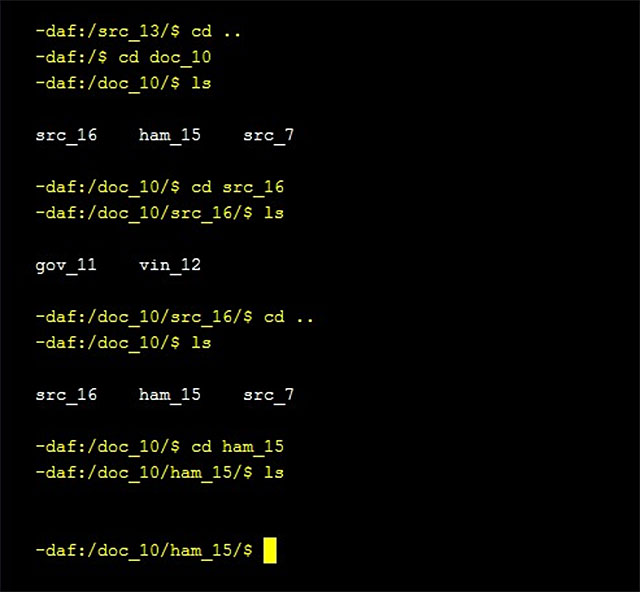
As already mentioned, the graphic file is in a random folder and also, the folder tree is not predetermined. As a result, you need to search through the contents of the drive, and this is what the entire process should look like:
- Always start with the ls command, to view the contents of the current folder. This will allow you to find out if there are other sub-folders and/or the graphic file.
- If, in a given folder, there are other folders, access them with the cd command (e.g. cd doc_10). After you access a new folder, use the ls command again to find out about its contents.
- If a folder is empty, return with the cd .. command, to the higher level on the folder tree (the previously checked folder).
- Use the cd .. command also in the case, in which the names of the folders repeat. You can follow the game's suggestion and write down their names and ignore those of the folders that you have already checked, later into the puzzle.
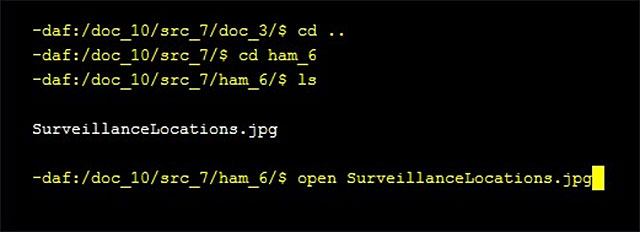
Continue searching, up until the moment, at which the system, after you enter the ls command, informs you of the presence of the SurveillanceLocations.jpg file (the above screenshot).
The only thing that you need to do now is open the graphic file that you have found and to do that, you need to enter the open SurveillanceLocations.jpg command. After you get an appropriate confirmation and see the report, return to the game to start the next mission.
- inFamous: Second Son Game Guide & Walkthrough
- inFamous Second Son: Guide, Walkthrough, City
- inFamous Second Son: inFamous Paper Trail
- inFamous Second Son: Introduction inFamous Paper Trail
- inFamous Second Son: inFamous Paper Trail - map
- inFamous Second Son: Chapter 1, part 1 - things to do in the game
- inFamous Second Son: Chapter 1, part 1 - things to do outside the game
- inFamous Second Son: Chapter 1, part 2 - things to do in the game
- inFamous Second Son: Chapter 1, part 2 - things to do outside the game
- inFamous Second Son: Chapter 1, part 3 - things to do in the game
- inFamous Second Son: Chapter 1, part 3 - things to do outside the game
- inFamous Second Son: Chapter 2, part 1 - things to do in the game
- inFamous Second Son: Chapter 2, part 1 - things to do outside the game
- inFamous Second Son: Chapter 2, part 2 - things to do in the game
- inFamous Second Son: Chapter 2, part 2 - things to do outside the game
- inFamous Second Son: Chapter 2, part 3 - things to do in the game
- inFamous Second Son: Chapter 2, part 3 - things to do outside the game
- inFamous Second Son: Chapter 3, part 1 - things to do in the game
- inFamous Second Son: Chapter 3, part 1 - things to do outside the game
- inFamous Second Son: Chapter 3, part 2 - things to do in the game
- inFamous Second Son: Chapter 3, part 2 - things to do outside the game
- inFamous Second Son: Chapter 3, part 3 - things to do in the game
- inFamous Second Son: Chapter 3, part 3 - things to do outside the game
- inFamous Second Son: Chapter 3 - additional recording
- inFamous Second Son: Chapter 4, part 1 - things to do in the game
- inFamous Second Son: Chapter 4, part 1 - things to do outside the game
- inFamous Second Son: Chapter 4, part 2 - things to do in the game
- inFamous Second Son: Chapter 4, part 2 - things to do outside the game
- inFamous Second Son: Chapter 4, part 3 - things to do in the game
- inFamous Second Son: Chapter 4, part 3 - things to do outside the game
- inFamous Second Son: Chapter 5, part 1 - things to do in the game
- inFamous Second Son: Chapter 5, part 1 - things to do outside the game
- inFamous Second Son: Chapter 5, part 2 - things to do in the game
- inFamous Second Son: Chapter 5, part 2 - things to do outside the game
- inFamous Second Son: Chapter 5, part 3 - things to do in the game
- inFamous Second Son: Chapter 5, part 3 - things to do outside the game
- inFamous Second Son: Chapter 6, part 1 - things to do in the game
- inFamous Second Son: Chapter 6, part 1 - things to do outside the game
- inFamous Second Son: Chapter 6, part 2 - things to do in the game
- inFamous Second Son: Chapter 6, part 2 - things to do outside the game
- inFamous Second Son: Chapter 6, part 3 - things to do in the game
- inFamous Second Son: Chapter 6, part 3 - things to do outside the game
- inFamous Second Son: Chapter 6, part 4 - things to do in the game
- inFamous Second Son: inFamous Paper Trail
- inFamous Second Son: Guide, Walkthrough, City
You are not permitted to copy any image, text or info from this page. This site is not associated with and/or endorsed by the developers and the publishers. All logos and images are copyrighted by their respective owners.
Copyright © 2000 - 2025 Webedia Polska SA for gamepressure.com, unofficial game guides, walkthroughs, secrets, game tips, maps & strategies for top games.
