Hitman 2: The Last Yardbird, Himmelstein - walkthrough, map of the bonus mission
This page of our Hitman 2 guide contains a description of The Last Yardbird mission taking place in the Himmelstein location. This is a unique bonus mission for Sniper Assassin mode. Our guide includes information on the main rules of this mode and The Last Yardbird mission's objectives. This page also contains a map of Himmelstein on with the most important areas marked on it.
- The most important information about the mission and the Sniper Assassin mode
- The main objectives of The Last Yardbird mission
The most important information about the mission and the Sniper Assassin mode

In the Last Yardbird mission (and other Sniper Assassin mode missions that will be added later) you can play solo or in the cooperation with another player. We recommend learning the map in the single player mode first.
In the Sniper Assassin mode, you can't move freely on the map. The character uses a sniper rifle to eliminate the mission's objectives and to complete additional challenges. In the Himmelstein mission, all shots are taken from the hill near the huge mansion.

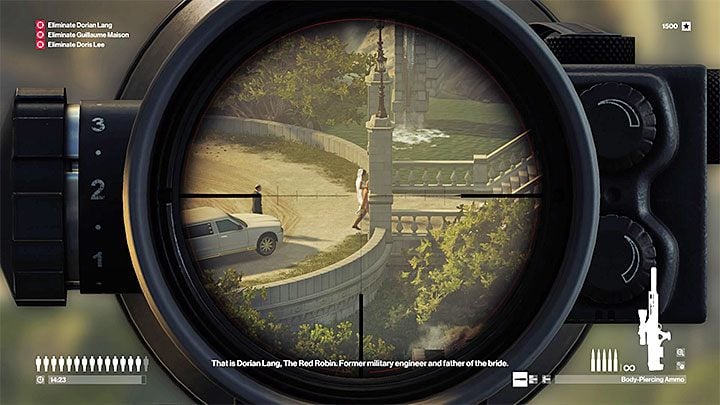
In "The Last Yardbird" mission you have 15 minutes to eliminate three main objectives. These are Dorian Lang, Guillaume Maison, and Doris Lee. The game stops the time counter when the last person is killed. The mission may fail if you won't fit in the 15 minutes time limit or if any of the targets flee from the area after the alarm (like Dorian in the example picture above).
Besides killing the three targets, you have to get rid of 15 guards on the map. You can take care of them between eliminating the main objectives, or after killing Lang, Maison, and Lee (it's easier that way because the time counter will stop). If the alarm rises, the guards will also try to leave the area (one at a time). Their escape doesn't mean that you'll fail the mission. However, it'll worsen your score.

It's recommended to use the instinct mode during this mission. In this mode, the main mission's objectives and guards for elimination are marked (in red). Thanks to this, you can easily localize your next target and find a way to get rid of them without starting the alarm.
The Sniper Assassin mode has a different mechanism for raising the alarm compared to the story missions. When someone finds the body or spots a killing, a yellow icon appears above their head. Kill them before the icon turns white - otherwise, they'll alarm the entire map and start the evacuation process. Try to eliminate the main objectives first. Only then take care of the guards - they always escape one by one. A red icon will appear above fleeing person's head (example in the picture above). Focus on killing this person, because rest of the guards will stay in one place the entire time.

The alarm will start only in the abovementioned cases. Shooting the environment objects, like walls or floors, won't trigger it. You can miss on purpose to distract enemies (a question mark will appear above their head - example in the picture) and lure them to secluded places. After the opponent disappears from the field of view of other people and goes near, for example, a balustrade or water tank, you can easily kill him and get rid of his body at the same time.
The Sniper Assassin mode has a complex scoring system. You'll get additional points for eliminating mission's main objectives or guards. Bonus points can be obtained for headshots, killing moving targets, using environment objects for eliminating the targets (like exploding gas lamps) or killing in the short intervals of time. You'll get negative points for killing innocent people.

The Sniper Assassin mode has also a score multiplier. You don't always start from the lowest value - it's permanently increased by completing the challenges in the mission. Like in the example from the picture, completing some challenges increased score multiplier by .37. It's best to early finish as many challenges as possible to earn more points during the next completion of the mission. The game offers additional score bonuses for completing the mission with a Silent Assassin rank, for no bodies found and for no innocent people kills.
The Sniper Assassin mode allows you to get mastery levels, but in contrast to the mission stories, they aren't rewarded with new gadgets or starting locations. All of the unlocks apply to the sniper rifle - it can be upgraded with better accuracy, faster reload or bigger magazine.

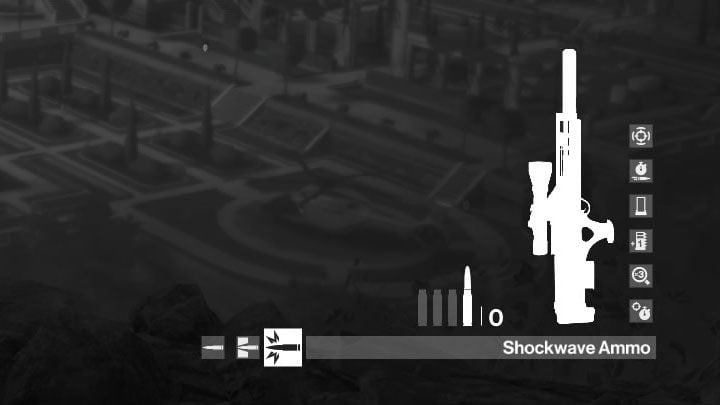
In the Sniper Assassin mode, the sniper rifle uses three types of ammunition. Body-Piercing Ammo is unlimited, so you'll be using it the most. Wall-Piercing Ammo is limited, use it when your target is in the building and you don't want/can't wait for them to go out on the open field. Shockwave Ammo is also limited and it'll push away your target. You can use it to throw people to the chasm or through the balustrade (that way you won't need to worry about the body). This ammo is also useful during the evacuation when aiming at your target gets really hard.
You can use a silencer, but the most important feature of the rifle is the ability to slow down time. Pushing the attack button (R2/right trigger by default) stabilizes the scope and activate a slow motion for a short amount of time. Use this option for precise aiming.
The main objectives of The Last Yardbird mission

Dorian Lang is the first of the three mission's objectives. He approaches the estate in a limousine, which stops on the driveway on the west side of the map right after you start the mission. Before Dorian gets out of the limousine, it's worth getting rid of the bodyguard waiting for him. Lure the guard close to the water tank and shoot him into the water.
Dorian is accompanied by his daughter, who is also a bride. Both of them will travel to the eastern end of the map where the wedding will take place. Dorian will visit other areas of the estate, as well as meet other objectives later in the mission.

Doris Lee is a second mission's target. She approaches the estate in the helicopter, which appears on the landing pad in the southern part of the map few second after the mission starts. One bodyguard is waiting for her. It's worth distracting him by shooting the landing pad's edge and throw him into the chasm using the shockwave ammo.
After the landing, Doris will travel mainly through the gardens of the estate, although she can also enter the building and meet with other mission's objectives.

Guillaume Maison is the last of the mission main objectives. He is the owner of the estate so he will be on the map from the very beginning. Guillaume by default is in his office on the upper floor in the left part of the mansion. The man is accompanied by a bodyguard - you can kill them both at the same time when they're standing close to each other or lure the guard to one of the balconies.
Guillaume goes to other rooms or he can go outside later in the mission. He can also meet with other mission's targets.

The abovementioned meetings between the objectives take place in various locations in the estate. It's worth noting that some meetings may not take place in the planned manner or may not happen at all if you've previously alerted people who are the main objectives of the mission. If you want to complete the challenges associated with these meetings easily, then you shouldn't do any
These are the most important meeting places:

1) A room with chandelier - all three can meet here. Don't make any moves. The meeting should happen when you'll have about 4 minutes left. Aim at the chandelier chain above the talking targets, it'll kill all of the three.

2) A place with a cannon - all three can meet in here. You have to sabotage the chandelier first for the targets to meet in the alternative place. The meeting should happen when you have about 4 minutes left. Shoot the cannon on the left of the talking people. It'll fire and the objectives will die from the explosion.


3) Labyrinth - Dorian and Doris can meet here. In order to arrange this meeting, you have to hit the flag mechanism in the labyrinth (picture 1), and then wait until you have 8 minutes left. After meeting starts, aim at the 2 planks holding the statue (shown in the picture above), so it'll fall on the talking targets.

4) Art Gallery - Dorian and Guillaume can meet here. You can recognize the room by a large painting. Meeting here by default doesn't guarantee you any unique way to arrange an accident. You must also destroy the lamp next to the photographer's stand (picture 1) and hang the flag in the labyrinth. Only then, wait until the mission is over in 4 minutes. Dorian and Giullaume will go on the balcony after the meeting. You can then shout the speaker above them, thanks to which it'll fall and kill them.
You are not permitted to copy any image, text or info from this page. This site is not associated with and/or endorsed by the developers and the publishers. All logos and images are copyrighted by their respective owners.
Copyright © 2000 - 2026 Webedia Polska SA for gamepressure.com, unofficial game guides, walkthroughs, secrets, game tips, maps & strategies for top games.
