Drakensang The Dark Eye: Main quests
Quest order:
Q32.2.1 Find the key
Q32.2.2 Use the key
Q32.2.3 Find another key
Q32.2.4 Use the second key
Q32.2.5 Find the third key
Q32.2.6 Read the final inscription
Q32.3 Find the helm of fire
Q32.1.2 Return to Murolosh
Q33 Madness in Murolosh
Q20 Caves below Murolosh (continued)
2. Earn the king's trust
You need to complete Q33 Madness in Murolosh.
3. Find the Adamantine Heart
3.1 Find your way to the caves
You need to complete Q32.2.2 Use the key.
3.2 Gather the clues
You need to complete Q32.2.6 Read the final inscription.
3.3 Pass through the Fire Fall
You will complete this quest in chapter ten.
Q32 Depths of Gruldur
1. Explore the caves
1.1 Find the teleporter disc
You need to complete Q32.3 Find the Helm of Fire.
1.2 Return to Murolosh
After completing Q32.3 Find the Helm of fire return to the portal M11(1) using the shorter path. Get through the now open door M11.3(8) and take the stairs M11.3(9) down. Get to the first level and enter the portal.
2. Decipher the writings
2.1 Find the key
Approach the dwarven remains M11(2). A ghost, who will want to give you the cyclopean artifact. You will find it by the body.
2.2 Use the key

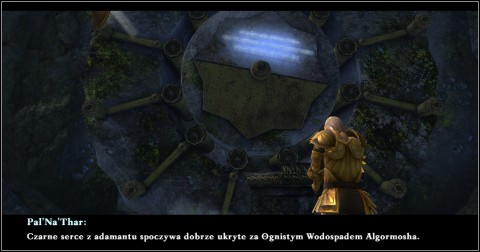
Artifact, you just got is the key to the first cyclopean door M11(3). Approach them and watch the cinematic after which the door will open and the sign appears: "The Black Adamantine Heart is safely held behind the Fire Falls of Algormorsh".
2.3 Find another key
Another key M11(4) can be found in one of the caves behind the open door - it is guarded by fire spirits. Deal with them and collect the Cyclopean artifact.
2.4 Use the second key
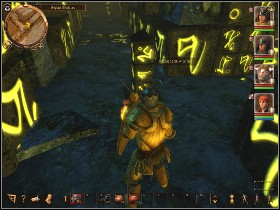
Open the second set of doors M11(5) and read the inscription. "Great number of cyclops protect the Heart from the greedy hands of grolms and the sight of the evil dragon's progeny".
2.5 Find the third key
In order to reach the third key M11(8) you need to get to level 1 A M11(6). While there use the hidden door M11(14) to get to the treasure room M11(15). Then proceed to level 1 B M11(16). Keep going forward until you get to the passage to level 1 M11(18). Enter the room M11(8), where another group of spirits guards the key and get through them to get the artifact.
2.6 Read the final inscription
Use the block M11(9) to open your way forward M11(10) then go back near the portal. Go down the stairs to level 2 M11(12), approach the third door M11.1(2) and read the final inscription "Only the one wearing the Helm of Fire will get through the mountain flames unharmed".
3. Find the Helm of Fire
|
|
The right order of flipping the switches is: S1, S2 twice, S1, S3. | The door will open. |
Helm of Fire M11.3(6) is in the big room on level 4. In order to enter it you need to pass through the corridor in which you will be attacked by a statue M11.3(5). It will cast a few spells weakening you before the fight.
You can avoid the damage dealt by the statue - in order to do that you need to solve the puzzle on level three - one of the chambers has four switches M11.2 (2, 3, 4 and 5). Using one of them will open up the way to one of the switches and closing of another set of door. The point of the riddle is to open the final door. The right order is S1, S2 twice, S1, S3. The door will open and you will find a key to Grolm M11.2(6) in a hidden room. Return to level 4 and approach the door M11.3(3). They will open when you use the key. Enter the chamber and take the stairs down. Use the switch M11.3(4), which will disarm the statue. This will make the fight for the Helm much easier.
Helm of Fire is guarded by a very powerful enemy - a cyclopean skeleton supported by undead grolms. The cyclops is quite slow so try to lure him with one of your characters (just keep running until the rest of the party deals with grolms). And once he's alone focus your attacks on him.
After the fight use the switch M11.3(7), to lower the monolith M11.3(6) and take the Helm of Fire. A moment after you pick it up a ghost of the Dragon Quest Warrior. Will appear and hand you over the teleportation disc, which you can use to return to Murolosh.
Reward: Helm of Fire, teleportation disc
Q33 Madness in Murolosh
Right after you enter the Murolosh you will run into the Follower of Lugosh. Who will tell you that the king and his guards have gone mad and are attacking the other dwarves. He will also tell you that Xolgorax wants to see you.
1. Meet Xolgorax in the Throne Room
Head to the throne room M10(2), where Xolgorax Awaits you High Priest thinks that the madness is caused by the dragon carbuncle and wants you to destroy it.
2. Make king Arombolosh regain sanity
Enter the throne room and fight the king and the other dwarves. Once you land a few successful blows on him he will fall to the ground allowing you to destroy the jewel set in his crown. Arombolosh will regain sanity, thank you for your help and send you to the treasurer M10(8), who has a reward for you. He will also create a new item from the armor pieces you've assembled - Armor of Fire. The treasurer will give you one of the items you haven't picked before (Q19.1 Accept the gift).
Reward: Armor of Fire, Titanium ring of untamed power or Robe of Confusion or Kangroshes Axe or Malmargarashno two-handed axe
3. Ask about the Fire Falls
Ask the king for the permission to head to the Fire Falls and Xolgorax will join in the conversation saying that after reading through Aldessia's notes he found a way to reach the spot where the Adamantine Heart rests. You can now go to Aldessia's chambers M10(4) and use the portal M10.5(4), to reach a new location.
End of chapter nine!
You are not permitted to copy any image, text or info from this page. This site is not associated with and/or endorsed by the developers and the publishers. All logos and images are copyrighted by their respective owners.
Copyright © 2000 - 2025 Webedia Polska SA for gamepressure.com, unofficial game guides, walkthroughs, secrets, game tips, maps & strategies for top games.


