Drakensang The Dark Eye: Main quests
Quest order:
Q13.1 Meet with Gerling
Q14.1 Stop Humbold's Pursuers
Q13.2 Get to the hidden passage
Q13.3 Find the Dragon's Eye
Q13.4 Return to the temple of Hesinde
Q13 The Dragon's Eye
1. Meet with Gerling
Gerling M5(10) can be found by the gate leading to the dwarven district. Wait for him to finish the conversation with the guard and chat him up. Explain him your mission and he will tell you about a secret passage leading to the Grimtooth Castle that you will need to use.
2. Head to the secret passage
Continue on towards the castle. On your way you will encounter some orc squads. The secret passage M8(3) leading to the castle vault is in the nearby graveyard. Defeat the orcs guarding the spot and enter the caves.
3. Sneak past the orcs
If you'll manage to proceed unseen to the third level you will gain extra experience.
4. Find the Dragon's Eye
Tunnels beneath the castle - level 1
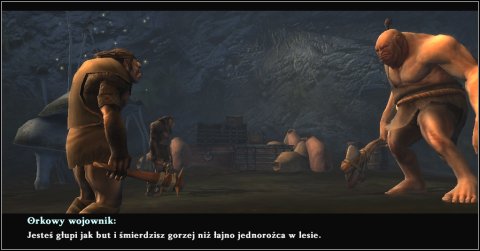
First you need to get past the caves and onto the next level M8.1(4). On your way you will encounter loads of orcs and spiders who hatch in these caves. In the guard post M8.1(3) you will encounter some orc warriors and an ogre that can't attack the orcs due to the spell that has been cast on him. The ogre is pretty angry and keeps on smashing his club against the ground - this has caused the cave-in that blocks your way back. M8.1(2). You have no choice but to fight the orcs and the ogre and head to the next level M8.1(4).
Tunnels beneath the castle - level 2
It's a good idea to use the hidden passages set throughout this level M8.1(6) and collect the valuable items stored there. There are orcs all throughout this level so you'll need to either sneak your way up to the next level M8.1(7) or hack your way through them.
Tunnels beneath the castle - level 3
|
|
The right lever setting is, beginning from the left: up / down / up. | The grates blocking your way will be lifted and you will be able to continue. |
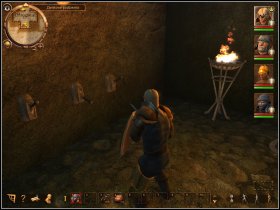
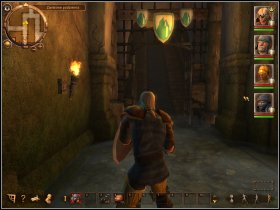
The treasure room M8.1(13) can be reached after completing a simple riddle. The guard room M8.1(9) contains three levers M8.1(10). That you will need to set to match the shields above. Set the first on the left up, the middle one down and the right one up. You could just go on to the next level M8.1(13), but it's better to look around a bit, and collect the money and valuables laying around. The most interesting room is M8.1(12) where you will find some very interesting weapons and armor.
Tunnels beneath the castle - level 4
Another riddle blocks your path - in order to pull the grates M8.1(16) up you will need to pull the torch handles in the right order M8.1(15). Face the door and pull the one to the right. Then turn so that you're facing away from the door and pull the right one, then the left one. You can now continue on until you reach the large, round chamber with pedestal and four statues M8.1 (17). You need to rotate the statues so that each of them is facing inside. The trick is that each of the statues rotates a different number of statues - one only rotates itself, the second rotates two, the third rotates three and the fourth rotates each of them. The solution to the riddle is: rotate the eastern statue three times, the northern two times and the southern twice. After you solve the riddle the Dragon's Eye will appear on the pedestal.
Reward: Dragon's Eye
5. Return to the temple of Hesinde
A. Courtyard
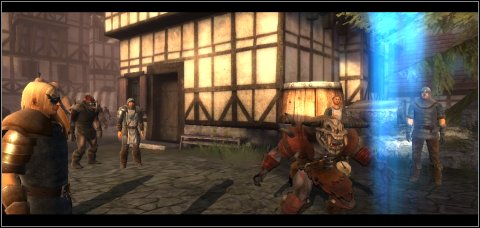
Once you have what you wanted it's time to leave the castle. Exit to the courtyard M8.1(19), where a fight is on. You will see that orcs are very close to victory. Among the defenders only Knight Traldar M8.2(1), his son Phenar and Mercenary Gudwin M8.2(2) seem fit to fight. The sorceress Malgorra M8.2(1), is threatening Traldar, but when she sees you she will tell you to hand over the Dragon's Eye.
Option 1: Give her the item right away.
Option 2: Tell her that you will never surrender the jewel and Malgorra will kill Mercenary Gudwin, and you will still have to give her the Dragon's Eye.
After getting what she wanted the sorceress will disappear and you will be forced to fight the orc leader, Bloodfang M8.2(1). Once you land a few blows he will transform into a mage you've previously encountered in Avestreu and Blood Mountains - Noldrokon M8.2(1). Next few hits will force him to reveal his true form - he's one of the lizard-like M8.2(1) creatures. Kill it and listen to orcish captain, who will say that he had no idea what his leader truly was and apparently has lost his will to fight. Let the orcs leave and talk to Knight Traldar. Tell him that you are the warrior of the Dragon Quest. Traldan will surprise you by giving you the real Dragon's Eye and another armor piece. Tradan will head out to the Ducal Citadel. After you get back to Ferdok go and visit him and he will join your party.
Reward: Real Dragon's Eye, Fire Armlet
B. Temple of Hesinde
Leave the courtyard bearing in mind that you won't be able to return to this place. Head out to the Temple of Hesinde M2(2) and talk to Dorion M2.2(2). Watch the cinematic and you will receive the Shield of Fire. Your new goal will be retrieving the Adamantine Heart. After listening to the Oracle talk to Dorion. He will tell you that according to the Book of the Serpent you will need a powerful wizard. The only one you know seems to be Rakorium, so you should head out and talk to him.
Reward: Fendral's Shield
End of chapter six!
Q14 The Messenger
1. Stop Humbold's pursuers
You can now head out to the newly revealed location. First notable thing is the burning castle. Move along to encounter the running Mercenary Humbold M8(2). He will tell you that the castle is being attacked by the orcs and that he and a few others were sent to bring help via the secret entrance. He is pursued by a band of orcs and will ask you to halt the creatures for him to run away. The group that you will need to stop is composed of orcs supported by a powerful ogre. Try to focus your attacks on the huge creature and only after it's dead take care of the rest.
You are not permitted to copy any image, text or info from this page. This site is not associated with and/or endorsed by the developers and the publishers. All logos and images are copyrighted by their respective owners.
Copyright © 2000 - 2026 Webedia Polska SA for gamepressure.com, unofficial game guides, walkthroughs, secrets, game tips, maps & strategies for top games.
