Darkest Dungeon The Color of Madness: How to beat Fracture, The Sleeper?
The second boss introduced in The Color of Madness DLC. It has two different forms - Fracture and The Sleeper. Each of the fights are unique and they make you focus on different aspects.
- Stats and resistances of the Fracture
- How to defeat the Fracture
- Statistics and resistances of The Sleeper
- How to defeat The Sleeper
- Party recommendation
Stats and resistances of the Fracture
Health | Dodge | Protection | Speed | Resistance to Stun | Resistance to Blight | Resistance to Bleed | Resistance to Debuff | Resistance to Move |
115 | 0% | 20% | 6 | 140% | 120% | 240% | 90% | 140% |
The boss is almost invulnerable to Bleed. The creature also has a lot of resistance to Blight. Focus on dealing regular damage.
Note - the boss makes a total of three moves per turn and during one of them it always uses the same attack.
How to defeat the Fracture

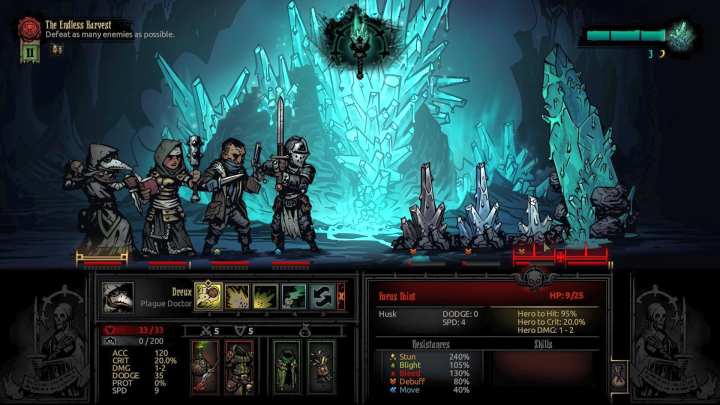
The fight with the Fracture is peculiar due to the boss' behavior. This enemy won't attack your party at all. Instead, it will keep creating up to 3 crystals per turn (requires an empty position). Those crystals won't attack you - they simply block you from reaching the boss. However, the Fracture can strengthen those crystals - this is the most important aspect of this fight.
The boss has two additional attacks per turn (summoning a crystal doesn't count). Both of these moves apply Buffs to the crystals. The first move increases a crystal's size and stats but it still won't be able to attack you. The second buff, done at the end of a turn, allows a crystal to use its only attack. A crystal explodes which deals damage to all heroes and it inflicts one of the few available status effects - Bleed, Blight, Debuff or Horror.
As you can tell, your goal is to quickly eliminate crystals before they manage to explode. You have two full turns to destroy them after they get summoned. The problem is that they get fully healed when the boss applies Buff - because of that it is better to focus on attacking those crystals that were already strengthened. Remember to keep attacking the boss throughout the entire fight. After depleting enough of its health, the Fracture will turn into The Sleeper.
Statistics and resistances of The Sleeper
Health | Dodge | Protection | Speed | Resistance to Stun | Resistance to Blight | Resistance to Bleed | Resistance to Debuff | Resistance to Move |
225 | 0% | 30% | 6 | 140% | 70% | 140% | 100% | 240% |
The boss' stats has changed - the enemy is now more vulnerable to Bleed and it is now much easier to inflict Blight on it. Don't bother with using either Stun or Move.
Note - the boss makes two moves per turn.
How to defeat The Sleeper

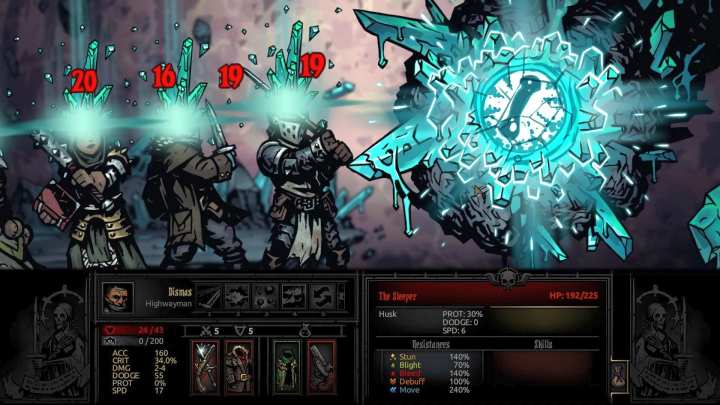
The fight with The Sleeper differs significantly from the battle with its previous form. The boss stops summoning creatures. Instead, it will use two different attacks alternately. Both of them deal damage to all heroes in the party - the first attack deals damage and has a chance to inflict Blight or Horror, the second move causes 15-20 Stress points. This fight is a race against time - try to finish it in 3-4 turns. Otherwise, your heroes can either run out of health points or their Stress can reach 100 points which will make this fight much more difficult.
The best solution is to focus on dealing as much damage as possible. There is no point in trying to Stun the enemy - he has high resistance to this effect. Make use of a character who can inflict Blight - the boss uses two moves and its resistance to this effect is rather low. A Vestal with her AoE healing is very useful here - thanks to her you will be able to survive a few additional turns.
Party recommendation
The boss has two phases which means that it would be better to use two different parties. Sadly, you can't change your lineup mid-fight. Instead, you should choose your heroes in a such way that would make both fights with the boss less problematic. You can use the following lineup:
- A Crusader or a Leper in the first position. Both heroes work great here. As for a Crusader, you can use Trinkets that boost his health and damage. A Leper would benefit from better Accuracy because he has problems with hitting his targets. Both heroes can deal massive damage to single targets which makes them perfect for the second phase.
- A Highwayman or a Hellion in the second position. A Highwayman is a great choice if you want to deal damage to the boss. However, you can also use this character to damage positions 1-2-3 - this deals damage to both the boss and his summoned creature. A Hellion is great for attacking single targets but she can also attack positions 1-2-3. After the transformation into The Sleeper, both characters will be able to deal a lot of damage and inflict Bleed status.
- A Vestal in the third position. She is the best choice when it comes to healers - both forms can use devastating AoE attacks. A Vestal is especially useful during the second phase where the enemy deals 15-20 damage each turn - her healing will help you survive a few more turns.
- A Plague Doctor in the fourth position. She is great against this boss - a Plague Doctor can use a powerful Buff that raises damage of her allies. You can use this ability to strengthen the heroes on the first and the second positions - this allows them to destroy the crystals with a single attack and deal serious damage to the boss' second form. Her Blight is also useful - both during the first and the second phase of the battle.
As you can see, this is the starting lineup of heroes which can be accessed after completing the tutorial. A party that consists of a Crusader, a Highwayman, a Vestal and a Plague Doctor can deal with every boss introduced by The Color of Madness DLC. Of course, you can change this lineup - to maximize damage you can use a Hellion in the first position and place either a Jester or a second Highwayman in the third position. You can destroy all crystals before the boss even manages to Buff them. The second phase with this lineup should take you about 1-2 turns.
You are not permitted to copy any image, text or info from this page. This site is not associated with and/or endorsed by the Red Hook Studios or Red Hook Studios. All logos and images are copyrighted by their respective owners.
Copyright © 2000 - 2025 Webedia Polska SA for gamepressure.com, unofficial game guides, walkthroughs, secrets, game tips, maps & strategies for top games.
