Darkest Dungeon: How to beat Flesh?

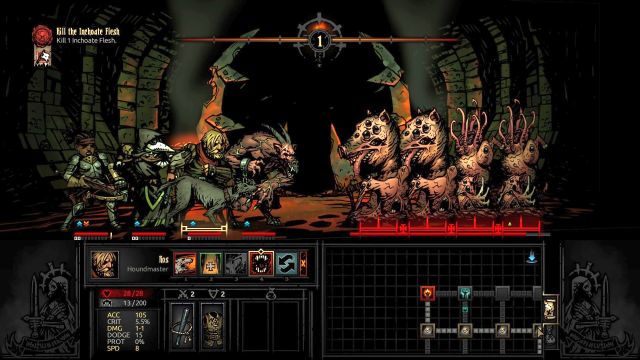
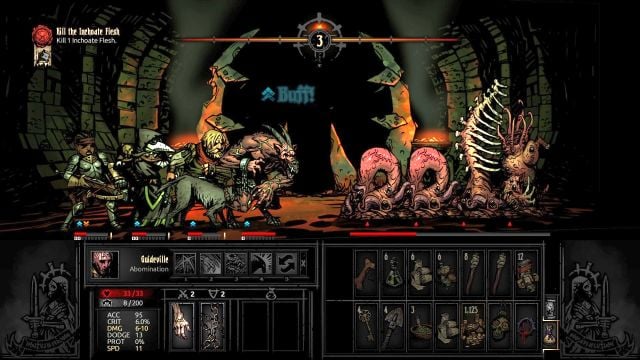
Flesh is the boss that you encounter in the Warrens and, as a matter of fact, he is four opponents in one, because he has been divided into four fragments - Head, Bone, Heart and Butt. Each of these parts has different abilities and different statistics and each of the four enemies changes his form each turn. Of course, the forms can duplicate themselves and you may have, e.g. to fight against four Hearts at once.
The problem with this boss is that three out of his parts (i.e. Head, Bone and Butt) gave high Protection level, which makes regular attacks barely effective, because they deal only several points of damage, but fortunately their attacks do not deal that much damage (although they attack there times per round, in total, as a result of which they can wreak some havoc). The heart, on the other hand, is highly vulnerable to attacks, but it has the annoying ability of healing the rest of the parts, which may be quite a problem, in the case in which this particular part keeps appearing at the back, and you have no way of targeting them.
The boss's attacks
Name | Aiming spot | Targets | Accuracy | Effect |
Maw of Life (used by the Head) | 1 or 2 | 1st or 2nd row | 92,5% / 100% / 112,5% | 6-12 / 8-15 / 11-23, 100% / 120% / 140% of chances to cause Bleed |
Sanguine Stroke (used by the Heart) | any | All of the allied targets | 100% | Heals 4-8 / 5-10 / 6-12 health points |
Bone Zephyr (used by the Bone) | 1, 2 or 3 | Your entire party | 82,5% / 90% / 102,5% | 100% / 120% / 140% Chances of stun |
Undulating Invasion (used by the Butt) | 3 or 4 | 3rd or 4th row | 92,5% / 100% / 112,5% | 100% / 120% / 140% chances of causing Blight |
The above table presents all of the boss's attacks - values separated with the "/" symbol provide effects depending on levels (1, 3 and 5), at which you are going to fight this opponent.
The boss's statistics - Heart
Name | Inchoate Flesh | Unstable Flesh | Formless Flesh |
Health | 100 | 152 | 212 |
Dodge | 0 | 10% | 22,5% |
Protection | 0% | 0% | 0% |
Speed | 10 | 11 | 12 |
Resistance to Stun | 10% | 30% | 55% |
Resistance to Blight | 0% | 20% | 45% |
Resistance to Bleed | 0% | 20% | 45% |
Resistance to Debuff | 0% | 20% | 45% |
Resistance to Move | 200% | 220% | 245% |
The boss's statistics - Bone
Name | Inchoate Flesh | Unstable Flesh | Formless Flesh |
Health | 100 | 152 | 212 |
Dodge | 0 | 10% | 22,5% |
Protection | 70% | 80% | 90% |
Speed | 1 | 2 | 3 |
Resistance to Stun | 50% | 70% | 95% |
Resistance to Blight | 20% | 40% | 65% |
Resistance to Bleed | 33% | 53% | 78% |
Resistance to Debuff | 20% | 40% | 65% |
Resistance to Move | 200% | 220% | 245% |
The boss's statistics - Head
Name | Inchoate Flesh | Unstable Flesh | Formless Flesh |
Health | 100 | 152 | 212 |
Dodge | 0 | 10% | 22,5% |
Protection | 70% | 80% | 90% |
Speed | 1 | 2 | 3 |
Resistance to Stun | 50% | 70% | 95% |
Resistance to Blight | 20% | 40% | 65% |
Resistance to Bleed | 33% | 53% | 78% |
Resistance to Debuff | 20% | 40% | 65% |
Resistance to Move | 200% | 220% | 245% |
The boss's statistics - Butt
Name | Inchoate Flesh | Unstable Flesh | Formless Flesh |
Health | 100 | 152 | 212 |
Dodge | 0 | 10% | 22,5% |
Protection | 30% | 40% | 50% |
Speed | 8 | 9 | 10 |
Resistance to Stun | 25% | 45% | 70% |
Resistance to Blight | 33% | 53% | 78% |
Resistance to Bleed | 20% | 40% | 65% |
Resistance to Debuff | 20% | 40% | 65% |
Resistance to Move | 200% | 220% | 245% |
The above tables present the boss's statistics in each of the forms, in all three difficulty variants.
How to defeat the boss

Due to the extremely high Protection statistics of the majority of the parts, the best tactic is to use characters that can deal damage over time. These are:
Houndmaster - his Hound's Harry targets the enemies and provides a high chance of causing Bleed. Of course, this effect can be stacked several times, as a result of which the enemies will be taking massive damage, after a time. Also, remember to use the delicacy, which increases, damage dealt by the character.
Abomination - He is capable of imposing the Poison effect on two targets at the same time (on positions 2 an 3). Additionally, he is quick and tough, capable of healing himself, which makes him self-sufficient.
Plague Doctor - Plague Grenades impose a powerful (4 points per turn, on tier 1) Poison effect on the last two targets in the enemy lines. Even without being upgraded, you can deal 12 damage per turn (!) in one attack.
Apart from that, it is a good idea to take someone with the capability to heal the party. Due to the Abomination's presence, you have no need for the Vestal or the Crusader, but you can still use:
Occultist - his Wyrd Reconstruction is not the most reliable healing effect in the game (and it can additionally cause bleeding), but in a critical situation it can save your skin
Arbalest - she is mainly a damage dealer, but her Battlefield Bandage is a powerful healing ability that additionally increases the potency of any instance of healing not cast by the Arbalest.
Your task is to drain the boss's health bar to zero (which is obvious), but with the exception of Heart, you will not be able to hurt the enemy too much with the "regular" attacks" which is why you should be using DoT attacks. As soon as Heart (or Hearts) appears on the battlefield concentrate on it all of your attacks - thanks to the 0% protection each of your attacks deals massive damage.
You are not permitted to copy any image, text or info from this page. This site is not associated with and/or endorsed by the Red Hook Studios or Red Hook Studios. All logos and images are copyrighted by their respective owners.
Copyright © 2000 - 2025 Webedia Polska SA for gamepressure.com, unofficial game guides, walkthroughs, secrets, game tips, maps & strategies for top games.
