CS GO: Inferno
Last update:
Due to many long and narrow passages, Inferno is one of the hardest maps. Furthermore, both bombsites are located far away from each other, which makes it more difficult to disarm or defend a bomb if you are in a wrong place. Thus, to slow down Terrorist attacks, Counter-Terrorists need to use a lot of smoke grenades and flashbangs. In order to control both bombsites, Counter-Terrorists will have to split up and secure the middle of the map and the Banana passage. On the other hand, Terrorists will have to split up and try to make their way through the middle of the map and/or the Banana. This will make Counter-Terrorists use their grenades. Once they run out of all their smoke grenades and flashbangs, it will be much easier to pick a weak spot and assault one of the bombsites.
Smoke grenades
The following list describes recommended grenade throws that can be useful during a match.
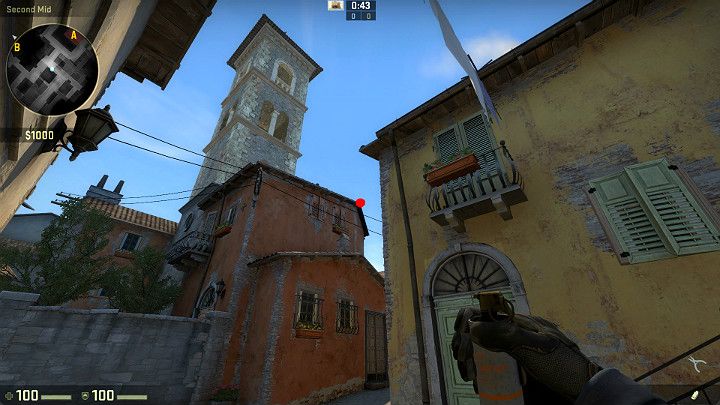
Turn your back against the wall in the presented location and aim at the marked spot. Now use LMB to throw your grenade.
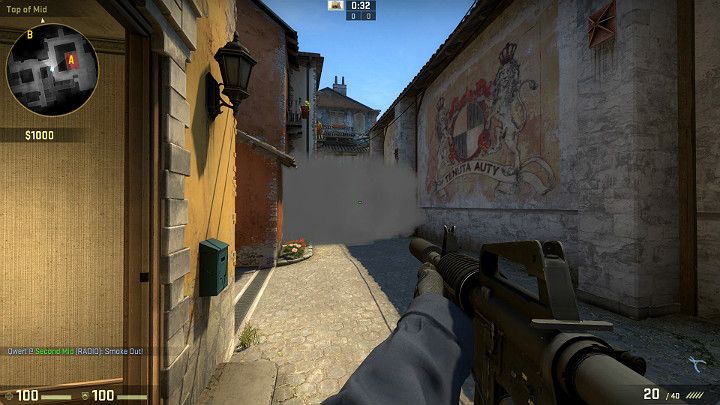
The created smoke screen will cover you from enemies coming from the Terrorist Spawn Zone. This will allow you to reach bombsite A.
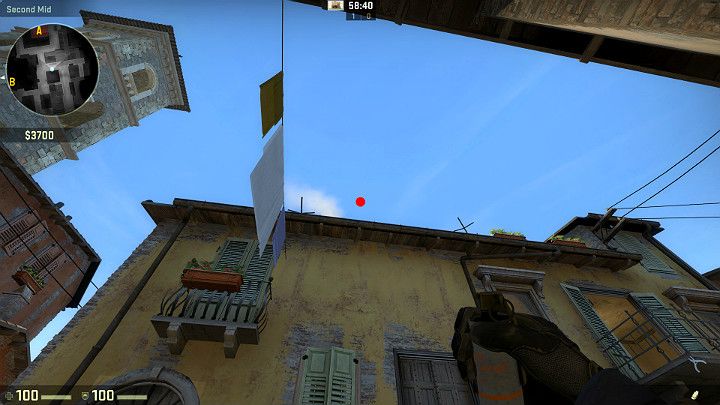
Stand in the presented location, against the wall, and aim at the marked spot. The dot should be in a straight line with the left antenna. Now press LMB to throw your grenade.
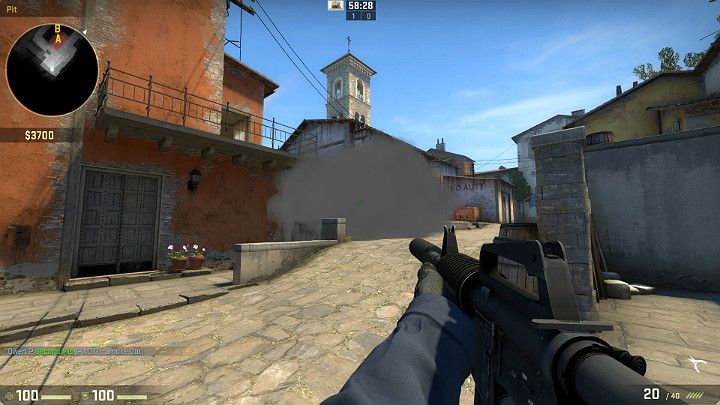
The grenade will explode right under the balcony, and the smoke screen will limit vision of any enemies hiding there. If you combine this throw with the previous one, you will be covered from both sides on your way to bombsite A.
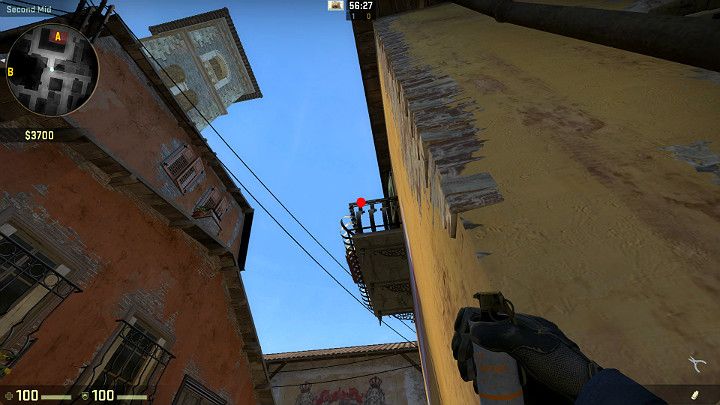
Stand by the corner and aim at the marked spot (the balcony railing, right above the bar). Use LMB to throw your grenade.
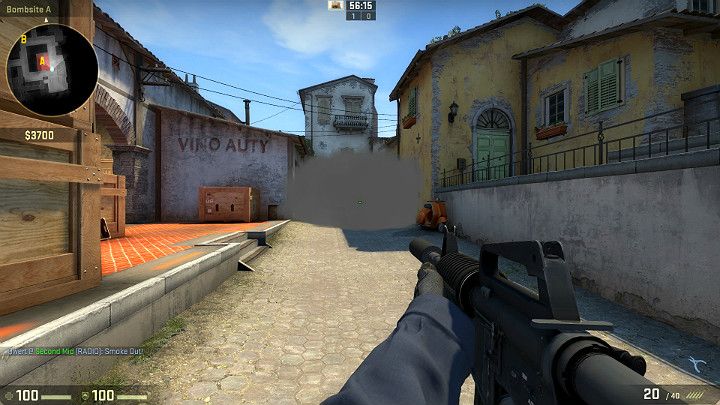
The grenade will explode inside the tunnel, on the library side. The blast will limit vision of all the Players striking from the Terrorist Spawn Zone.
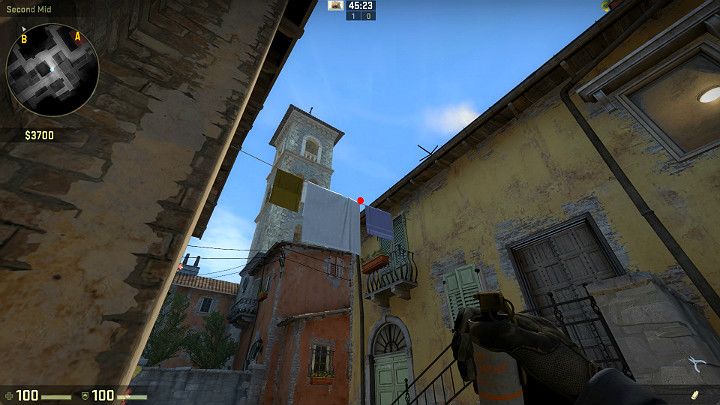
Stand by the corner of the building, aim at the marked spot and use LMB to throw your grenade.
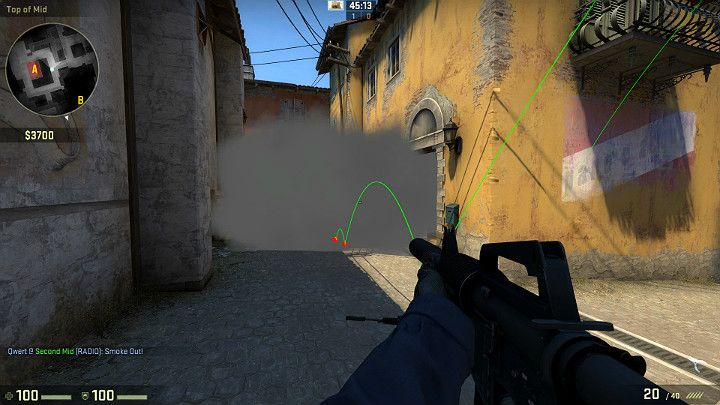
The grenade will explode right in front of the door leading to the flat where enemies can hide. Furthermore, the smoke screen will cover you from opponents looking from the direction of bombsite A and those hiding on the roof of the opposite wall.
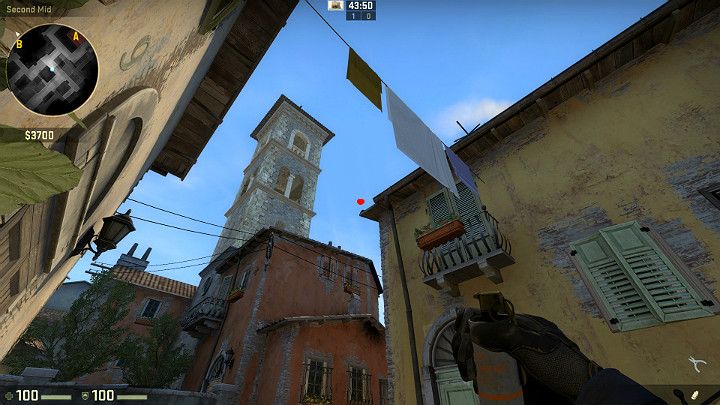
Put your back against the wall and aim at the marked spot. Use LMB to pull the grenade pin and throw the grenade.
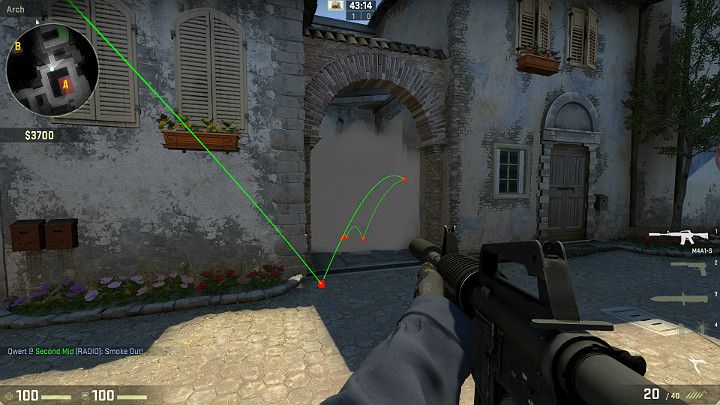
This will create a smoke screen inside the tunnel leading to the Counter-Terrorist Spawn
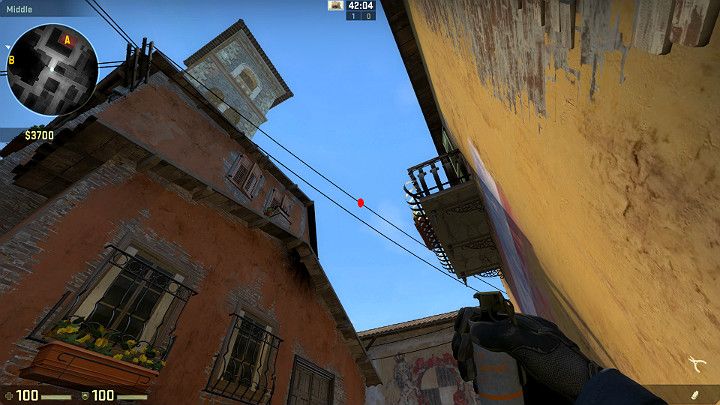
Stand by the corner and aim at the spot marked in the picture (the power line). Use LMB to throw your grenade.
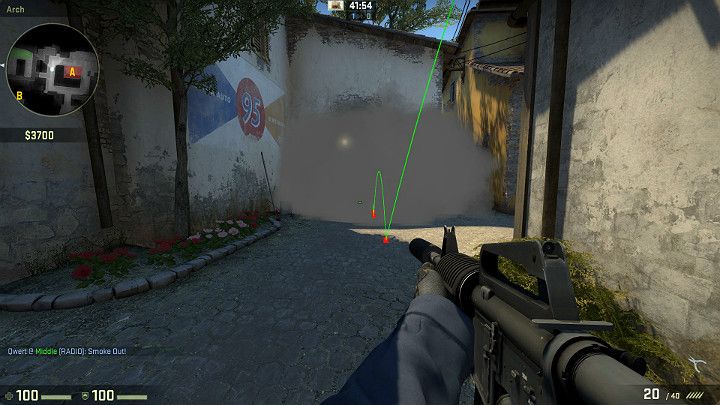
The smoke screen will cover you from all players attacking through the library.
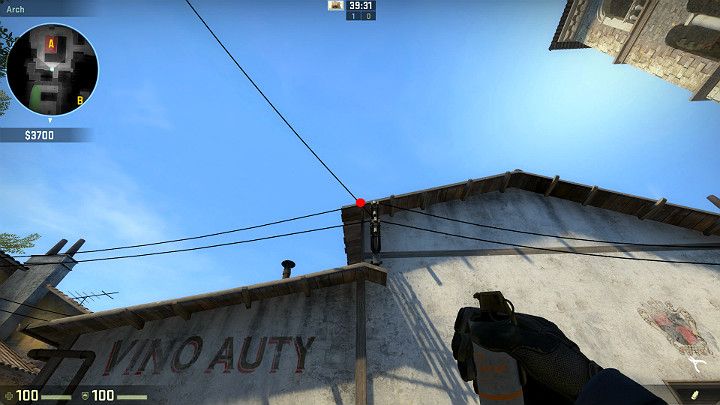
Stand in the presented location and aim at the marked spot (intersection of the cable and the roof). Use LMB to throw your grenade.
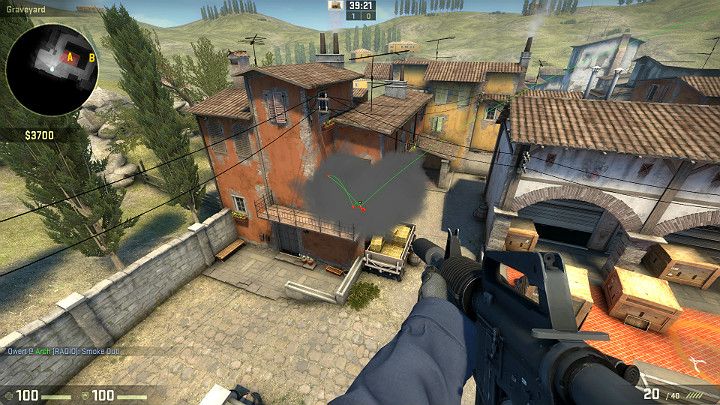
This way, you will cover the entire balcony with your smoke screen. Your enemies won't know how many people are waiting at bombsite A.
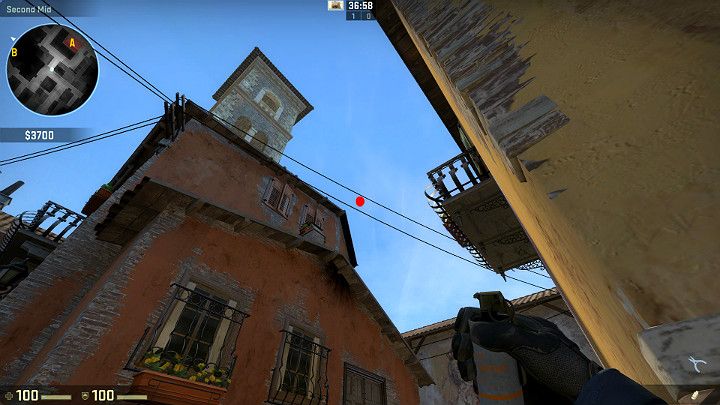
Stand by the corner of the building and aim at the marked spot. Aim between the power lines and press LMB to throw your grenade.
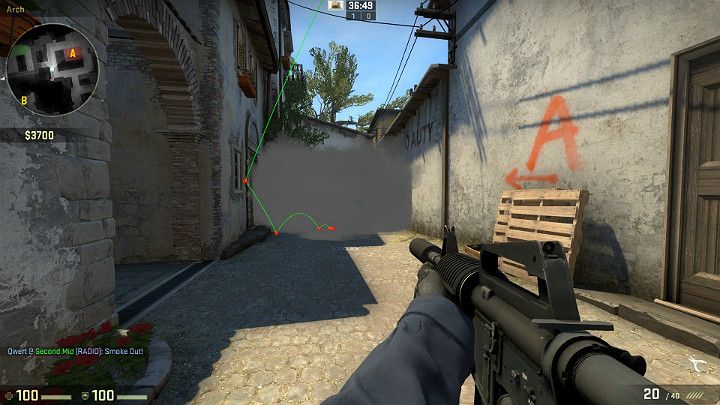
The created smoke screen will separate you from Players moving from the Counter-Terrorist Spawn Zone.
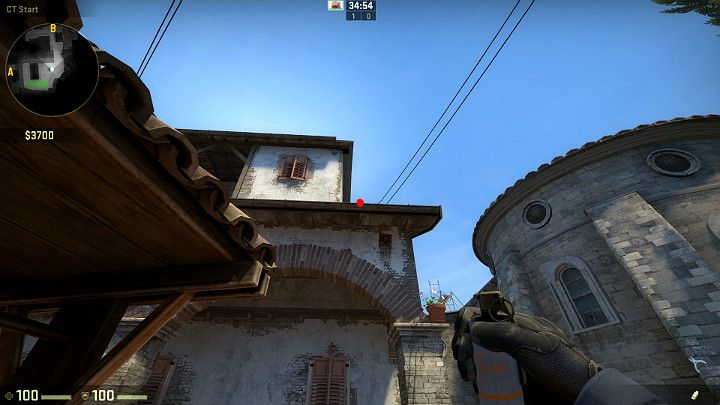
Stand by the well, aim at the roofline and use LMB to throw your grenade.
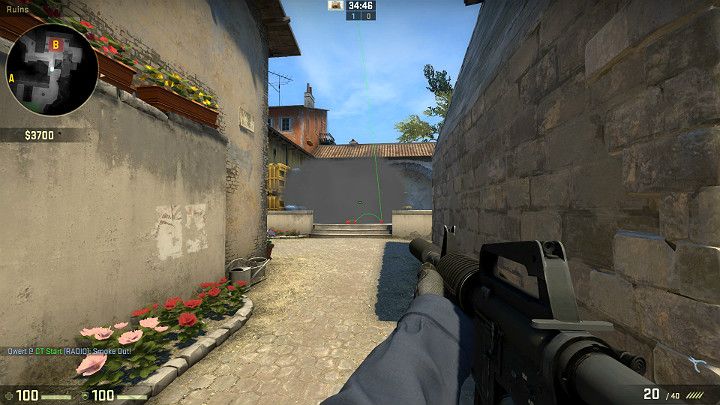
This will create a smoke screen in bombsite B.
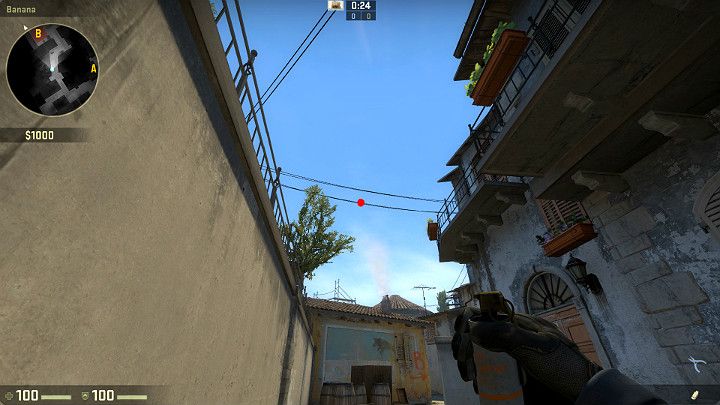
Stand by the crates, right next to the wall of the Banana, and aim at the marked spot. Use LMB to throw your smoke grenade.
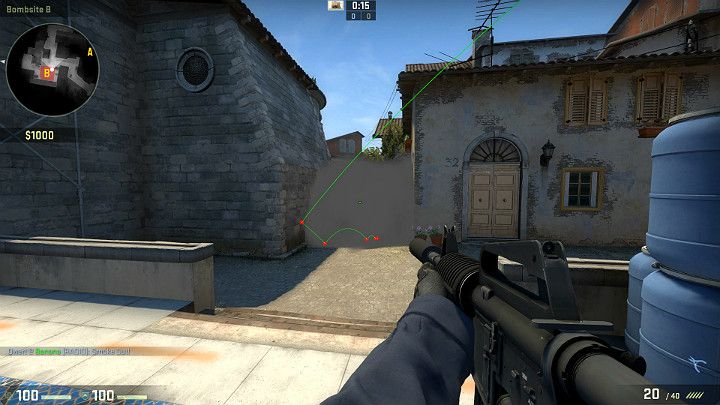
The smoke screen will slow down the Counter-Terrorists attacking from the direction of the well.
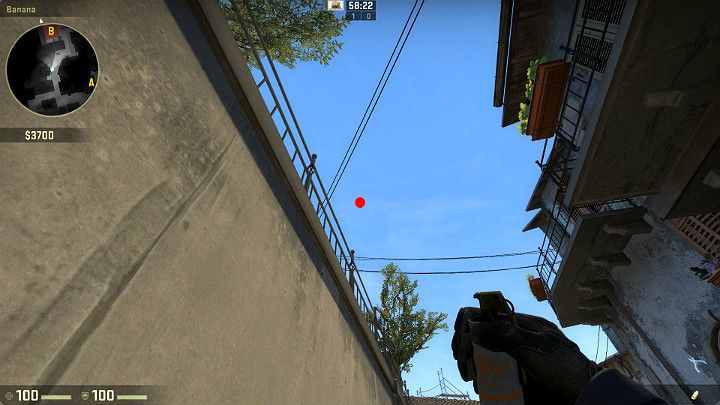
Stand in the same location but this time aim at a different spot. Use LMB to throw your grenade.
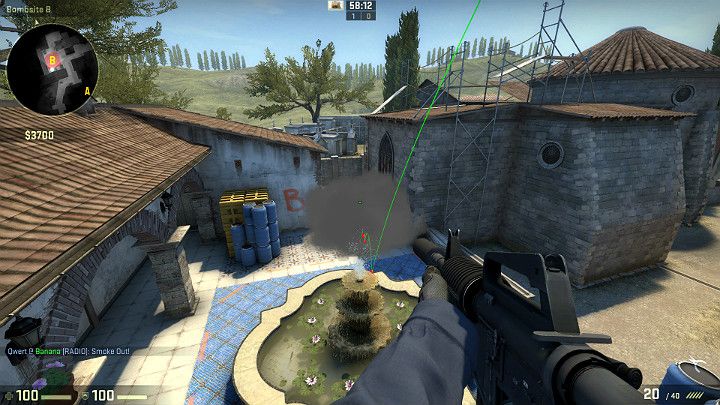
The grenade will explode deeper inside bombsite B and cover you from Players coming through the ruins. Combine this throw with the previous one, and you will cover the entire bombsite B.
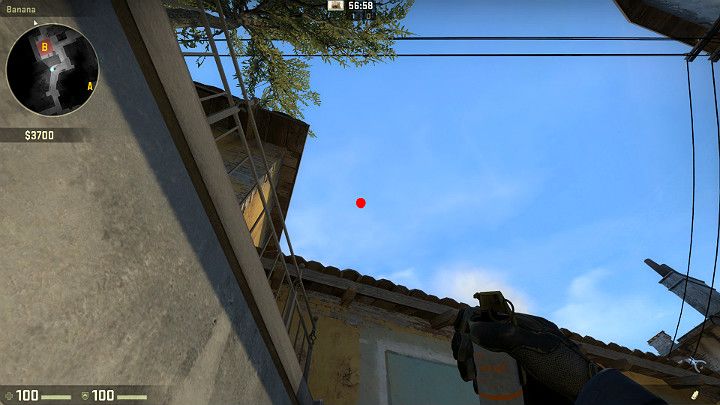
Stand in the corner, between the barrels in the Banana, and aim at the marked location. Use LMB to throw your grenade.
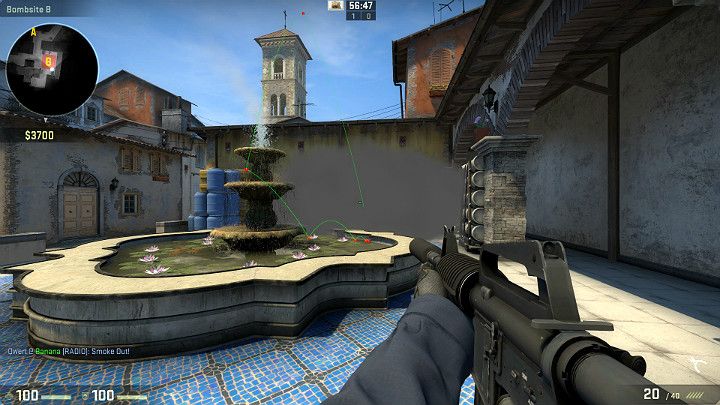
The grenade will explode in bombsite B and the smoke screen will affect enemies hiding in the corner of the building.
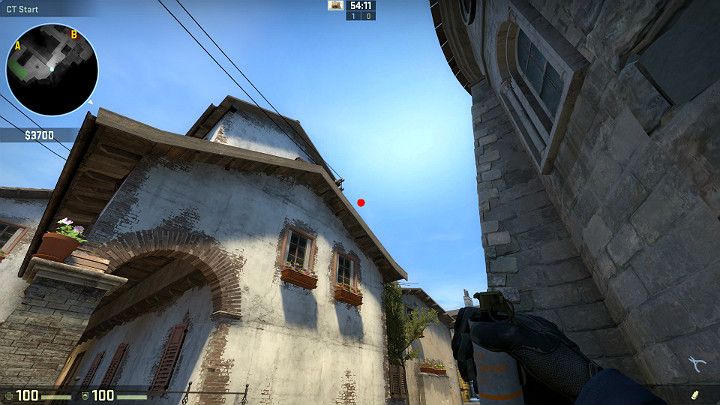
Stand by the corner of the building, right next to the well. Aim at the marked spot and use LMB to throw your grenade.
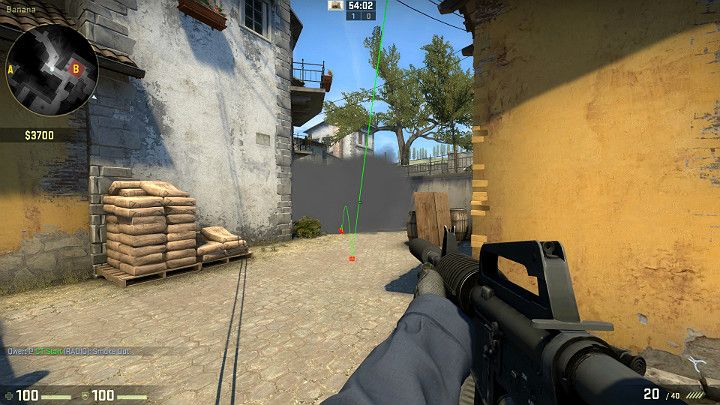
Your grenade will land in the Banana, and the smoke screen will limit vision of Players looking from the direction of the Terrorist Spawn Zone.
Flashbang grenades
The following list describes recommended flashbang throws that can be useful during a match.
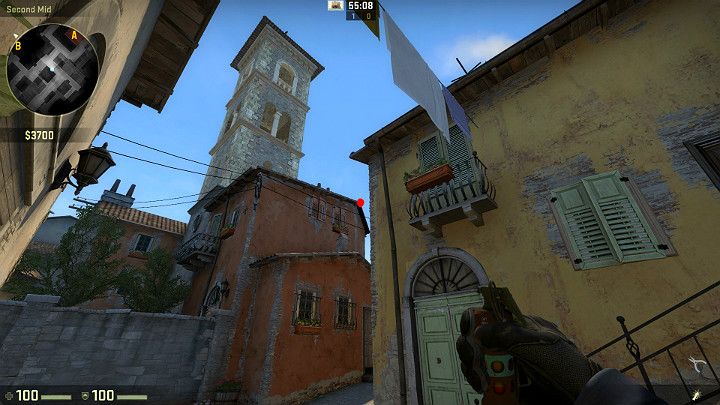
Turn your back against the wall and aim at the marked spot, located at the top of the roof. Now use LMB to throw your grenade.
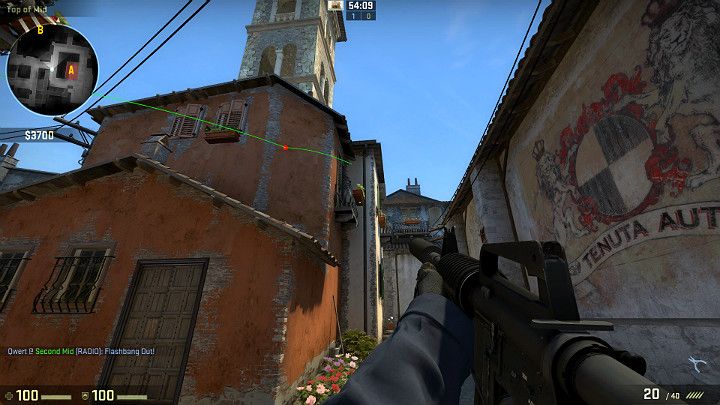
The grenade will bounce off the wall and explode in the passage leading to bombsite A and the Counter-Terrorist Spawn Zone.
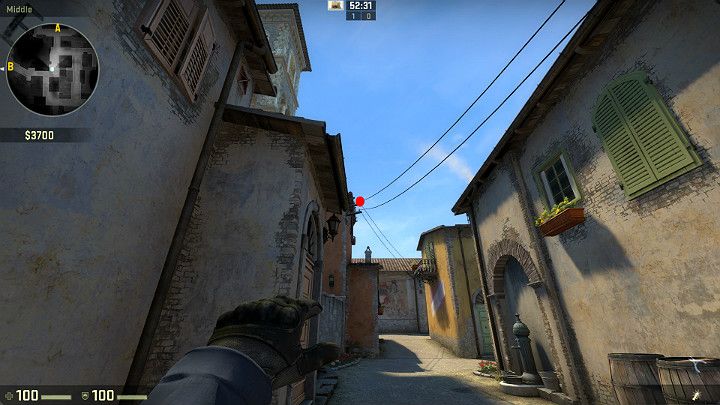
Stand in front or behind the small ditch. Aim at the marked spot and use LMB to throw your grenade.
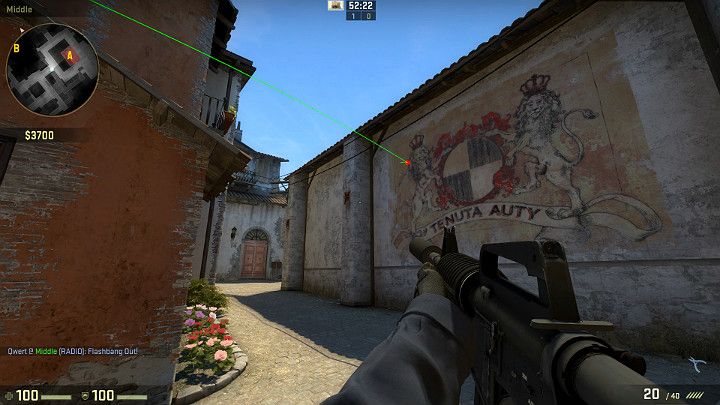
The grenade will explode in the previously described location.
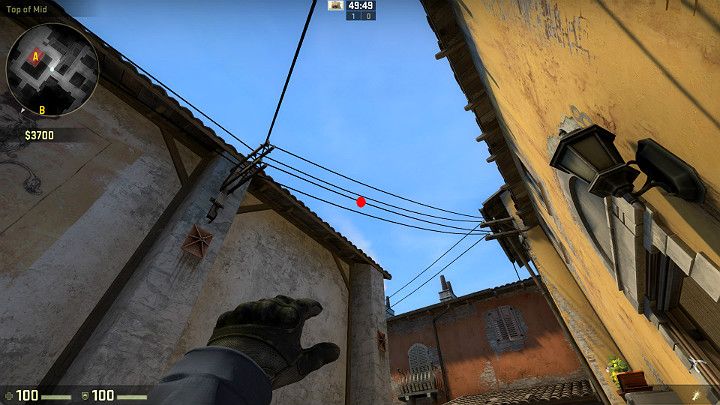
Stand right next to the entrance to the flat and aim at the marked spot. Notice that you need to perform the throw (LMB) while moving forward. This will allow the grenade to travel greater distance.
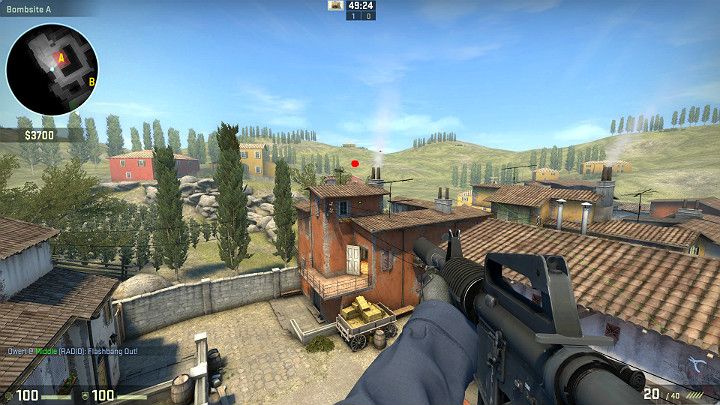
The grenade will bounce off an invisible wall and explode right above the balcony. The blast will blind all the enemies in bombsite A.
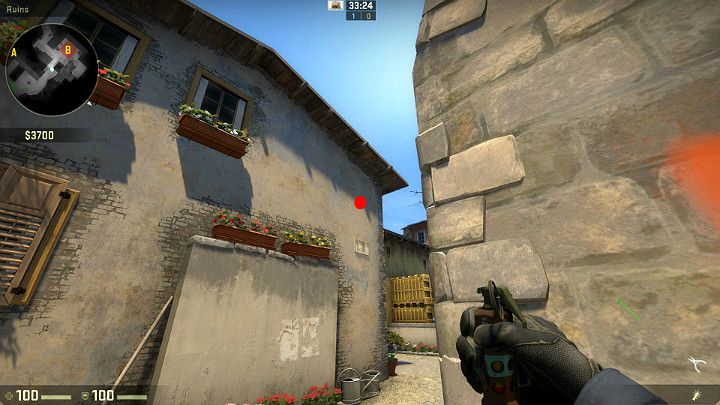
Before entering bombsite B, stand by the corner and aim at the marked spot. Now use LMB to throw your grenade.
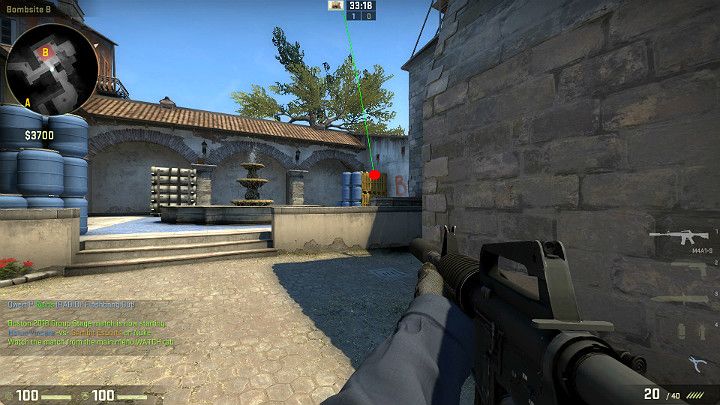
The grenade will explode above the ground and blind all opponents looking from the direction of the square and the passage leading to the well.
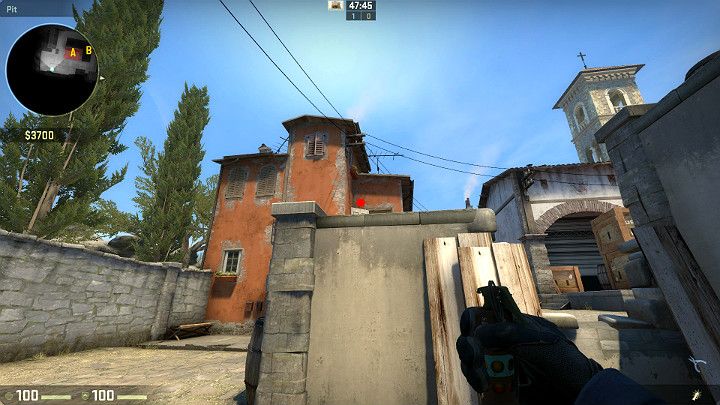
Stand in the lower part of the area, right behind the wall, and aim at the spot above the balcony door. Now use LMB to throw your grenade.
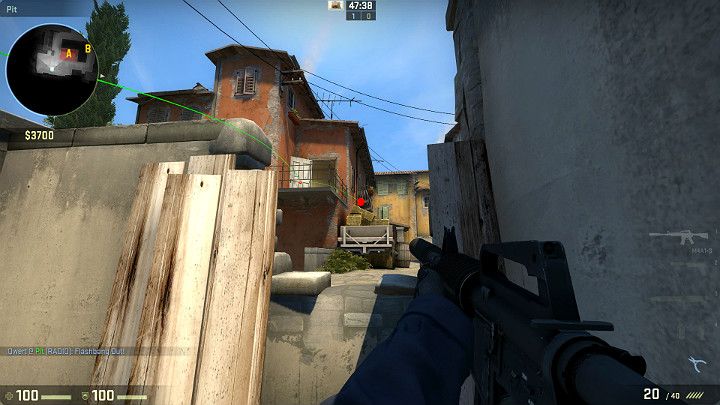
The grenade will bounce off the balcony door and explode above the hay wagon. The blast will blind all the Players in bombsite A.
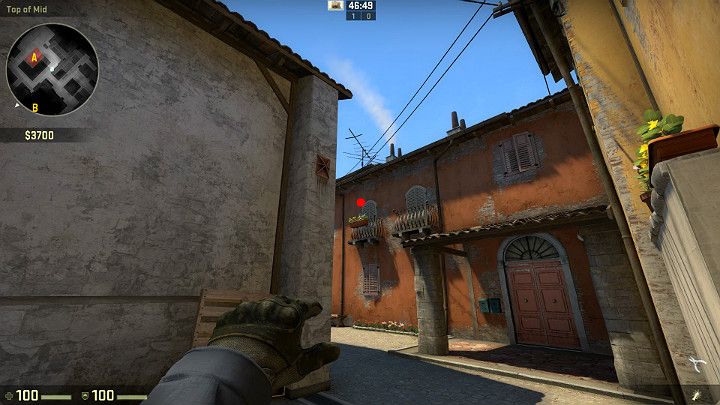
This throw needs to be performed while moving towards bombsite A. Pull the grenade pin and aim (more or less) at the marked spot. Now use LMB to release your grenade.
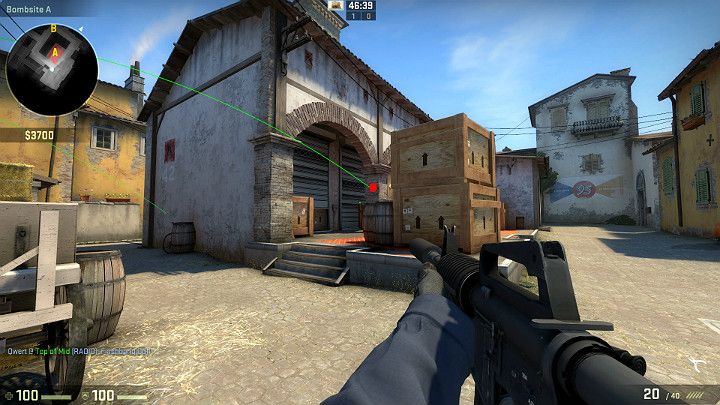
The grenade will explode in bombsite A and blind all the nearby Players, looking from the direction of the library or the balcony.
Tricks and Boost spots
The following pages describe several places where you can perform an interesting jump or ask your companions to adjust their positions and jump on their shoulders.
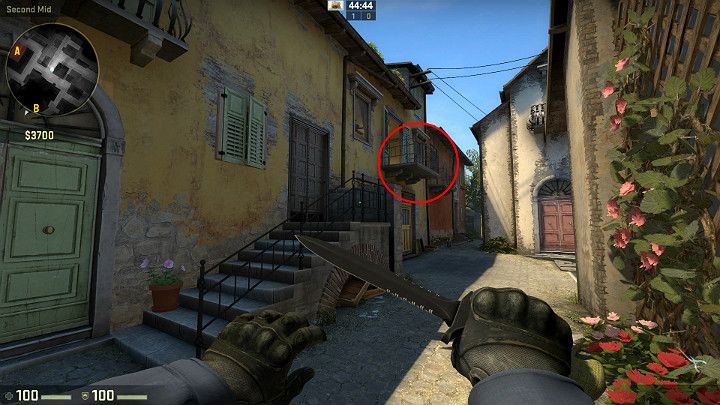
You can jump on the marked balcony by using the stair railing. Just jump on the railing and run towards the balcony. Jump at the very last moment and crouch when you get right in front of the balcony. This is a quick way to reach the upper room or jump to the next balcony.
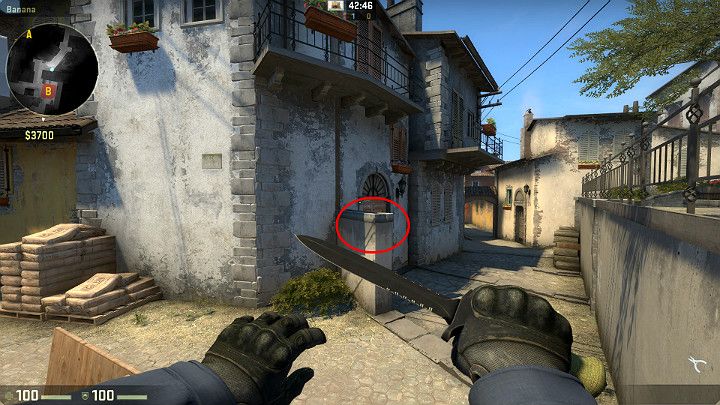
Get on the barrels to jump to the small wall marked in the picture. Just stand as far away as possible to give yourself momentum. Jump at the very last moment (not to fall down) and crouch before reaching the obstacle.
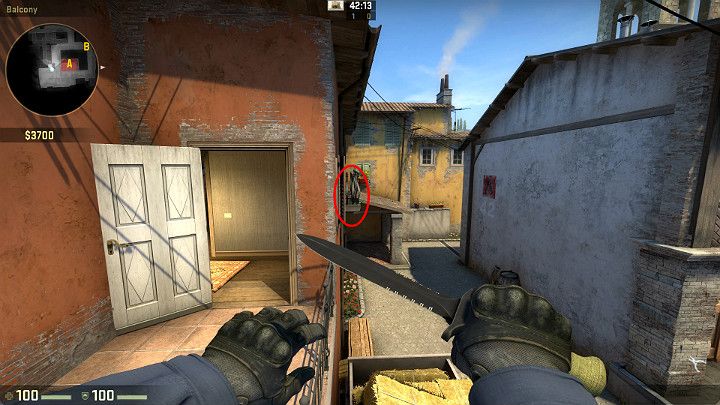
You can also jump to the marked balcony and use it to reach the roof in the distance. Jump on the railing and move far to the right side. Now move forward and perform a curved jump to avoid the corner of the building.
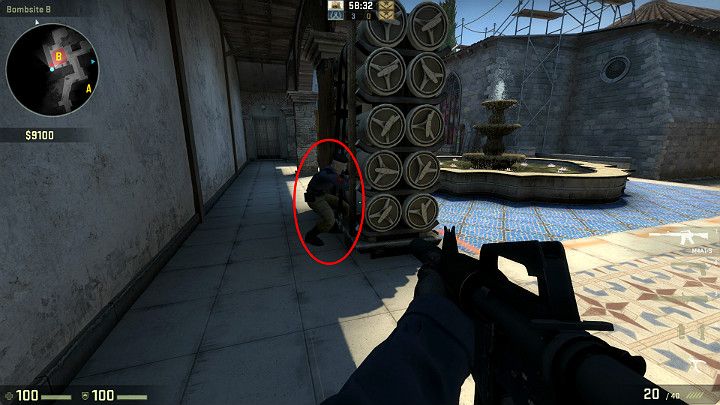
When you are in bombsite B, you can ask your companion to crouch in the marked location. Now jump on his shoulders.
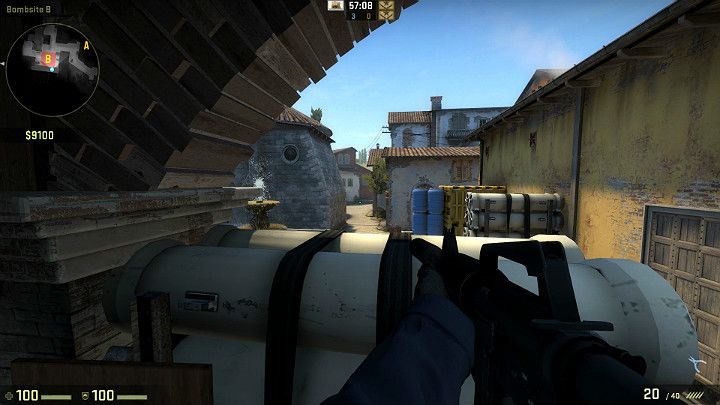
Now jump up to let him straighten up. You will have a clear view of the passage leading to the well (enemies can often use it to assault the bombsite). Crouch to hide from them.
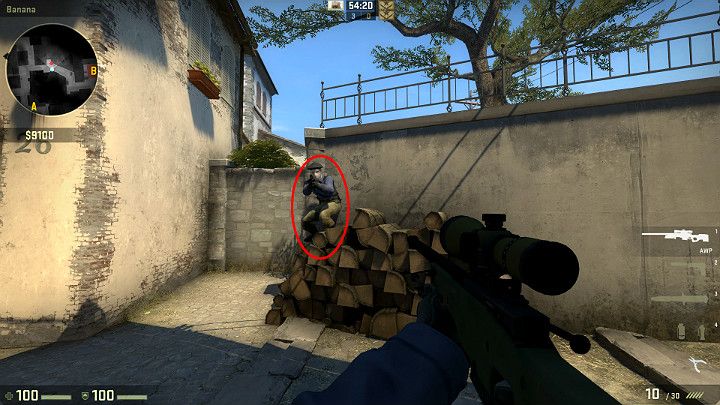
If you are protecting the passage presented in the screenshot, you can ask your ally to crouch on the marked pile of wood and jump on his shoulders. Jump up to climb the wall.
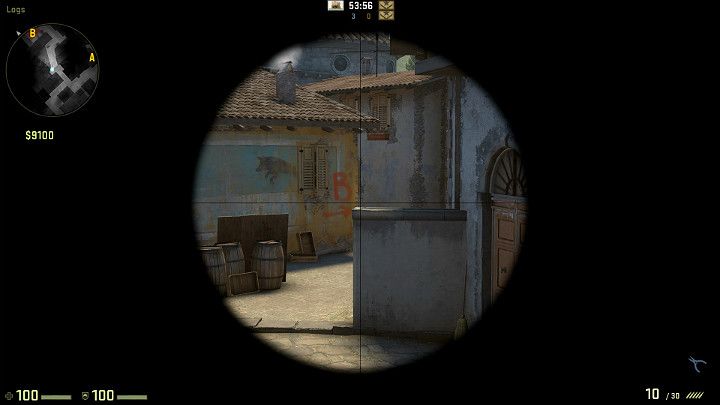
You will have a clear view of enemies moving through the Banana from the direction of bombsite B.
Places where you can set or expect an ambush
The following pages describe specific places that you can use to set an ambush, or move across the map and eliminate any threat.
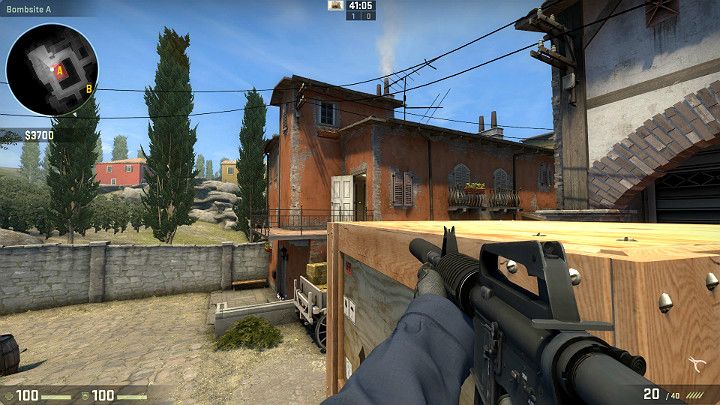
Jump on one of the crates located in bombsite A (see screenshot). You will have a clear view of the balcony door and enemies coming from that direction. Furthermore, crates will cover you from Players striking from the direction of the flat on your right. Crouch to become invisible for opponents standing in the balcony door
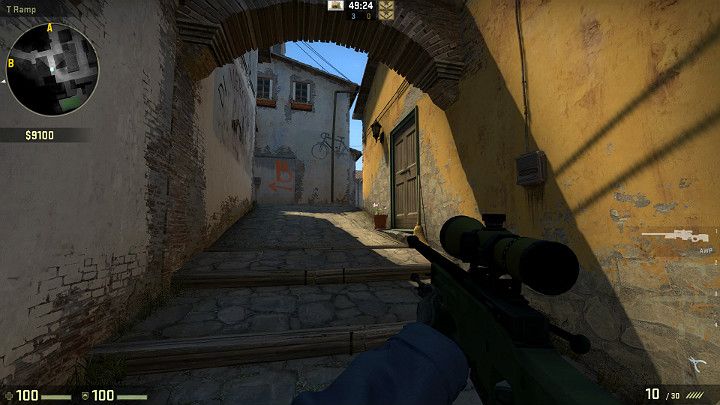
If you were able to leave the Terrorist Spawn Zone fast enough, you can run to the presented location and take a good sniping position. You should be able to take this position quite fast, so you will see all the enemies running in the distance.
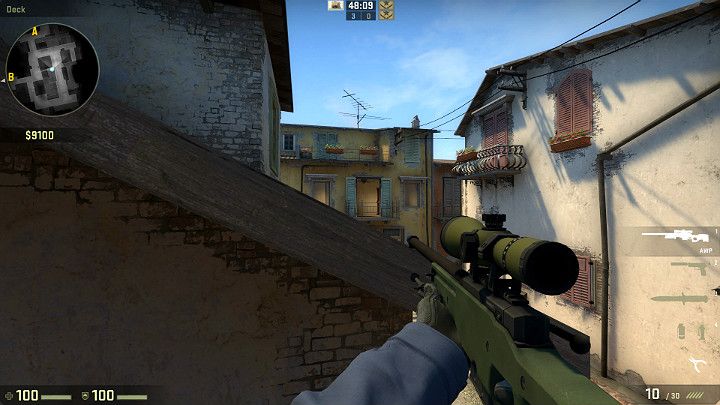
Leave the Terrorist Spawn Zone and go right through the apartments. You will reach a good sniping position on the balcony where you will have a clear view of the upper rooms in the opposite building.
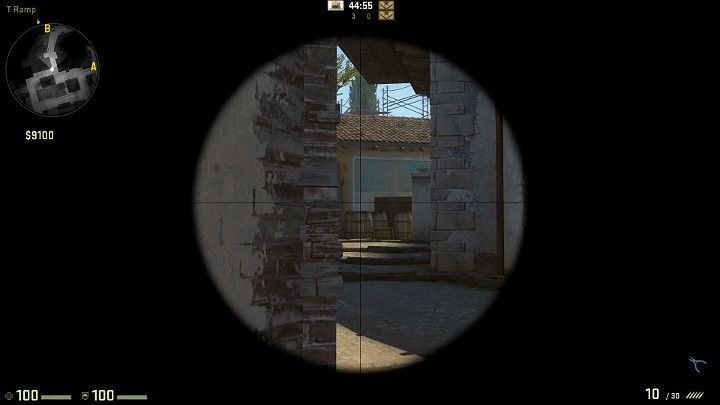
Moving from the Terrorist Spawn Zone to the Banana, you will have a clear view of the barrels where you can often spot hiding enemies. You should also pay attention to the wall on your right.
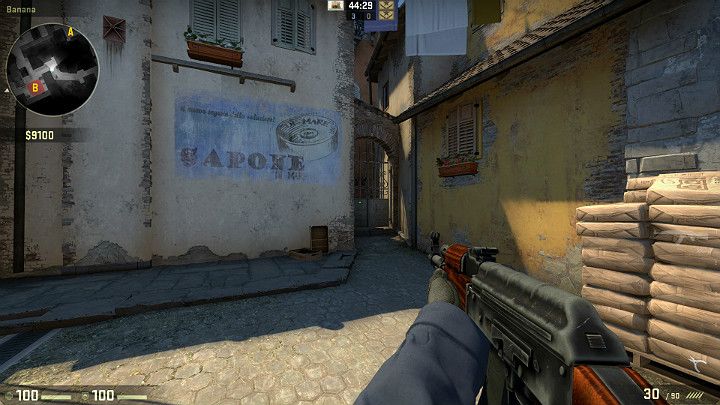
If you are heading towards bombsite B through the Banana (or from the other direction if you are moving to the middle of the map), make sure to check the alley presented in the screenshot. Players will often hide there.
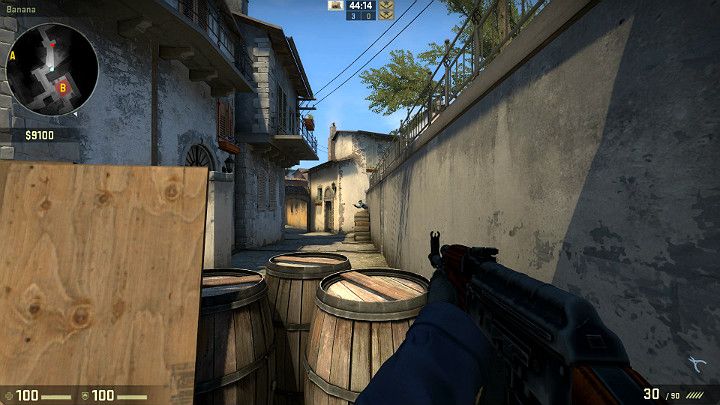
Let's go back to the position behind the barrels, which is visible from the ramp by the Terrorist Spawn Zone. One player can secure the entire passage, but opponents can still shoot through the barrels.

Whenever you enter bombsite B, you should always check if there are any Players behind the blue barrels. This position is often occupied by Players defending the site.
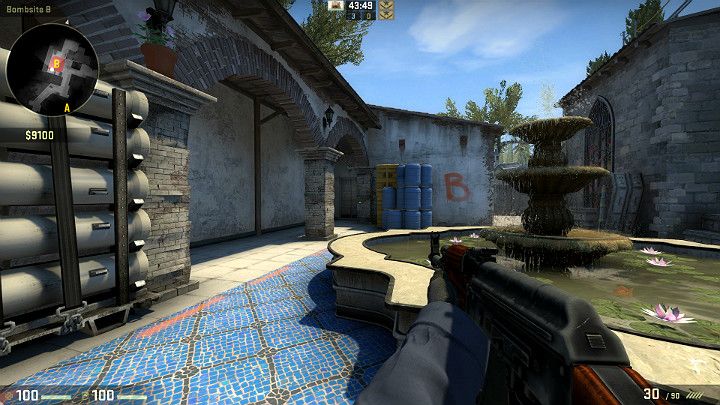
You should also remember about the other side of bombsite B, and check the rest of the barrels. It's a good idea to check the obstacle on your left as well.
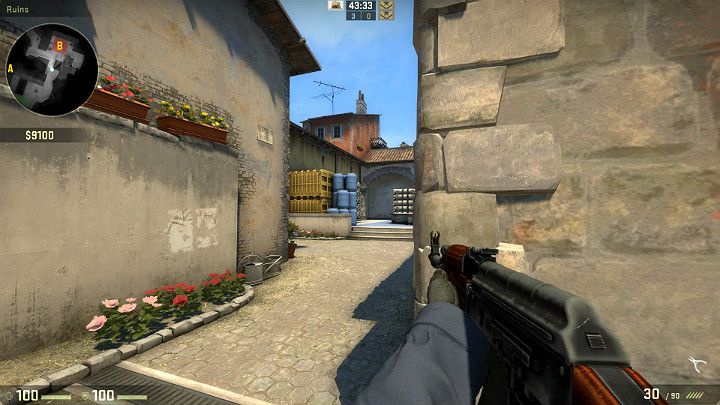
If you are heading towards bombsite B from the direction of the well, you should always check the position behind the barrels in the distance.
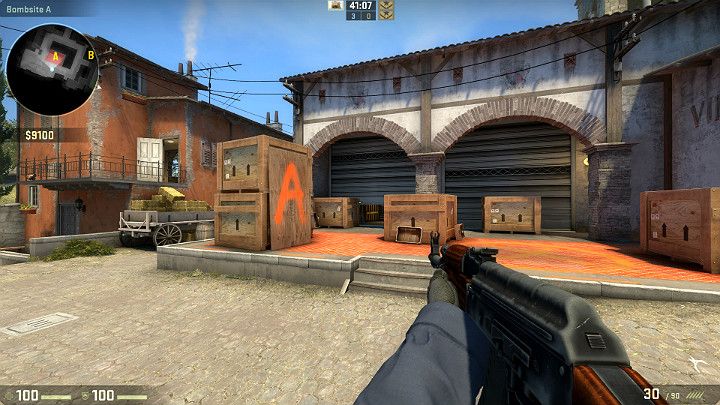
Players defending bombsite A will often hide in the presented position, in the corner.
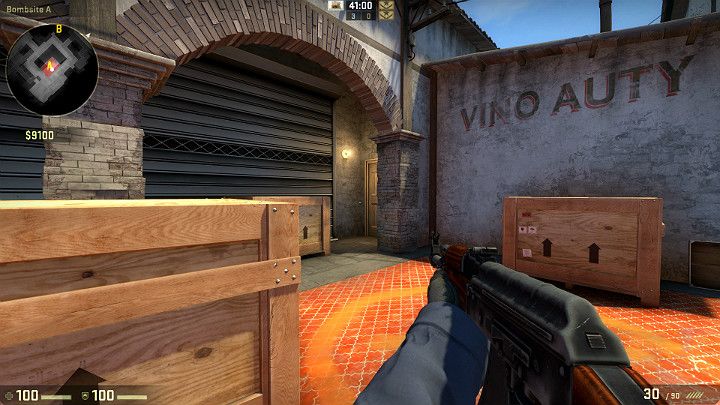
Another location, often used as an ambush, is on the other side of bombsite A, where Players can hide behind the pillar and wait for their prey.
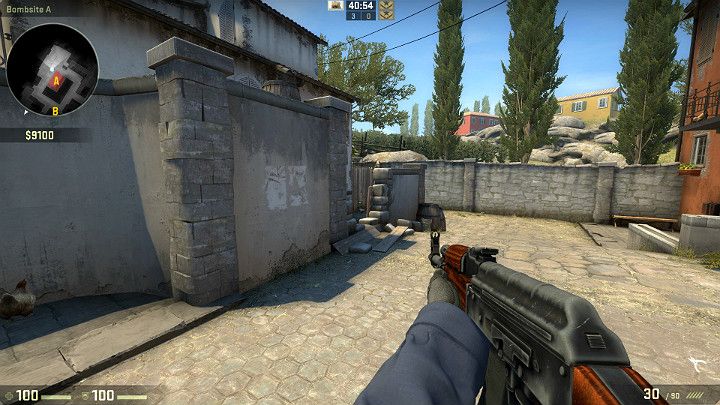
Another place worth checking is the lower terrain behind the wall. If you know that someone is there, you can always use a HE grenade or a Molotov to make the enemy leave the hideout. An alternative would be to throw a flashbang and eliminate the opponent.
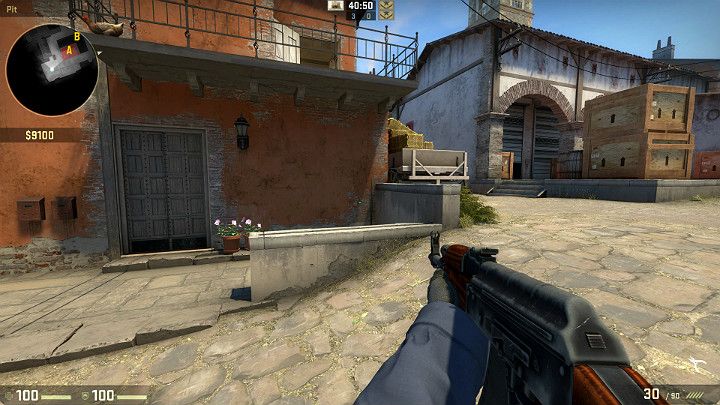
Another location that's often occupied is the spot under the balcony (see screenshot). Enemies will frequently crouch behind the wall to remain invisible, and stand up to shoot at incoming Players.
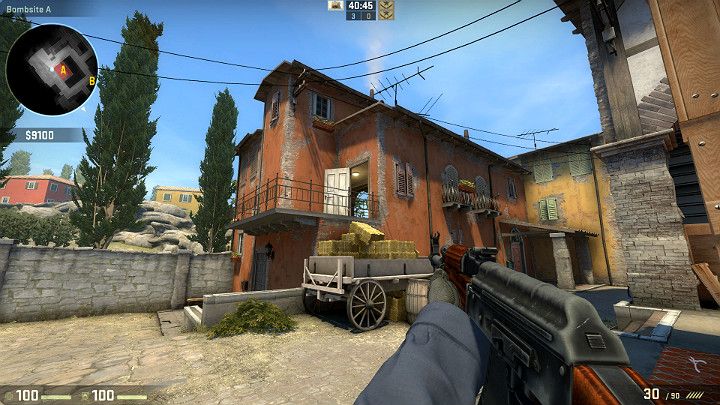
The balcony door is another popular spot. This passage is often used by Terrorists trying to reach bombsite A.
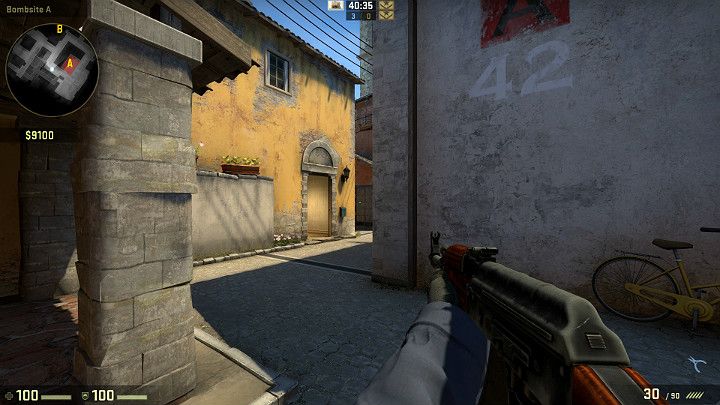
The door in the distance is regularly used as a hideout. Another place worth checking is the passage leading to the middle of the map. Players trying to recapture a bombsite are likely to use it.
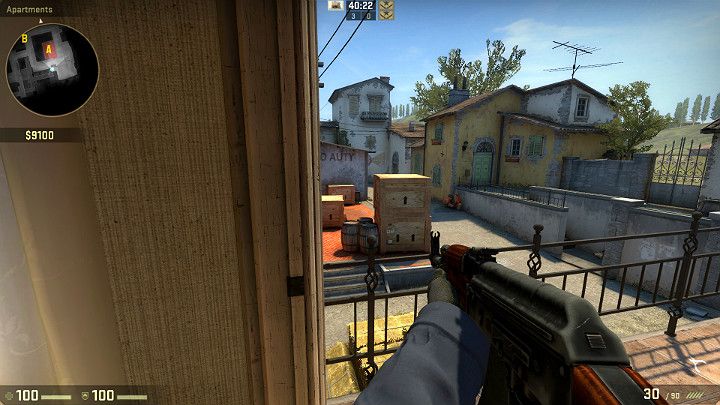
The screenshot presents bombsite A from the perspective of a player standing on the balcony. Keep in mind that this spot provides no cover, and you can be easily eliminated even by Players at the entrance of the library.
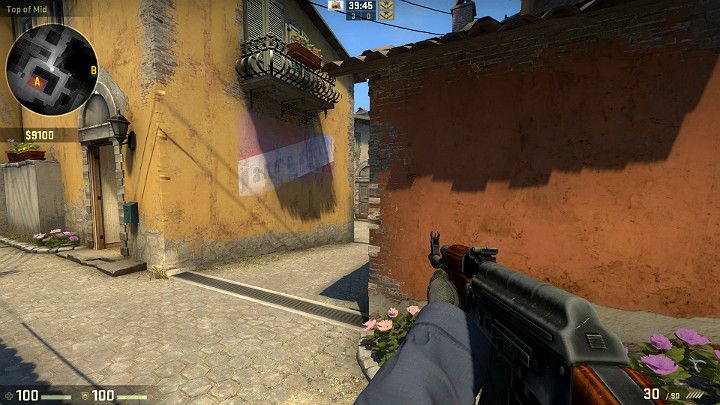
Moving from the direction of the Counter-Terrorist Spawn Zone, you can take a good sniping position (see picture). Just don't lean out too much, as there is a long passage covered by enemies on the right.
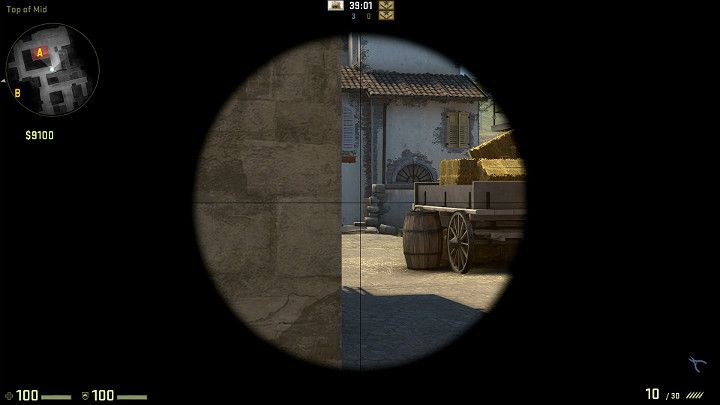
Before you enter bombsite A, remember to check the lower terrain in the distance (see screenshot). It's possible that a player with a sniper rifle will aim at you through the hole in the wall.
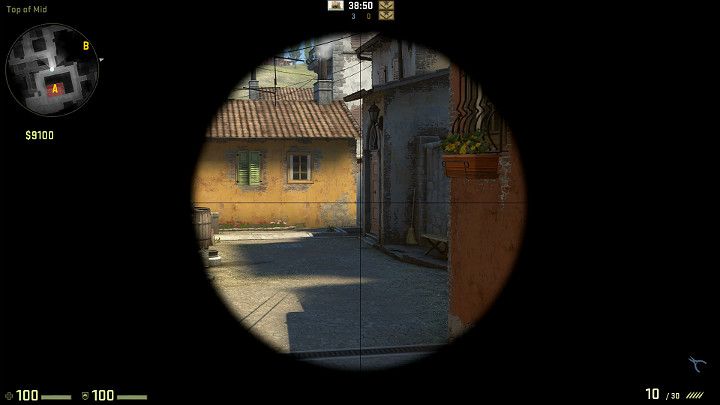
You will have a clear view of the Terrorists leaving the Spawn Zone and heading for the middle of the map or the Banana passage. You have to be very careful, as enemies can get on the ramp much faster and aim at you.
You are not permitted to copy any image, text or info from this page. This site is not associated with and/or endorsed by the developers and the publishers. All logos and images are copyrighted by their respective owners.
Copyright © 2000 - 2026 Webedia Polska SA for gamepressure.com, unofficial game guides, walkthroughs, secrets, game tips, maps & strategies for top games.
