BioShock Infinite: Powerful enemies
On this page of the guide to BioShock Infinite, you will find a list of powerful enemies /minibosses encountered during the campaign. Our guide features information about the attacks used by powerful enemies, their weaknesses, the number of their health points. You will also learn what is the resistance of powerful enemies to various vigors.
Powerful enemies are encountered less frequently than regular infantry, they usually support weaker allies. The first encounter with each of them can be considered as a battle with a miniboss. As you progress through the story, they will be appearing more frequently.
Strong enemies differ from common enemies. Powerful opponents aren't using conventional weapons and instead they prefer exotic weaponry and vigors. Each of the unique enemies has some kind of a weaknesses and is also resistant to certain vigors, however normal weapons are equally effective.
Powerful enemies sometimes appear in several different versions and they're named "ranks" later in the guide. Enemies with a higher rank won't appear until later in the game and you'll have to remember about them being slightly different when you encounter them.
The list seen below can be very helpful for those of you who dared to complete the game on the highest '1999 mode' difficulty setting. I strongly recommend that you take some time to read about your opponent's life points and resistances so that you'll be able to plan your gear and upgrades much better.
Fireman
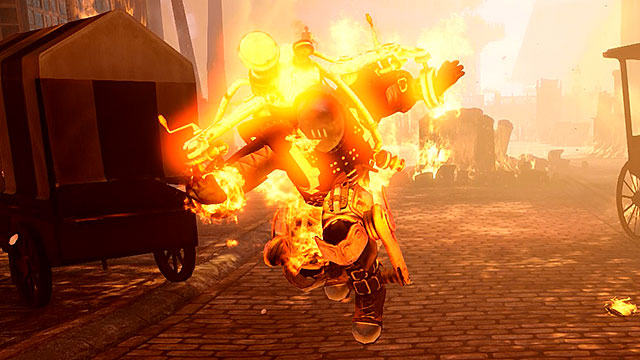
Firemen (contrary to what they're called) are experts in setting things and people of fire and they've mastered using the Devil's Kiss vigor. Each time they're on a brink of death they attempt a suicide run towards the main character, hoping to explode in flames. An impending detonation is signalized by a time meter appearing above the Fireman's head.
As you've probably suspected they are fully resistant to fire damage. Don't forget to examine their bodies, because each Fireman will always leave one lockpick behind (the only exception is the Fireman encountered in the Raffle Square), as well as salts and a medkit.
Life points:
Rank 1: 1430
Rank 2: 2860
Rank 3: 4833
Rank 4: 4833
Damage dealt:
Rank 1: 240 [attacks from distance], 300 [direct combat], 360 [detonation]
Rank 2: 480 [attacks from distance], 600 [direct combat], 720 [detonation]
Rank 3: 691 [attacks from distance], 864 [direct combat], 1037 [detonation]
Rank 4: 829 [attacks from distance], 1037 [direct combat], 1244 [detonation]
Effectiveness of the vigors:
Possession: 50%
Shock Jockey: 100%
Murder of Crows: 100%
Return to Sender: 100%
Devil's Kills: 0%
Charge: 100%
Bucking Bronco: 100%
Undertow: 100%
Crow
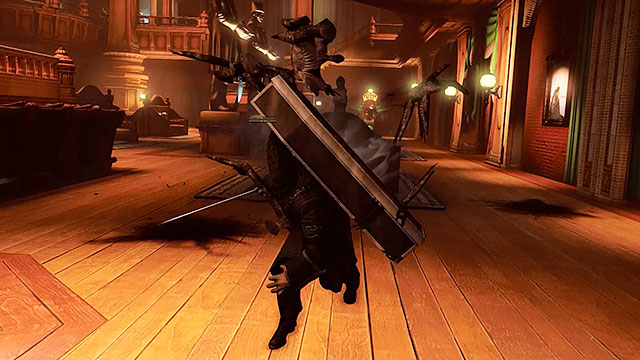
Crows (they are also referred to as Zealots) prefer melee weapons and they attack the player with a large sword. They appear alone or in pairs and they are rarely accompanied by other enemies. Zealots move around the battlefield by taking a form of a flock of crows and that's when they become invulnerable to attacks.
Once they materialize back to their original form the main character has only a few seconds for the attack. The best way to defeat a Crow is to lure him to a fiery trap and then attack him with a high caliber weapon after he's returned to his standard form. Zealots don't use Murder of Crows vigor, however they're immune to it.
Life points:
Rank 1: 2356
Rank 2: 3062
Rank 3: 3981
Rank 4: 5175
Damage dealt:
Rank 1: 532 [direct combat]
Rank 2: 639 [direct combat]
Rank 3: 767 [direct combat]
Rank 4: 921 [direct combat]
Effectiveness of the vigors:
Possession: 50%
Shock Jockey: 100%
Murder of Crows: 0%
Return to Sender: 0%
Devil's Kiss: 100%
Charge: 100%
Bucking Bronco: 100%
Undertow: 100%
Motorized Patriot
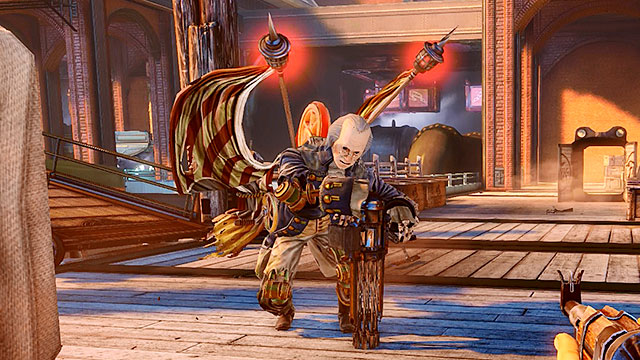
Motorized Patriots are human-like automatons and they carry very powerful Crank Guns. They're fearless opponents and they will continue following you no matter the danger, not stopping and not using any cover until they're destroyed. The only time when you're allowed to have a short breathing moment is when the Patriot is reloading the Crank Gun. Motorized Patriots have a weak spot - it's a flywheel mounted on the back. Destroying the Patriot's head stops him only for a short time, but it won't destroy him and it won't prevent him from continuing with the attacks. A good way to win is to possess a Patriot or one of the other nearby enemies, forcing the opponent to reveal his back. You can also try hiding behind cover and waiting for Patriot to start reloading his weapon, giving you a few seconds to shoot at the flywheel. Patriots wear different masks depending on their rank. You should also know that killing a Patriot is one of the rare occasions to obtain the Crank Gun mentioned before.
Life points:
Rank 1 (Franklin): 5053
Rank 2 (Washington): 6569
Rank 3 (Comstock): 8540
Damage dealt:
Rank 1 (Franklin): 72 [attacks from distance], 432 [direct combat]
Rank 2 (Washington): 86 [attacks from distance], 518 [direct combat]
Rank 3 (Comstock): 104 [attacks from distance], 622 [direct combat]
Effectiveness of the vigors:
Possession: 50%
Shock Jockey: 75%
Murder of Crows: 0%
Return to Sender: 100%
Devil's Kiss: 100%
Charge: 100%
Bucking Bronco: 10%
Undertow: 100%
Handyman
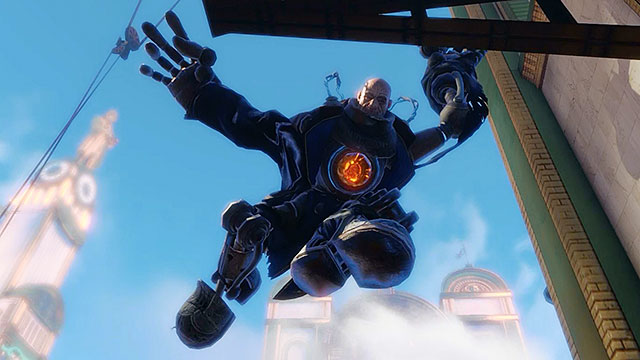
A Handyman is a fusion between a man and a machine and it's often called the new version of the Big Daddy known from the previous games in the BioShock series. Handymen move quickly and freely in the environments where they appear and that makes escaping them almost impossible. The only way to slow down the giant is to either use the Murder of Crows or the Undertow vigor.
Handyman's weak point is his orange glowing heart located on his chest. An interesting thing to know is that immobilizing the Handyman with vigors makes it easier for the player to unlock the Heartbreaker achievement/trophy. Handymen like to attack the main character from a distance, throwing dead bodies or even opponents who are still very much alive. As for the close combat, they use their massive fists and they also emit deadly electricity that has a significant range.
Don't forget that you shouldn't be using the sky-lines too often when fighting Handymen, because they can send a powerful impulse to harm you. The only good thing that comes out of it is that the Handyman is stunned for a while after electrifying the sky-lines, making him vulnerable to your attacks. Each Handyman you've killed will leave a random gear element behind.
Life points:
Rank 1: 9952
Rank 2: 12938
Damage dealt:
Rank 1: 1334 [attacks from distance], 800 [direct combat], 1382 [electrical discharges]
Rank 2: 1601 [attacks from distance], 960 [direct combat], 1382 [electrical discharges]
Effectiveness of the vigors:
Possession: 0%
Shock Jockey: 10%
Murder of Crows: 75%
Return to Sender: 0%
Devil's Kiss: 100%
Charge: 0%
Bucking Bronco: 0%
Undertow: 100% (weaken)
Siren / Lady Comstock

Lady Comstock who's been brought to life back from the dead is the only real boss in the game. You will have to defeat her three times: at the cemetery in Memorial Gardens, near the entrance to the Bank of the Prophet and near a gate leading to Comstock's House. The siren resurrects nearby dead corpses to help her in the duel. She likes to maintain safe distance from the main character, however she may also attack you if you get too close.
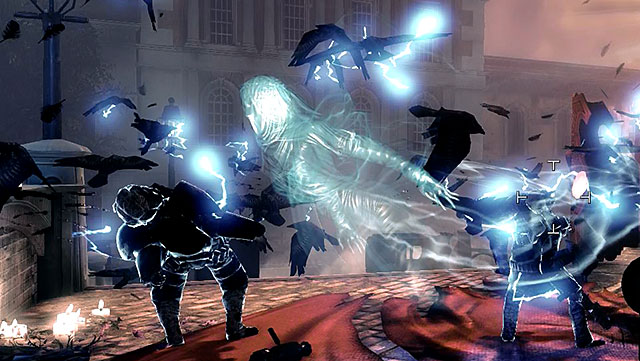
The siren remains in her spectral form for most of each battle and she materializes only to summon more zombies. This is an ideal moment to inflict serious injuries and as a result you should be using high powered weapons, such as a shotgun, a sniper rifle, a hand cannon or an rpg. Maintain a rather close distance from the siren. Don't move too close to avoid her melee attacks, but be ready to use your weapons effectively.
I don't recommend that you focus on killing the enemies Siren is bringing back from the dead. It's much better to immobilize them using the MURDER OF CROWS + SHOCK JOCKEY vigor combination while attacking the Siren at the same time. Don't waste your vigors on the Siren (even though she has a weakness for fire) and instead leave the salts for zombies.
To summarize: use firearms on the Siren and paralyze the summoned zombies with vigors. Repeat this until the boss is defeated.
Life points:
15994
Damage dealt:
985 [direct combat]
Effectiveness of the vigors:
Possession: 10%
Shock Jockey: 10%
Murder of Crows: 10%
Return to Sender: 0%
Devil's Kiss: 150%
Charge: 10%
Bucking Bronco: 10%
Undertow: 10%
Boy of Silence
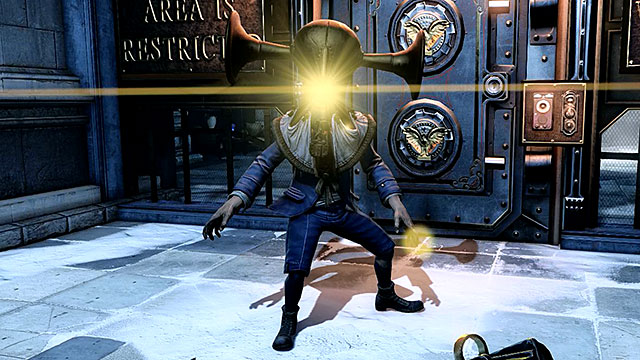
Boys of Silence act in a similiar manner to security cameras. Their objective is to find hostiles, either basing on their sight or hearing. Each time a boy has tracked down an enemy (meaning - you) he dematerializes (without inflicting any damage to the player) and he takes control over his helpers. From this moment onward you can't harm or kill the boy himself.
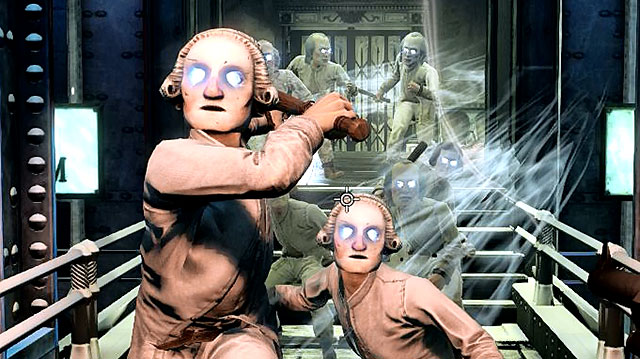
Boys of Silence are always accompanied by non-aggressive "patients" wearing masks. These helpers become aggressive and a threat after they've been taken over by the boy. They're equipped only with sticks, but their strength is in numbers.
A good vigor combination against them is BUCKING BRONCO + DEVIL'S KISS. Lure all the patients into one spot and then use the vigor combination mentioned above. If you're lucky you'll kill all of them (or at least most of them) with one attack. One last thing to remember when fighting the helpers is to prevent them from forcing you to a corner and therefore surrounding you.
You are not permitted to copy any image, text or info from this page. This site is not associated with and/or endorsed by the developers and the publishers. All logos and images are copyrighted by their respective owners.
Copyright © 2000 - 2026 Webedia Polska SA for gamepressure.com, unofficial game guides, walkthroughs, secrets, game tips, maps & strategies for top games.
